
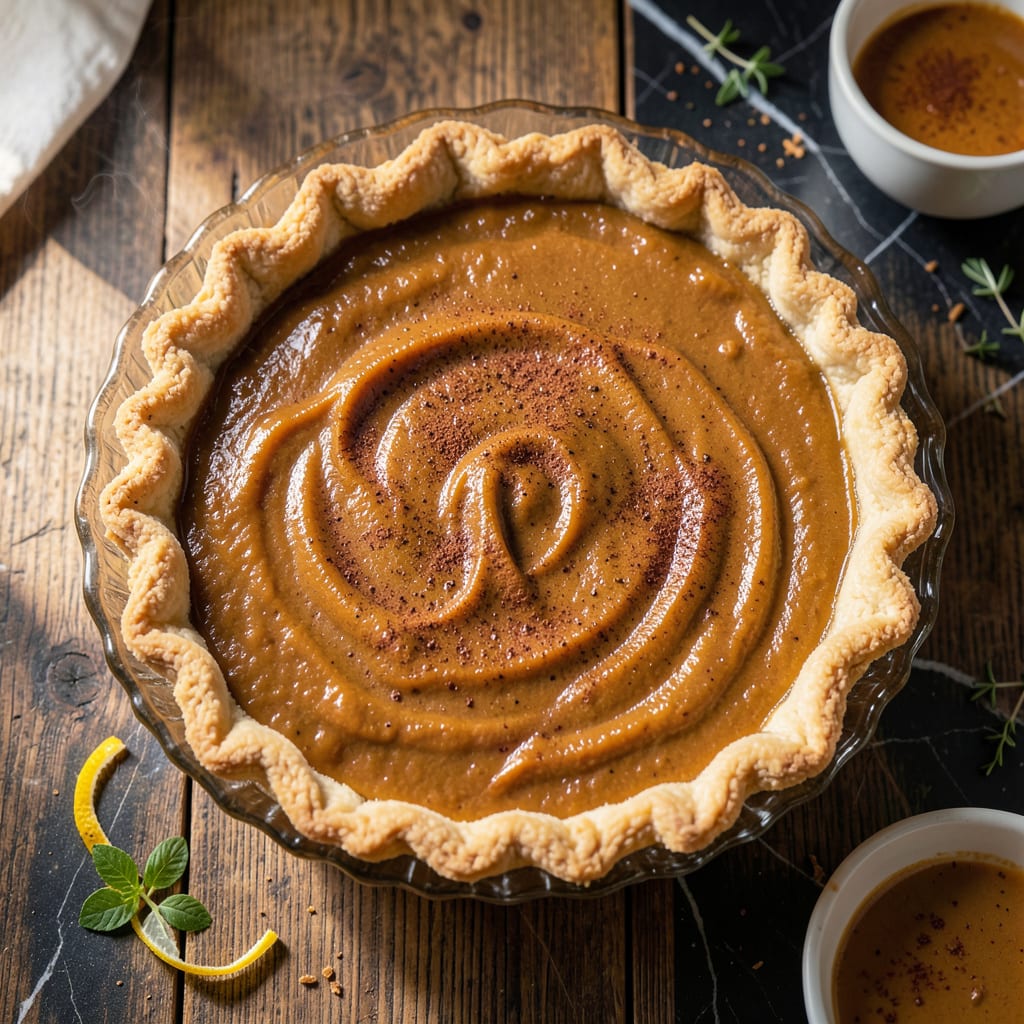
This fat-free pumpkin pie delivers all the spiced holiday warmth you love without compromising flavor or texture. The secret lies in using pure pumpkin puree and a carefully balanced blend of spices to create that classic richness.
With no butter or oil, this version proves you can enjoy a lightened dessert that still satisfies. The filling sets beautifully, offering the same creamy consistency as traditional recipes.
Ingredients for Fat Free Pumpkin Pie
A dozen pantry staples create that classic holiday pie without a drop of fat.
| Ingredient | Amount | Notes |
|---|---|---|
| Canned Pumpkin Puree 🎃 | 2 cups | Not pumpkin pie filling |
| Egg Whites 🥚 | 4 whole | Large eggs, room temperature |
| Granulated Sugar 🍚 | ¾ cup | Or substitute brown sugar |
| Light Brown Sugar 🟤 | ¼ cup | Packed, for depth of flavor |
| Ground Cinnamon 🌿 | 1 ½ tsp | Freshly ground preferred |
| Ground Ginger 🌿 | ½ tsp | Warm and aromatic |
| Ground Nutmeg 🌰 | ¼ tsp | Freshly grated if possible |
| Ground Cloves 🌿 | ¼ tsp | Strong, use sparingly |
| Salt 🧂 | ½ tsp | Balances sweetness |
| Vanilla Extract 🌿 | 1 tsp | Pure, not imitation |
| Evaporated Fat-Free Milk 🥛 | 1 can | 12 oz can, undiluted |
| Unbaked Pie Crust 🥧 | 1 whole | 9-inch, fat-free or low-fat |
The pumpkin puree is non-negotiable—Libby’s is the gold standard (consistent thickness, no weird additives). Egg whites do the heavy lifting here, replacing the richness butter usually provides. Costco sells them pre-separated if you don’t want to crack a dozen eggs. For the evaporated milk, Carnation fat-free is what you want. Don’t even think about the full-fat version—this recipe needs that specific texture.
No egg whites? Aquafaba (chickpea brine) works in a 1:1 swap but may need a minute longer to set. Out of evaporated milk? Fat-free Greek yogurt thinned with a splash of milk gets close. The spices are flexible—swap cloves for allspice if that’s what’s in your cabinet. Freshly grated nutmeg (from a whole nut) is worth the extra effort for that warm, complex flavor.
The filling sets as it cools, so let it sit at least 2 hours before slicing. Store leftovers covered in the fridge for up to 5 days—though it never lasts that long at my house. Freeze slices for up to 2 months if you’re making ahead (thaw overnight in the fridge).
Why You’ll Love This Recipe
- No Fuss Mixing: I just dump the pumpkin puree, egg whites, and sugars in a bowl—no creaming butter or worrying about lumps.
- Warm Spice Hug: The cinnamon plus brown sugar combo gives that deep, cozy sweetness that tastes like fall in every bite.
- Holiday or Tuesday: Between us, I’ve served this at Thanksgiving and for a random weeknight dessert with zero guilt.
- Lightens the Load: Honestly, using egg whites instead of whole eggs shaves off calories but keeps it just as rich and sliceable.
Step-by-Step Instructions for Fat Free Pumpkin Pie
Here is the method I use for a perfectly spiced, creamy pie that stays true to tradition.
Step 1: Preheat the Oven and Prepare the Unbaked Pie Crust
Preheat your oven to 425°F. This high temperature helps set the filling quickly, preventing a soggy bottom crust. While the oven heats, press the unbaked pie crust into a 9-inch pie dish, crimping the edges for a decorative finish.
I always prick the bottom and sides with a fork to prevent air bubbles from forming during baking. This also helps the crust bake evenly without puffing up. Place the prepared crust in the refrigerator to chill while you make the filling.
Step 2: Whisk Together the Wet Ingredients and Sugars
In a large mixing bowl, combine the 2 cups Canned Pumpkin Puree, 0.75 cup Granulated Sugar, and 0.25 cup Light Brown Sugar. The brown sugar adds a depth of caramelized flavor that complements the pumpkin beautifully.
Add the 1 can Evaporated Fat-Free Milk, 4 whole Egg Whites, and 1 tsp Vanilla Extract. Whisk until the mixture is completely smooth and all the sugar has dissolved. This ensures a silky texture in the finished pie.
Step 3: Incorporate the Spices and Seasonings
Sprinkle in the 1.5 tsp Ground Cinnamon, 0.5 tsp Ground Ginger, 0.25 tsp Ground Nutmeg, 0.25 tsp Ground Cloves, and 0.5 tsp Salt. Whisk vigorously for 1 minute to fully distribute the spices and prevent any clumping.
I always use freshly ground spices for the most aromatic flavor, but pre-ground works perfectly too. Taste the filling at this stage—it should have a warm, balanced spice profile with a hint of sweetness from the sugars.
Step 4: Pour the Filling and Bake Until Set
Remove the unbaked pie crust from the refrigerator and pour the pumpkin filling into it, smoothing the top with a spatula. Place the pie on the middle rack of your preheated oven.
Bake at 425°F for 15 minutes, then reduce the heat to 350°F and continue baking for 40-50 minutes. The pie is done when the edges are firm and the center jiggles slightly but doesn’t slosh when gently shaken. A knife inserted near the center should come out mostly clean.
Step 5: Cool Completely Before Serving
Transfer the pie to a wire rack and let it cool completely at room temperature for at least 2 hours. This cooling time is crucial—it allows the filling to set fully and develop its signature creamy texture.
Once cooled, you can serve it immediately or refrigerate for up to 3 days. For the best flavor, I recommend bringing it to room temperature before slicing. This pie serves 8 generously, with each slice delivering that classic holiday warmth without the guilt.
Pro Tips For Making Fat Free Pumpkin Pie
- Preheat the Oven: I learned this the hard way—always preheat to 425°F before putting in your pie. It sets the egg whites properly and keeps the crust from getting soggy.
- Drain the Pumpkin: Canned pumpkin puree holds a lot of liquid—drain it in a fine mesh strainer for 10 minutes to avoid a watery filling.
- Skip Overmixing: Stir the egg whites just until combined, or you’ll whip in too much air and end up with a puffy, uneven texture.
- Boost the Spice: Sounds weird, but it works: add an extra ½ teaspoon of cinnamon—fat-free versions need the extra warmth to shine.
Troubleshooting Great fat free pumpkin pie
Crust Troubleshooting
If your crust browns too quickly, cover the edges with aluminum foil or a pie shield after the first 15 minutes. For a soggy bottom, try pre-baking the crust for 5-7 minutes before adding the filling. I always use a glass pie dish to monitor browning. 🔥
Filling Not Setting
If the center remains jiggly after baking, it may need more time. Return it to the 350°F oven for 10-15 minute intervals until set. Overmixing the filling can incorporate too much air, so whisk just until smooth. Also, ensure your evaporated milk is fresh.
Cracked Top
Avoid overbaking—pull the pie when the center has a slight jiggle. If cracks appear, cover with whipped topping or a dusting of powdered sugar before serving. Cooling too quickly can also cause cracks, so let it rest gradually on a wire rack.
Spice Imbalance
If the flavor seems flat, you may have under-measured the spices. Add a pinch more cinnamon or nutmeg to taste. For too much spice, balance with a drizzle of maple syrup or extra vanilla extract. I always taste the filling before baking to adjust.
Texture Issues
For a grainy texture, ensure sugars are fully dissolved in the wet ingredients. If the filling seems watery, bake longer at 350°F until thickened. Using room temperature egg whites helps create a smoother, more uniform filling. ✨
Cooling Problems
Rushing the cooling process can lead to a runny pie. Let it sit at room temperature for at least 2 hours, then refrigerate if needed. If serving the same day, keep it in a cool, dry place away from direct sunlight.
Nutrition Facts
Frequently Asked Questions
Can I use fresh pumpkin instead of canned?
Yes, but strain roasted pumpkin puree through cheesecloth first to remove excess liquid. Use 2 cups of thick puree for the same result. Canned is more consistent for baking.
Why use egg whites instead of whole eggs?
Egg whites provide structure without added fat, keeping the pie light yet creamy. Whole eggs would add cholesterol and fat, defeating the purpose of this recipe.
Can I make this ahead of time?
Bake up to 2 days in advance. Store covered in the fridge. For longer storage, freeze slices for up to 2 months.
What if my pie cracks on top?
This happens with overbaking or rapid cooling. Cover cracks with whipped topping or powdered sugar. Next time, pull it from the oven when the center still jiggles slightly.

- 8 Bean Soup Recipe Crock Pot: Hearty Vegetable Medley in One Pot - September 25, 2026
- 4C Bread Crumbs Meatballs Recipe: Crispy Crust and Juicy Centers - September 25, 2026
- 6 Oz Chocolate Chip Cookie Recipe: Perfectly Balanced Crispy Edges and Chewy Hearts - September 25, 2026