
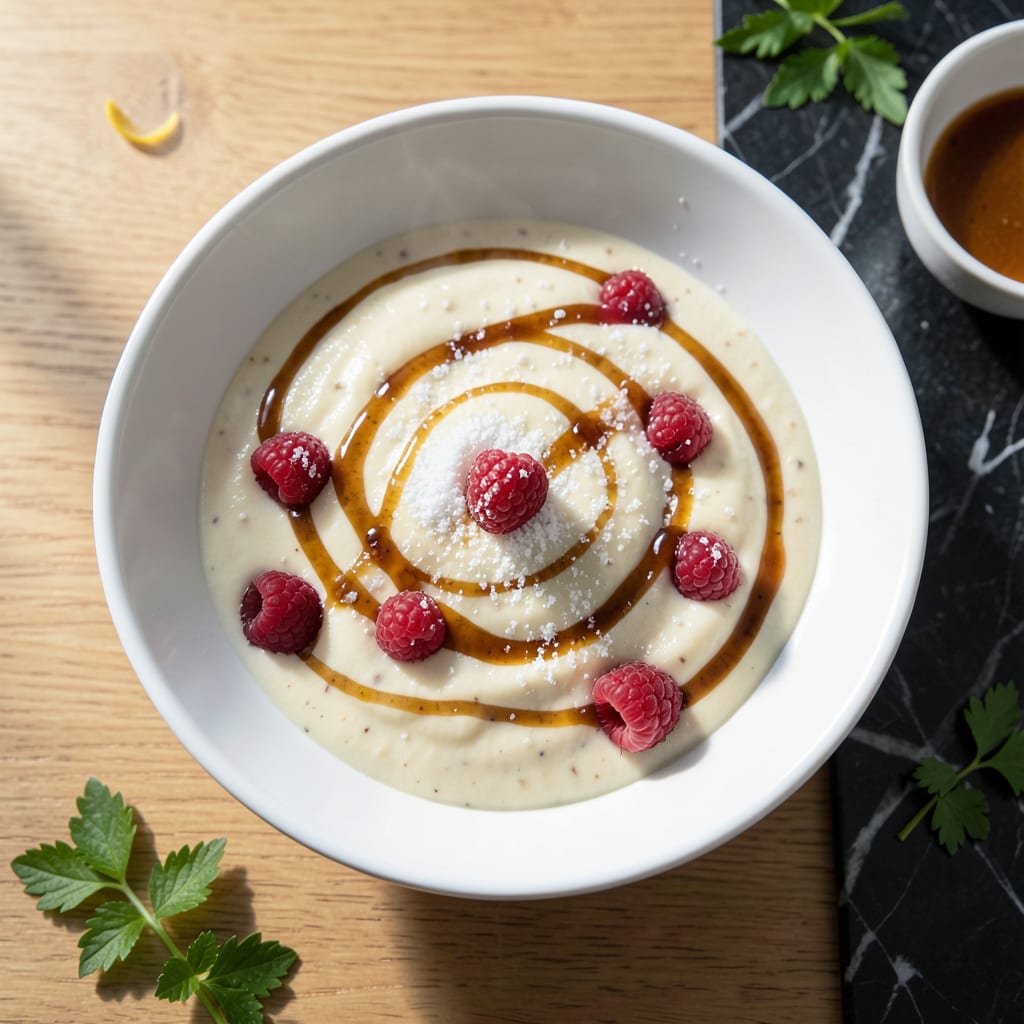
Achieving velvety smooth pudding without dairy or fat is absolutely possible with this proven method. The secret lies in using cornstarch as a thickener and non-fat milk for creaminess.
This recipe delivers a silky texture and pure vanilla flavor that rivals traditional versions. The process takes less than 20 minutes on the stovetop, with results that are light yet satisfying.
Ingredients for Fat Free Vanilla Pudding
Six simple ingredients create this light, silky vanilla pudding with zero fat.
| Ingredient | Amount | Notes |
|---|---|---|
| Granulated Sugar 🍚 | ¾ cup | Fine white sugar preferred |
| Cornstarch 🌾 | ¼ cup | For thickening pudding |
| Non-Fat Milk 🥛 | 3 cups | Skimmilk or 0% milkfat |
| Pure Vanilla Extract 🌿 | 2 tsp | Not imitation vanilla |
| Salt 🧂 | ¼ tsp | Fine table salt |
| Large Egg Whites 🥚 | 4 whole | Pasteurized if preferred |
The cornstarch is your thickener here—look for pure cornstarch without added ingredients at any grocery store. Clabber Girl is a reliable brand, but store brands work equally well. For the milk, any non-fat milk (dairy or plant-based like almond or oat) will deliver the creamy base. Just ensure it’s unsweetened to control the sugar content yourself.
No cornstarch? Arrowroot powder at a 1:1 ratio works as a substitute. Want more vanilla punch? Scrape seeds from a vanilla bean in addition to the extract. For a dairy-free version, unsweetened almond milk maintains the texture. The egg whites provide structure—don’t substitute with whole eggs as it alters the fat content.
This pudding sets beautifully in the fridge and keeps for 5 days in an airtight container. A thin skin may form on top—press plastic wrap directly on the surface to prevent it. Serve chilled for the best velvety texture.
Why You’ll Love This Recipe
- Stir and Forget: I just whisk sugar, cornstarch, and non-fat milk on the stove—no fancy steps, no constant monitoring.
- Velvety Vanilla: The real vanilla extract gives it that warm, sweet depth that tastes indulgent without a drop of cream.
- Meal Prep Magic: Honestly, it sets perfectly in the fridge for up to five days, so I can make a big batch for the week.
- Pantry Staples: All I need is sugar, cornstarch, milk, vanilla, and a pinch of salt—nothing expensive or hard to find.
Step-by-Step Instructions for Fat Free Vanilla Pudding
Master the technique for a silky-smooth pudding with professional precision and consistency.
Step 1: Create the Cornstarch Slurry
In a medium bowl, whisk together the 0.75 cup Granulated Sugar, 0.25 cup Cornstarch, and 0.25 tsp Salt until completely smooth and lump-free. This dry blend ensures even distribution of thickening power throughout your pudding.
Gradually whisk in 1 cup of the 3 cups Non-Fat Milk until the mixture becomes a uniform, opaque liquid. The cornstarch must be fully hydrated before cooking to prevent clumping. Set this slurry aside while you prepare the remaining ingredients.
Step 2: Temper the Egg Whites
In a separate bowl, lightly beat the 4 whole Large Egg Whites with a fork—just enough to break them up, not to create foam. Tempering is essential here to prevent curdling when the hot milk mixture meets the eggs.
Heat the remaining 2 cups Non-Fat Milk in a medium saucepan over medium heat until it just begins to steam (do not boil). Slowly pour about ½ cup of the hot milk into the beaten egg whites while whisking constantly. This gradual introduction raises the eggs’ temperature safely.
Step 3: Cook to Perfect Thickness
Combine the tempered egg mixture with the cornstarch slurry, then pour everything into the saucepan with the remaining hot milk. Cook over medium heat, stirring constantly with a wooden spoon or silicone spatula, making sure to reach all edges of the pan.
The mixture will begin to thicken after 5-7 minutes. Continue cooking until it reaches a full boil and becomes thick enough to coat the back of a spoon. You’ll notice it transforms from a thin liquid to a velvety, pudding-like consistency—this visual change signals it’s ready.
Step 4: Incorporate Vanilla and Chill
Remove the pudding from heat and stir in the 2 tsp Pure Vanilla Extract. The residual heat will distribute the vanilla evenly throughout. Pour the pudding into a heatproof bowl or individual serving dishes immediately to prevent a skin from forming on top.
Press plastic wrap directly onto the surface of the pudding to create an airtight seal. Refrigerate for at least 4 hours (overnight is ideal) until completely chilled and set. This chilling period allows the cornstarch to fully hydrate and create that signature smooth, creamy texture.
The pudding should be firm enough to hold its shape when spooned, with a glossy finish and pure vanilla aroma. Serve chilled for the best texture and flavor development.
Pro Tips For Making Fat Free Vanilla Pudding
- Whisk Cornstarch First: Mix the cornstarch with a quarter cup of the cold non-fat milk before adding it to the pot—this prevents clumping and gives you that silky texture without lumps.
- Low and Slow Heat: Keep the heat at medium-low; I learned this the hard way after scorching two batches trying to rush the thickening process.
- Vanilla at the End: Stir in the pure vanilla extract only after removing the pudding from heat—high temperatures can mute its flavor, and you want that rich vanilla taste to shine.
- Use Fresh Milk: Non-fat milk separates faster than whole, so use the freshest carton you have to avoid a thin or grainy pudding.
Troubleshooting Perfect Results
Lumpy Pudding
If your pudding has lumps, it likely means the cornstarch wasn’t fully dissolved before cooking. I always whisk my cornstarch slurry until completely smooth, then strain it through a fine-mesh sieve for extra insurance. Cooking over medium heat while stirring constantly also prevents clumping. 💡
Thin Consistency
Pudding that won’t thicken usually needs more cooking time. The mixture must reach a full, rolling boil to activate the cornstarch. If it’s still thin after boiling, mix 1 tbsp cornstarch with 1 tbsp cold water, stir into the pudding, and cook for another 2-3 minutes.
Curdled Texture
Curdling happens when eggs overheat. Always temper your egg whites by slowly adding hot milk while whisking. If curdling occurs, immediately remove from heat and whisk vigorously. In a pinch, strain through a sieve to smooth it out.
Skin Formation
To prevent a skin from forming, press plastic wrap directly onto the pudding’s surface before chilling. If a skin does form, simply whisk it in or peel it off. I’ve found parchment paper works just as well as plastic wrap for this.
Weak Vanilla Flavor
For a stronger vanilla taste, use pure vanilla extract—not imitation. I also add a pinch of salt to enhance the vanilla’s sweetness. For next-level flavor, split a vanilla bean, scrape the seeds, and add them to the milk while heating.
Grainy Texture
Graininess often comes from undissolved sugar. Ensure your granulated sugar is fully whisked into the cornstarch before adding milk. If it’s still grainy, strain the finished pudding through a sieve to catch any undissolved bits.
Nutrition Facts
Frequently Asked Questions
Can I make this with almond milk?
Yes, unsweetened almond milk works perfectly as a 1:1 substitute for non-fat dairy milk. The texture remains smooth and creamy. Just ensure it’s unsweetened to control sugar content yourself.
How do I prevent lumps in my pudding?
Whisk the cornstarch and sugar together first, then slowly add cold milk. Strain the mixture before cooking and stir constantly over medium heat to avoid clumps.
Can I use whole eggs instead of whites?
No, whole eggs add fat and may alter the texture. Stick with 4 large egg whites for the proper consistency and to keep it truly fat-free.
How long does this keep in the fridge?
It stays fresh for up to 5 days in an airtight container. Press plastic wrap directly on the surface to prevent a skin from forming.

- 8 Bean Soup Recipe Crock Pot: Hearty Vegetable Medley in One Pot - September 25, 2026
- 4C Bread Crumbs Meatballs Recipe: Crispy Crust and Juicy Centers - September 25, 2026
- 6 Oz Chocolate Chip Cookie Recipe: Perfectly Balanced Crispy Edges and Chewy Hearts - September 25, 2026