
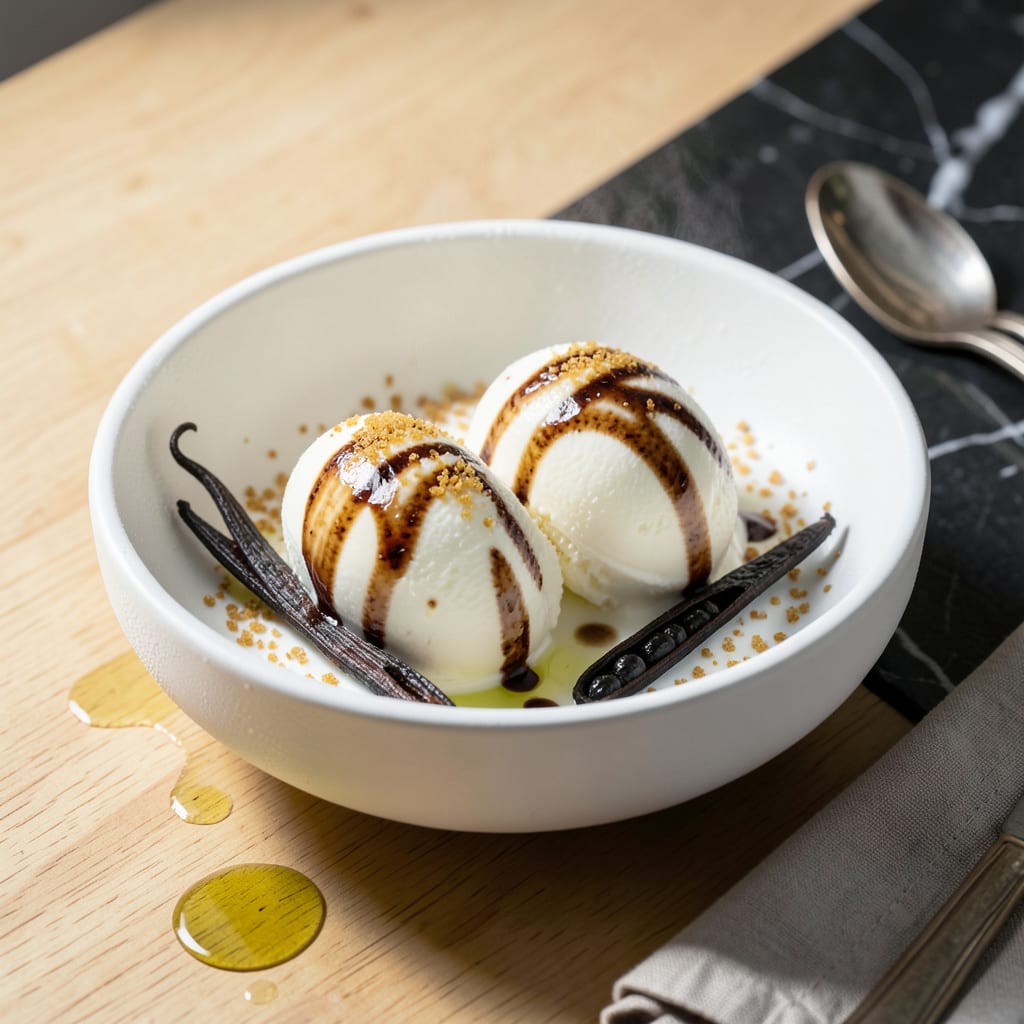
This fat-free vanilla ice cream proves you don’t need heavy cream to achieve a light and fluffy texture. The secret lies in using low-fat milk and a touch of cornstarch for stability.
With just a few simple ingredients and an ice cream maker, you’ll create a smooth frozen treat that’s as satisfying as the full-fat version. Perfect for guilt-free indulgence.
Ingredients for Fat Free Vanilla Ice Cream
Light, fluffy, and guilt-free with just a handful of plant-based ingredients.
| Ingredient | Amount | Notes |
|---|---|---|
| Low-Fat Coconut Milk 🥥 | 2 cups | Full-fat for creaminess |
| Granulated Sugar 🍚 | ¾ cup | Or substitute coconut sugar |
| Vanilla Extract 🌿 | 2 tsp | Pure extract for best flavor |
| Cornstarch 🌾 | 2 tbsp | For stability and thickness |
| Salt 🧂 | ¼ tsp | Balances sweetness |
| Vanilla Bean 🌿 | 1 whole | Scraped seeds for extra flavor |
| Almond Milk 🥛 | ½ cup | Unsweetened preferred |
| Maple Syrup 🍁 | 2 tbsp | Optional for extra sweetness |
| Lemon Juice 🍋 | 1 tsp | Freshly squeezed for brightness |
The coconut milk is doing the heavy lifting here. Native Forest or Thai Kitchen brands are my go-to—they’re thick and rich without any weird additives. If you’re avoiding coconut, cashew or oat milk (full-fat versions) work too, but the texture won’t be quite as creamy. For the vanilla, splurge on the good stuff—Rodelle or Nielsen-Massey extract makes a huge difference in flavor depth.
No vanilla bean? Double the extract instead. Swap granulated sugar for maple syrup or agave, but reduce other liquids slightly since they’re thinner. Cornstarch is key for that smooth texture—arrowroot powder works as a 1:1 substitute if you’re out. The almond milk can be any plant milk, but unsweetened keeps the flavor clean.
This keeps 1-2 weeks in the freezer if stored in an airtight container. Let it sit at room temp for 5-10 minutes before scooping for the creamiest texture. Freeze leftovers in portions for quick single servings.
Why You’ll Love This Recipe
- One-Bowl Wonder: I just mix the coconut milk, sugar, and vanilla in one saucepan—no fancy equipment, no mess.
- Pure Vanilla Bliss: The real vanilla extract shines through, giving that rich, creamy taste without a drop of dairy.
- Diet-Friendly Crowd Pleaser: Honestly, it’s the only dessert I can serve to my vegan friends and my calorie-counting aunt alike.
- Freezer Staple: A batch lasts me weeks, and it’s ready whenever cravings hit—no last-minute store runs.
Step-by-Step Instructions for Fat Free Vanilla Ice Cream
Here’s the method. Straightforward, tested, works every time.
Step 1: Infuse the Milk Base with Vanilla Flavor
In a medium saucepan, combine the 2 cups Low-Fat Coconut Milk and 0.5 cup Almond Milk over medium heat. As it warms, split the 1 whole Vanilla Bean lengthwise and scrape the seeds into the pan, then add the pod as well.
Heat the mixture until it begins to steam and tiny bubbles form around the edges—don’t let it boil. This gentle heating extracts the maximum vanilla flavor without scorching the milk. You’ll notice the aroma become more pronounced after about 5 minutes.
Step 2: Create the Sugar and Cornstarch Slurry
While the milk infuses, whisk together the 0.75 cup Granulated Sugar, 2 tbsp Cornstarch, and 0.25 tsp Salt in a separate bowl. This dry mix ensures the cornstarch is fully incorporated before adding liquid, preventing lumps in your final ice cream base.
Slowly pour about ½ cup of the warm milk mixture into the dry ingredients while whisking constantly. This creates a smooth slurry that will thicken your base. The mixture should look like thin pancake batter with no visible cornstarch streaks.
Step 3: Thicken the Custard Base
Return the slurry to the saucepan with the remaining warm milk, whisking constantly. Cook over medium-low heat for 8-10 minutes, stirring frequently with a wooden spoon or silicone spatula. The mixture will gradually thicken to the consistency of heavy cream.
You’ll know it’s ready when it coats the back of a spoon and your finger leaves a clear path when drawn through it. Remove from heat and stir in the 2 tsp Vanilla Extract, 2 tbsp Maple Syrup, and 1 tsp Lemon Juice. The lemon brightens the sweetness beautifully.
Step 4: Chill Completely Before Churning
Transfer the custard to a clean bowl and press plastic wrap directly onto the surface to prevent a skin from forming. Refrigerate for at least 4 hours, or preferably overnight. This chilling step is crucial—it allows the flavors to meld and the base to reach the ideal temperature for churning.
I always make my base the night before I plan to churn. The longer it chills, the better the texture of your final ice cream. The mixture should be cold throughout (about 40°F) before you begin churning.
Step 5: Churn and Freeze to Perfection
Pour the chilled custard into your ice cream maker and churn according to the manufacturer’s instructions, typically 20-25 minutes. The mixture will transform from liquid to a soft, creamy consistency resembling thick whipped cream.
Transfer to a freezer-safe container and freeze for at least 4 hours to firm up completely. For the smoothest texture, press plastic wrap directly on the surface before freezing. The result should be light, fluffy, and perfectly scoopable with intense vanilla flavor throughout.
Pro Tips For Making Fat Free Vanilla Ice Cream
- Whisk the cornstarch: Mix the cornstarch with a little cold coconut milk first to make a smooth slurry—lumps ruin the texture. I learned this the hard way after fishing out clumps from my first batch.
- Simmer, don’t boil: Heat the mixture just until it thickens enough to coat the back of a spoon, about 160°F. After scorching a pot of coconut milk, I finally figured out boiling turns it grainy.
- Chill overnight: Give the base a full 12 hours in the fridge before churning—rushing it with just 2 hours leaves you with icy, sad ice cream. Your future self will thank you.
- Use real vanilla: Splurge on pure vanilla extract, not imitation. Sounds weird, but it works: the flavor difference is night and day in a fat-free base where every note counts.
Perfect Pairings for fat free vanilla ice cream
Fruity Toppings
Fresh berries like strawberries, blueberries, or raspberries add natural sweetness and vibrant color. I love a warm berry compote made with 1 cup mixed berries and 2 tbsp maple syrup simmered for 5 minutes. 🍓
Crunchy Additions
For texture contrast, try toasted almonds or granola. Spread ½ cup chopped almonds on a baking sheet at 350°F for 8-10 minutes until golden. Sprinkle generously over each serving for a satisfying crunch.
Sauce Pairings
A drizzle of sugar-free chocolate syrup or caramel sauce elevates this ice cream. Hershey’s or Torani brands work well. For a fruity twist, blend 1 cup frozen mango with 2 tbsp almond milk for a quick tropical sauce.
Beverage Matches
Pair with iced coffee or cold brew for an affogato-style treat. The bitterness balances the sweetness beautifully. For a non-caffeinated option, sparkling water with lime cleanses your palate between bites. 💫
Cookie Companions
Serve with fat-free oatmeal cookies or gingersnaps for dipping. I love crushing 2-3 cookies on top for a cookie-dough-like experience. The warmth of the cookie softens the ice cream slightly for perfect harmony.
Nutrition Facts
Frequently Asked Questions
Can I make this without an ice cream maker?
Yes! Freeze the chilled base in a shallow container, then whisk vigorously every 30 minutes for 3-4 hours to break up ice crystals. The texture won’t be as smooth, but it’s still delicious.
Why use cornstarch instead of egg yolks?
Cornstarch acts as a stabilizer without adding fat, keeping the texture creamy. Egg yolks would add richness but also fat and cholesterol, which we’re avoiding here.
How long can I store this in the freezer?
For best quality, enjoy within 2 weeks. After that, ice crystals may form. Thaw at room temperature for 5-10 minutes before scooping.

- 8 Bean Soup Recipe Crock Pot: Hearty Vegetable Medley in One Pot - September 25, 2026
- 4C Bread Crumbs Meatballs Recipe: Crispy Crust and Juicy Centers - September 25, 2026
- 6 Oz Chocolate Chip Cookie Recipe: Perfectly Balanced Crispy Edges and Chewy Hearts - September 25, 2026