
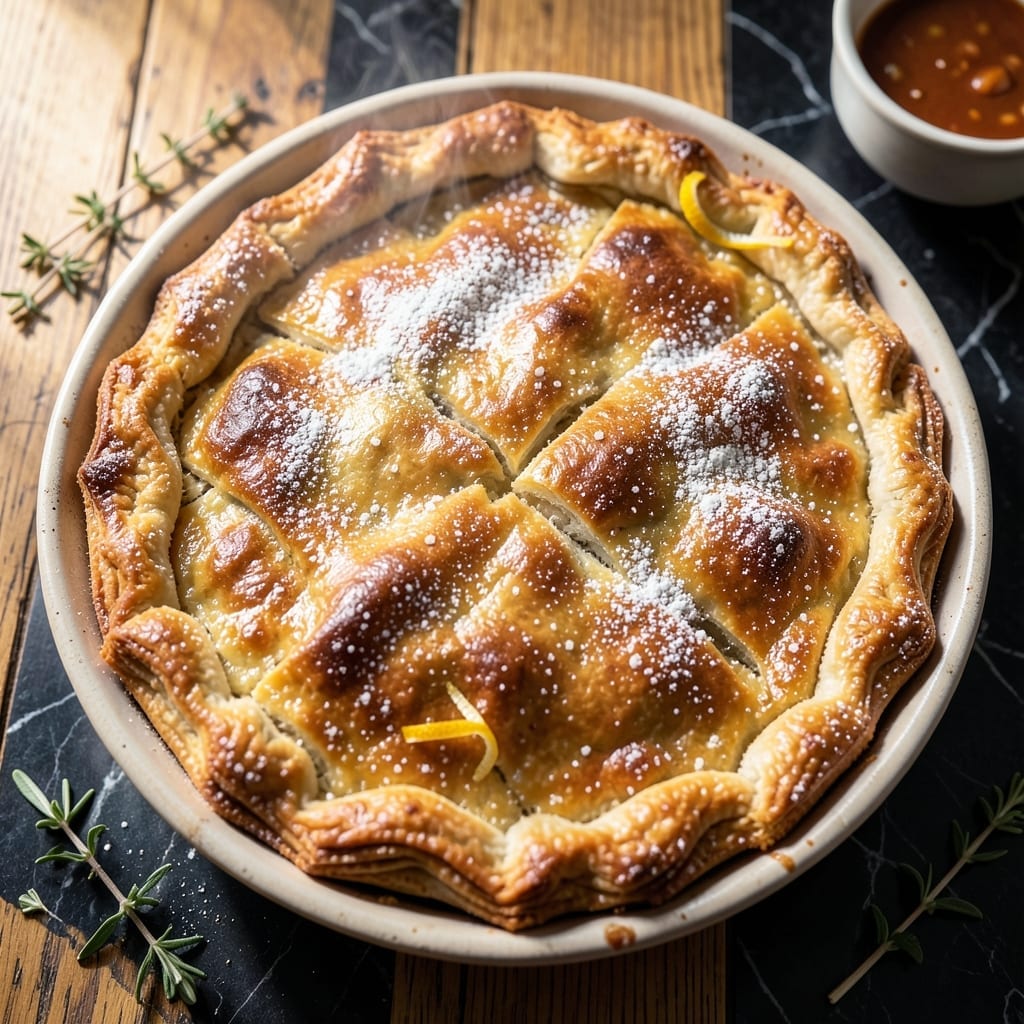
This crust recipe delivers the flaky, golden layers that make pot pie irresistible. A precise mix of cold butter and minimal handling creates that signature shatter with every bite.
The secret lies in keeping ingredients ice-cold and working quickly. I’ve perfected this technique through years of testing to ensure consistent results every time.
What emerges from the oven is a buttery, layered crust that holds its shape yet melts in your mouth. It’s the foundation for any pot pie filling you choose.
With just a few simple ingredients and proper technique, you’ll achieve bakery-quality results at home. The process is straightforward but requires attention to detail.
Ingredients for Flaky Pot Pie Crust
Cold butter, minimal handling, and precise measurements create these shatter-perfect layers.
| Ingredient | Amount | Notes |
|---|---|---|
| All-Purpose Flour 🌾 | 2 ½ cups | Sifted for even texture |
| Unsalted Butter 🧈 | 1 cup | Ice-cold, cubed into 1/2-inch pieces |
| Ice Water 💧 | ½ cup | Plus 1 tbsp as needed |
| Kosher Salt 🧂 | 1 tsp | Diamond Crystal preferred |
| Granulated Sugar 🍚 | 1 tsp | Optional, for color |
| Distilled White Vinegar 💧 | 1 tbsp | For tenderness |
| Egg 🥚 | 1 whole | For egg wash |
| Heavy Cream 🥛 | 1 tbsp | Optional, for richer egg wash |
The butter is non-negotiable here. European-style unsalted butter (like Plugrá or Kerrygold) has higher fat content for superior flakiness. Keep it ice-cold—freeze the cubed butter for 10 minutes before mixing. The flour should be all-purpose, but White Lily or King Arthur brands yield the most consistent results. Sift it first to avoid dense spots in your crust.
No unsalted butter? Use salted and reduce the added salt by half. Short on time? Food processor cuts the butter in seconds—just pulse until pea-sized crumbs form. The vinegar tenderizes the gluten; apple cider vinegar works too but may add slight color. For a richer wash, swap water in the egg wash for heavy cream.
Dough keeps in the fridge for 2 days or freezes for 3 months. Wrap tightly in plastic—double-layer for freezing. Baked crusts stay crisp for 24 hours at room temperature in an airtight container. Revive with a 5-minute 350°F oven session if needed.
Why You’ll Love This Recipe
- One Bowl Wonder: I just dump flour, cold butter, and a pinch of sugar in a bowl—no fancy tools, no mess.
- Buttery Layers: The ice water and chilled butter create that shatteringly crisp, golden flakiness I crave in every bite.
- Weeknight Hero: I’ll prep a double batch on Sunday and freeze one for those “no-time-to-cook” evenings.
- Pantry Staples: Honestly, I always have flour, butter, and salt on hand, so this crust is my last-minute dinner savior.
Step-by-Step Instructions for Flaky Pot Pie Crust
Master the technique for perfect layers with this reliable method that guarantees shatteringly crisp results.
Step 1: Combine Dry Ingredients and Prepare Butter
In a large bowl, whisk together 2.5 cups all-purpose flour, 1 tsp kosher salt, and 1 tsp granulated sugar until evenly distributed. The sugar adds subtle browning, while the salt enhances flavor without overpowering the butter.
Keep 1 cup unsalted butter (cubed into ½-inch pieces) chilled in the freezer until ready to use. Cold butter is non-negotiable—it creates steam during baking that separates the dough into distinct, flaky layers. Any warmth will compromise the texture.
Step 2: Cut in Butter Until Pea-Sized
Add the frozen butter cubes to the flour mixture. Using a pastry cutter or your fingertips (working quickly to avoid melting), cut the butter into the flour until the mixture resembles coarse crumbs with pea-sized butter pieces visible throughout.
This step should take 3-5 minutes by hand. Stop when the butter is evenly coated in flour but still intact—visible flecks mean flaky layers. Avoid overworking; the dough should look shaggy, not smooth.
Step 3: Bind with Ice Water and Vinegar
Create a well in the center of the mixture. Add 0.5 cup ice water and 1 tbsp distilled white vinegar. The vinegar tenderizes the gluten, ensuring a delicate crumb. Using a fork, gently toss the flour mixture with the liquid until it just begins to clump together.
If the dough seems too dry, add 1 tbsp ice water at a time until it holds when pressed. It should not be sticky—just cohesive enough to form a shaggy mass when gathered.
Step 4: Chill and Roll for Layers
Turn the dough onto a lightly floured surface and divide it into two equal portions. Shape each into a 1-inch-thick disc, wrap tightly in plastic, and refrigerate for 1 hour (or up to 2 days). This rest relaxes the gluten and rechills the butter.
On a floured surface, roll one disc into a 12-inch circle about ⅛-inch thick. For a perfect fit, roll the dough slightly larger than your pie dish, then transfer it carefully. The visible butter layers should remain intact—this is the foundation of flakiness.
Step 5: Egg Wash and Bake for Golden Finish
Whisk 1 whole egg with 1 tbsp heavy cream for a rich egg wash. Brush this over the top crust just before baking. The wash promotes even browning and adds a subtle sheen to the finished crust.
Bake at 375°F until the crust is deep golden brown and the filling is bubbling. The sugar in the dough will caramelize under the egg wash, creating a crisp, glossy exterior that contrasts beautifully with the tender, layered interior.
Pro Tips For Making Flaky Pot Pie Crust
- Chill Your Butter: Keep your butter ice cold until the moment you cut it into the flour—I learned this the hard way after ending up with a tough, dense crust instead of flaky layers.
- Use Ice Water: Fill a glass with water and ice cubes, then measure from that for the coldest possible liquid, which prevents the butter from melting prematurely.
- Don’t Overwork Dough: Stop mixing as soon as the dough comes together, even if it looks a little shaggy—overworking develops gluten, and that means a chewy crust instead of a tender one.
- Rest Before Rolling: Give the dough a solid 30 minutes in the fridge before rolling it out, which relaxes the gluten and makes it easier to handle without shrinking in the pan.
Pro Cooking Tips for This Dish
Butter Temperature Control
Keep your 1 cup unsalted butter ice-cold—freeze cubed pieces for 10 minutes before mixing. I use European-style butter like Plugrá for higher fat content. Any warmth will melt the butter, ruining those flaky layers. 🌡️
Minimal Handling Technique
Use your fingertips or a pastry cutter to work the butter into flour until pea-sized crumbs form. This should take 3-5 minutes. Overworking develops gluten, making the crust tough instead of tender and flaky.
Vinegar for Tenderness
The 1 tbsp distilled white vinegar tenderizes the gluten, ensuring a delicate texture. Don’t skip it—this small addition makes a noticeable difference in the final product’s crumb structure.
Chilling is Non-Negotiable
Rest the dough for at least 1 hour in the fridge before rolling. This rechills the butter and relaxes the gluten. I often let it rest overnight for even better results. ❄️
Rolling for Layers
Roll the dough to ⅛-inch thickness on a floured surface. Keep the butter cold by working quickly. Visible butter flecks in the rolled dough guarantee those shattering layers we love.
Egg Wash Perfection
Use 1 egg + 1 tbsp heavy cream for a rich wash. Brush it on just before baking at 375°F. This creates a deep golden color and glossy finish that makes your creation look professional.
Nutrition Facts
Frequently Asked Questions
Why is cold butter important for flakiness?
Cold butter creates steam pockets during baking that separate the dough layers. If it melts prematurely, the layers merge into a dense crust. Keep it ice-cold until ready to use
Can I make the dough ahead of time?
Yes! Wrap it tightly and refrigerate for up to 2 days or freeze for 3 months. Thaw overnight in the fridge before rolling.
What if my crust browns too quickly?
Cover the edges with foil or a pie shield. Bake at 375°F until the filling is bubbling, then remove the cover for final browning.
Can I use a food processor?
Pulse until pea-sized crumbs form, about 10-15 seconds. Avoid overmixing to prevent tough crust.

- 4C Bread Crumbs Meatballs Recipe: Crispy Crust and Juicy Centers - September 25, 2026
- 6 Oz Chocolate Chip Cookie Recipe: Perfectly Balanced Crispy Edges and Chewy Hearts - September 25, 2026
- 6-Inch Coffee Cake Recipe: Vanilla Bean Swirls and Buttery Streusel Topping - September 25, 2026