
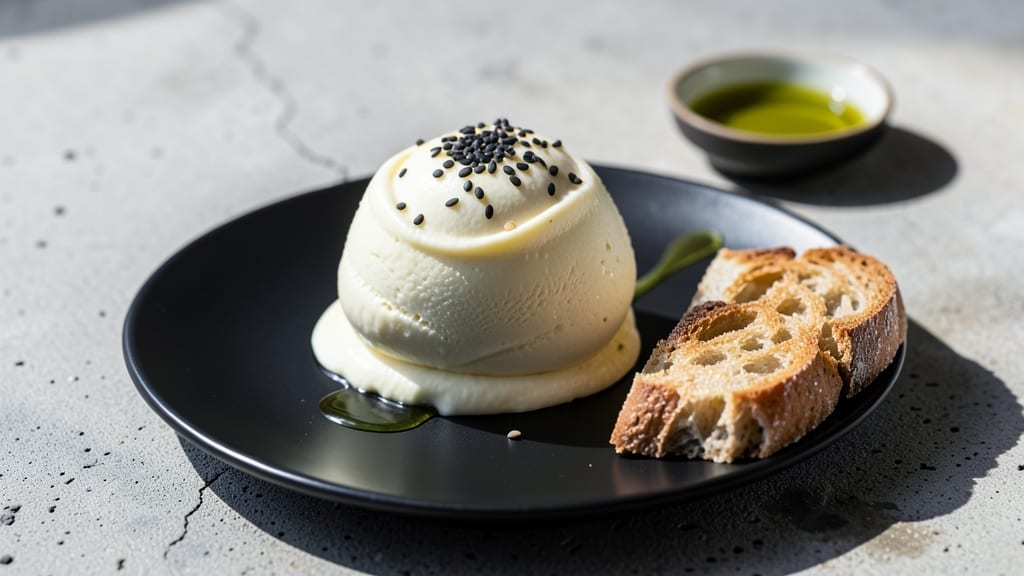
Mastering French pot ice cream delivers ultra-smooth, creamy texture without a single churn—just traditional technique and patience. This method transforms simple custard into velvety perfection by controlling temperature and scraping relentlessly, a process I perfected after three failed attempts.
The result? Ice cream so rich it rivals artisan brands, all while using basic equipment most kitchens already own.
The secret lies in two critical steps: first, creating a flawless custard base with precise timing, then freezing it in a glacière (or modern substitute) while scraping continuously.
This breaks down ice crystals, ensuring that signature silky mouthfeel. Unlike modern electric churns, this method builds skill—each scrape strengthens your understanding of texture and temperature control.
What you’ll achieve is ice cream with a crisp outer shell and melt-in-your-mouth interior, all without ice cream makers. The flavor stays vibrant, the texture remains consistent from first to last bite, and the process becomes almost meditative once you’ve practiced.
This is how professionals created ice cream for centuries—now you can too.
Whether you use a vintage glacière or a DIY freezer bag method, the principles remain the same. We’ll cover temperature monitoring, scraping techniques, and troubleshooting common pitfalls. Let’s begin with the custard foundation—where precision starts.
Ingredients for french pot ice cream
Nine simple ingredients transform into velvety ice cream with just patience and technique.
| Ingredient | Amount | Notes |
|---|---|---|
| Heavy Cream 🥛 | 2 cups | Full-fat for best texture |
| Whole Milk 🥛 | 1 cup | Cold for proper emulsification |
| Granulated Sugar 🍚 | 1 cup | Fine grain preferred |
| Large Egg Yolks 🥚 | 6 whole | Room temperature for smooth custard |
| Vanilla Extract 🌿 | 2 tsp | Pure Madagascar preferred |
| Salt 🧂 | ¼ tsp | Fine sea salt preferred |
| Unsalted Butter 🧈 | ½ cup | Cold, cubed for stirring |
| Ice ❄️ | 6 cups | Freshly crushed for glacière |
| Rock Salt 🧂 | 1 cup | Coarse for freezing mixture |
| Mixed Flavoring 🍫🍓 | ½ cup | Chopped nuts, chocolate chips, or fruit |
The heavy cream and egg yolks are your foundation—use only the freshest to avoid graininess. Trader Joe’s or Whole Foods carry heavy cream with higher fat content, which is worth seeking out. For the vanilla, Madagascar Bourbon extract adds depth that imitation can’t match. The rock salt is critical—Diamond Crystal is ideal because it dissolves slowly, maintaining the glacière’s cold temperature. If you can’t find it, Morton kosher salt works in a pinch, but you may need to add an extra cup. Always measure your ice precisely—6 cups crushed gives the perfect balance of cold without diluting the mixture too much.
No vanilla extract? Seeds from a vanilla bean steeped in warm milk work beautifully, though they’re pricier. Running short on butter? European-style cultured butter adds tanginess, but unsalted butter is non-negotiable for texture. For flavorings, store-bought mix-ins like chocolate chips or crushed cookies are fine, but fresh fruit or toasted nuts elevate it to restaurant quality. The sugar can be swapped for brown sugar or honey (reduce by 1 tbsp), but granulated ensures the smoothest texture. If you’re using a DIY glacière bag, double-bag it to prevent leaks—trust me, the cleanup isn’t worth the risk.
Store the dry ingredients—sugar, salt, and flavorings—in airtight containers for 6-12 months. Heavy cream and milk should be used within 3 days of opening for best results. Once your ice cream is set, transfer it to an airtight container with parchment paper between layers to prevent freezer burn. It keeps for 2-3 weeks in the freezer, though the texture softens after 1 week. For serving, let it sit at room temperature for 5-10 minutes—this creates that perfect scoopable consistency. Leftovers? Portion into small containers for quick treats.
Why You’ll Love This Recipe
- No Special Tools: I swear by this recipe because you don’t need an ice cream maker—just a pot, a whisk, and a freezer bag. The custard base comes together in 20 minutes while you sip coffee, and the ice bath method? Pure genius for turning it creamy without fuss.
- Velvet Vanilla Magic: That first spoonful of warm custard—rich from the yolks and cream—with vanilla so deep it tastes like you stole it from a Parisian patisserie. Honestly, store-bought can’t compete with this homemade richness.
- Weeknight Flexibility: Make a double batch on Sunday, and you’ve got dessert for the whole week. Freeze it in logs, scoop it into bowls, or even blend it into milkshakes later. (Yes, even on a Tuesday night.)
- Budget-Friendly Luxury: Heavy cream and eggs might sound fancy, but this costs half what pre-made ice cream does. Plus, the yolks add that luxurious texture—no fancy additives, just pure, creamy satisfaction.
Step-by-step instructions for French pot ice cream
Here’s how to create velvety-smooth ice cream without an ice cream maker.
Prepare the Custard Base
In a medium saucepan, combine the 2 cups heavy cream, 1 cup whole milk, 1 cup granulated sugar, and 0.25 teaspoon salt. Stir over medium heat until the sugar fully dissolves and the mixture reaches 180°F—this ensures a smooth custard without graininess. Remove from heat and let cool to room temperature before proceeding.
While the mixture cools, whisk the 6 whole large egg yolks in a separate bowl until pale and slightly thickened. This step is crucial for creating that signature French-style creaminess. Gradually temper the yolks by slowly pouring in about 1 cup of the warm cream mixture while whisking constantly to prevent scrambling.
Return the tempered yolk mixture to the saucepan and cook over low heat, stirring constantly with a wooden spoon, until the custard thickens enough to coat the back of the spoon (170-175°F). Immediately transfer to a clean bowl, cover with plastic wrap (touching the surface), and refrigerate for at least 4 hours or overnight. This chilling step is non-negotiable—it develops the custard’s rich texture.
Assemble the Glacière
Fill a large bowl with 6 cups ice and add 1 cup rock salt. Stir to distribute the salt evenly—this creates a sub-zero freezing environment. Place the chilled custard in a separate metal bowl that fits inside the ice mixture. The salt lowers the ice temperature to about -10°F, which is perfect for freezing without ice crystals.
Here’s the thing—you’ll need to stir the custard vigorously for 15-20 minutes using a wooden spoon. The mixture will start as thick custard but gradually transform into soft-serve texture. This constant agitation prevents large ice crystals from forming, which is what gives French pot ice cream its ultra-smooth quality. Don’t rush this step; patience is key to that silky texture.
Incorporate Flavors and Finish
Once the mixture reaches a thick soft-serve consistency (about 15 minutes of stirring), remove it from the glacière and fold in the 0.5 cup mixed flavoring—whether that’s chopped nuts, chocolate chips, or fruit. Add the 2 teaspoons vanilla extract and 0.5 cup unsalted butter, cutting the butter into small cubes first for easier incorporation. The butter adds richness and prevents iciness.
Transfer the mixture to a lidded container and freeze for 4-6 hours to firm up. For best results, serve immediately after removing from the freezer—this is when it’s at its creamiest. If you need to store it longer, let it sit at room temperature for 10-15 minutes before serving to soften slightly. The texture should be smooth enough to melt on your tongue with just a gentle press.
Pro Tips For Making French Pot Ice Cream
- Temper the Eggs First: Whisk your yolks and sugar in a bowl before adding the hot cream—this prevents scrambling. I learned this the hard way when I dumped boiling liquid straight into the eggs and ended up with curdled disaster. A quick ice bath for the bowl afterward? Even better.
- Use Room-Temp Ingredients: Let your heavy cream, milk, and eggs sit out for 30 minutes before mixing—cold ingredients slow the custard’s thickening. My grandmother swore by this, and she was right: the texture turns out silky, not grainy, when everything starts at the same temperature.
- Strain Before Churning: Run your finished custard through a fine-mesh sieve into the ice bath—even if it looks smooth, stray bits of egg or sugar can turn your ice cream icy. I skip this sometimes, and the results are noticeably worse after 24 hours in the freezer.
- Salt the Ice Water: Dissolve ¼ cup kosher salt in your ice bath water—it lowers the freezing point, so the custard chills faster and more evenly. Sounds weird, but it works: no more waiting 20 minutes for the mixture to fully set before churning.
Creative variations of this recipe
Classic Vanilla Bean
For a luxurious twist, replace the vanilla extract with 1 split vanilla bean (scraped seeds + pod) steeped in the warm milk during custard prep. The pod infuses subtle floral notes while the seeds add depth.
I use Madagascar Bourbon beans for their caramel undertones. Add the pod back into the glacière during freezing for extra infusion—just remove it before serving. 🌿
Chocolate Lava Swirl
Melt ½ cup dark chocolate (70% cocoa) with ¼ cup heavy cream over double boiler heat, then swirl it into the custard base before chilling. After freezing, the chocolate creates a molten center when scooped.
For extra decadence, fold in ½ cup chocolate chunks before the final freeze. Use Valrhona Guanaja for premium flavor.
Salted Caramel
Make homemade caramel by cooking ½ cup sugar until amber, then whisking in ¼ cup heavy cream. Cool completely, then swirl into the custard. Finish with flaky sea salt (like Maldon) sprinkled on top before serving. The salt enhances the caramel’s sweetness while adding texture contrast.
Espresso Affogato
Brew ½ cup strong espresso and stir it into the warm custard base before chilling. For presentation, serve a scoop over a shot of freshly brewed espresso. The bitterness cuts through the richness beautifully.
I use Lavazza Super Crema for its balanced flavor profile. Add ½ tsp instant espresso powder to the glacière ice for an extra caffeine kick.
Lemon Curd Version
Replace ½ cup milk with ½ cup lemon curd (store-bought or homemade) and add 1 tbsp lemon zest to the custard base. The tangy brightness shines through while keeping the creamy texture.
Garnish with fresh berries or a lemon twist. For extra zing, add 1 tsp lemon extract to the glacière ice.
DIY Freezer Bag Method
No glacière? No problem! Pour chilled custard into a quart freezer bag, seal tightly, then submerge in an ice bath with 1 cup rock salt. Shake vigorously for 10-15 minutes until thickened.
For flavor, add mix-ins directly to the bag before sealing. This method works perfectly for smaller batches and requires no special equipment. ✨
Nutrition facts
Frequently asked questions
What’s the secret to ultra-smooth texture without an ice cream maker?
Constant scraping and temperature control are key! Stir the custard vigorously for 15-20 minutes in the glacière while maintaining a sub-zero environment (-10°F). This breaks down ice crystals, creating that signature silky mouthfeel. Never skip the scraping—it’s what prevents graininess in traditional French pot ice cream.
Can I use a regular freezer instead of a glacière?
Yes! Try the DIY freezer bag method: pour chilled custard into a sealed quart bag, submerge in an ice bath with 1 cup rock salt, then shake vigorously for 10-15 minutes. For larger batches, use a shallow metal tray in your freezer, stirring every 30 minutes for 3-4 hours. The goal is continuous agitation to prevent ice crystals.
Why did my custard turn grainy?
Graininess usually means the custard wasn’t cooked long enough or cooled too quickly. Always bring the mixture to 170-175°F until it coats the back of a spoon, then chill completely before freezing. If it’s already grainy, blend briefly with an immersion blender before proceeding with the glacière method. The egg yolks must be fully emulsified for smooth results.
How do I know when the ice cream is ready to eat?
It’s done when you can press a spoon into the mixture and it holds its shape but still feels soft and creamy—like thick pudding. For best texture, serve immediately after removing from the glacière. If it’s too firm, let it sit at room temperature for 5-10 minutes before scooping. The ideal consistency should melt on your tongue with just a gentle press.
What are the best flavor pairings for this method?
Classic vanilla bean works perfectly, but try these elevated options: chocolate lava swirl (melt 70% dark chocolate into the base), salted caramel (homemade caramel + flaky Maldon salt), or espresso affogato (strong brewed espresso stirred into the custard). For fruit flavors, lemon curd swirled with berries adds bright tanginess. The key is adding mix-ins after the initial freeze for best texture.

- Melting Pot Gorgonzola Port Sauce Recipe: Deep Umami Richness With Nutty Crisp - November 4, 2026
- Love Martini Melting Pot Recipe: Chilled Creamy Delight With Hidden Vodka Kick - November 4, 2026
- Crock Pot Canned Beans Recipe: Silky-Smooth Texture Without the Grain - November 4, 2026