
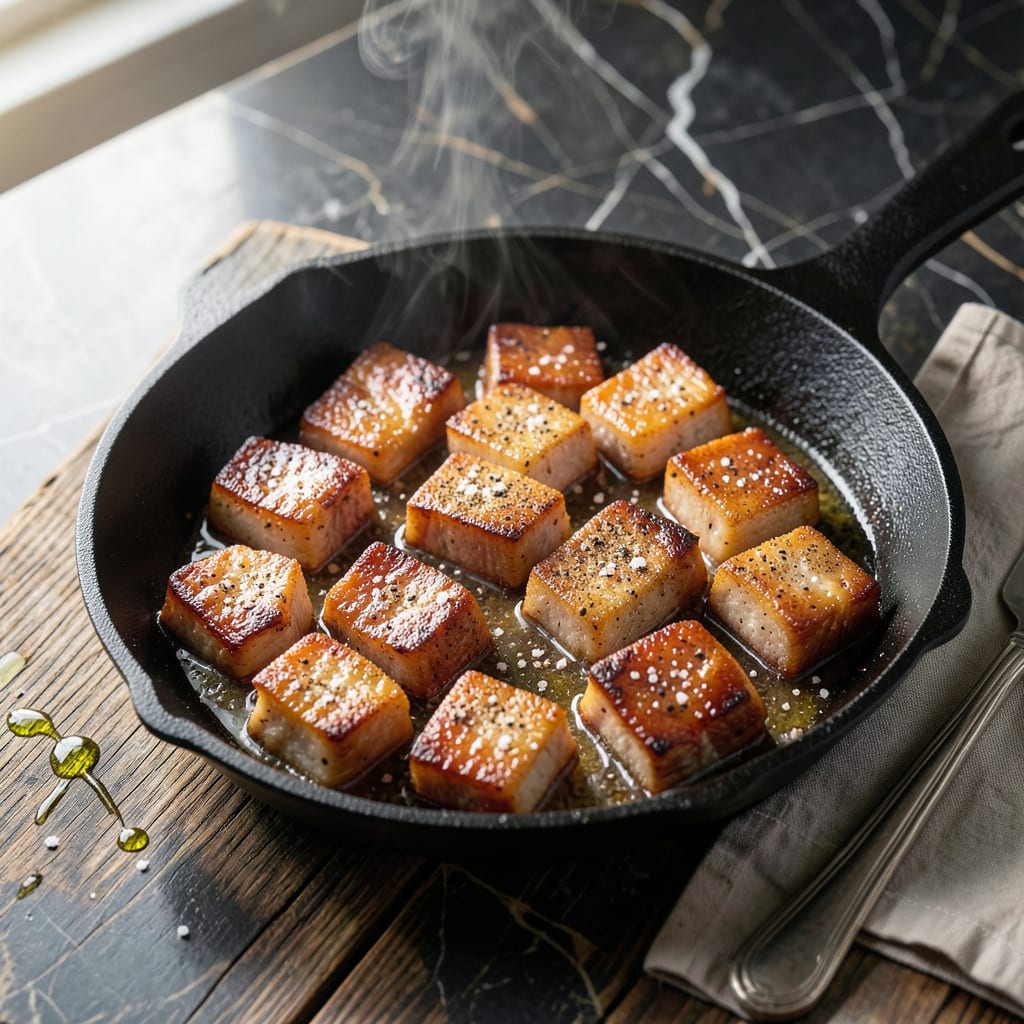
This Southern classic transforms humble pork fat into crispy, golden cracklings with minimal effort. The key is patience—low heat renders the fat while achieving the perfect crunch.
Traditional frying methods ensure each piece develops a shatteringly crispy texture. Serve warm as a snack or alongside hearty dishes for an authentic taste of the South.
Ingredients for Fried Fat Back
Transform pork fat back into golden, crispy cracklings with these simple Southern staples.
| Ingredient | Amount | Notes |
|---|---|---|
| Pork Fat Back 🥓 | 1 lb | Cubed with skin on |
| Water 💧 | 1 cup | For initial rendering |
| Coarse Kosher Salt 🧂 | 1 ½ tsp | Diamond Crystal preferred |
| Freshly Ground Black Pepper 🌶️ | ½ tsp | Coarse grind preferred |
| Garlic Powder 🧄 | ½ tsp | Optional for seasoning |
| Onion Powder 🧅 | ½ tsp | Optional for seasoning |
| Smoked Paprika 🌶️ | ¼ tsp | For depth of flavor |
| Cayenne Pepper 🔥 | 0.125 tsp | Adjust to heat preference |
| Vegetable Oil 🫒 | ¼ cup | For frying if needed |
| Apple Cider Vinegar 🍏 | 1 tsp | For balancing richness |
The pork fat back is non-negotiable here. Look for fresh, unbrined pieces at your butcher or specialty meat counter—local farms often sell it if you ask. The skin should be intact and the fat firm, with a creamy white color (avoid anything gray or yellowed). Whole Foods or local butcher shops are your best bet for quality. Avoid pre-packaged if possible, as it may contain preservatives that affect texture.
No pork fat back? Pork belly skin-on works in a pinch, though the texture differs slightly. For seasoning, sea salt at half the amount can replace kosher salt, but avoid iodized—it tastes metallic. Smoked paprika adds depth, but regular paprika works fine. If you prefer heat, increase the cayenne or add crushed red pepper flakes. The vinegar isn’t traditional but balances the richness beautifully.
Rendered fat keeps in the fridge for 1 month or freezes for 6 months. Store cracklings in an airtight container at room temperature—they’ll stay crispy for 3-4 days. Reheat in a dry skillet to revive the crunch if needed. The rendered lard is liquid gold for cooking.
Why You’ll Love This Recipe
- Five-Minute Prep: I just slice the fat back, season with salt, pepper, and garlic powder, then fry—no fancy steps.
- Crispy Garlic Bites: The coarse salt and garlic powder make every bite savory and irresistibly crispy.
- Breakfast or Snack: I fry a batch Sunday morning and keep it for quick breakfasts or a salty snack all week.
- Pocket-Friendly Protein: A pound of pork fat back costs pennies and stretches into multiple meals without breaking the bank.
Step-by-Step Instructions for Crispy Southern-Style Cracklings
This method ensures perfectly crispy results with minimal effort and maximum flavor.
Step 1: Render the Pork Fat Back in Water
Place the cubed 1 lb Pork Fat Back in a heavy-bottomed skillet or Dutch oven. Add the 1 cup Water and set over medium heat. The water prevents the fat from burning during the initial rendering phase while allowing the skin to crisp gradually.
As the water evaporates, the fat will begin to render slowly. Stir occasionally to prevent sticking, and watch for the water to completely cook off—this takes about 20-25 minutes. You’ll notice the cubes start to shrink and the skin begins to puff slightly.
Step 2: Season and Continue Cooking Until Crisp
Once the water has fully evaporated and the pork fat back is rendering in its own fat, add the 1.5 tsp Coarse Kosher Salt, 0.5 tsp Freshly Ground Black Pepper, 0.5 tsp Garlic Powder, 0.5 tsp Onion Powder, 0.25 tsp Smoked Paprika, and 0.125 tsp Cayenne Pepper. Stir to coat the pieces evenly in the spices.
Continue cooking over medium-low heat, stirring frequently, for another 30-40 minutes. The fat back will transform from soft cubes to golden, crispy cracklings as the moisture evaporates and the collagen breaks down. Keep an eye on the heat—too high, and the outside will burn before the inside crisps.
Step 3: Add Vegetable Oil for Final Crisping
If the rendered fat starts to run low before the cracklings reach your desired crispness, add the 0.25 cup Vegetable Oil to the skillet. This ensures the pieces fry evenly and develop a uniform, deep golden-brown color.
Use a slotted spoon to stir the cracklings gently, allowing them to crisp on all sides. You’ll know they’re ready when they’re deep amber and have a light, airy texture. This step usually takes an additional 10-15 minutes.
Step 4: Finish with Apple Cider Vinegar and Drain
Just before removing the cracklings from the skillet, drizzle the 1 tsp Apple Cider Vinegar over the top. Stir quickly to distribute the vinegar evenly—it adds a subtle tang that balances the richness of the pork.
Remove the cracklings with a slotted spoon and transfer them to a paper towel-lined plate to drain excess fat. Sprinkle with a pinch of extra Coarse Kosher Salt if desired. Let them cool for 5 minutes before serving to allow them to crisp up fully.
Pro Tips For Making Fried Fat Back
- Score the Fat: Cut shallow crosshatches into the fat back before seasoning—this helps the salt and pepper penetrate and creates more crispy edges as it fries.
- Start Cold, Finish Low: Begin frying in a cold pan with the fat back and a splash of water, then reduce heat to medium-low once it starts rendering. This prevents burning and ensures even cooking.
- Pat It Dry: Blot the fat back with a paper towel before seasoning—I learned this the hard way after my first batch steamed instead of crisped in the pan.
- Salt Last: Sprinkle the coarse kosher salt just before serving, not before frying. Salting too early can draw out moisture and make the fat back tough instead of tender.
Storing and Reheating This fried fat back
Room Temperature Storage
Once completely cooled, store cracklings in an airtight container at room temperature. They’ll maintain their crispy texture for 3-4 days. I use glass jars with tight-sealing lids to keep them fresh and crunchy. 💪
Refrigerator Storage
For longer storage, place in an airtight container and refrigerate for up to 1 week. The cold can make them slightly softer, but they’ll crisp back up when reheated. Let them come to room temperature before reheating for best results.
Freezer Storage
Freeze in a single layer on a baking sheet first, then transfer to a freezer bag. They’ll keep for 3 months. This prevents them from sticking together. I always label my bags with the date to track freshness.
Oven Reheating
Preheat oven to 350°F and spread cracklings on a baking sheet. Heat for 5-7 minutes until they regain their crispiness. Watch closely to avoid burning—they can go from perfect to overdone quickly. 🔥
Skillet Reheating
For smaller batches, warm in a dry skillet over medium heat for 2-3 minutes, stirring occasionally. This method revives the texture beautifully without adding extra oil. The rendered fat in the pan adds subtle richness.
Microwave Warning
I avoid microwaving as it makes them soggy. If you must, use 30-second intervals on a paper towel, but expect reduced crispness. The microwave just can’t replicate the dry heat needed for that perfect crunch.
Nutrition Facts
Frequently Asked Questions
Why use water when frying?
Water prevents burning during the initial rendering phase. It slowly evaporates while the fat renders, ensuring even cooking and a perfect crispy texture without charring.
Can I use pork belly instead?
Yes, pork belly works, but the texture will differ slightly. It has more meat, so it won’t get as light and airy as traditional cracklings. Stick to skin-on for best results.
How do I know when they’re done?
They’re ready when deep amber and light. If unsure, test one—it should shatter when bitten. Overcooking makes them bitter, so watch closely during the final 10-15 minutes.
Can I save the rendered fat?
Strain and store the lard in an airtight container. It keeps in the fridge for 1 month or freezes for 6 months. Perfect for frying or baking.

- 5 Lb Bag Of Mashed Potatoes Recipe: Slow-Cooker Creaminess Without the Lumps - September 25, 2026
- 1950s Chili Recipe: Beef and Bean Classic With Bold Spice - September 25, 2026
- 1 Person Chocolate Chip Cookie Recipe: Single-Batch Warmth With Perfectly Balanced Bites - September 25, 2026