
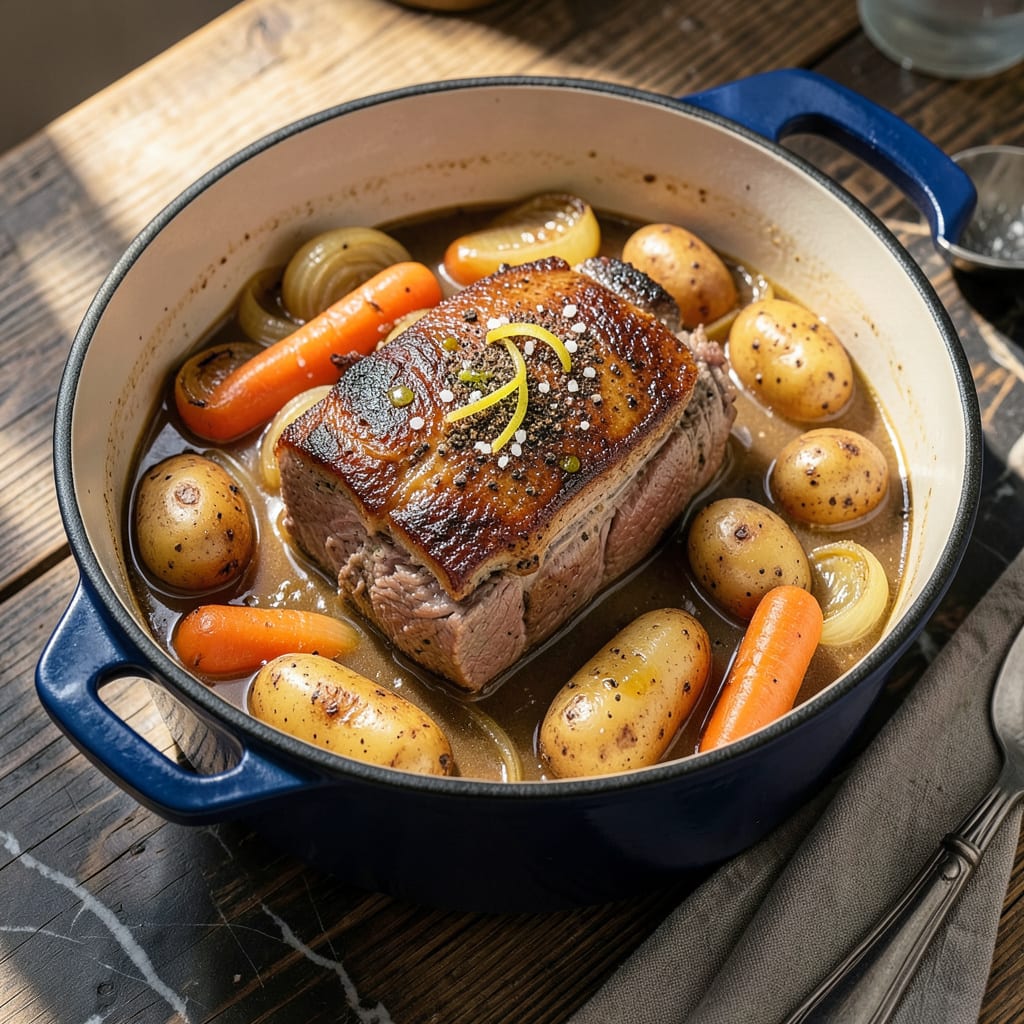
This frozen pot roast method delivers fall-apart tender results without the wait of traditional thawing. The secret lies in a slow, steady cooking process that transforms even frozen beef into succulent, flavorful meat. No need to plan ahead—this technique works with whatever you have on hand.
By adjusting cooking times and liquid ratios, you’ll achieve the same rich, deeply flavored pot roast as fresh-start recipes. The meat becomes incredibly tender while vegetables absorb the savory broth, creating a complete meal in one pot. Perfect for busy weeknights when you forgot to thaw dinner.
Ingredients for Frozen Pot Roast
No thawing, no stress—just a frozen roast and pantry staples for tender, savory perfection.
| Ingredient | Amount | Notes |
|---|---|---|
| Beef Chuck Roast 🥩 | 3 lb | Frozen solid, no thawing needed |
| Olive Oil 🫒 | 2 tbsp | Divided for searing and deglazing |
| Kosher Salt 🧂 | 2 tsp | Diamond Crystal preferred for even seasoning |
| Coarsely Ground Black Pepper 🌶️ | 1 tsp | Freshly ground for maximum flavor |
| Yellow Onions 🧅 | 2 whole | Large, cut into 1-inch chunks |
| Carrots 🥕 | 4 whole | Peeled, cut into 2-inch pieces |
| Celery Stalks 🌿 | 3 whole | Cut into 1-inch pieces |
| Garlic Cloves 🧄 | 6 cloves | Smashed but left whole |
| Low-Sodium Beef Broth 💧 | 4 cups | Divided for deglazing and braising |
| Tomato Paste 🍅 | 2 tbsp | Double-concentrated preferred |
| Dried Thyme 🌿 | 1 tsp | Or 1 tbsp fresh thyme leaves |
| Dried Rosemary 🌿 | 1 tsp | Crushed between fingers to release oils |
| Bay Leaves 🌿 | 2 whole | Fresh or dried |
| Red Wine Vinegar 🍷 | 1 tbsp | Balances richness of the broth |
| Worcestershire Sauce 🫕 | 1 tbsp | Anchovy-free version if preferred |
The beef is the star here. Chuck roast with good marbling handles the frozen-to-cooked transition best—look for USDA Choice at Costco or Whole Foods if you’re stocking up. The frozen solid part is key (don’t partially thaw), and a 3-pound roast feeds six with leftovers. I grab the pre-cut stew meat sometimes, but whole roasts give better texture. The broth matters too—Better Than Bouillon makes a killer beef base if you’re using water instead of boxed broth.
No red wine vinegar? Apple cider vinegar works in a pinch. Out of Worcestershire? Soy sauce plus a dash of lemon juice gets you 80% there. The tomato paste can be swapped for 1/4 cup crushed tomatoes (just reduce the broth by 2 tbsp). Fresh herbs? Use triple the amount but add them in the last hour. And if your roast is bigger or smaller, just keep the liquid ratio—1 cup broth per pound of meat is the golden rule.
This actually tastes better the next day—4 days in the fridge is the sweet spot. Freeze portions for up to 3 months (broth and all). Pro tip: Skim the fat after chilling, then reheat with a splash of broth. The carrots and onions get mushy but delicious—perfect for mashing into the sauce or blending into gravy. Leftovers make killer pot roast tacos with corn tortillas and pickled onions.
Why You’ll Love This Recipe
- I’ll be real: day-two pot roast might taste even better. The flavors deepen overnight, so I stretch it into sandwiches, soups, or just reheat with a splash of broth. One roast, three meals—my wallet (and schedule) thank me.
- No-Thaw Necessary: I’ve burned dinner rushing to defrost meat one too many times—this recipe lets me toss the chuck roast in frozen, no stress. Just a hot pan, olive oil, and that satisfying sizzle when the cold beef hits the heat.
- Caramelized Magic: Honestly, the onions are the sleeper hit here. They melt into the salt and pepper crust on the roast, turning sweet and jammy while the beef gets crispy-edged and tender inside. (I fight my husband for the crusty bits.)
- Sunday or Tuesday: Between us, this is my secret for both fancy family dinners and the nights I’m running late. The same pot roast works sliced over mashed potatoes for guests or shredded into tacos for a weeknight—no extra effort.
Step-by-Step Instructions for Frozen Pot Roast
This method transforms frozen beef into fall-apart tender perfection without thawing—simple but game-changing.
Step 1: Sear the Frozen Roast for Maximum Flavor
Heat a heavy Dutch oven over medium-high heat until it’s screaming hot. Add 1 tablespoon olive oil and let it shimmer for 30 seconds. Here’s the key: place the frozen beef chuck roast directly in the pot—no thawing needed. The ice crystals will actually help create steam that keeps the meat moist during searing.
Sear undisturbed for 5-6 minutes per side until you develop a deep brown crust. You’ll hear aggressive sizzling at first as the ice meets hot oil, then it’ll quiet down as the crust forms. Don’t rush this step—the Maillard reaction happening now builds the foundation for your entire dish’s flavor. Season aggressively with kosher salt and coarsely ground black pepper after searing.
Step 2: Build the Aromatic Base
Remove the roast temporarily and reduce heat to medium. Add the remaining 1 tablespoon olive oil, then toss in the yellow onions, carrots, and celery stalks. Cook for 8-10 minutes, stirring occasionally, until the onions develop golden edges and the carrots start to soften at the tips.
Push the vegetables to one side and add the tomato paste to the cleared spot. Let it toast for 1-2 minutes until it darkens slightly and smells rich and sweet. This step removes the raw tinny flavor from the paste. Add the garlic cloves, dried thyme, dried rosemary, and bay leaves, stirring constantly for 30 seconds until fragrant. The garlic should just begin to color—not burn.
Step 3: Deglaze and Begin the Braise
Pour in 1 cup low-sodium beef broth and scrape up all those browned bits from the bottom—they’re pure flavor. Add the remaining 3 cups low-sodium beef broth, red wine vinegar, and Worcestershire sauce. The vinegar might seem odd, but it balances the richness and helps tenderize the meat.
Return the seared roast to the pot, nestling it among the vegetables. The liquid should come about two-thirds up the side of the meat. If it doesn’t, add a splash of water. Bring everything to a gentle simmer, then immediately reduce heat to low, cover, and let it work its magic.
Step 4: Slow Cook to Fall-Apart Tenderness
Maintain a barely-there simmer for 3-3½ hours. You’ll know it’s perfect when the meat yields easily to a fork but hasn’t completely fallen apart yet. Resist the urge to check frequently—every time you lift the lid, you add 15-20 minutes to the cooking time. The house will smell incredible as the aromatics meld together.
About 30 minutes before it’s done, you’ll notice the liquid reducing and the meat pulling away from the bones slightly. That’s your signal to start checking for doneness. The roast is ready when you can insert a fork and twist it to pull apart a chunk with zero resistance. The carrots should be butter-soft and the onions nearly dissolved into the sauce.
Step 5: Rest and Serve with Rich Pan Juices
Transfer the roast to a cutting board and tent loosely with foil. Let it rest for 15 minutes—this allows the juices to redistribute so they don’t all run out when you slice it. Meanwhile, skim any excess fat from the surface of the braising liquid, then simmer uncovered for 5-7 minutes to concentrate the flavors into a rich, velvety sauce.
Slice the meat against the grain into 1-inch thick pieces, or use two forks to pull it into large chunks. Arrange on a platter and spoon the reduced pan juices and vegetables over the top. The sauce should coat the back of a spoon and have a glossy sheen. Serve immediately while everything’s piping hot—the meat will be tender enough to cut with a fork but still hold its shape beautifully.
Flavor Customization for This Recipe
Herb-Crusted Variation
For an aromatic twist, create a herb crust by mixing 2 tbsp chopped fresh parsley, 1 tbsp fresh thyme leaves, and 1 tbsp fresh rosemary with 1 tbsp Dijon mustard. After searing the frozen roast, brush this mixture all over the meat before adding it back to the pot. The herbs will infuse the broth while creating a flavorful crust on the meat. 🌿
Spicy Southwest Kick
Add 1 tbsp chili powder, 1 tsp ground cumin, and ½ tsp smoked paprika to the tomato paste when toasting. Replace the red wine vinegar with lime juice and add 1 diced chipotle pepper in adobo with the broth. This transforms your pot roast into a smoky, slightly spicy masterpiece perfect for tacos or nachos.
Asian-Inspired Umami
Swap the Worcestershire for 2 tbsp soy sauce and add 1 tbsp grated fresh ginger, 1 star anise pod, and 1 cinnamon stick to the braising liquid. Use rice vinegar instead of red wine vinegar. The result is a deeply savory, slightly sweet broth that pairs beautifully with steamed rice or noodles.
Mediterranean Brightness
Add 1 cup pitted Kalamata olives, ½ cup sun-dried tomatoes, and 1 tsp fennel seeds to the pot. Replace the red wine vinegar with lemon juice and add 1 tsp lemon zest at the end. This variation brings bright, briny flavors that cut through the richness of the beef. The olives become incredibly tender and flavorful.
Coffee-Rubbed Depth
Create a dry rub with 1 tbsp finely ground coffee, 1 tbsp brown sugar, and 1 tsp cocoa powder. Pat this onto the frozen roast before searing. The coffee adds incredible depth without bitterness, while the sugar helps create a beautiful crust. I love this with sweet potatoes instead of regular potatoes. ☕
Classic French Style
Add 8 oz sliced mushrooms when cooking the vegetables and deglaze with ½ cup dry red wine instead of some broth. Stir in 1 tbsp brandy at the end for richness. This creates a more sophisticated, wine-infused sauce perfect for serving over egg noodles or with crusty French bread to soak up every drop.
Nutrition Facts
Frequently Asked Questions
Can I use a different cut of beef?
Chuck roast works best for this method, but you can use brisket or bottom round in a pinch. Chuck’s marbling keeps it moist during the long cook time, while leaner cuts may dry out. If using brisket, increase cooking time by 30-45 minutes for optimal tenderness.
Why does the recipe call for vinegar?
The red wine vinegar balances the richness of the beef and helps tenderize the meat. It doesn’t make the dish taste sour—just adds brightness. If you’re out, substitute apple cider vinegar or lemon juice in equal amounts.
How do I know when it’s done?
The roast is ready when it reaches 195-205°F internally and shreds easily with a fork. The meat should pull apart with zero resistance when twisted. Don’t rely on time alone—always check with a meat thermometer for perfect results.
Can I make this in a slow cooker?
Sear the frozen roast first, then transfer everything to your slow cooker. Cook on low for 8-10 hours or high for 5-6 hours. The texture will be slightly different but equally delicious. Pro tip: Reduce the broth to 3 cups to prevent a watery sauce.

- 8 Bean Soup Recipe Crock Pot: Hearty Vegetable Medley in One Pot - September 25, 2026
- 4C Bread Crumbs Meatballs Recipe: Crispy Crust and Juicy Centers - September 25, 2026
- 6 Oz Chocolate Chip Cookie Recipe: Perfectly Balanced Crispy Edges and Chewy Hearts - September 25, 2026