
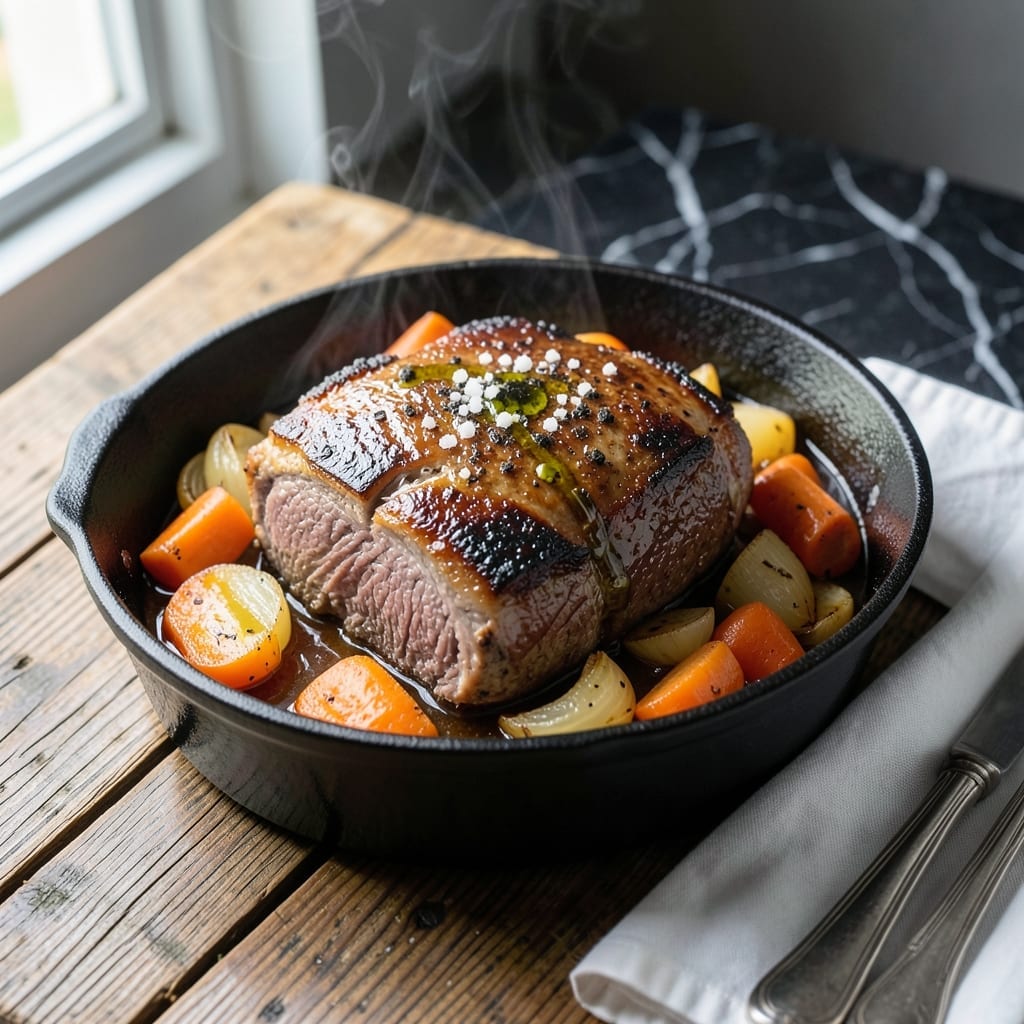
Sunday dinner just got an upgrade with this wine-infused pot roast that transforms tough cuts into fall-apart tender perfection. The secret lies in a long, slow braise that coaxes maximum flavor from every ingredient.
I start with a well-marbled chuck roast, seared until deeply browned, then build layers of flavor with aromatic vegetables, red wine, and fresh herbs. The low oven temperature ensures the meat becomes fork-tender while the liquid reduces to a rich, velvety sauce.
Root vegetables soak up the wine-infused juices, becoming sweet and caramelized alongside the beef. The result is a complete meal in one pot—comforting yet sophisticated enough for special occasions.
This method delivers consistent results every time, with meat that shreds effortlessly and a sauce so flavorful you’ll want to soak it up with crusty bread.
Ingredients for Gourmet Pot Roast
A well-marbled chuck roast plus aromatics and wine deliver gourmet results in one pot.
| Ingredient | Amount | Notes |
|---|---|---|
| Chuck Roast 🥩 | 3 lb | Well-marbled, boneless preferred |
| Olive Oil 🫒 | 2 tbsp | Divided for searing and sautéing |
| Kosher Salt 🧂 | 2 tsp | Diamond Crystal preferred |
| Black Pepper 🌶️ | 1 tsp | Freshly ground |
| Yellow Onion 🧅 | 2 whole | Large, roughly chopped |
| Carrots 🥕 | 4 whole | Peeled, cut into chunks |
| Celery Stalks 🌿 | 3 pieces | Cut into large pieces |
| Garlic Cloves 🧄 | 6 cloves | Smashed, peeled |
| Dry Red Wine 🍷 | 2 cups | Bold variety like Cabernet Sauvignon |
| Beef Stock 🥘 | 2 cups | Low-sodium preferred |
| Tomato Paste 🍅 | 2 tbsp | For depth of flavor |
| Fresh Thyme Sprigs 🌿 | 4 pieces | Plus extra for garnish |
| Fresh Rosemary Sprigs 🌿 | 2 pieces | Stems removed before serving |
| Bay Leaves 🍃 | 2 pieces | Dried, whole |
| Russet Potatoes 🥔 | 1 ½ lb | Peeled, cut into chunks |
The beef is non-negotiable here. Chuck roast with visible marbling (look for those white fat streaks) breaks down beautifully during the long braise. I get mine from Whole Foods or Costco—both have consistent quality. Avoid lean cuts like sirloin; they’ll stay tough. The wine matters too: Cabernet Sauvignon or Merlot adds the right depth (no need for expensive bottles though).
No red wine? Substitute with extra beef stock plus 1 tbsp balsamic vinegar. Fresh herbs not on hand? Dried thyme and rosemary at half the amount work fine. The potato count is flexible—add more if you’re feeding a crowd (they’ll soak up all that glorious sauce). For a shortcut, pre-cut mirepoix from the grocery store saves time without sacrificing flavor.
This tastes even better the next day—store in the fridge for up to 4 days or freeze for 3 months. The sauce thickens as it cools, so thin with a splash of stock when reheating. Leftovers make killer sandwiches (trust me on this one).
Why You’ll Love This Recipe
- Set and Forget: I just sear the chuck roast, toss in onion, salt, and pepper, then let the oven do the work for hours.
- Sunday Dinner, Anytime: Honestly, it’s impressive enough for guests but simple enough for a regular Tuesday.
- Leftovers for Days: One roast feeds us for two meals—sandwiches the next day taste even better.
Step-by-Step Instructions for Wine-Infused Pot Roast With Root Vegetables
This method transforms tough cuts into melt-in-your-mouth perfection with deep, complex flavors.
Step 1: Sear the Chuck Roast to Develop a Crust
Pat the 3 lb chuck roast completely dry with paper towels. This is non-negotiable—moisture prevents proper browning. Season all sides aggressively with the 2 tsp kosher salt and 1 tsp black pepper, pressing gently so the seasoning adheres.
Heat 1 tbsp olive oil in a heavy Dutch oven over medium-high heat until shimmering. Add the chuck roast and sear undisturbed for 4-5 minutes per side until a deep, mahogany crust forms. You’ll hear the meat sizzle and see the edges caramelize—that’s the Maillard reaction creating flavor. Transfer to a plate.
Step 2: Sauté Aromatics and Deglaze the Pan
In the same pot, add the remaining 1 tbsp olive oil and reduce heat to medium. Add the 2 whole yellow onion, 4 whole carrots, 3 pieces celery stalks, and 6 cloves garlic cloves. Cook for 6-8 minutes, stirring occasionally, until the onions soften and begin to brown.
Stir in the 2 tbsp tomato paste and cook for 1-2 minutes until it darkens slightly—this removes the raw taste and deepens its flavor. Pour in the 2 cups dry red wine, scraping the browned bits from the bottom of the pot with a wooden spoon. Let it simmer for 3-4 minutes until reduced by half.
Step 3: Build the Braising Liquid and Add the Roast
Return the seared chuck roast to the pot along with any accumulated juices. Add the 2 cups beef stock, 4 pieces fresh thyme sprigs, 2 pieces fresh rosemary sprigs, and 2 pieces bay leaves. The liquid should come about halfway up the roast—if it doesn’t, add a splash of water.
Bring the mixture to a gentle simmer over medium-high heat, then reduce to low heat. Cover the pot and transfer it to a preheated 325°F oven. This low-and-slow method is key for breaking down the connective tissue without drying out the meat.
Step 4: Add Vegetables and Finish the Braise
After 2 hours, add the 1.5 lb russet potatoes (peeled and cut into chunks) to the pot, pressing them into the liquid. Re-cover and return to the oven. The potatoes will soak up the rich, wine-infused braising liquid as they cook.
Continue braising for another 1 to 1.5 hours until the chuck roast is fork-tender and the potatoes are easily pierced with a knife. The meat should pull apart with minimal resistance, and the vegetables should be tender but not mushy. Remove the rosemary stems and bay leaves before serving.
Pro Tips For Making Gourmet Pot Roast
- Sear It Hard: I learned this the hard way—crank the heat to medium-high and get that chuck roast deeply browned on all sides. It builds a crust that carries flavor through the long braise.
- Salt the Roast Overnight: Sprinkle the chuck roast with kosher salt at least 12 hours before cooking. It penetrates deep, seasons evenly, and makes the meat taste richer.
- Don’t Crowd the Pan: After burning my first few attempts, I now sear the roast in batches if needed. Overcrowding steams the meat instead of browning it.
- Use Onion as a Rack: Sounds weird, but it works: Place thick onion slices under the roast in the pot. It lifts the meat, prevents sticking, and adds subtle sweetness to the braise.
Essential Equipment for This Recipe
Dutch Oven Essentials
Invest in a heavy 5-7 quart Dutch oven—I swear by my Le Creuset for even heat distribution. The enameled cast iron retains heat perfectly for long braises. Avoid thin aluminum pots; they won’t maintain steady temperatures. 🔥
Thermometer Matters
An instant-read thermometer ensures your roast reaches the ideal 195-205°F internal temp. I use a ThermoWorks Thermapen for accuracy. Don’t guess—overcooked pot roast becomes dry despite the braising liquid.
Wooden Spoon Must-Have
A sturdy wooden spoon won’t scratch your Dutch oven while deglazing. It’s perfect for scraping up those flavorful browned bits. I keep mine by the stove at all times—it’s my most-reached-for tool.
Sharp Knife Prep
Use an 8-inch chef’s knife to trim excess fat from your chuck roast. A sharp blade makes clean cuts without tearing the meat. I sharpen mine weekly with a Pull-Through Sharpener.
Tongs for Handling
12-inch locking tongs let you flip the roast safely during searing. They’re also great for removing the meat to rest. I prefer the OXO Good Grips brand for comfort and durability.
Resting Surface
Have a wire rack set over a rimmed baking sheet ready for resting the roast. This keeps the meat elevated so it doesn’t steam in its juices. Resting for 15-20 minutes is non-negotiable for juicy results.
Nutrition Facts
Frequently Asked Questions
What’s the best cut for this dish?
Use a well-marbled chuck roast for the most tender results. The fat content breaks down beautifully during the long braise, creating that signature melt-in-your-mouth texture. Avoid lean cuts like sirloin.
Can I use a slow cooker instead?
Yes! Sear the meat first, then transfer everything to a slow cooker. Cook on low for 8 hours or high for 5-6 hours. The flavor will be slightly different but still delicious.
How do I know when it’s done?
The meat should reach an internal temperature of 195-205°F and pull apart easily with a fork. If it resists, give it more time—the collagen needs to fully break down.
Why rest before serving?
Resting for 15-20 minutes lets juices redistribute throughout the meat. Skipping this step means dry pot roast, even with all that braising liquid.

- 4C Bread Crumbs Meatballs Recipe: Crispy Crust and Juicy Centers - September 25, 2026
- 6 Oz Chocolate Chip Cookie Recipe: Perfectly Balanced Crispy Edges and Chewy Hearts - September 25, 2026
- 6-Inch Coffee Cake Recipe: Vanilla Bean Swirls and Buttery Streusel Topping - September 25, 2026