
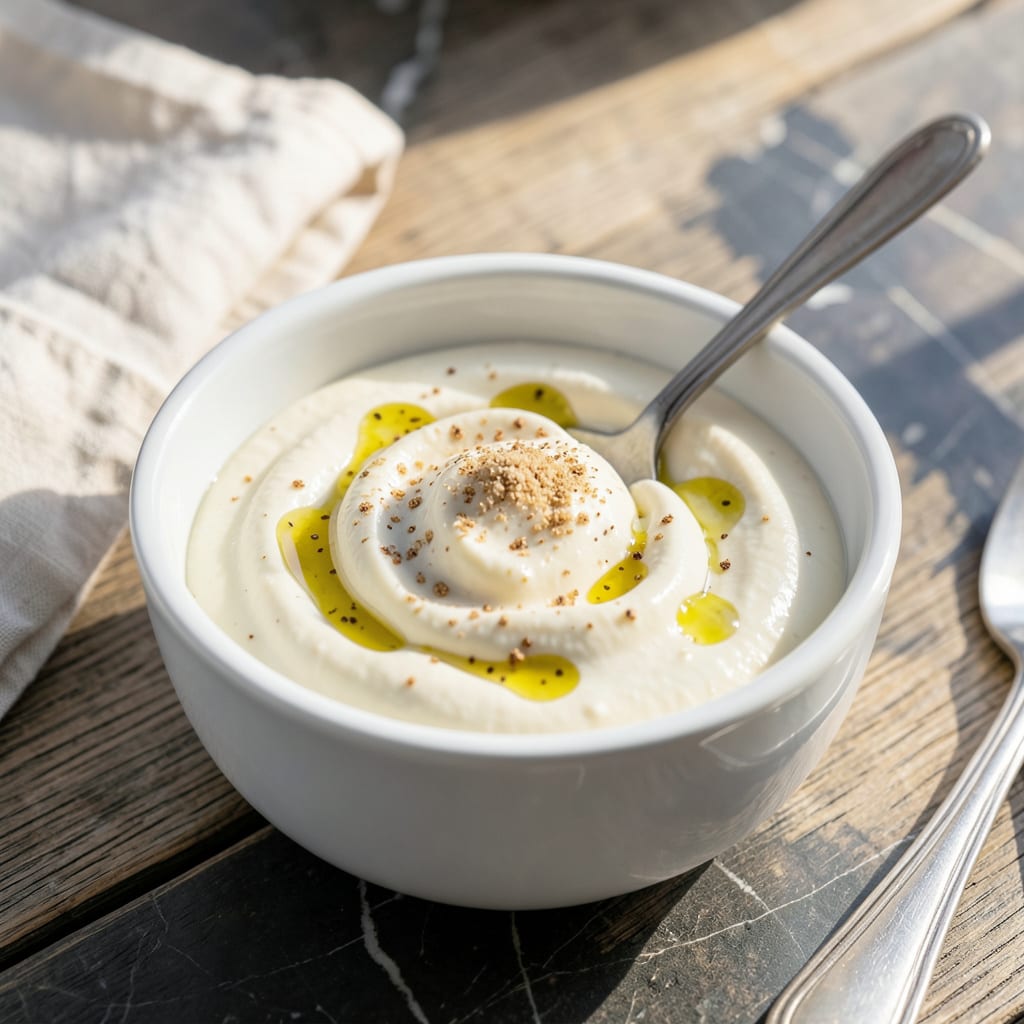
Creamy, rich mayonnaise without the guilt is absolutely possible with this homemade emulsion technique. I developed this egg-free version to deliver the same velvety texture as traditional mayo but with a fraction of the fat.
Using simple ingredients and a precise whisking method, you’ll achieve a stable, spreadable condiment that’s perfect for sandwiches, dressings, or dips. The secret lies in slow incorporation and constant motion to create a smooth, luscious result.
Ingredients for Homemade Low Fat Mayo
Nine ingredients create this lighter, egg-free emulsion with rich, creamy results.
| Ingredient | Amount | Notes |
|---|---|---|
| Low-Fat Milk 🥛 | ½ cup | 2% or skim for best texture |
| Neutral-Flavor Oil 🫒 | ¾ cup | Canola or light olive oil |
| Lemon Juice 🍋 | 2 tbsp | Freshly squeezed preferred |
| White Vinegar 💧 | 1 tbsp | Or apple cider vinegar |
| Dijon Mustard 🟡 | 1 tsp | Acts as emulsifier |
| Garlic Powder 🧄 | ¼ tsp | Optional for flavor depth |
| Salt 🧂 | ½ tsp | Fine sea salt recommended |
| White Pepper 🧂 | 0.125 tsp | For clean appearance |
| Xanthan Gum 🧪 | 0.125 tsp | Stabilizes emulsion (optional) |
The oil quality is paramount for emulsion stability. Look for refined, neutral-flavored oils like canola or light olive oil—avoid extra-virgin as its strong flavor can dominate. Whole Foods and Trader Joe’s offer excellent organic options. The milk should be cold straight from the fridge (this helps the emulsion form). For best results, use a high-speed blender or immersion blender.
No xanthan gum? Substitute with 1/2 tsp cornstarch for similar stabilization. Swap lemon juice for lime if preferred. The vinegar can be white wine vinegar (milder) or rice vinegar (sweeter). For garlic-free versions, onion powder at the same amount works well. If avoiding mustard, increase vinegar by 1/2 tsp to maintain acidity balance.
This keeps 5-7 days refrigerated in an airtight container. The emulsion may separate slightly over time—simply whisk before using. For longer storage, freeze in ice cube trays (thaw in fridge overnight). Always use clean, dry utensils to prevent contamination.
Why You’ll Love This Recipe
- 5-Minute Magic: I blend the oil and low-fat milk right in my immersion blender jar—no extra bowls, no mess.
- Tangy Zing: The Dijon and lemon juice give it that bright, creamy kick store-bought just can’t match.
- Sandwich Hero: Slathers perfectly on turkey wraps, dips veggie sticks, or dresses up my sad desk lunch salads.
- Budget Keeper: A bottle of oil and milk lasts me weeks of mayo, and honestly, it’s cheaper than the shelf stuff.
Step-by-Step Instructions for Egg-Free Low Fat Mayo
This professional technique creates a stable emulsion with perfect texture and flavor every time.
Step 1: Combine Liquid Base Ingredients
In a blender or food processor, combine the 0.5 cup Low-Fat Milk with the 2 tbsp Lemon Juice and 1 tbsp White Vinegar. Pulse for 10-15 seconds until the mixture appears slightly thickened and uniform in color.
This acidulated milk base provides the liquid foundation for your emulsion. The slight curdling you might observe is normal and actually helps create a more stable base for the oil to incorporate into. Watch for the mixture to take on a creamy, slightly opaque appearance.
Step 2: Add Emulsifiers and Seasonings
To the milk mixture, add the 1 tsp Dijon Mustard, 0.5 tsp Salt, 0.25 tsp Garlic Powder, 0.125 tsp White Pepper, and 0.125 tsp Xanthan Gum. Blend for another 20 seconds until all ingredients are fully incorporated and the mixture appears smooth.
The Dijon mustard acts as your primary emulsifier, while the xanthan gum provides additional stability to prevent separation. This is particularly important for low-fat emulsions which are naturally less stable than traditional mayonnaise. The seasonings should be completely dissolved with no visible specks remaining.
Step 3: Begin Slow Oil Incorporation
With the blender running on its lowest speed, begin slowly drizzling in the 0.75 cup Neutral-Flavor Oil in a very thin, steady stream. This initial stage is critical—add no more than 1 tablespoon of oil during the first 30 seconds to establish the emulsion properly.
You’ll notice the mixture starting to thicken and turn a pale, creamy color as the oil incorporates. The sound of the blender will change slightly as the emulsion forms. If at any point the mixture looks shiny or greasy, stop adding oil and blend for 10-15 seconds to re-establish the emulsion before continuing.
Step 4: Complete the Emulsion
Once the initial emulsion is established, you can increase the oil flow slightly but still maintain a slow, steady drizzle. The entire process of adding the oil should take 3-4 minutes from start to finish. Stop the blender and scrape down the sides once or twice during this process if needed.
The finished mayo should be thick, creamy, and pale with a smooth, glossy texture. It should hold its shape briefly when a spoon is dragged through it, then slowly level out. If the mixture appears too thin, blend for an additional 10-15 seconds to help thicken it.
Step 5: Rest and Adjust Consistency
Transfer the mayo to a clean jar or bowl and let it rest for 5-10 minutes. This resting period allows the emulsion to fully stabilize. The texture will thicken slightly as it sits.
After resting, give it a stir. If it appears slightly separated, simply blend for another 5-10 seconds to bring it back together. Taste and adjust seasoning if needed, though the flavors will meld and mellow slightly over time. Store in an airtight container in the refrigerator for up to 5 days.
Pro Tips For Making Homemade Low Fat Mayo
- Drizzle Slowly: Add the oil in a thin, steady stream—about 1 teaspoon at a time at first—while whisking constantly. I learned this the hard way after ending up with a broken, greasy mess when I rushed it.
- Room Temp Milk: Use low-fat milk straight from the fridge and your mayo won’t emulsify properly. Let it sit out for 10-15 minutes first—sounds fussy, but it actually changes the outcome.
- Skip the Overmixing: Once the mayo thickens, stop whisking. Overworking it after it sets can cause it to separate, and nobody wants a sad, watery spread.
- Boost with Mustard: A full teaspoon of Dijon mustard not only adds flavor but stabilizes the emulsion, especially with low-fat milk. I was skeptical until I tried it—now it’s non-negotiable.
Essential Equipment for homemade low fat mayo
High-Speed Blender
A high-speed blender is my top choice for this recipe—I use my Vitamix and get perfect results every time. The powerful motor creates a strong vortex that pulls the oil down into the milk mixture efficiently, ensuring a stable emulsion. 💡
Immersion Blender
An immersion blender works wonderfully for smaller batches. I recommend the Bamix or Cuisinart SmartStick. Use a tall, narrow container to help the blender create a proper vortex as you slowly drizzle in the oil.
Food Processor
A food processor with a feed tube is ideal for hands-free oil drizzling. The Cuisinart 14-Cup model has the perfect capacity. Pulse in short bursts at first, then switch to continuous blending once the emulsion starts to form.
Whisk and Bowl
For a traditional approach, use a balloon whisk and a stainless steel mixing bowl. The bowl’s rounded bottom helps create a circular motion. This method requires strong arm muscles and patience, but it’s incredibly satisfying when you nail the emulsion.
Measuring Tools
Precision matters with emulsions. Use liquid measuring cups for the oil and milk, and measuring spoons for the smaller quantities. I love the OXO Good Grips set for its magnetic handles and clear markings.
Storage Containers
Transfer your finished mayo to a clean glass jar with an airtight lid. I reuse Ball Mason jars for this purpose. Make sure the container is completely dry before adding your mayo to prevent any water from breaking the emulsion. ❄️
Nutrition Facts
Frequently Asked Questions
Why does the recipe use milk instead of eggs?
The milk base creates a lighter emulsion while maintaining creaminess. Eggs are omitted to reduce fat and cholesterol, making this version healthier while still delivering rich flavor.
Can I use a different oil?
Yes, but stick to neutral flavors like avocado or grapeseed oil. Avoid strong oils like extra-virgin olive, which can overpower the taste. The 0.75 cup amount remains the same.
How do I fix separated mayo?
Add 1 tsp of cold water or milk, then blend for 10-15 seconds. This often re-emulsifies the mixture. If needed, repeat the process.
What’s the best way to store it?
Keep in an airtight container in the fridge for up to 5 days. Always use clean, dry utensils to prevent spoilage.

- 8 Bean Soup Recipe Crock Pot: Hearty Vegetable Medley in One Pot - September 25, 2026
- 4C Bread Crumbs Meatballs Recipe: Crispy Crust and Juicy Centers - September 25, 2026
- 6 Oz Chocolate Chip Cookie Recipe: Perfectly Balanced Crispy Edges and Chewy Hearts - September 25, 2026