
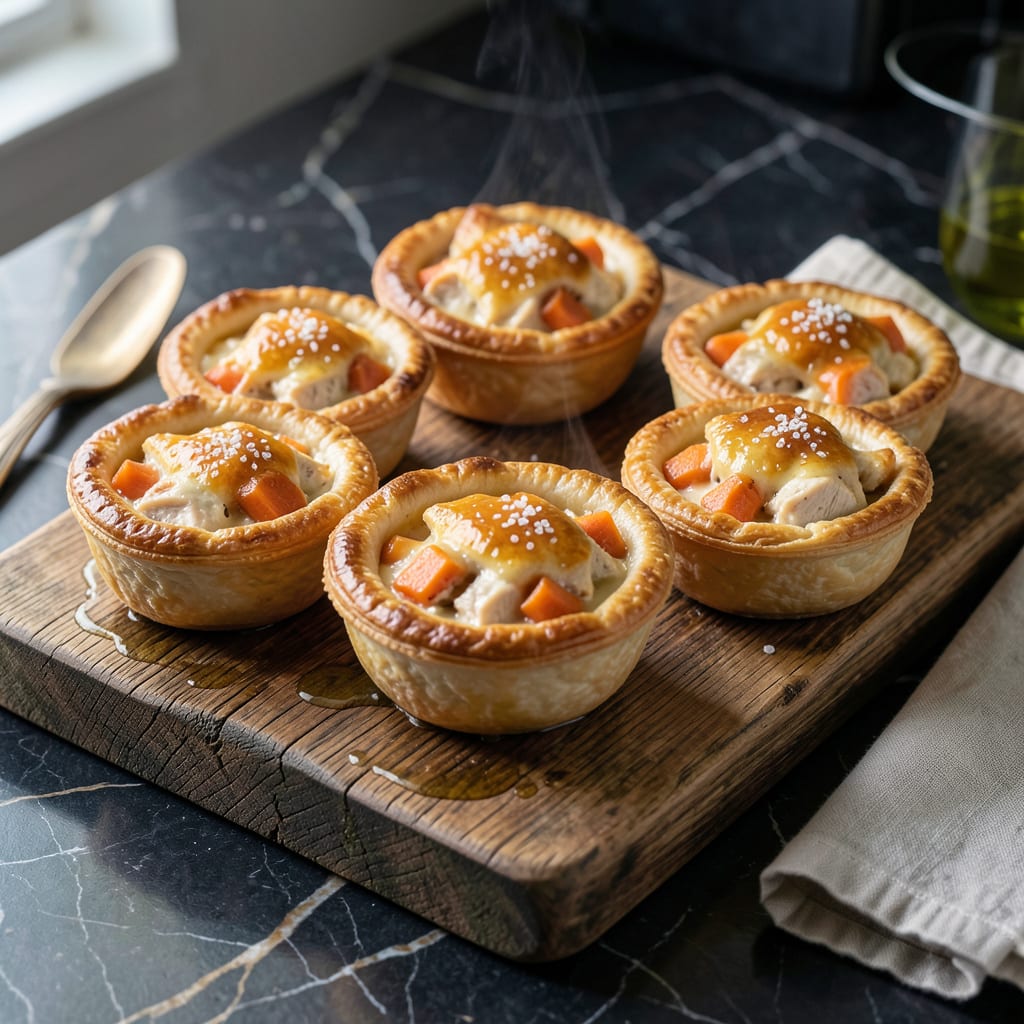
There’s nothing quite like the comfort of individual pot pies with flaky, buttery crusts and rich, creamy fillings. These mini versions deliver all the satisfaction of the classic dish in perfect single-serving portions.
This recipe simplifies the process without sacrificing quality, using straightforward techniques to create a meal that’s both impressive and deeply satisfying. The golden crust and savory filling make every bite worthwhile.
Ingredients for Homemade Mini Pot Pie
Flaky buttery crusts embrace a savory chicken and vegetable filling in perfect individual portions.
| Ingredient | Amount | Notes |
|---|---|---|
| All-Purpose Flour 🌾 | 2 ½ cups | Plus extra for dusting |
| Unsalted Butter 🧈 | 1 cup | Cold, cubed for flaky crust |
| Ice Water 💧 | ⅓ cup | As needed for dough |
| Salt 🧂 | 1 tsp | Divided between crust and filling |
| Boneless Skinless Chicken Breast 🍗 | 1 lb | Diced into small cubes |
| Carrots 🥕 | 2 whole | Peeled and finely diced |
| Frozen Peas 🌱 | ¾ cup | No need to thaw |
| Yellow Onion 🧅 | 1 whole | Finely chopped |
| Celery Stalks 🌿 | 2 whole | Finely diced |
| Garlic Cloves 🧄 | 2 cloves | Minced |
| All-Purpose Flour 🌾 | ¼ cup | For thickening filling |
| Chicken Broth 🥣 | 1 ½ cups | Low-sodium preferred |
| Whole Milk 🥛 | ½ cup | For creamy filling |
| Unsalted Butter 🧈 | 2 tbsp | For sautéing vegetables |
| Dried Thyme 🍃 | ½ tsp | For earthy depth |
| Black Pepper 🌶️ | ½ tsp | Freshly ground preferred |
The crust demands cold, high-quality butter—Plugrá or European-style for superior flakiness. Use all-purpose flour with moderate protein content (10-11%); King Arthur is ideal. For the chicken, air-chilled breasts from Whole Foods or Trader Joe’s yield the best texture. The vegetables should be fresh and firm; avoid pre-cut mixes as they lose moisture quickly.
No chicken? Turkey breast or firm tofu work well—adjust cooking time accordingly. Short on time? Rotisserie chicken (about 2 cups shredded) is a great shortcut. For a richer filling, heavy cream at half the milk volume adds luxury. The thyme can be substituted with poultry seasoning, but reduce by half to avoid overpowering the dish.
Assembled pies freeze beautifully for up to 3 months—bake straight from frozen, adding 10-15 minutes to cook time. The filling thickens as it cools, so let it rest 5 minutes before serving. Leftovers keep 3-4 days refrigerated; reheat in a 350°F oven to revive the crust.
Why You’ll Love This Recipe
- One Bowl Magic: That buttery crust comes together in minutes—just flour, butter, and ice water. No fancy tools, no mess.
- Golden Comfort: The chicken stays tender, and that flaky crust? It’s the kind of bite that makes you close your eyes.
- Freezer Friendly: I make a double batch and freeze half for those nights I’d rather not cook. Honestly, they taste just as good reheated.
- Budget Winner: Chicken breast and pantry staples keep it affordable. Between us, it’s cheaper than takeout and way more satisfying.
Step-by-Step Instructions for Mini Pot Pie
Master the technique for flaky crust and rich filling that defines these individual servings.
Step 1: Prepare the Pie Crust Dough
In a food processor, pulse the 2.5 cups All-Purpose Flour with 1 tsp Salt to combine. Add the 1 cup Unsalted Butter (cold and cubed) and pulse until the mixture resembles coarse crumbs with pea-sized butter pieces visible. This texture ensures flaky layers in your crust.
With the processor running, drizzle in the 0.33 cup Ice Water 1 tablespoon at a time until the dough just begins to come together. You’ll need about 5-6 tablespoons total. The dough should hold when pressed but not be sticky. Turn it onto a floured surface, divide into two equal portions, and shape into disks. Wrap in plastic and refrigerate for 1 hour.
Step 2: Make the Savory Chicken Filling
In a large skillet, melt the 2 tbsp Unsalted Butter over medium heat. Add the diced Yellow Onion, Carrots, and Celery Stalks. Sauté for 5-6 minutes until the vegetables soften and the onion becomes translucent. Add the minced Garlic Cloves and cook for 30 seconds until fragrant.
Stir in the diced Boneless Skinless Chicken Breast and cook for 5-6 minutes until no longer pink. Sprinkle the 0.25 cup All-Purpose Flour over the mixture and stir to coat evenly. This creates a roux that will thicken your filling perfectly.
Step 3: Create the Creamy Sauce Base
Gradually pour in the 1.5 cups Chicken Broth and 0.5 cup Whole Milk, stirring constantly to prevent lumps. Add the 0.5 tsp Dried Thyme and 0.5 tsp Black Pepper. Bring to a gentle simmer and cook for 3-4 minutes until the mixture thickens to a gravy-like consistency.
Stir in the 0.75 cup Frozen Peas and cook for an additional 2 minutes. The filling should be thick enough to mound slightly when spooned. Taste and adjust seasoning with additional Salt if needed. Remove from heat and let cool slightly while you prepare the crust.
Step 4: Assemble and Bake the Mini Pies
Preheat your oven to 375°F. On a lightly floured surface, roll out one disk of dough to ⅛-inch thickness. Using a 4-inch round cutter, cut out circles for the bottom crusts and press them into a greased muffin tin. Roll out the second disk and cut slightly larger circles for the top crusts.
Spoon the filling into each crust-lined cup, mounding slightly in the center. Top with the larger dough circles, pressing the edges to seal. Cut a small slit in the top of each pie to allow steam to escape. Bake for 25-30 minutes until the crusts are golden brown and the filling is bubbly.
Pro Tips For Making Homemade Mini Pot Pie
- Chill the Dough: After mixing the flour, butter, and ice water, let the dough rest in the fridge for at least 30 minutes—this prevents shrinking and makes it way easier to handle when cutting out those mini pie tops.
- Dry the Chicken: Pat the boneless chicken breast very dry with paper towels before cooking; I learned this the hard way after my filling turned watery more times than I care to admit.
- Vent the Tops: Poke a small hole or slit in each mini pie top before baking, or you’ll be cleaning steam explosions off your oven ceiling like I did my first attempt.
- Use Cold Butter: Cut the unsalted butter into tiny cubes and keep it ice-cold until mixing—this is what gives the crust that flaky, bakery-style texture every time.
Common Mistakes When Making Great homemade mini pot pie
Overworking the Dough
Handle the dough as little as possible to avoid tough crusts. I pulse my food processor just until the mixture forms pea-sized crumbs, then add ice water 1 tbsp at a time. Overmixing develops gluten, which makes the crust chewy instead of flaky.
Skipping the Chill
Don’t rush the 1-hour refrigeration step for your dough. Cold butter creates those coveted flaky layers. If your kitchen is warm, I sometimes chill mine for 90 minutes to be extra safe. Patience here pays off in texture.
Thin Filling
If your filling seems watery, cook it longer after adding the chicken broth and milk. It should mound when spooned. I often let mine simmer an extra 2-3 minutes to reach the perfect consistency. Too thin, and your pies will be soggy.
Also, ensure you’re using 1.5 cups broth—not more—to prevent excess liquid.
Overfilling the Pies
Resist the urge to overfill your muffin cups. Leave ¼-inch space at the top for the crust to seal properly. I use a cookie scoop to portion the filling evenly. Overfilling leads to messy spills and undercooked crusts.
Sealing the Edges
Press the top and bottom crust edges together firmly with your fingers or a fork. I dip my fork in flour to prevent sticking. A good seal keeps the filling inside where it belongs and ensures a crisp, golden finish.
Baking Temperature
Bake at 375°F—not higher—to allow the filling to heat through without burning the crust. I rotate my muffin tin halfway through for even browning. Lower heat gives you that perfect golden color without drying out the filling. 💛
Nutrition Facts
Frequently Asked Questions
Can I use store-bought pie crust instead?
Yes, you can use pre-made crust to save time. Just be sure to thaw it according to package instructions and roll it to ⅛-inch thickness for best results.
How do I prevent the bottom crust from getting soggy?
Pre-bake the bottom crust for 5 minutes before adding the filling. Also, ensure the filling is thick enough to prevent excess moisture.
Can I make these ahead of time?
Assemble the pies and refrigerate for up to 24 hours before baking. Or freeze unbaked pies for up to 3 months and bake straight from frozen, adding 10-15 minutes to the cook time.
What’s the best way to reheat leftovers?
Reheat in a 350°F oven for 10-15 minutes to restore the crust’s crispiness. Microwaving will make the crust soggy.

- 4C Bread Crumbs Meatballs Recipe: Crispy Crust and Juicy Centers - September 25, 2026
- 6 Oz Chocolate Chip Cookie Recipe: Perfectly Balanced Crispy Edges and Chewy Hearts - September 25, 2026
- 6-Inch Coffee Cake Recipe: Vanilla Bean Swirls and Buttery Streusel Topping - September 25, 2026