
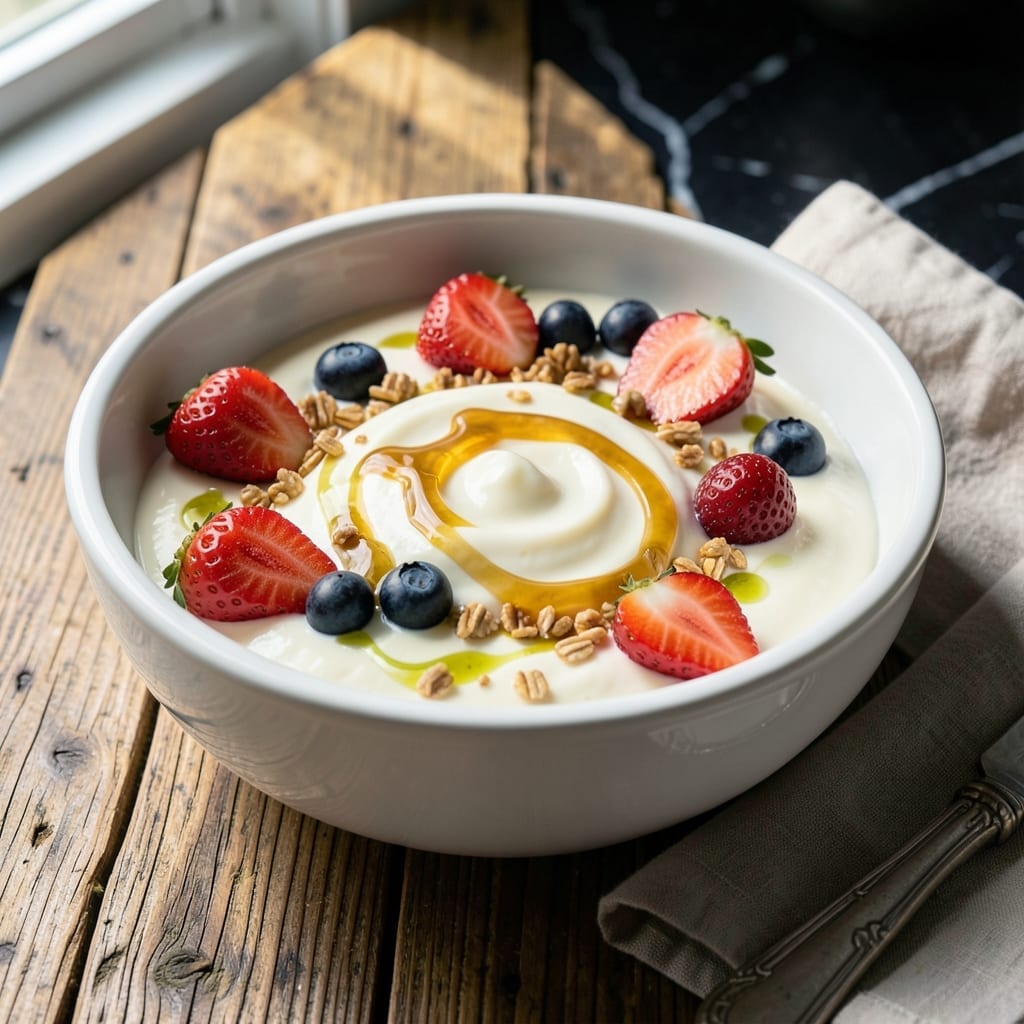
Making yogurt at home is simpler than you think, and your crock pot is the perfect tool for consistent results. This method delivers thick, tangy yogurt with minimal effort and no special equipment required.
The process begins with heating milk to the ideal temperature, then cooling it before adding starter culture. Your crock pot maintains the perfect environment for fermentation, ensuring the bacteria thrive and transform the milk overnight.
By morning, you’ll have fresh yogurt with the perfect texture and flavor. The beauty of this approach is its reliability—once you master the timing, you’ll never go back to store-bought versions.
Strain it for Greek-style thickness or enjoy it as-is. This technique puts you in control of the entire process.
Ingredients for Homemade Yogurt Crock Pot
Just milk and a little starter transform into creamy, tangy perfection overnight.
| Ingredient | Amount | Notes |
|---|---|---|
| Whole Milk 🥛 | 8 cups | Full-fat for creaminess |
| Plain Yogurt with Live Cultures 🥣 | ½ cup | Starter culture, unsweetened |
| Granulated Sugar 🍚 | 2 tbsp | Optional, for sweetness |
| Vanilla Extract 🌿 | 1 tsp | Pure, for flavor |
| Honey 🍯 | 2 tbsp | Optional, for sweetness |
| Fresh Berries 🍓 | 2 cups | For serving, optional |
| Cheesecloth 🧻 | 1 sheet | For straining Greek-style |
| Colander 🍲 | 1 whole | For straining process |
| Thermometer 🌡️ | 1 whole | Instant-read for accuracy |
| Salt 🧂 | ¼ tsp | Optional, to taste |
The milk makes all the difference. Whole milk from a trusted dairy (I prefer Organic Valley or local farm-fresh) gives the richest texture. Avoid ultra-pasteurized—it won’t culture properly. Your starter yogurt needs live active cultures (check the label). Fage or Nancy’s work great. If using a previous batch as starter, make sure it’s less than 2 weeks old for best results.
No plain yogurt on hand? Use buttermilk at the same quantity as your starter. Want it thicker? Strain through cheesecloth for 2-4 hours—the longer, the thicker. Prefer it sweeter? Add honey or sugar after fermentation (adding before can interfere with cultures). For dairy-free, coconut milk works but needs a probiotic capsule as starter instead.
Store in glass jars with tight lids. Keeps for 2 weeks in the fridge. Save 1/2 cup as starter for your next batch. The flavor gets tangier the longer it sits—perfect for that authentic homemade taste.
Why You’ll Love This Recipe
- Set and Forget: I just warm the milk in the crock pot, stir in the store-bought yogurt, and let it sit overnight—no babysitting required.
- Velvety Vanilla Swirl: The vanilla and honey folded in at the end give it this rich, creamy sweetness that beats any store version.
- Breakfast for Days: One batch makes enough for smoothies, parfaits, and snacks all week—my kids grab it straight from the fridge.
- Dime a Dozen: A gallon of whole milk turns into quarts of yogurt for the cost of a single fancy cup at the café. Honestly, it’s a steal.
Step-by-Step Instructions for Crock Pot Yogurt
This method transforms simple ingredients into creamy, tangy yogurt with minimal hands-on time.
Step 1: Heat the Whole Milk to the Perfect Temperature
Pour all 8 cups Whole Milk into your crock pot and set it to low heat. Cover with the lid and let it warm gradually—this gentle heating prevents scorching and ensures even temperature distribution.
After about 2.5-3 hours, check the temperature with your instant-read thermometer. You’re aiming for 180°F, which pasteurizes the milk and prepares it for the culturing process. This step is crucial for achieving that signature thick texture and tangy flavor.
Step 2: Cool the Milk to Culturing Temperature
Once the milk reaches 180°F, unplug the crock pot and remove the lid. Let it sit undisturbed until the temperature drops to 110-115°F. This cooling period typically takes 1-1.5 hours at room temperature.
I always stir the milk occasionally during this stage to help it cool evenly. The temperature is critical here—too hot will kill the live cultures, while too cool will prevent proper fermentation. Your thermometer is your best friend for this precision work.
Step 3: Introduce the Starter Culture
When the milk hits that sweet spot of 110-115°F, whisk in the 0.5 cup Plain Yogurt with Live Cultures until fully dissolved. This starter contains the bacteria that will transform your warm milk into tangy yogurt.
For the best results, I use a yogurt with clearly labeled live and active cultures. Distribute it evenly throughout the milk by gently stirring in a circular motion. This ensures the cultures are uniformly incorporated, leading to consistent texture and flavor throughout your batch.
Step 4: Ferment for Thick, Tangy Results
Cover the crock pot again and wrap it in a thick towel to maintain warmth. Let it ferment undisturbed for 8-12 hours. The longer it ferments, the tangier and thicker your yogurt will become.
I like to start this process in the evening so it can work its magic overnight. Resist the urge to peek—maintaining a stable environment is key. When finished, the mixture should resemble a soft custard and have a pleasant tangy aroma.
Step 5: Strain for Greek-Style Consistency (Optional)
For a thicker, Greek-style yogurt, line your colander with the cheesecloth and place it over a large bowl. Pour in the yogurt and let it strain for 1-4 hours in the refrigerator.
The longer it strains, the thicker it becomes. I typically check it after 2 hours and adjust based on my desired consistency. Discard the liquid (whey) that collects in the bowl or save it for smoothies. Once strained, stir in the 2 tbsp Granulated Sugar, 1 tsp Vanilla Extract, or 2 tbsp Honey if using, then serve with 2 cups Fresh Berries or a pinch of salt to taste.
Pro Tips For Making Homemade Yogurt Crock Pot
- Heat Milk Slow: I learned this the hard way—rush the milk to 180°F and you’ll scorch it. Use low heat and stir occasionally for an even, gentle rise.
- Use Fresh Starter: That old yogurt in the back of your fridge? Skip it. A fresh plain yogurt with live cultures (check the label) guarantees active bacteria for thickening.
- Skip the Boil: After heating the milk, resist the urge to boil it. 180°F is enough to pasteurize without ruining the texture.
- Warm Your Crock: Sounds weird, but it works: preheat your crock pot with hot water for 5 minutes before adding the milk. It keeps the temperature steady during fermentation.
Common Mistakes When Making Great homemade yogurt crock pot
Temperature Timing
Don’t rush heating the milk—180°F is non-negotiable for pasteurization. Skipping this kills bacteria but also denatures proteins, which actually helps thicken the final yogurt. I’ve ruined batches by pulling at 165°F thinking it was “close enough.”
Cooling Too Fast
Adding starter to milk above 115°F destroys those precious cultures. Let it cool naturally—no ice baths. I once added cold water to speed it up and ended with a thin, sad liquid instead of creamy yogurt. 🌡️
Starter Problems
Using expired or weak starter is the #1 cause of failure. Your 0.5 cup Plain Yogurt with Live Cultures must be fresh—check the date. I learned this the hard way with a 3-week-old container that just wouldn’t culture.
Fermentation Fails
Moving your crock pot during fermentation disrupts the bacteria’s work. Wrap it in towels and place in a draft-free spot. My first batch failed because I kept checking it—now I set a timer and walk away.
Straining Mistakes
For Greek-style, don’t skip the cheesecloth lining in your colander. I tried using just the colander and lost half my yogurt through the holes. Also, strain in the fridge—not on the counter—to prevent over-fermentation.
Cleanliness Matters
Any bacteria from dirty utensils competes with your cultures. I sanitize my crock pot, thermometer, and whisk with boiling water first. One time I didn’t, and my yogurt had an off flavor that lasted a week. 💡
Nutrition Facts
Frequently Asked Questions
Can I use a different type of milk?
Whole milk works best for creamy results. Skim milk will yield thinner yogurt. For dairy-free, use coconut milk with a probiotic capsule as starter instead.
How do I know when it’s done fermenting?
After 8-12 hours, it should resemble soft custard with a tangy aroma. The longer it ferments, the thicker and tangier it becomes.
Why did my yogurt turn out runny?
Common causes: milk didn’t reach 180°F, starter was old, or fermentation time was too short. Straining through cheesecloth can help thicken it.
Can I reuse my homemade yogurt as starter?
Yes, but use it within 2 weeks for best results. After that, the cultures weaken and may not ferment properly.

- 4C Bread Crumbs Meatballs Recipe: Crispy Crust and Juicy Centers - September 25, 2026
- 6 Oz Chocolate Chip Cookie Recipe: Perfectly Balanced Crispy Edges and Chewy Hearts - September 25, 2026
- 6-Inch Coffee Cake Recipe: Vanilla Bean Swirls and Buttery Streusel Topping - September 25, 2026