
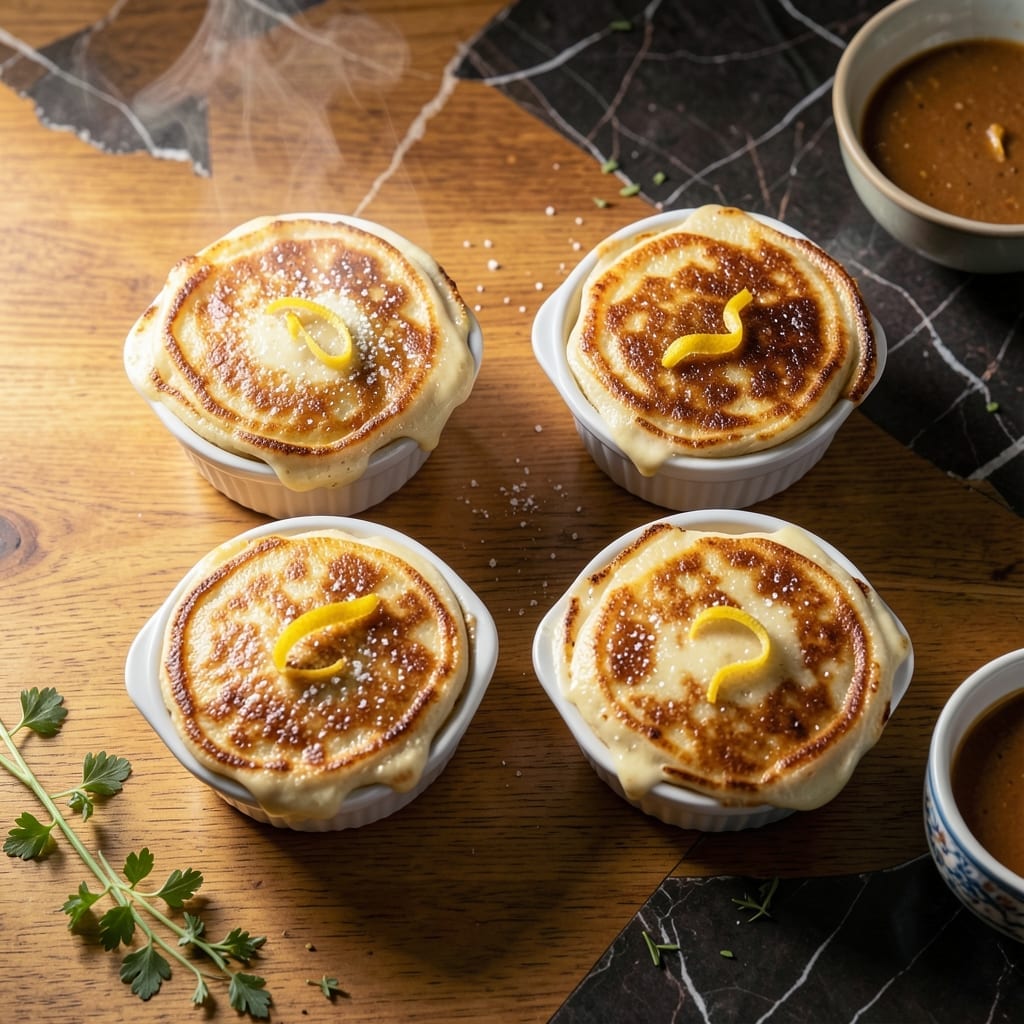
I’ve developed a method for making fluffy pancakes in your Instant Pot that eliminates the need for flipping or watching a griddle. This approach uses the pressure cooker’s steam function to create even, golden stacks with minimal effort.
The technique involves pouring batter into greased ramekins and stacking them on the trivet. The Instant Pot’s consistent steam ensures pancakes cook through without burning, while maintaining that classic tender texture we all love.
What you’ll achieve are perfectly cooked pancakes with golden edges and soft centers, ready to serve directly from the pot. The process takes about 25 minutes from start to finish, with most of that time being hands-off.
This method works with any pancake batter and produces consistent results every time. The pancakes come out so evenly that you might never return to the stovetop method.
Ingredients for Instant Pot Pancake
Simple pantry staples transform into those fluffy, golden stacks everyone loves.
| Ingredient | Amount | Notes |
|---|---|---|
| All-Purpose Flour 🌾 | 2 cups | Sifted for lighter texture |
| Baking Powder 🧂 | 2 tsp | Ensures fluffy rise |
| Granulated Sugar 🍚 | 2 tbsp | Adjust to taste preference |
| Salt 🧂 | ½ tsp | Balances sweetness |
| Large Eggs 🥚 | 2 whole | Room temperature preferred |
| Whole Milk 🥛 | 1 ½ cups | Full-fat for richness |
| Unsalted Butter 🧈 | 4 tbsp | Melted and cooled |
| Vanilla Extract 🌿 | 1 tsp | Pure vanilla for best flavor |
| Vegetable Oil 🫒 | 1 tbsp | For greasing ramekins |
| Buttermilk 🥛 | ½ cup | Or sub milk + 1 tbsp lemon juice |
The flour is the foundation here. King Arthur all-purpose is my go-to for consistency, but any reliable brand works. Baking powder is non-negotiable—check the expiration date (old stuff loses its oomph). The milk and butter bring the richness, so full-fat dairy is ideal. I grab mine from Whole Foods when I want the good stuff, but regular grocery store brands are fine for weekdays.
No buttermilk? Milk plus a splash of lemon juice works in a pinch. Out of vanilla extract? Almond extract at half the amount gives a nice twist. Want it lighter? Swap half the all-purpose flour for whole wheat (add an extra tbsp of milk). The sugar can be reduced or swapped for honey if you prefer. For extra fluffiness, separate the eggs and fold in whipped whites.
Batter keeps 24 hours in the fridge (gives the flour time to hydrate). Cooked pancakes stay warm in a 200°F oven for up to 30 minutes. Leftovers? Reheat in the toaster or microwave with a damp paper towel. Freeze extras between parchment paper for 2 months.
Why You’ll Love This Recipe
- One-Pot Wonder: I toss the batter in the Instant Pot and let it do the work—no flipping, no hovering over a skillet.
- Sweet Morning Magic: That touch of sugar and a fluffy rise from the baking powder make these pancakes irresistibly soft and just sweet enough.
- Breakfast in Bulk: I make a big batch on Sunday and reheat all week—my kids don’t even notice they’re leftovers.
- Budget Breakfast: Flour, eggs, and a few pantry staples stretch into a filling meal that costs pennies per serving.
Step-by-Step Instructions for Instant Pot Pancakes
This no-flip method delivers tall, tender pancakes with minimal effort and maximum results.
Step 1: Prepare the Batter
In a large bowl, whisk together the 2 cups All-Purpose Flour, 2 tsp Baking Powder, 2 tbsp Granulated Sugar, and 0.5 tsp Salt. I sift the flour first for a lighter texture, but it’s not mandatory if you’re short on time.
In a separate bowl, beat the 2 whole Large Eggs lightly, then add the 1.5 cups Whole Milk, 4 tbsp Unsalted Butter (melted and cooled), 1 tsp Vanilla Extract, and 0.5 cup Buttermilk. Whisk until just combined—small lumps are fine. Pour the wet ingredients into the dry and stir gently until no flour streaks remain. Overmixing will make your pancakes tough.
Step 2: Grease the Ramekins
Use the 1 tbsp Vegetable Oil to thoroughly grease four 6-ounce ramekins or custard cups. I like to use a paper towel to ensure every nook is coated. This prevents sticking and helps the pancakes release cleanly after cooking.
Divide the batter evenly among the greased ramekins, filling each about ¾ full. The pancakes will rise significantly, so leave room. Tap the ramekins gently on the counter to remove any air bubbles and level the batter.
Step 3: Pressure Cook
Place the trivet in the bottom of your Instant Pot and add 1 cup of water. Arrange the ramekins on the trivet, ensuring they don’t touch each other or the sides of the pot. Secure the lid, set the valve to sealing, and cook on high pressure for 8 minutes.
The Instant Pot will take about 10-12 minutes to come to pressure before cooking begins. Once the cooking cycle is complete, let the pressure release naturally for 5 minutes, then manually release any remaining pressure. This gentle release prevents the pancakes from collapsing.
Step 4: Check and Serve
Carefully remove the ramekins from the Instant Pot using tongs or a towel (they’ll be hot). Insert a toothpick into the center of a pancake—it should come out clean or with a few moist crumbs. If it’s wet, reseal the pot and cook for another 2-3 minutes.
Let the pancakes cool in the ramekins for 2-3 minutes, then run a butter knife around the edges to loosen. Invert each pancake onto a plate—they should pop out easily with a gentle tap. Serve warm with maple syrup, fresh fruit, or a dusting of powdered sugar.
Pro Tips For Making Instant Pot Pancake
- Preheat the Pot: Always start with a quick sauté function for 2-3 minutes to warm the Instant Pot before adding batter—I learned this the hard way after my first batch came out dense and undercooked.
- Whisk Eggs First: Beat the eggs until frothy before mixing with dry ingredients; it adds air and makes the pancakes fluffier than skipping this step.
- Skip Overmixing: Stir the batter just until the flour disappears—lumps are fine, and overworking it turns pancakes tough and chewy.
- Use a Silicone Pan: Grease a silicone cake pan or liner for easy removal; without it, you’ll be scraping pancakes off the bottom for 10 minutes.
Pro Cooking Tips for Perfect Results
Ramekin Selection
Use 6-ounce ramekins or custard cups for even cooking. I prefer oven-safe glass so I can see the sides browning. Fill each ¾ full—the batter rises significantly under pressure. Avoid metal as it can react with acidic ingredients. 💡
Pressure Release Timing
Let the pressure release naturally for 5 minutes before quick-releasing. This prevents sudden temperature drops that can cause pancakes to collapse. I set a timer to avoid overcooking during this phase.
Stacking Ramekins
If doubling the batch, stack ramekins carefully using a second trivet. Ensure 1-inch clearance between levels for steam circulation. I use silicone cupcake liners for extra stability when stacking.
Batter Consistency
The batter should be thick but pourable—like heavy cream. If too thin, add 1-2 tbsp flour. Too thick? Stir in 1-2 tbsp milk. Lumps are fine; they’ll dissolve during cooking.
Greasing Technique
Use a paper towel to thoroughly coat ramekins with vegetable oil. Pay extra attention to the rims where pancakes tend to stick. I keep a dedicated pastry brush for this task. ✨
Water Amount
Always use 1 cup water in the Instant Pot—this creates enough steam for even cooking. Too little water risks burning, while too much can dilute flavors. The water should never touch the ramekins.
Nutrition Facts
Frequently Asked Questions
Can I make these without ramekins?
Use silicone cupcake molds instead—they’re flexible and easy to remove. Avoid metal as it can react with acidic ingredients. Just ensure they fit in your pot with 1-inch clearance for steam.
Why do my pancakes come out dense?
Overmixing the batter or using expired baking powder are common culprits. Stir just until combined, and check your leavening agent’s freshness. Also, ensure you’re using high pressure for 8 minutes.
How do I double the batch?
Use two trivets to stack ramekins, leaving 1-inch clearance between levels. Cook time remains the same, but increase water to 1.5 cups for adequate steam.
Can I add mix-ins like blueberries?
Fold ½ cup blueberries or chocolate chips into the batter before dividing. Avoid overfilling ramekins—stick to ¾ full to prevent spills.

- 4C Bread Crumbs Meatballs Recipe: Crispy Crust and Juicy Centers - September 25, 2026
- 6 Oz Chocolate Chip Cookie Recipe: Perfectly Balanced Crispy Edges and Chewy Hearts - September 25, 2026
- 6-Inch Coffee Cake Recipe: Vanilla Bean Swirls and Buttery Streusel Topping - September 25, 2026