
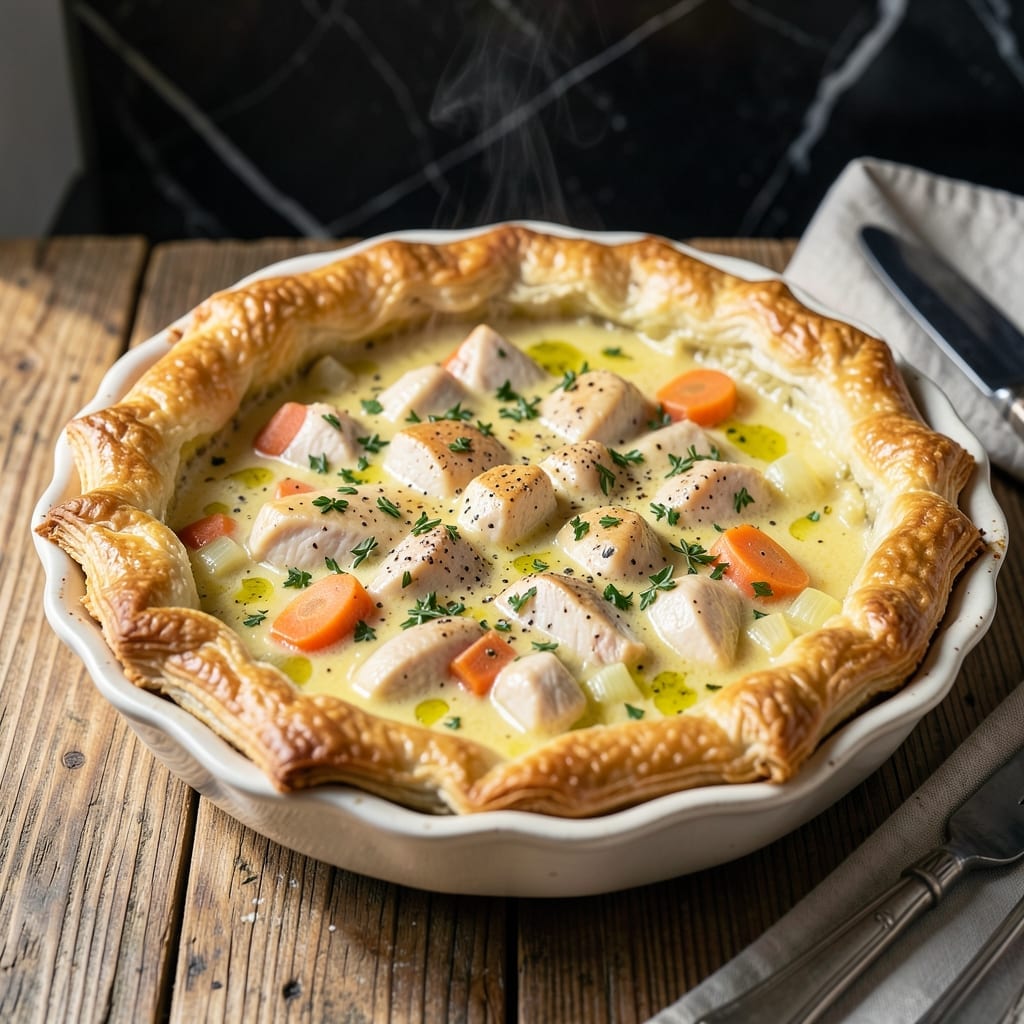
There’s nothing quite like a classic pot pie to bring comfort to the dinner table. This recipe delivers a buttery, flaky crust over a hearty filling that’s rich with tender chicken and fresh herbs.
I’ve refined this method over years of testing to ensure the filling stays thick without being gluey. The crust bakes to golden perfection, while the herbs add just the right amount of rustic warmth.
Each bite offers a perfect balance of savory chicken, vegetables, and creamy sauce, all wrapped in that irresistible pastry. It’s the kind of dish that feels like home.
Serve it straight from the oven for the best experience. This is comfort food at its finest.
Ingredients for Homestyle Chicken Pot Pie
Buttery crust and a hearty filling come together with these classic ingredients for comfort.
| Ingredient | Amount | Notes |
|---|---|---|
| Chicken Breast 🍗 | 1 ½ lb | Boneless, skinless, diced |
| All-Purpose Flour 🌾 | ½ cup | For thickening sauce |
| Unsalted Butter 🧈 | ½ cup | For crust and sauce |
| Yellow Onion 🧅 | 1 whole | Medium, finely diced |
| Carrots 🥕 | 2 whole | Peeled, sliced into rounds |
| Celery Stalks 🥬 | 2 whole | Diced for filling |
| Garlic Cloves 🧄 | 3 cloves | Minced for depth |
| Fresh Thyme 🌿 | 2 tsp | Chopped, stems removed |
| Fresh Rosemary 🌿 | 2 tsp | Chopped, stems removed |
| Chicken Broth 💧 | 2 cups | Low-sodium preferred |
| Whole Milk 🥛 | ¾ cup | Full-fat for creaminess |
| Peas 🟢 | 1 cup | Frozen works perfectly |
| Pie Crust 🥧 | 2 sheets | Store-bought or homemade |
| Salt 🧂 | 1 tsp | Kosher or sea salt |
| Black Pepper 🌶️ | ½ tsp | Freshly ground preferred |
The chicken is the foundation—opt for boneless, skinless breasts for ease, but thighs add richer flavor. For the crust, store-bought pie dough saves time without sacrificing flakiness. Whole Foods has a great all-butter version, or make your own with European-style butter for extra richness. Fresh herbs are key here: look for vibrant green thyme and rosemary at the market.
No fresh herbs? Dried thyme or rosemary at one-third the amount works in a pinch. For a thicker filling, swap half the milk for heavy cream. If you’re out of peas, diced potatoes or green beans add heartiness. The broth can be homemade or low-sodium store-bought—just avoid anything overly salty, as it’ll throw off the balance.
Assemble the pie just before baking for the flakiest crust. Leftovers keep 3-4 days in the fridge—reheat in the oven to maintain texture. The filling also freezes well for up to 3 months if you want to prep ahead.
Why You’ll Love This Recipe
- One Pan Magic: I love that everything—chicken, carrots, onions—simmers together in one pot before baking.
- Buttery Crust Love: The flaky, butter-rich topping with that golden crunch makes every bite worth it.
- Weeknight Hero: Honestly, it’s my go-to for busy evenings when I need comfort food fast.
- Leftovers Win: Between us, it tastes even better the next day—if there’s any left.
Step-by-Step Instructions for Homestyle Chicken Pot Pie
This method ensures a golden crust and creamy filling with every bite.
Step 1: Sear the Chicken and Sauté the Vegetables
Heat 2 tablespoons of the unsalted butter in a large pot over medium-high heat. Add the diced chicken breast and cook for 5-6 minutes until lightly browned and no longer pink. Remove the chicken with a slotted spoon and set aside.
In the same pot, melt the remaining unsalted butter. Add the diced yellow onion, sliced carrots, and diced celery stalks. Cook for 5-7 minutes until the vegetables begin to soften and the onion turns translucent.
Step 2: Build the Creamy Herb Sauce
Stir in the minced garlic cloves, chopped fresh thyme, and chopped fresh rosemary. Cook for 1 minute until fragrant. Sprinkle the all-purpose flour over the vegetables and stir to coat evenly.
Slowly pour in the chicken broth and whole milk, stirring constantly to prevent lumps. Season with the salt and black pepper. Bring the mixture to a simmer and cook for 3-4 minutes until it thickens to a creamy consistency.
Step 3: Combine the Filling and Prepare the Pie Crust
Return the cooked chicken breast to the pot, along with the peas. Stir to combine and cook for an additional 2 minutes until everything is heated through. Remove from heat and let the filling cool slightly while you prepare the crust.
Unroll the pie crust sheets and place one in a 9-inch pie dish, pressing it gently into the bottom and sides. Trim any excess dough hanging over the edge. Pour the chicken and vegetable filling into the crust-lined dish.
Step 4: Top with Crust and Bake to Golden Perfection
Place the second pie crust sheet over the filling. Trim and crimp the edges to seal, then cut 3-4 slits in the top crust to allow steam to escape. For extra shine, brush the top with a little whole milk.
Bake at 375°F for 35-40 minutes, or until the crust is golden brown and the filling is bubbling. If the edges begin to brown too quickly, cover them with aluminum foil.
Let the pie rest for 10 minutes before slicing. This allows the filling to set and makes serving easier.
Pro Tips For Making Homestyle Chicken Pot Pie
- Precook the Chicken: Poach or sauté the chicken breast first—raw pieces in the filling often dry out or stay undercooked. I learned this the hard way after pulling apart rubbery chicken in my first few pies.
- Sweat the Onions: Cook the yellow onions low and slow in that unsalted butter until they’re translucent, about 8-10 minutes. Rushing this step leaves them crunchy and watery in the finished pie.
- Chill the Dough: Let your flour-butter crust rest in the fridge for at least 30 minutes before rolling. Sounds tedious, but it prevents the butter from melting into the dough, which means a flakier crust.
- Cut Veggies Evenly: Dice the carrots and onions into uniform, 1/4-inch pieces so everything cooks at the same rate. Uneven chunks mean some bits are mushy while others stay firm—I skip this when I’m lazy, but the texture suffers.
Health Benefits of This Dish
Protein Powerhouse
This dish delivers a solid 40g of protein per serving from the chicken, supporting muscle repair and keeping you full. The combination of protein and fiber from the vegetables creates a balanced meal that sustains energy levels throughout your day. 💪
Vitamin-Rich Vegetables
The carrots, celery, and peas bring essential vitamins like vitamin A from carrots for eye health and vitamin K from peas for bone strength. The onion and garlic contribute immune-boosting properties that make this more than just comfort food.
Comfort with Nutrition
Whole milk in the sauce provides calcium for strong bones, while the butter offers healthy fats for brain function. I love that this classic dish packs so many nutritional benefits without sacrificing that cozy, homemade flavor.
Herb Health Benefits
The fresh thyme and rosemary aren’t just for flavor—they contain antioxidants that fight inflammation. Rosemary has been shown to improve digestion, while thyme may support respiratory health. These herbs make the dish as wholesome as it is delicious.
Energy from Carbs
The pie crust and flour provide complex carbohydrates for steady energy, while the chicken broth keeps the dish hydrating. It’s a complete meal that satisfies both your taste buds and your body’s nutritional needs. 🥗
Low-Calorie Option
Each serving comes in around 500-600 calories, making it a reasonable indulgence. You can reduce calories further by using low-fat milk or adding more vegetables to bulk up the filling without adding many calories.
Nutrition Facts
Frequently Asked Questions
Can I use rotisserie chicken instead of raw?
Yes! Shred 2 cups of cooked rotisserie chicken and add it directly to the sauce. Skip the initial cooking step and reduce baking time by 5 minutes.
Why did my filling turn out watery?
This usually happens if the sauce wasn’t thickened enough before baking. Simmer the mixture for a full 3-4 minutes after adding flour. Also, let the pie rest for 10 minutes after baking.
Can I make this ahead of time?
Assemble the pie completely, then refrigerate uncovered for 1-2 hours. Bake as directed, adding 5-10 minutes if cold. Or freeze unbaked pies for up to 1 month.
What’s the best way to prevent a soggy crust?
Brush the bottom crust with a thin layer of beaten egg white before adding filling. Also, ensure your filling isn’t too hot when assembling. This creates a moisture barrier.

- 4C Bread Crumbs Meatballs Recipe: Crispy Crust and Juicy Centers - September 25, 2026
- 6 Oz Chocolate Chip Cookie Recipe: Perfectly Balanced Crispy Edges and Chewy Hearts - September 25, 2026
- 6-Inch Coffee Cake Recipe: Vanilla Bean Swirls and Buttery Streusel Topping - September 25, 2026