
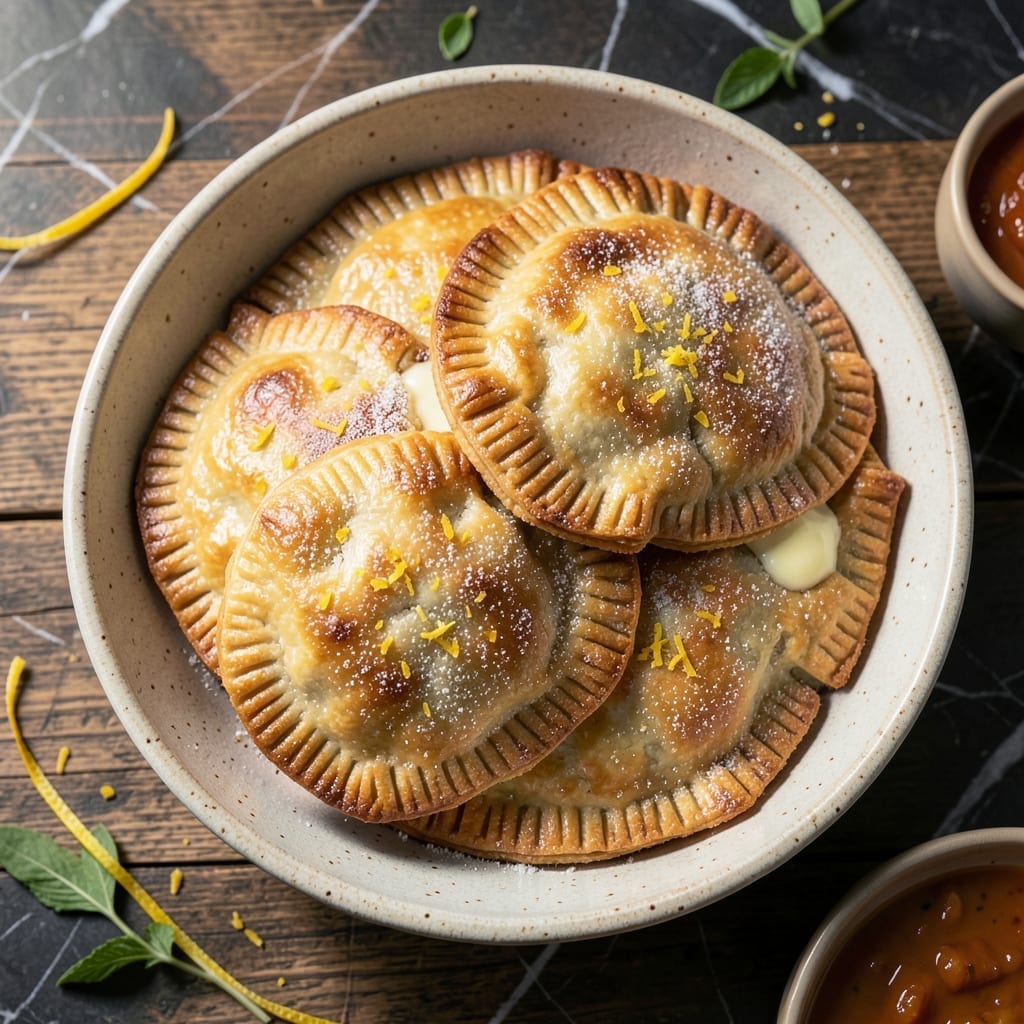
Nothing beats the satisfaction of pulling a golden pot pie from the oven, especially when it’s perfectly portioned for one. This crust delivers the ideal balance of flakiness and structure to hold rich fillings without sogginess.
The key lies in keeping ingredients ice-cold and working quickly to prevent gluten development. A lattice top ensures even baking while allowing steam to escape, preserving that coveted crisp texture.
Each individual pie bakes to a deep amber hue, with layers that separate beautifully. The buttery aroma alone signals comfort is minutes away.
Perfect for meal prep or cozy dinners, this crust transforms simple ingredients into a restaurant-worthy presentation.
Ingredients for Individual Pot Pie Crust
A handful of pantry staples plus butter creates this golden, flaky lattice crust for personal pies.
| Ingredient | Amount | Notes |
|---|---|---|
| All-Purpose Flour 🌾 | 2 ½ cups | Sifted for even texture |
| Unsalted Butter 🧈 | 1 cup | Ice-cold, cubed, European-style preferred |
| Ice Water 💧 | ½ cup | Plus extra as needed |
| Kosher Salt 🧂 | 1 tsp | Diamond Crystal preferred |
| Granulated Sugar 🍚 | 1 tsp | Balances saltiness |
| Apple Cider Vinegar 🍏 | 1 tbsp | Tenderizes dough |
| Large Egg 🥚 | 1 whole | For egg wash |
| Heavy Cream 🥛 | 1 tbsp | For egg wash richness |
| All-Butter Puff Pastry 🥧 | 1 sheet | For lattice top, thawed |
| Lemon Zest 🍋 | ½ tsp | Freshly grated for aroma |
The butter must be ice-cold—European-style (like Plugrá or Kerrygold) has higher fat content, yielding superior flakiness. King Arthur Flour is ideal for all-purpose, but any unbleached brand works. Sift the flour first; it prevents dense spots in the dough. The vinegar tenderizes without affecting flavor, so don’t skip it (even if it seems odd).
No puff pastry? Homemade rough puff works well—just fold butter into flour three times instead of six. For a dairy-free crust, coconut oil (solid, chilled) substitutes at a 1:1 ratio. The egg wash can be milk or cream for a matte finish, but egg gives that deep amber shine. If avoiding gluten, Cup4Cup multipurpose flour is the best swap.
Dough keeps 2-3 days wrapped tightly in the fridge, or freeze for 1 month. Assemble pies just before baking—lattice weaves best when pastry is firm but pliable. Baked pies reheat beautifully at 350°F for 10 minutes.
Why You’ll Love This Recipe
- Foolproof Mix: I just dump flour, cold cubed butter, salt, and a touch of sugar, then pulse in ice water—no fancy techniques, no stress.
- Buttery Bliss: That flaky, golden crust with a hint of sweetness? It makes every bite of pot pie taste like it came from a bakery.
- Portion Control: I love baking individual pies—perfect for meal prep, lunchboxes, or when I want to treat myself without leftovers.
- Pantry Staples: All-purpose flour, butter, salt— ingredients I always have on hand. Honestly, it’s cheaper than store-bought and twice as good.
Step-by-Step Instructions for Individual Pot Pie Crust
Here’s the method for creating a perfectly flaky crust with a beautiful lattice top.
Step 1: Combine Dry Ingredients and Cold Butter
In a large bowl, whisk together the 2.5 cups All-Purpose Flour, 1 tsp Kosher Salt, 1 tsp Granulated Sugar, and 0.5 tsp Lemon Zest until evenly distributed. The sugar balances the saltiness while the lemon zest adds a subtle aromatic brightness to the crust.
Add the 1 cup Unsalted Butter, cubed and ice-cold, to the flour mixture. Using a pastry cutter or your fingertips, work the butter into the flour until the mixture resembles coarse crumbs with some pea-sized butter pieces remaining. This creates the flaky layers in your crust.
Step 2: Incorporate Liquid Ingredients
Create a well in the center of the flour-butter mixture. Add the 0.5 cup Ice Water and 1 tbsp Apple Cider Vinegar. The vinegar tenderizes the dough, while the ice water prevents the butter from melting prematurely, ensuring flakiness.
Using a fork, gradually incorporate the wet ingredients into the dry, mixing just until the dough begins to come together. It should look shaggy with some dry bits remaining. Avoid overmixing, which can develop gluten and make the crust tough.
Step 3: Chill and Roll Out the Dough
Turn the dough onto a lightly floured surface and gently shape it into a disk. Wrap in plastic wrap and refrigerate for at least 1 hour. This resting period allows the gluten to relax and the butter to firm up, making the dough easier to roll out.
On a floured surface, roll out the chilled dough to about ⅛-inch thickness. Use it to line your individual pot pie molds, pressing gently into the bottom and sides. Trim any excess dough, leaving a slight overhang for crimping later.
Step 4: Prepare the Lattice Top
Unfold the 1 sheet All-Butter Puff Pastry, thawed according to package instructions. Roll it out slightly to even the thickness. Using a sharp knife or pastry wheel, cut the puff pastry into strips about ½-inch wide for the lattice.
Arrange the strips over the filled pot pies in a lattice pattern. Trim any excess and crimp the edges to seal. This creates a visually appealing top while allowing steam to escape during baking.
Step 5: Apply Egg Wash and Bake
In a small bowl, whisk together the 1 whole Large Egg and 1 tbsp Heavy Cream until smooth. Brush this egg wash generously over the entire lattice top. The cream adds richness and ensures a deep, golden-brown finish.
Bake in a preheated 400°F oven for 20-25 minutes until the crust is golden brown and the filling is bubbling. The egg wash creates a glossy sheen, while the puff pastry lattice adds a delicate, flaky texture that complements the hearty filling.
Pro Tips For Making Individual Pot Pie Crust
- Chill Your Butter: Cut your unsalted butter into small cubes and freeze for 10 minutes before mixing—I learned this the hard way after my crust turned out tough instead of flaky.
- Ice Water Only: Use truly ice-cold water, and measure it precisely (about 1/4 cup for this recipe), or your dough will be sticky and hard to work with.
- Don’t Overwork It: Mix just until the dough comes together—resist the urge to knead, or your crust will be dense instead of light and tender.
- Rest the Dough: Give it a solid 30 minutes in the fridge before rolling out—this makes a real difference in preventing shrinkage when baking.
Make-Ahead Tips for This Dish
Prep the Dough Ahead
The dough can be made 2-3 days in advance. Wrap it tightly in plastic wrap and store in the fridge. This actually improves the texture as the flour hydrates and the butter firms up. 💡
Assemble Before Baking
Line your molds with the chilled dough and fill with your favorite pot pie mixture. Cover tightly with plastic and refrigerate for up to 24 hours before adding the lattice and baking. The cold dough holds its shape better during baking.
Freeze for Later
For longer storage, freeze the dough disk for up to 1 month. Thaw overnight in the fridge before rolling out. Assemble the entire pie, wrap in foil, and freeze for up to 2 weeks. Bake from frozen, adding 5-10 minutes to the baking time.
Lattice Prep Tip
Cut your puff pastry strips and arrange them on a parchment-lined tray. Freeze for 15 minutes before applying to the pies. This prevents the lattice from softening as you work, ensuring clean lines and even baking.
Egg Wash Timing
Only brush the egg wash on just before baking. If you prep the lattice ahead, keep it uncovered in the fridge to prevent sogginess. The wash should be the last step before the oven to maintain that crisp texture. ❄️
Reheating Baked Pies
Baked individual pies reheat beautifully at 350°F for 10-12 minutes. Cover with foil to prevent over-browning. The lattice will stay flaky, and the filling will be just as warm and comforting as the day you made it.
Nutrition Facts
Frequently Asked Questions
Can I use store-bought pie crust instead?
Yes, but it won’t be as flaky or rich as homemade. For best results, use all-butter puff pastry for the lattice top. Store-bought crusts lack the buttery layers this recipe achieves.
Why does the dough need to rest?
Resting for 1 hour relaxes gluten and re-chills butter. This ensures easy rolling and maximum flakiness. Skipping this step can make the crust tough or dense.
How do I prevent a soggy bottom crust?
Blind-bake the bottom crust for 10 minutes before adding filling. Also, ensure your filling isn’t too wet and let it cool slightly before assembling.
Can I make these without special molds?
Use ramekins, oven-safe mugs, or even muffin tins. Just adjust baking time—start checking at 18 minutes for smaller portions.

- 4C Bread Crumbs Meatballs Recipe: Crispy Crust and Juicy Centers - September 25, 2026
- 6 Oz Chocolate Chip Cookie Recipe: Perfectly Balanced Crispy Edges and Chewy Hearts - September 25, 2026
- 6-Inch Coffee Cake Recipe: Vanilla Bean Swirls and Buttery Streusel Topping - September 25, 2026