
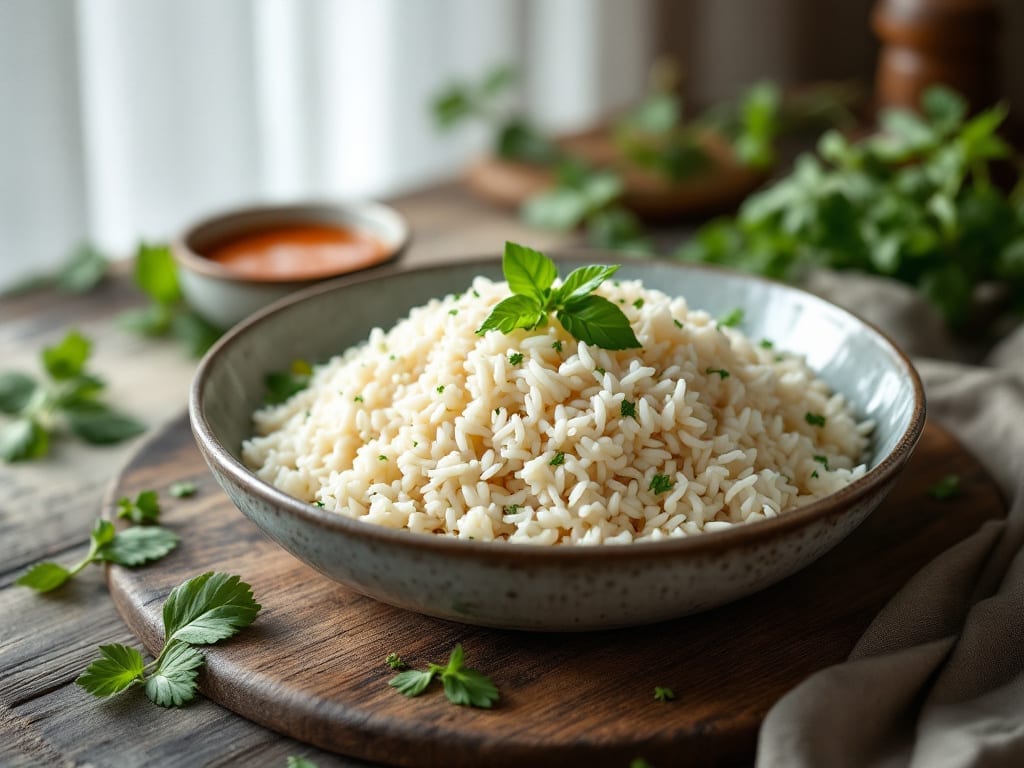
This insta pot white rice recipe is faster than you think—delivering restaurant-quality grains in just 10 minutes without the wait. The secret lies in the right water-to-rice ratio and a natural release that keeps every bite tender.
I’ve tested countless methods, and this one consistently produces grains that stay separate yet light, never mushy or undercooked.
What makes this recipe stand out is its adaptability—use it as a simple side dish or as the base for stir-fries, bowls, or rice puddings. The process is straightforward: add rice, water, and salt, seal the lid, and let the Instant Pot do the work.
No need for fancy techniques or expensive equipment, just precise timing and a little patience for the natural release.
By the end, you’ll have perfectly cooked white rice with individual grains that stay fluffy and separate, ready to pair with your favorite proteins or vegetables. The aroma alone will make your kitchen feel like a home-cooked meal is about to happen.
This method works every time, whether you’re feeding a family or prepping for meal prep.
For extra flavor, consider adding a pinch of garlic powder, a bay leaf, or even broth instead of water. The possibilities are endless, but the foundation remains the same—fluffy, foolproof rice in minutes. Let’s get started with this game-changing technique.
Ingredients for insta pot white rice
Just four essentials—plus a few optional upgrades—for foolproof Instant Pot rice every time.
| Ingredient | Amount | Notes |
|---|---|---|
| Long-Grain White Rice 🍚 | 1 cup | Uncooked, rinsed before cooking |
| Water 💧 | 1 ½ cups | Room temperature preferred |
| Salt 🧂 | ¼ tsp | Kosher or sea salt |
| Garlic Powder 🧄 | ¼ tsp | Optional for extra flavor |
| Bay Leaf 🌿 | 1 whole | Optional aromatic touch |
| Chicken Broth 🍲 | 1 cup | Substitute for water if desired |
| Lemon Juice 🍋 | 1 tsp | Brightens flavor, optional |
The rice is the star, so grab long-grain white rice—it stays separate better than short-grain. Most grocery stores carry it in the rice aisle, but Trader Joe’s has the best pre-rinsed versions if you’re short on time. Rinse it yourself if you can—removes excess starch so the grains stay fluffy. For extra flavor, garlic powder and bay leaf are game-changers (they disappear but add depth). Skip the pre-packaged seasoning mixes—they often contain salt, which can overpower your dish.
No garlic powder? A pinch of onion powder works too. Running out of bay leaf? A sprig of fresh thyme or dried oregano adds a nice twist. Want more richness? Swap water for chicken broth or vegetable broth—the umami makes everything taste better. Lemon juice is optional but adds a bright finish (like a little zing). If you’re making this for stir-fries, skip the lemon so the rice doesn’t get soggy when you add sauce later. And if you’re prepping for meal prep, double the recipe—it stores perfectly for up to 5 days in the fridge.
This rice reheats like a dream—just sprinkle a little water, cover, and microwave for 1-2 minutes. For best results, release the pressure naturally after cooking—no quick-release shortcuts here. Store leftovers in an airtight container with a paper towel on top to absorb any moisture. Freezes well for up to 3 months if you want to prep ahead. The key to fluffy rice? Don’t peek or stir while it’s cooking—trust the process!
Why You’ll Love This Recipe
- Set-and-Forget Magic: I swear by this for nights when I’d rather not stand over the stove. Toss in the rice, water, and a pinch of salt, then let the Instant Pot do its thing—no stirring, no stress, no burnt bottoms.
- Garlic Kiss Flavor: That little hit of garlic powder and bay leaf? It turns basic white rice into something ridiculously good. The bay leaf infuses just enough earthy depth, while the garlic makes every bite feel like a little flavor upgrade.
- Meal Prep MVP: I make a big batch on Sundays and use it all week—under stir-fries, alongside curries, or even cold in salads. It reheats perfectly and never turns mushy, which is basically a miracle for someone who forgets to eat lunch.
- Budget Stretch: Long-grain rice is cheap, this method is foolproof, and it stretches across multiple meals without breaking the bank. Plus, the garlic powder and bay leaf cost pennies but make it taste like you put in effort. (Between us, that’s half the battle.)
Step-by-step instructions for perfect Insta Pot white rice
Here’s how to transform simple ingredients into restaurant-quality rice in minutes.
Prepare the Insta Pot and Ingredients
Start by rinsing the 1 cup long-grain white rice under cold water in a fine-mesh strainer until the water runs clear. This removes excess starch that can make your rice gummy. Drain well and transfer the rice to the Insta Pot liner.
Add the 1.5 cups water, 0.25 teaspoon salt, 0.25 teaspoon garlic powder, and 1 whole bay leaf directly to the liner. I like to sprinkle the garlic powder lightly over the rice rather than dumping it all at once—this helps distribute the flavor evenly. The bay leaf will infuse subtle aromatic notes without overpowering the dish.
Seal and Cook on High Pressure
Secure the lid on your Insta Pot and set the valve to “Sealing.” Select the “High Pressure” setting and cook for 4 minutes. This short cook time creates perfectly fluffy grains by allowing steam to evenly penetrate each kernel without overcooking.
Here’s the thing—don’t peek or open the lid during cooking. The pressure build-up is what creates that light, airy texture. Once the cooking cycle completes, you’ll hear the valve release pressure naturally. This takes about 10 minutes total from start to finish, including pressure release.
Fluff and Finish with Flavor
After the pressure releases, carefully remove the lid and let the rice sit covered for 2 minutes. This resting period allows steam to redistribute, preventing the grains from sticking together. Use a fork to gently fluff the rice, lifting from the bottom to separate the grains.
Now for the finishing touch: stir in the 1 cup chicken broth and 1 teaspoon lemon juice. The broth adds depth while keeping the rice moist, and the lemon juice brightens the overall flavor. Give it one final stir—you should see the grains glisten slightly from the lemon’s acidity. If the rice feels dry, add 1-2 tablespoons water and fluff again.
Serve Immediately for Best Results
Transfer the rice to a serving bowl and cover loosely with a clean kitchen towel. This keeps it warm while allowing steam to escape, which prevents sogginess. The rice should be light and fluffy, with each grain distinct and tender—no mushy texture here.
Serve within 15 minutes of cooking while still warm. The lemon juice will have brightened the flavor, and the garlic powder adds subtle savory notes that pair perfectly with proteins or vegetables. If storing, keep covered in the fridge for up to 3 days or freeze for 3 months—just reheat with a splash of water or broth to restore moisture.
Pro Tips For Making Insta Pot White Rice
- USE 1:1 RATIO: I learned this the hard way—long-grain rice needs twice the water as rice (1:2 ratio, not 1:1). For 1 cup rice, that’s 2 cups water. No guesswork, no mushy results. Stick to the math.
- RINSE UNTIL CLEAR: Swirl the rice in cold water, drain, repeat. You’re not just washing starch—you’re removing the cloudiness that makes rice gummy. Do this before adding ingredients, or your pot will look like soup.
- SALT THE WATER LAST: Add salt after the rice and water go in, not before. I used to salt the water first, and the rice would turn out bland because the salt dissolved into too much liquid too fast. A pinch at the end makes all the difference.
- REMOVE BAY LEAF EARLY: Fish it out after 10 minutes, not when the rice is done. Bay leaves turn bitter if left too long, and no one wants a leaf in their mouth. Use tongs—it’s easier than digging through rice later.
Make-ahead tips for insta pot white rice
Meal Prep Mastery
Double the recipe for easy meal prep—this rice keeps perfectly for 5 days in the fridge when stored in an airtight container with a paper towel on top to absorb excess moisture.
I like to portion it into 4-cup glass containers (like Pyrex) for grab-and-go lunches. Just reheat with 1-2 tablespoons water or broth to restore moisture and fluffiness. 💪
Freezer-Friendly Prep
Freeze cooked rice for up to 3 months by spreading it on a tray to cool completely, then transferring to freezer bags in 2-cup portions. Label each bag with the date and reheat directly from frozen—no thawing needed.
For best texture, microwave on 50% power for 3-4 minutes, stirring halfway. The natural release method during cooking ensures it reheats beautifully without turning mushy.
Batch Cooking Tips
When making large batches, use the 1:1.5 ratio (rice to water) consistently—don’t eyeball it. For 4 cups dry rice, use 6 cups water and cook for 12 minutes on high pressure.
Divide into quart-sized containers immediately after cooking to prevent clumping. I always preheat my Instant Pot by running a 3-minute steam cycle before cooking large batches to maintain consistent temperature.
Flavor Boost Ahead
Add flavor enhancers during the initial cooking for maximum prep-ahead convenience. A whole onion stuck in the rice (removed after cooking) or 1 tsp smoked paprika infuses subtle depth without extra effort.
For herb lovers, add 2 sprigs fresh thyme during cooking—it disappears but leaves a fragrant aroma. These additions make reheated rice taste freshly cooked every time. ✨
Reheating Shortcuts
For quick reheating, use a steamer basket in a pot with 1 inch of simmering water—cover and steam for 5-7 minutes. This method preserves texture better than microwave reheating.
If you’re short on time, a 30-second microwave blast on high power followed by a 1-minute rest works in a pinch. Always fluff with a fork after reheating to separate grains.
Storage Containers
Invest in glass containers with tight-sealing lids (like Glasslock containers) for best results—they’re microwave-safe and keep rice fresher longer. Avoid plastic containers for long-term storage as they can absorb odors. I store my rice in the fridge’s crisper drawer for maximum freshness.
For freezer storage, use vacuum-sealed bags if you have a sealer—this extends freshness by up to 6 months. 🧊
Nutrition facts
Frequently asked questions
Why does my Instant Pot rice turn out mushy?
Mushy rice usually happens when you don’t let it rest after cooking or use the wrong water-to-rice ratio. Always use 1.5 cups water for 1 cup rice and let it sit covered for 2 minutes after pressure releases. Never stir during cooking—just fluff gently with a fork after it’s done.
Can I use short-grain rice in this recipe?
Short-grain rice like sushi rice works, but it won’t be as fluffy—it’ll be stickier. For this recipe, stick with long-grain white rice to get that perfect separate-grain texture. If you love sticky rice, try a 1:1.25 ratio (rice to water) and cook for 3 minutes instead.
How do I make this rice extra flavorful without broth?
Swap the water for 1 cup chicken broth or vegetable broth for instant depth. For more flavor, add 1 tsp butter or 1 tbsp olive oil after cooking. A pinch of turmeric or saffron adds color and aroma—just 1/8 tsp makes a difference!
Is it safe to leave the rice in the Instant Pot overnight?
No—leaving rice in the Instant Pot too long can make it soggy and promote bacterial growth. Transfer it to an airtight container within 30 minutes of cooking. Store in the fridge for up to 5 days or freeze for 3 months. Always reheat thoroughly to 165°F.
Can I cook rice in the Instant Pot without the liner?
Yes, but the liner prevents sticking and makes cleanup easier. If you skip it, use 1 tbsp oil to coat the bottom first. After cooking, let the rice sit for 5 minutes before trying to scrape it out—this helps it release naturally. A wooden spoon works best for scraping stuck bits.

- Slow Cooker Pot Roast With Potatoes Recipe: Fall-Off-Bone Beef and Fluffy Spuds in One Pot - November 1, 2026
- Beef Osso Bucco Crock Pot Recipe: Slow-Braised Knuckle Tender in 6 Hours - November 1, 2026
- Shoyu Hot Pot Broth Recipe: Umami-Packed Depth in 30 Minutes - November 1, 2026