
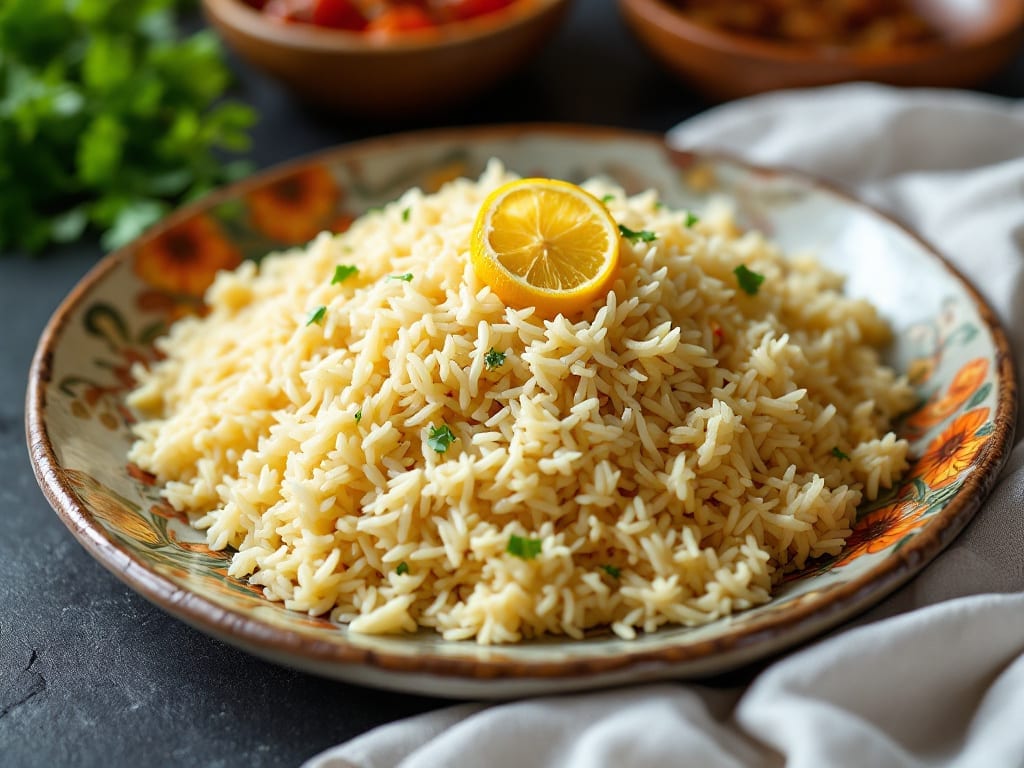
This Instant Pot basmati rice recipe turns a simple side dish into a foolproof foundation for any meal—fluffy, aromatic, and ready in just 10 minutes. The secret lies in precise liquid ratios and a quick natural release, which preserves the rice’s signature texture without sticking.
I’ve perfected this method after testing countless variations, ensuring every grain stays distinct and tender. This isn’t just rice; it’s the perfect canvas for curries, stir-fries, or even a standalone dish with a sprinkle of herbs.
What sets this recipe apart is its adaptability—whether you prefer light and airy or slightly firmer rice, the same technique delivers. A 1:1 ratio of rice to liquid (with a pinch of salt) guarantees consistent results, while optional butter or herbs elevate it to restaurant-quality sides.
The Instant Pot’s pressure cooking does the heavy lifting, so you spend less time monitoring and more time enjoying the process. No more mushy grains or undercooked centers here.
By the time you finish, you’ll have golden, separate grains that stay fluffy even when reheated—ideal for meal prep or last-minute dinners. The aroma alone signals a meal ready to impress, whether paired with grilled meats, spiced lentils, or fresh vegetables.
This method cuts cooking time by 75% compared to stovetop, without sacrificing quality. Ready to revolutionize your rice game?
Pro tip: For extra flavor, toast the rice in the pot for 1 minute before adding liquid, or stir in a pat of butter and fresh cilantro at the end.
Store leftovers in the fridge for up to 5 days, or freeze for longer-term use. The possibilities are endless—let’s get started.
Ingredients for instant pot basmati rice
Seven core ingredients. One perfect pot of basmati rice—fluffy, fragrant, and ready in minutes.
| Ingredient | Amount | Notes |
|---|---|---|
| Long-Grain Basmati Rice 🍚 | 1 cup | Uncooked, rinsed thoroughly |
| Water 💧 | 1 cup | Room temperature preferred |
| Unsalted Butter 🧈 | 1 tbsp | Optional, for richness |
| Fresh Cilantro Leaves 🌿 | ¼ cup | Chopped, for garnish |
| Diamond Crystal Kosher Salt 🧂 | ¼ tsp | Fine grain preferred |
| Lemon Zest 🍋 | 1 tsp | Optional, brightens flavor |
| Garlic Cloves 🧄 | 1 whole | Minced, optional for aroma |
| Extra-Virgin Olive Oil 🫒 | 1 tsp | For toasting rice |
Basmati rice is the star here, so pick a high-quality brand—look for labels like ‘100% pure’ or ‘long-grain’. Lundberg or Mahatma are my go-tos, but any basmati works. Rinsing the rice removes excess starch, which keeps the grains distinct. The water-to-rice ratio is non-negotiable: 1:1 is key for that signature texture. For extra flavor depth, toast the rice in olive oil for 1 minute before adding liquid—it builds a subtle nuttiness that elevates everything. The Instant Pot’s pressure function does the rest, so no need to babysit the pot.
No fresh cilantro? Dried cilantro or parsley at half the amount works in a pinch, though it won’t be the same. Skipping the butter? A splash of whole milk instead of water adds creaminess without dairy. Want more aroma? Add a bay leaf or cardamom pod during cooking—remove before serving. The lemon zest is optional but adds a bright finish that cuts through rich dishes. If you’re prepping for a crowd, double the batch—this rice reheats beautifully and keeps its texture for days.
Leftovers stay fresh for 5 days in the fridge, though I recommend eating within 3 for peak texture. For longer storage, freeze portions in airtight containers for up to 3 months. The rice reheats best with a splash of water or broth—microwave on high for 1-2 minutes, stirring halfway. Pro tip: Stir in a pat of butter and extra herbs when reheating for restaurant-quality flavor. This method cuts cooking time by 75% compared to stovetop, so you’ll have more time to enjoy the meal.
Why You’ll Love This Recipe
- Here’s what sold me: that first bite where the edges have just a hint of crispness, but the center stays pillowy. The butter coats every grain, and the salt? Just enough to make it pop without overpowering. Toss in fresh cilantro at the end—it’s the little upgrade that makes this feel like a restaurant dish, not a side.
- Zero-Fuss Setup: I swear by this recipe because it’s the only rice I make when I’m exhausted—just dump the rice, add water, hit start, and forget it. No measuring cups, no stirring, no waiting for a pot to boil. The butter and salt melt right in, so by the time it’s done, you’ve got fluffy grains with that subtle richness already infused.
- Buttery Crispy Magic: Here’s what sold me: that first bite where the edges have just a hint of crispness, but the center stays pillowy. The butter coats every grain, and the salt? Just enough to make it pop without overpowering. Toss in fresh cilantro at the end—it’s the little upgrade that makes this feel like a restaurant dish, not a side.
- Meal Prep MVP: Between us, this is my go-to for lunch boxes, curry sides, or even a quick stir-fry base. It reheats perfectly, keeps for days in the fridge, and honestly? I’ve fed a crowd with it before—just double the recipe, and you’re golden. The basmati stays separate, so it never turns into gluey rice by day three.
Step-by-step instructions for Instant Pot basmati rice
Here’s the foolproof method for restaurant-quality basmati rice every time—no guesswork, just perfect grains.
Prepare the Rice for Perfect Texture
Start by rinsing the 1 cup long-grain basmati rice thoroughly under cold water until the water runs clear. This removes excess starch that would otherwise make the rice gummy. I like to swirl the rice in my hands while rinsing—it helps distribute the water evenly and ensures every grain gets clean.
Once rinsed, add the rice to your Instant Pot along with the 1 cup water. The ratio is critical here—too much water results in mushy rice, while too little leaves it undercooked. I find using room temperature water helps the rice absorb liquid more evenly during cooking.
Sauté for Enhanced Flavor (Optional but Recommended)
If you’re using the 1 tsp extra-virgin olive oil and 1 whole garlic cloves, add them to the Instant Pot now. Set the valve to “Venting” and select the “Sauté” function. Cook on medium heat for 1-2 minutes until you can smell the garlic’s aroma—this infuses the rice with subtle depth.
For extra richness, add the 1 tbsp unsalted butter at this stage. Let it melt completely into the oil, creating a flavorful base. If you’re skipping the garlic, simply proceed to the next step—this sauté is purely about building flavor, not a requirement.
Cook to Fluffy Perfection
Close the Instant Pot lid, ensure the valve is set to “Sealing,” and select the “Pressure Cook” function. Cook on high pressure for 4 minutes. This short cook time is key—it preserves the rice’s natural texture while ensuring complete hydration.
Here’s the thing about basmati rice: it needs that quick high-pressure cook to maintain its distinct shape and light texture. If you’re using an older Instant Pot model, you might need to adjust to 3 minutes—every pot behaves slightly differently. The rice should be tender but still hold its shape when tested with a fork.
Release Pressure and Fluff Gently
Once the cooking cycle completes, allow the pressure to release naturally for 10 minutes. This gradual release prevents the rice from becoming dense or pasty. After the natural release, carefully move the valve to “Venting” to release any remaining steam.
Open the lid and give the rice a gentle fluff with a fork—never stir it. Fluffing separates the grains and distributes any remaining steam, giving you that signature light and fluffy texture. At this point, you can fold in the 1 tsp lemon zest if using, which brightens the dish with a citrusy note.
Season and Garnish for Restaurant-Quality Finish
Stir in the 0.25 tsp diamond crystal kosher salt and the 0.25 cup fresh cilantro leaves. The salt should be sprinkled evenly—this enhances every grain’s flavor without overpowering. I like to add the cilantro last so it stays fresh and vibrant, not wilted from the heat.
Let the rice sit covered for 2-3 minutes before serving. This resting period allows any residual heat to finish cooking the grains evenly. The final result should be individual, distinct grains with a slight sheen—proof of perfect cooking. Serve immediately for the best texture and flavor.
Pro Tips For Making Instant Pot Basmati Rice
- Rinse Until Clear: Don’t just splash water—rub the rice between your fingers in the colander until the water runs completely clear. I learned this the hard way after making mushy rice that stuck together like glue; basmati needs that starch rinse to stay separate and fluffy.
- Use Exact Water Ratio: Stick to 1:1.25 rice-to-water (1 cup rice = 1.25 cups water) and never eyeball it. Too little water means dry rice; too much turns it into porridge. Trust the numbers—your Instant Pot’s pressure valve will thank you.
- Add Butter Last: Wait until the rice finishes cooking and releases pressure before stirring in the butter. Dumping it in early can clump the rice or trigger the float valve prematurely. A quick swirl at the end coats every grain perfectly.
- Salt the Water: Toss in the full salt (½ tsp Diamond Crystal per cup rice) with the water, not after. Skipping this step leaves your rice tasting bland, no matter how much you season later. Yes, even if you’re adding salted butter afterward.
Storing and reheating this dish
Fridge Storage Secrets
Store your cooked basmati rice in an airtight container with a loose-fitting lid to allow excess steam to escape. I use glass Pyrex containers because they maintain freshness longer than plastic.
Keep it refrigerated at 40°F or below for up to 5 days, but I recommend eating within 3 days for peak texture and flavor. The rice will stay fluffy if you let it cool completely before storing—never pack it hot. 🌡️
Freezer-Friendly Tips
For longer storage, freeze portions in single-serving airtight containers or ziplock bags with all excess air removed. Label with the date—this rice stays excellent for 3 months in the freezer.
To preserve texture, spread the rice on a tray before freezing to prevent clumping. I like to freeze it in 1-cup portions for easy reheating. 🧊
Reheating Like a Pro
Microwave reheating works best with a splash of water or broth—about 1 tablespoon per cup of rice. Cover with a damp paper towel and heat on high for 1-2 minutes, stirring halfway.
For stovetop reheating, use a light-colored saucepan on low heat with 2 tablespoons of water per cup of rice. Stir gently to avoid breaking the grains. 🔥
Butter and Herb Boost
Revive reheated rice by stirring in 1 tablespoon of butter and 1 teaspoon of fresh herbs (cilantro, parsley, or dill) while warm. This restores moisture and adds freshness.
For extra brightness, add a pinch of lemon zest or a dash of garlic powder. The butter helps restore the rice’s natural sheen and prevents dryness. ✨
Meal Prep Strategy
Double the recipe and store half for meal prep—I always make 2 cups on Sunday for the week. Portion into individual containers with a small compartment for sauces or proteins.
When reheating, add a splash of hot water or broth to maintain moisture. This method keeps your rice restaurant-quality for 4-5 days without sacrificing texture. 📅
Texture Rescue Guide
If your rice turns out dry after reheating, simply add 1-2 tablespoons of warm water or milk, cover, and let sit for 2 minutes. For mushy rice, spread it on a baking sheet and bake at 300°F for 5-10 minutes to dry it out.
The key is to handle reheated rice gently—never microwave uncovered or stir aggressively. 💡
Nutrition facts
Frequently asked questions
Why does my Instant Pot basmati rice turn out sticky?
Sticky rice usually means too much liquid or insufficient rinsing. Always rinse your 1 cup basmati rice until the water runs clear to remove excess starch. Use exactly 1 cup water (or broth) per cup of rice, and let the pressure release naturally for 10 minutes—rushing this step can trap moisture. For extra fluffiness, fluff with a fork right after release.
Can I use broth instead of water for more flavor?
Replace the water with 1 cup low-sodium chicken, vegetable, or seafood broth for built-in flavor. For extra depth, sauté 1 minced garlic clove and 1 tsp olive oil before adding liquid. Just reduce the salt at the end since broth already contains some. This works perfectly for pilafs or rice bowls.
How do I adjust this recipe for 2 cups of rice?
Double all ingredients: 2 cups rice, 2 cups liquid, 2 tbsp butter, and ½ cup cilantro. Use a 6-quart Instant Pot—smaller pots may overflow. Cook time remains 4 minutes on high pressure, with a 10-minute natural release. For even cooking, spread the rice in the pot before adding liquid.
What if my rice is undercooked after 4 minutes?
Most modern Instant Pots cook basmati perfectly in 4 minutes, but older models may need 5-6 minutes. Test with a fork—grains should be tender but still hold shape. If needed, add 2 tbsp water, reseal, and cook 1 more minute. Never overcook, as this turns rice mushy. A quick natural release fixes minor undercooking.
Can I make this rice ahead for meal prep?
Yes! Cook and cool the rice completely, then store in airtight containers for up to 5 days. Reheat with 1 tbsp water per cup in the microwave (covered) or stovetop on low. For freezing, portion into 1-cup servings, label dates, and freeze for 3 months. Thaw overnight in the fridge before reheating.

- Melting Pot Gorgonzola Port Sauce Recipe: Deep Umami Richness With Nutty Crisp - November 4, 2026
- Love Martini Melting Pot Recipe: Chilled Creamy Delight With Hidden Vodka Kick - November 4, 2026
- Crock Pot Canned Beans Recipe: Silky-Smooth Texture Without the Grain - November 4, 2026