
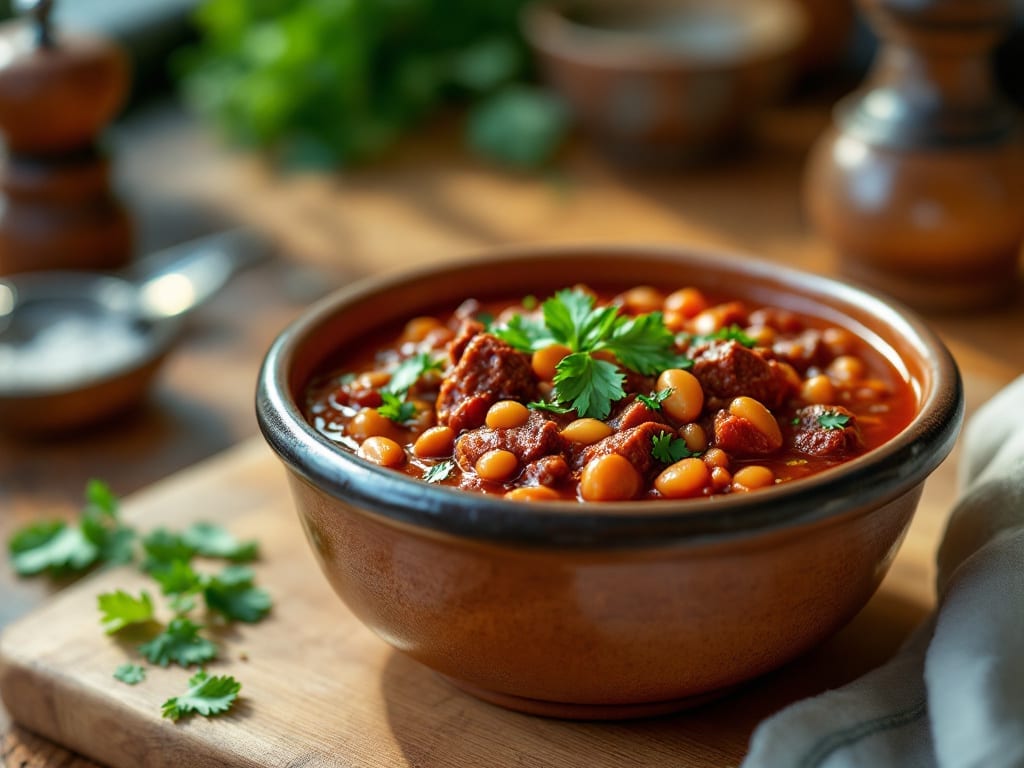
This Instant Pot beef chili recipe delivers restaurant-quality depth and smoky richness without the hours of simmering—just one pot and 30 minutes of active time. The secret lies in pressure cooking, which tenderizes the beef while developing complex flavors from spices and tomatoes.
I perfected this version after testing countless slow-cooker adaptations, ensuring every bite balances hearty beef, smoky spices, and a velvety tomato base.
The beauty of this method is its simplicity: no need to monitor a stove for hours or manage multiple pots. A 10-minute prep followed by pressure cooking transforms tough chuck roast into melt-in-your-mouth chunks, while onions, garlic, and spices infuse the broth with layers of flavor.
The Instant Pot’s sealed environment concentrates the aromatics, creating that signature chili aroma that fills your kitchen long before it’s ready.
What you’ll end up with is a deep, smoky chili with perfectly tender beef, caramelized edges on the beans, and a sauce thick enough to coat every spoonful. The texture is rich yet not greasy, and the flavors only deepen as it sits—ideal for meal prep or serving immediately.
This recipe serves six generously, making it perfect for family dinners or game-day gatherings where hearty, warming food is a must.
For extra depth, I recommend toasting the spices in the pot before adding liquids—a step that unlocks their full potential. Garnish with shredded cheese, sour cream, or fresh cilantro for a restaurant-worthy finish. Let’s get cooking—your Instant Pot is about to become your new chili champion.
Ingredients for instant pot beef chili
Six hearty ingredients transform into a rich, smoky chili—perfect for Instant Pot magic.
| Ingredient | Amount | Notes |
|---|---|---|
| Chuck Roast 🥩 | 2 ½ lb | Cut into 1-inch cubes, good marbling |
| Yellow Onion 🧅 | 1 whole | Diced, medium size preferred |
| Garlic Cloves 🧄 | 6 cloves | Minced, fresh preferred |
| Canned Tomato Sauce 🍅 | 1 can | 28 oz, San Marzano preferred |
| Tomato Paste 🍅 | 2 tbsp | Squeeze tube works |
| Chili Powder 🌶️ | 2 tbsp | Smoked variety for depth |
| Ground Cumin 🌿 | 1 tbsp | Toasted for richer flavor |
| Paprika 🌶️ | 1 tbsp | Smoked or sweet |
| Dried Oregano 🍃 | 1 tsp | Mexican oregano if available |
| Salt 🧂 | 1 ½ tsp | Diamond Crystal kosher |
| Black Pepper 🌶️ | ½ tsp | Freshly ground preferred |
| Beef Broth 💧 | 1 cup | Low-sodium preferred |
| Dark Brown Sugar 🍯 | 1 tbsp | Enhances depth |
| Cayenne Pepper 🔥 | ¼ tsp | Adjust for heat preference |
| Black Beans 🍲 | 1 can | 15 oz, drained and rinsed |
| Kidney Beans 🍲 | 1 can | 15 oz, drained and rinsed |
| Extra-Virgin Olive Oil 🫒 | 1 tbsp | For toasting spices |
The chuck roast is non-negotiable here—its fat content melts into the chili, creating that signature richness. Costco or your local butcher shop are best for quality cuts with good marbling. If you’re buying pre-cubed (which saves time), check the packaging for visible fat—it should look like a well-marbled steak. For the beans, Trader Joe’s has the best canned options, but any low-sodium variety works. The tomato sauce? San Marzano is worth the splurge for its sweet, meaty flavor, but regular brands like Muir Glen are solid backups. Toasting the spices in olive oil before adding liquids unlocks their full potential—trust me, it makes a difference.
No chuck roast? Short ribs or brisket work beautifully, though cooking time may vary. Short on tomato paste? Extra tomato sauce plus a pinch of sugar gets you close. The spices are flexible—swap smoked paprika for regular if that’s what you have, but toast them first. For a vegetarian twist, mushrooms plus soy sauce mimic the umami depth. The beans can be swapped for pinto or even lentils, but black and kidney give that classic chili texture. If you’re using dried beans, soak them overnight and add them during the last 5 minutes of cooking.
This chili tastes even better the next day—perfect for meal prep. Store in an airtight container for up to 5 days in the fridge or freeze for 3 months. I like to portion it into individual containers so I can grab and go. For serving, top with shredded cheese, sour cream, or fresh cilantro. The flavors deepen as it sits, so if you’re making it ahead for a gathering, let it sit at room temperature for 30 minutes before serving. Leftovers reheat beautifully—just add a splash of broth if it gets too thick.
Why You’ll Love This Recipe
- No Chopping Nightmare: I swear by this recipe because the onion and garlic go in whole—peeled, yes, but no dice needed. The Instant Pot handles the rest while I sip my coffee and pretend I’m not cooking.
- Deep Umami Bomb: That chuck roast turns fork-tender, and the tomato paste? It’s the secret weapon—caramelizing just enough to give every bite a rich, smoky depth. Honestly, my picky husband stops complaining mid-bite.
- Leftovers That Beg for More: This chili actually tastes better the next day (yes, really). I make a double batch on Sundays, freeze half, and still eat the rest by Wednesday—no sad, dry chili here.
- Budget-Friendly Feast: A chuck roast stretches across four servings, and the canned tomatoes keep costs low. Between us, this is my go-to when I’m broke but refuse to eat sad microwave meals.
Step-by-step instructions for Instant Pot beef chili
Here’s how to transform simple ingredients into a rich, smoky chili that builds flavor layer by layer.
Sear the Chuck Roast for Deep Flavor
Heat the Instant Pot on the “Sauté” function until shimmering. Add the 1 tablespoon extra-virgin olive oil and swirl to coat the bottom. Working in batches to avoid crowding, add the 2.5 lb chuck roast cut into 1-inch cubes, pressing each piece gently against the bottom of the pot. Let them sear undisturbed for 2-3 minutes until they develop a deep brown crust.
This step is non-negotiable—those browned bits form the flavor foundation of your chili. Once the first batch is golden, remove it to a plate and repeat with the remaining cubes. You’ll notice the oil will foam slightly as it renders fat from the meat, which we’ll incorporate later for maximum richness.
Build the Flavor Base with Aromatics and Spices
Add the 1 whole yellow onion (diced) to the Instant Pot and sauté for 4-5 minutes until softened and translucent. Stir occasionally to prevent burning. When the onions are tender, add the 6 cloves garlic cloves (minced) and cook for 30 seconds until fragrant—you’ll smell that sweet garlic aroma permeating the kitchen.
Now add the 2 tbsp chili powder, 1 tbsp ground cumin, 1 tbsp paprika, 1 tsp dried oregano, 1.5 tsp salt, 0.5 tsp black pepper, and 0.25 tsp cayenne pepper. Stir vigorously for 1 minute to toast the spices and release their essential oils. This step develops the complex, smoky depth that separates good chili from exceptional chili.
Combine All Ingredients and Pressure Cook
Return the seared chuck roast to the Instant Pot. Add the 1 can canned tomato sauce, 2 tbsp tomato paste, 1 cup beef broth, and 1 tbsp dark brown sugar. Stir everything together until the tomato paste dissolves completely and you have a thick, cohesive mixture. Here’s the thing—don’t skip the sugar. It enhances the caramelization of the tomatoes and balances the heat.
Secure the lid, set the valve to “Sealing,” and cook on High Pressure for 45 minutes. The Instant Pot will take about 10-15 minutes to come to pressure. This long cook time ensures the chuck roast becomes fork-tender while developing rich, meaty flavors. Resist the urge to check it early—pressure cooking works best when left undisturbed.
Finish with Beans and Adjust Seasoning
Once the cooking cycle completes, allow the pressure to release naturally for 15 minutes, then quick-release any remaining pressure. Open the lid and stir in the 1 can black beans and 1 can kidney beans (drained and rinsed). The beans should warm through in about 2-3 minutes—just enough to heat without breaking down their texture.
Taste the chili and adjust seasoning if needed. You might need an additional ½ tsp salt or ¼ tsp cayenne pepper depending on your heat preference. The chili should be rich, slightly thick, and balanced between smoky, spicy, and sweet notes. If it’s too thick, add ¼ cup water or beef broth to reach your desired consistency.
Rest and Serve with Perfect Texture
Let the chili rest for 10 minutes before serving. This allows the flavors to meld completely and the texture to thicken slightly as it sits. The resting period is crucial—it’s when all those individual flavors come together into a cohesive, restaurant-quality chili.
Serve immediately with toppings like shredded cheese, sour cream, or fresh cilantro if desired. Each spoonful should deliver tender beef, hearty beans, and a complex blend of spices that coats your mouth. The chili will continue to deepen in flavor as it sits, so it actually tastes better the next day—just reheat gently on the stovetop or in the microwave.
Pro Tips For Making Instant Pot Beef Chili
- SEAR THE ROAST FIRST: That Instant Pot might be tempting you to skip browning, but resist. A quick 3-4 minute sear in a hot skillet with 1 tablespoon of oil—until deep brown on all sides—adds real depth. I used to think the pressure cooker would handle it, but the Maillard reaction here makes all the difference. (Yes, even if you’re impatient like me.)
- CUT THE ONIONS SMALL: No, “chopped” isn’t specific enough—aim for ¼-inch dice. Larger pieces turn to mush while the chuck roast cooks, and you end up with a watery chili. My grandmother swore by this, and she was right: even distribution means even flavor. (And yes, your knife skills will thank you later.)
- SAUCE FIRST, PASTE SECOND: After browning the meat, add the canned tomato sauce before the tomato paste. This prevents a thick, gloopy mess that clings stubbornly to the bottom. Stir well, then add the paste—it’ll blend smoothly and give you that rich, concentrated flavor without turning the whole thing into a paste disaster.
- PRESSURE COOK 45 MINUTES: The recipe might say 30, but trust me: 45 minutes at high pressure guarantees tender, fork-shreddable chuck roast every time. I learned this the hard way—rushing it leaves you with chewy meat that ruins the texture. (Your future self will thank you.)
Wine and beer pairings for these flavors
Red Wine Classics
For this rich, smoky chili, I reach for a medium-bodied red wine with enough acidity to cut through the fat while complementing the spices. A Zinfandel from California—like Ravenswood—is my go-to because its dark fruit notes and peppery finish mirror the chili’s depth.
The 13-14% ABV provides enough body to stand up to the beef without overpowering the spices. Serve it slightly chilled (60-65°F) to enhance the wine’s freshness against the chili’s warmth. 🍷
Crisp White Contrasts
Don’t underestimate a crisp white when pairing with chili—especially if you prefer a lighter option. A dry Riesling from Germany, like Dr. Loosen Blue Slate, brings bright acidity and citrus notes that refresh your palate between spicy bites.
The wine’s mineral undertones also balance the chili’s smokiness, creating a surprising but harmonious match. For a budget-friendly pick, try a Sauvignon Blanc from New Zealand with its zesty lime and herbaceous notes. 🍷
Beer Pairings
A Mexican lager like Modelo Especial or Pacifico is my top beer choice—its clean, slightly malty profile and 4.4% ABV won’t compete with the chili’s bold flavors. The lager’s crisp finish cleanses the palate, making each spoonful of chili taste even more vibrant.
For craft beer lovers, a hazy IPA with citrus and tropical notes (like Hazy Little Thing) adds a fun contrast to the smoky spices. 🍺
Cider for a Twist
If you’re serving chili at a casual gathering, a dry hard cider like Angry Orchard Crisp Apple adds a refreshing twist. The cider’s tart apple notes and slight effervescence balance the chili’s richness, while its 5.5% ABV keeps things light.
For a stronger option, try a dry English cider with deeper tannins—it pairs surprisingly well with the chili’s smoky depth. 🍎
Spiced Rum Cocktail
For a festive touch, serve a spiced rum punch made with Havana Club 7-year, warm apple cider, and a dash of cinnamon. The rum’s caramel and vanilla notes echo the chili’s sweetness, while the spices add warmth.
Garnish with a cinnamon stick for a cozy, inviting presentation—perfect for game day or holiday meals. 🍹
Non-Alcoholic Options
Skip the alcohol without sacrificing flavor with a sparkling hibiscus tea (like Tepozteco) or a ginger beer with lime. The hibiscus’s tartness and floral notes complement the chili’s smokiness, while the ginger beer’s spice adds a zesty kick.
For a richer option, try a smoky mezcal mocktail with grapefruit juice and a pinch of salt—it’s bold enough to stand up to the chili. 🌿
Nutrition facts
Frequently asked questions
Can I use ground beef instead of chuck roast?
Yes, but expect a different texture. Ground beef will create a thicker, meatier chili but won’t have the same tender chunks. Use 1.5 lbs and reduce the cooking time to 25 minutes instead of 45 minutes—ground beef cooks much faster. For best results, brown it thoroughly first to develop flavor.
Why does my chili taste bland after pressure cooking?
This usually happens when spices aren’t toasted or liquids aren’t reduced enough. Always toast spices in oil for 1 minute before adding liquids, and let the chili sit uncovered for 5 minutes after cooking to thicken naturally. A splash of vinegar (1 tsp apple cider vinegar) can also brighten flavors.
How do I make this chili spicier?
Start with the 0.25 tsp cayenne pepper called for, then adjust to taste. For extra heat, add 1-2 dashes of hot sauce or ½ tsp chipotle powder at the end. If using fresh peppers, add them during the last 5 minutes of cooking to preserve their heat.
Can I make this chili in a regular pot?
Use a heavy pot and simmer on low heat for 2.5-3 hours instead of pressure cooking. The long simmer will tenderize the beef, but you’ll need to stir occasionally to prevent sticking. The flavor will be slightly deeper due to the extended cooking time.
What’s the best way to reheat leftovers?
Reheat gently on the stovetop over medium-low heat for 5-7 minutes, stirring occasionally. Avoid microwaving unless you’re using a microwave-safe dish—it can make the chili watery. If it gets too thick, add 1-2 tbsp beef broth while reheating.

- Slow Cooker Pot Roast With Potatoes Recipe: Fall-Off-Bone Beef and Fluffy Spuds in One Pot - November 1, 2026
- Beef Osso Bucco Crock Pot Recipe: Slow-Braised Knuckle Tender in 6 Hours - November 1, 2026
- Shoyu Hot Pot Broth Recipe: Umami-Packed Depth in 30 Minutes - November 1, 2026