
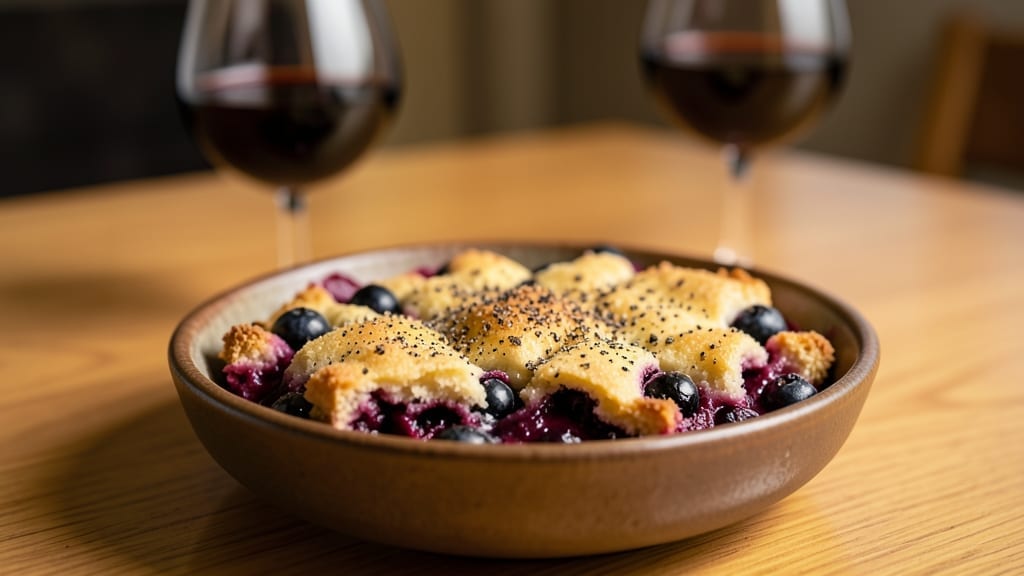
This Instant Pot blueberry cobbler delivers all the comfort of a classic oven-baked dessert—juicy berries, buttery crust, and that signature bubble-top—without the hours spent waiting.
The secret lies in pressure cooking the filling first, then finishing it under the crust in the Instant Pot’s “keep warm” mode, creating a texture that’s impossibly tender yet still holds its shape.
I developed this recipe after burning through three traditional versions, each leaving me with either a soggy bottom or an undercooked center.
The beauty of this method is how it preserves the juicy quality of the blueberries while achieving that perfect crust-to-filling ratio. You’ll start with a simple berry mixture—sweetened just enough to balance natural tartness—then top it with a foolproof biscuit-style crust that puffs up beautifully.
The Instant Pot handles the majority of the work, including pre-cooking the filling to release its juices before the crust goes on top.
By the time you’re done, you’ll have a cobbler with a golden, crackly crust that gives way to warm, bubbling filling underneath—every bite delivers bursts of juicy berries and tender, buttery crust. This version stays true to the classic while cutting active time to just 15 minutes, with minimal cleanup.
The best part? It tastes even better the next day when the flavors have had time to meld.
Perfect for summer gatherings, family dinners, or when you crave dessert without the oven heat. Here’s how to make it—your Instant Pot will thank you for the upgrade from traditional methods.
Ingredients for instant pot blueberry cobbler
Juicy blueberries, buttery crust, and zero oven heat—just 15 minutes of active time.
| Ingredient | Amount | Notes |
|---|---|---|
| Fresh Blueberries 🫐 | 3 cups | Frozen works but thaw first |
| Granulated Sugar 🍚 | 1 ¼ cups | Light brown sugar for depth |
| All-Purpose Flour 🌾 | 1 ½ cups | Sifted for light texture |
| Baking Powder 🍞 | 2 tsp | Freshly opened for lift |
| Salt 🧂 | ½ tsp | Fine sea salt preferred |
| Unsalted Butter 🧈 | ¾ cup | Cold, cubed for crust |
| Milk 🥛 | ½ cup | Room temperature works best |
| Vanilla Extract 🌸 | 1 tsp | Pure vanilla for flavor |
| Lemon Juice 🍋 | 1 tbsp | Freshly squeezed brightens berries |
| Ground Cinnamon 🌿 | 1 tsp | Toasted for deeper aroma |
| Cornstarch 🌾 | 1 tbsp | Thickens berry juices |
The blueberries are the star, so pick the plumpest, firmest berries you can find. Trader Joe’s or Whole Foods usually have the best quality, but any grocery store works if they’re fresh. If using frozen, thaw them first—no one wants icy pockets in their cobbler. The sugar balance is key: too much and it’s cloying, too little and the tartness overpowers. I always measure by weight if possible, but cups work fine for this. For the crust, cold butter is non-negotiable—cut it into small cubes and keep it chilled until mixing.
No fresh blueberries? Thawed frozen works perfectly, but drain any excess liquid. Swap sugar for maple syrup or honey at half the amount—just reduce other liquids slightly to balance. The vanilla extract can be omitted, but almond extract at half the amount adds a lovely depth. For a gluten-free version, swap the flour for a 1:1 gluten-free baking blend (like Bob’s Red Mill). The cornstarch is optional but helps thicken the juices—skip it if you prefer a saucier filling. And if you’re short on time, pre-made biscuit dough works in a pinch for the crust.
This cobbler tastes even better the next day—make a double batch if you can. Store leftovers in an airtight container for 4 days in the fridge. Reheat in the Instant Pot on high pressure for 3 minutes to restore that warm, bubbling texture. For make-ahead prep, mix the dry crust ingredients in advance and store in the freezer. The filling can be prepped a day ahead and refrigerated until ready to cook. Freeze individual portions for up to 3 months—just thaw overnight before reheating.
Why You’ll Love This Recipe
- No-Fuss Magic: I dump the blueberries right from the container—no peeling, no pitting, no mess. The Instant Pot handles the rest while I sip my coffee, and honestly? That buttery biscuit topping melts into the juicy berries with zero effort.
- Sweet-Sour Perfection: The sugar caramelizes just enough to make the blueberries burst, but there’s still that bright, tangy kick from the fresh fruit. (Yes, even if you use frozen berries—it still tastes like summer.)
- Weeknight or Company: Make it for a lazy Sunday breakfast or bring it to a potluck—same recipe, zero judgment. The leftovers reheat beautifully, and I’ve even packed it in lunches. (My coworkers think I’m a hero.)
- Budget-Friendly Luxury: Four ingredients, one pot, and it feels like a fancy dessert. The flour and sugar stretch far, and fresh blueberries in season? Cheaper than takeout, way more satisfying. (Between us, this is my secret for looking like a baking pro.)
Step-by-step instructions for Instant Pot blueberry cobbler
Here’s how to create that perfect balance of bubbly crust and juicy blueberries every time.
Prepare the Blueberry Filling
In a medium bowl, combine the 3 cups fresh blueberries, 1.25 cups granulated sugar, 1 tbsp lemon juice, and 1 tsp vanilla extract. Toss gently to coat each berry evenly. The lemon juice brightens the flavor while the sugar helps preserve the juices during cooking.
Transfer the mixture to a separate bowl and sprinkle with 1 tbsp cornstarch. Gently stir to distribute evenly – this creates a natural thickener that prevents a watery filling. I like to press the berries lightly through a mesh strainer to release some juices while keeping the whole berries intact for texture.
Make the Cobbler Crust
In the same bowl, add the 0.75 cup cold unsalted butter, cutting it into small cubes. Sprinkle over the 1.5 cups all-purpose flour, 2 tsp baking powder, 0.5 tsp salt, and 1 tsp ground cinnamon. Use a pastry cutter or your fingers to work the butter into the flour until you have pea-sized crumbs.
Pour in the 0.5 cup milk all at once and stir gently with a fork until just combined. The dough should hold together when pressed but still be slightly crumbly. If it’s too dry, add 1 tsp more milk. Don’t overmix – you want to preserve those air pockets for that signature bubble-top crust.
Assemble in the Instant Pot
Spray the Instant Pot insert with cooking spray, then spread the blueberry mixture evenly in the bottom. I like to use a rubber spatula to create an even layer about 1 inch thick. This ensures even cooking and prevents the berries from burning.
Sprinkle the cobbler crust mixture evenly over the blueberries, pressing down gently with your fingers. The crust should be about 1 inch thick. Here’s the thing – don’t worry if it looks uneven. The crust will puff up beautifully during cooking, creating those perfect golden bubbles on top.
Cook to Juicy Perfection
Place the trivet in the Instant Pot and secure the lid. Select the “Pressure Cook” setting for 20 minutes on high pressure. The high pressure creates steam that cooks the berries gently while building up pressure for that perfect crust texture.
When the cooking time is complete, allow the pressure to release naturally for 10 minutes before quick-releasing any remaining pressure. This gradual release prevents the crust from becoming soggy. The cobbler is done when the crust is golden brown and the filling is bubbling hot.
Serve Warm with Vanilla Ice Cream
Carefully remove the trivet and let the cobbler sit for 5 minutes before serving. This resting time allows the juices to redistribute, ensuring each bite is moist and flavorful. The crust should be golden with some puffy bubbles, while the filling should be thick and juicy.
Serve warm with a scoop of vanilla ice cream to balance the sweet-tart flavors. The contrast between the warm cobbler and cold ice cream creates an amazing experience. For best results, serve immediately while the crust is still crisp and the filling is hot.
Pro Tips For Making Instant Pot Blueberry Cobbler
- Prep Berries Last: Toss the blueberries in a little sugar—about 1 tablespoon per cup—right before dumping them in the pot. This keeps them from turning into mush while you’re mixing the batter, and the burst of sweetness hits first when you dig in. (Yes, even if you’re impatient like me.)
- Skip the Overmixing: Stir the flour, baking powder, and salt together once, then cut in the butter until it looks like crumbs the size of peas. Overmixing turns the topping into a sad, dense pancake—this way, it stays flaky and golden. I learned this the hard way after a lumpy, gray-topped disaster.
- Vent That Lid: Use the steam vent (not sealed) for the first 10 minutes, then switch to sealed for the rest. This prevents the topping from steaming into a soggy mess while the filling cooks. After burning three batches with a sealed lid the whole time, I finally cracked the recipe.
- Brown the Butter (Optional): Swap cold butter for lightly browned butter in the topping—it adds a nutty depth that cuts through the sweetness. Skip the fuss if you’re short on time, but if you’ve got 5 extra minutes, this is the upgrade that makes a real difference. (Your future self will notice.)
Storing and reheating this dish
Refrigerator Storage
Store your leftover blueberry cobbler in an airtight container for up to 4 days in the refrigerator. The flavors actually deepen overnight, making it even more delicious for breakfast or dessert the next day.
I always let it cool completely before covering to prevent condensation from making the crust soggy. 💫
Freezer Prep Tips
For long-term storage, freeze individual portions in single-serving containers or wrap tightly in plastic wrap followed by foil. This cobbler freezes beautifully for up to 3 months—just thaw overnight in the fridge before reheating.
I recommend freezing it after the initial cooking but before serving to preserve that perfect texture.
Instant Pot Reheating
My favorite reheating method is using the Instant Pot itself. Place the cobbler in the pot with 2 tablespoons water, then cook on high pressure for 3 minutes.
Let the pressure release naturally for 5 minutes before quick-releasing. This restores that warm, bubbling texture without drying out the crust. For extra crispiness, broil for 2-3 minutes after reheating.
Microwave Method
For quick reheating, cover the cobbler with a damp paper towel and microwave on medium power (50%) for 1-2 minutes. Stir the filling gently to redistribute any settled juices, then microwave in 30-second intervals until heated through.
This method works best for smaller portions—just be careful not to overheat and turn the crust rubbery. 🔥
Oven Crisp Option
If you want that perfect golden crust, transfer the cobbler to a baking dish and place in a 350°F oven for 10-15 minutes. Keep an eye on it to prevent over-browning.
This works especially well if you’re reheating for a dinner party when you want that restaurant-quality finish. The oven method also helps restore any lost crispiness from storage.
Serving Suggestions
Serve reheated cobbler with a scoop of vanilla ice cream or whipped cream to balance the warm, spiced filling. For a breakfast twist, top with Greek yogurt and a sprinkle of toasted nuts for added crunch.
The contrast of cold and warm makes every bite feel like a special treat—even when it’s just leftovers! ✨
Nutrition facts
Frequently asked questions
Can I use frozen blueberries instead of fresh?
Yes, but you must thaw them first and drain any excess liquid. Frozen berries work perfectly—they’re often cheaper and just as flavorful. Just pat them dry with a paper towel before mixing with sugar to prevent a watery filling. The texture difference is minimal when cooked this way!
Why does my crust turn out dense instead of bubbly?
Overmixing the dough or using warm butter are the most common causes. Keep the butter cold and cut it into small cubes—this creates air pockets for that signature bubble-top. Also, stir the crust mixture just until combined (about 10-12 strokes) to avoid developing gluten. A 1-inch thick crust layer helps too!
Can I make this without an Instant Pot?
Transfer the assembled cobbler to a 9×9-inch baking dish and bake at 350°F for 45-50 minutes until golden and bubbly. The Instant Pot version just cuts active time to 15 minutes while delivering the same juicy texture. For best results, tent with foil halfway through baking to prevent over-browning.
How do I adjust the sweetness for tart blueberries?
Start with the full 1.25 cups of sugar and taste the filling before assembling. If your berries are very tart, reduce sugar to 1 cup and add 1 tbsp lemon juice for brightness. For extra sweetness, sprinkle 1 tsp powdered sugar on top after baking. The crust’s buttery flavor balances natural tartness beautifully!
Can I make this gluten-free?
Yes! Swap the all-purpose flour for a 1:1 gluten-free baking blend (like Bob’s Red Mill). Add 1 tsp xanthan gum** to help with structure. The crust will be slightly denser but still delicious. For the filling, ensure your cornstarch is gluten-free certified—most brands are, but always check the label.

- Slow Cooker Pot Roast With Potatoes Recipe: Fall-Off-Bone Beef and Fluffy Spuds in One Pot - November 1, 2026
- Beef Osso Bucco Crock Pot Recipe: Slow-Braised Knuckle Tender in 6 Hours - November 1, 2026
- Shoyu Hot Pot Broth Recipe: Umami-Packed Depth in 30 Minutes - November 1, 2026