
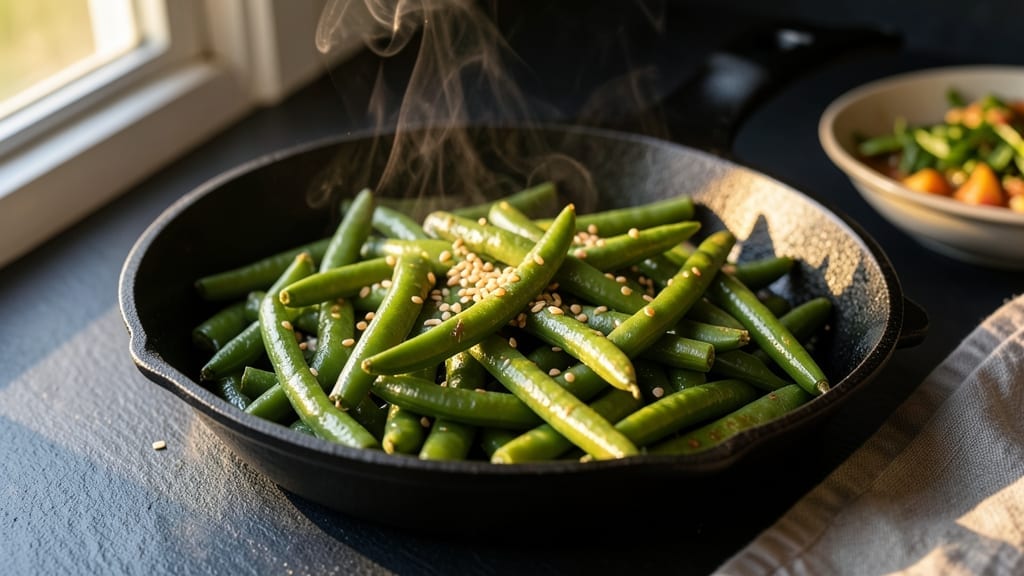
Transforming canned green beans into a crunchy-bright side dish in just 10 minutes is the kind of Instant Pot magic that changes how you approach weeknight dinners.
I developed this recipe after realizing how quickly canned beans could become restaurant-quality with the right technique—no soaking, no waiting, just flavor-packed results that pair perfectly with proteins or salads. The secret lies in high-pressure cooking followed by a quick sauté to crisp the edges without losing that vibrant snap.
This method preserves the beans’ natural texture while allowing them to absorb bold seasonings like garlic, bacon, or herbs in minutes. Unlike traditional stovetop methods, the Instant Pot locks in moisture and flavor while delivering that coveted crunch that often disappears in longer cooking.
The process is simple: pressure cook, sauté, and season, with optional garnishes like lemon zest or fresh parsley to elevate the dish further. It’s the kind of recipe that proves canned ingredients can be just as impressive as fresh.
By the end, you’ll have green beans that are bright, crisp-tender, and packed with flavor—ready to serve alongside grilled chicken, roasted meats, or even as a standalone salad component.
The versatility is its greatest strength: use it as a side, a topping, or even a quick veggie addition to soups. This is the recipe that turns a pantry staple into something special without sacrificing convenience.
Whether you’re feeding a family or prepping for meal prep, this foolproof method delivers consistent results every time. The best part? No one will guess they started with canned beans. Let’s get cooking—your Instant Pot is about to become your go-to for quick, flavorful sides.
Ingredients for instant pot canned green beans
Pantry staples and fresh flavors transform canned green beans into a restaurant-worthy side.
| Ingredient | Amount | Notes |
|---|---|---|
| Canned Green Beans 🌿 | 14 ½ oz | Drained, liquid reserved for broth |
| Extra-Virgin Olive Oil 🫒 | 1 tbsp | For sautéing beans |
| Garlic Cloves 🧄 | 3 cloves | Minced, for bold flavor |
| Smoked Bacon 🥓 | 4 oz | Diced, crispy preferred |
| Fresh Parsley 🌿 | ¼ cup | Chopped, for garnish |
| Lemon Zest 🍋 | 1 tsp | Brightens flavor profile |
| Sea Salt 🧂 | ½ tsp | Kosher or fine grain |
| Black Pepper 🌶️ | ¼ tsp | Freshly cracked |
| Red Pepper Flakes 🌶️ | ¼ tsp | Optional for heat |
| Vegetable Broth 💧 | ½ cup | Low-sodium preferred |
| Butter 🧈 | 1 tbsp | Unsalted, for crisping |
The green beans are the foundation, so opt for canned brands like Green Giant or Del Monte—they hold their texture best. Fresh parsley and lemon zest elevate the dish, so grab them at the grocery store’s produce section (they should be vibrant, not wilted). Smoked bacon adds depth, and Oscar Mayer or Costco’s bulk packs are reliable choices. For the garlic, fresh is non-negotiable—pre-minced garlic in jars lacks flavor. If you’re short on time, the reserved bean liquid can substitute for broth, but low-sodium vegetable broth ensures better flavor control.
No bacon? Crispy pancetta or turkey bacon work just as well—just adjust the quantity to taste. Swap fresh parsley for dried at one-third the amount, but fresh is always better. Short on lemon zest? Lemon juice at double the amount gives a similar tang. The red pepper flakes are optional, but if you omit them, add an extra pinch of black pepper for warmth. For a vegetarian option, skip the bacon and use toasted pine nuts or walnuts instead—about 2 tbsp for crunch.
Store cooked beans in an airtight container for up to 4 days in the fridge, or freeze for 3 months—they reheat beautifully. For meal prep, portion into containers with a sprinkle of lemon zest on top to keep everything fresh. The bacon and parsley can be added fresh when reheating for maximum flavor. This dish is versatile enough to serve as a side or a salad topping—just adjust the seasoning to fit your main course.
Why You’ll Love This Recipe
- No-Chop Required: I swear by this—just dump the canned beans, toss in crumbled bacon and garlic, and let the Instant Pot do the work. My hands stay clean while the magic happens.
- Smoky-Savory Magic: That crispy bacon and garlic combo? It turns simple green beans into something rich and satisfying. Honestly, I’ve never met a side dish that delivers this kind of flavor punch so effortlessly.
- Weeknight & Potluck Star: Serve it warm with dinner or pack it cold for lunch—it’s that adaptable. Between us, it’s also the go-to dish when I’m hosting because it’s hearty, shareable, and no one bats an eye at the canned beans.
- Budget-Friendly Leftovers: A single can of beans and a handful of bacon stretch across meals. I’ll make a big batch on Sunday, and by Wednesday, I’m still reheating it—because it tastes just as good the second time.
Step-by-step instructions for Instant Pot canned green beans
Here’s how to transform simple canned green beans into a restaurant-worthy side dish.
Cook the Bacon Until Crispy
Place the 4 oz smoked bacon in the Instant Pot and cook on the “Sauté” function over medium heat for 5-6 minutes. Stir occasionally until the bacon becomes deep golden brown and crispy, releasing its rich, smoky flavor. The rendered fat will create the perfect base for your dish.
Resist the urge to rush this step—properly crisped bacon adds texture and depth. If the bacon starts smoking too much, reduce the heat slightly. Once done, remove the bacon with a slotted spoon and set it aside on paper towels, leaving the fat in the pot. This fat will help create the signature crisp-tender texture of the green beans.
Sauté Garlic and Green Beans
Add the 1 tablespoon extra-virgin olive oil to the Instant Pot along with the 3 minced garlic cloves. Sauté for 30 seconds until the garlic becomes fragrant and lightly golden—this prevents it from burning while building flavor. Immediately add the 14.5 oz drained canned green beans and stir to coat them in the garlic-infused oil.
Cook for 2 minutes on “Sauté” while stirring occasionally. The green beans will begin to soften slightly but should still retain their bright green color and crisp texture. This quick sauté ensures they absorb the garlic flavor without becoming mushy. If the beans start to stick, add 1 tablespoon of the reserved green bean liquid to deglaze the pot.
Add Broth and Seasonings
Pour in the 0.5 cup vegetable broth, scraping up any browned bits from the bottom of the pot. Add the 0.5 teaspoon sea salt, 0.25 teaspoon black pepper, 0.25 teaspoon red pepper flakes, and 1 teaspoon lemon zest. Stir everything together until the seasonings are evenly distributed and the green beans are fully coated.
The lemon zest brightens the dish while the red pepper flakes add a subtle kick. The broth helps steam the beans gently, ensuring they stay tender-crisp. If you prefer a smoother texture, you can mash a few beans with a fork to thicken the liquid slightly, but keep most intact for that satisfying bite.
Pressure Cook for Perfect Texture
Secure the lid on the Instant Pot and set the valve to “Sealing.” Cook on High Pressure for 3 minutes. This short cooking time preserves the beans’ vibrant color and crisp texture while allowing them to absorb the flavors of the bacon, garlic, and seasonings.
Quick-release the pressure immediately after cooking. The beans should be tender but still crisp—if they feel too soft, the cooking time was too long. Open the lid carefully, as steam will escape. Stir the beans gently and taste for seasoning. If needed, adjust with a pinch more salt or red pepper flakes to suit your preference.
Finish with Butter and Garnish
Return the Instant Pot to the “Sauté” function and add the 1 tablespoon butter. Stir until melted and creamy, coating the green beans evenly. This step adds richness and helps bind the flavors together. The butter should melt into a smooth sauce that clings to the beans.
Finally, sprinkle the 0.25 cup chopped fresh parsley over the top and toss gently to distribute. The parsley adds freshness and a pop of color. Serve immediately while the beans are still crisp and the bacon is warm. This dish pairs perfectly with grilled meats, roasted chicken, or even as a standalone vegetable side.
Pro Tips For Making Instant Pot Canned Green Beans
- Crisp the Bacon First: Drain the bacon before cooking it in the Instant Pot—this prevents the beans from turning into a greasy mess. I learned this the hard way: skipping the drain step makes the dish taste like a deep-fryer instead of a simple, smoky side.
- Drain and Rinse Beans: Open those cans and give the green beans a quick rinse under cold water. The brine clings like glue, and skipping this step makes the final dish taste overly salty and watery—no one wants mushy, briny beans.
- Sauté Garlic Low and Slow: After cooking the bacon, reduce the heat to low when adding the garlic. I used to blast it on high, and it burned before the beans were ready—now I let it dance gently until it’s just golden, not crispy.
- Add Parsley Last: Chop the parsley right before serving and stir it in after the Instant Pot’s done cooking. Parsley loses its bright flavor when simmered, so tossing it in at the end keeps the dish fresh-tasting and vibrant.
Perfect pairings for instant pot canned green beans
Protein Pairings
These crisp-tender green beans shine alongside grilled chicken breast or herb-roasted turkey. The smoky bacon in the beans complements the savory crust of grilled meats, while the bright lemon zest cuts through richer proteins.
I often serve them with garlic butter shrimp—the buttery richness balances the beans’ acidity beautifully. 🍗
For a hearty meal, pair with pan-seared pork chops or beef tenderloin. The crisp edges of the beans contrast perfectly with the tender, juicy meat. If you’re serving baked salmon, the beans add a satisfying crunch that contrasts the fish’s delicate texture.
For a vegetarian option, serve alongside mushroom risotto or stuffed bell peppers—the beans bring freshness to earthy dishes.
Salad & Bowl Toppers
Use these beans as a protein-free salad topping—toss them with mixed greens, cherry tomatoes, and a balsamic vinaigrette. The crisp texture adds dimension to any green salad. I love adding them to quinoa bowls with avocado, black beans, and lime dressing for a complete meal. 🥗
For grain bowls, mix with couscous or farro and top with toasted almonds and a drizzle of tahini sauce. The beans’ bright flavor stands up to heartier bases like roasted sweet potatoes or wild rice.
For a quick lunch, serve over whole-grain pasta with a sprinkle of Parmesan cheese and fresh basil.
Breakfast & Brunch
Yes, you can eat these for breakfast! Add them to breakfast burritos with scrambled eggs, cheese, and salsa for a veggie-packed start. The crisp beans add texture that balances the soft eggs.
I also love serving them as a side to pancakes or waffles—drizzle with maple syrup and top with extra bacon for a sweet-savory combo. 🥞
For brunch, pair with fried eggs and crispy hash browns—the beans add a fresh, bright contrast. You can even fold them into crepes with goat cheese and honey for a gourmet twist. The versatility makes them perfect for any meal of the day.
Dessert Contrast
Believe it or not, these beans can even elevate desserts! Sprinkle them over warm apple crisp or peach cobbler for a surprising crunch. The bright lemon zest ties into citrus desserts like key lime pie or lemon bars.
I’ve even used them as a garnish for vanilla ice cream with a drizzle of honey—a sweet-savory contrast that’s oddly delicious. 🍰
For a savory-sweet pairing, serve alongside baked brie with honey or fig and prosciutto platters. The beans’ acidity cuts through the richness, making them a sophisticated addition to charcuterie boards. It’s a fun way to repurpose leftovers into something unexpected!
Nutrition facts
Frequently asked questions
Can I use fresh green beans instead of canned in this recipe?
Fresh green beans will work, but you’ll need to adjust the cooking time. Trim and halve them first, then pressure cook for 1 minute instead of using canned beans. Fresh beans release more moisture, so you may need to reduce the broth by 2 tablespoons to maintain the crisp texture.
Why do my Instant Pot green beans turn mushy?
Overcooking is the most common cause. Stick to the 3-minute high-pressure cook time—any longer breaks down the beans’ structure. Also ensure you’re using high-quality canned beans (like Green Giant) and don’t skip the quick sauté step before pressure cooking. Quick-release the pressure immediately after cooking to preserve texture.
Can I make this recipe without bacon?
Swap the bacon for 2 tablespoons olive oil and add 1 teaspoon smoked paprika or 1/4 teaspoon liquid smoke for depth. For extra protein, stir in 1/4 cup crumbled feta cheese at the end. The dish will still be flavorful—just with a different profile.
How do I prevent the green beans from sticking to the Instant Pot?
Always sauté the beans in 1 tablespoon oil for 2 minutes before adding broth. If they start sticking, immediately add 1-2 tablespoons of reserved bean liquid or broth to deglaze. Stir frequently during sautéing to prevent browning. A well-seasoned pot helps too—consider giving yours a quick oil wipe before cooking.
Can I double this recipe for a crowd?
Yes, but use a 6-quart Instant Pot for best results. Double all ingredients except the cooking time—keep it at 3 minutes high pressure. For the sauté step, work in batches if needed to avoid overcrowding. The bacon may need 7-8 minutes to crisp properly when doubled. Serve family-style with extra lemon wedges on the side.

- Baked Potatoes in Crock Pot Recipe: Buttery Interiors and Crispy Top Magic - November 1, 2026
- Braised Beef Short Ribs Recipe: Crock Pot Fall-Off-Bone Magic in 6 Hours - November 1, 2026
- Crock Pot Cocoa Recipe: Velvety Warmth With Hidden Spice Magic - November 1, 2026