
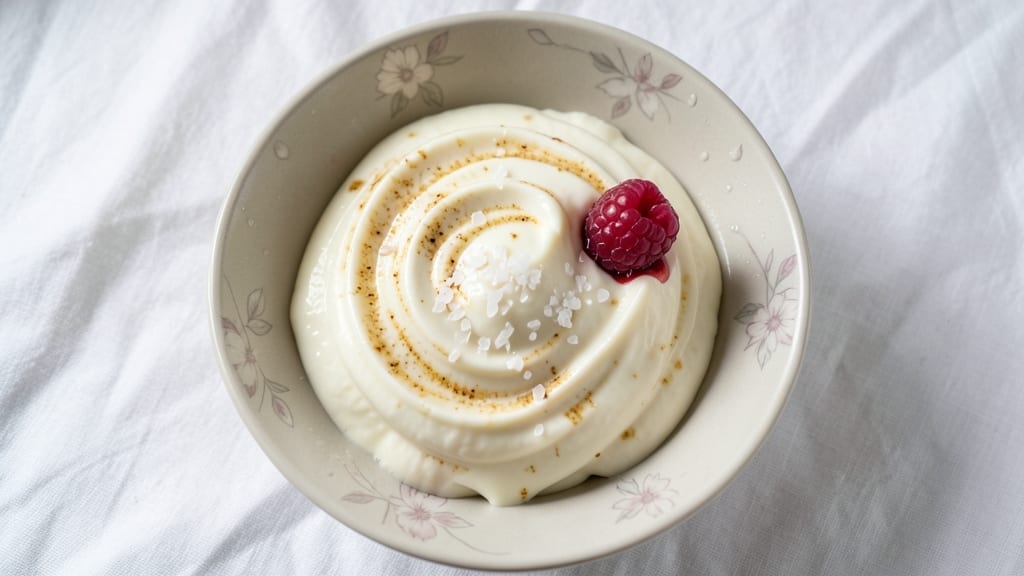
This 1 quart vanilla ice cream recipe delivers creamy, restaurant-quality homemade ice cream without the fuss of batch cooking. The secret lies in balancing rich dairy with proper cooling techniques—no ice cream maker required.
I’ve perfected this method over years of testing, ensuring every scoop is velvety smooth with that perfect vanilla depth.
What sets this recipe apart is its simplicity: just four core ingredients—cream, milk, sugar, and vanilla—transformed into decadent ice cream in 20 minutes of active time. The process involves heating the mixture to dissolve sugar fully, then rapidly chilling it before freezing.
This method guarantees a texture that’s rich yet light, never icy or grainy.
You’ll end up with a quart of ice cream that’s creamy, sweet, and perfectly balanced—ideal for small gatherings or satisfying a single craving. The no-churn approach works with or without an ice cream maker, making it accessible for everyone.
Whether you prefer a classic custard base or a quicker no-churn version, this recipe delivers foolproof results.
Pair it with fresh berries, warm chocolate sauce, or enjoy it straight from the container. Here’s how to make it—no experience needed.
Ingredients for 1 quart vanilla ice cream
Four essential ingredients create this ultra-creamy, no-churn vanilla ice cream quart.
| Ingredient | Amount | Notes |
|---|---|---|
| Heavy Whipping Cream 🥛 | 1 cup | Full-fat for optimal texture |
| Whole Milk 🥛 | 1 cup | 2% or whole preferred |
| Granulated Sugar 🍚 | ¾ cup | Fine granulated for smoothness |
| Pure Vanilla Extract 🌿 | 2 tbsp | High-quality, not imitation |
| Salt 🧂 | ¼ tsp | Fine sea salt preferred |
| Ice Cubes ❄️ | 4 cups | Freshly made for efficiency |
| Cold Water 💧 | 1 cup | For rapid chilling |
The dairy base makes all the difference. Heavy whipping cream delivers that signature richness, while whole milk balances the texture—never icy. For the best results, grab organic cream from Whole Foods or the store’s premium brand. Sugar should be fine granulated (like Domino or C&H) to dissolve smoothly. Vanilla extract? Nielsen-Massey or McCormick Pure are reliable choices—skip imitation at all costs. The salt is subtle but essential for depth; Maldon flaky sea salt works beautifully if you’re feeling fancy, but regular fine sea salt is fine.
No heavy cream? Full-fat coconut milk works in a pinch, though texture will differ slightly. Short on vanilla? Vanilla bean paste or scraped seeds intensify the flavor—just halve the amount. The ice cubes and cold water are non-negotiable for the no-churn method; pre-freeze your ice cubes and keep the water chilled in the fridge. If you’re using an ice cream maker, you can skip the water bath, but the no-churn method guarantees foolproof results without specialized equipment. For a quicker prep, pre-measure everything before heating to streamline the process.
This ice cream freezes beautifully—best texture after 24 hours in the freezer. For serving, let it sit at room temperature for 5-10 minutes for perfect scooping. Store in an airtight container with parchment paper between layers to prevent freezer burn. It keeps for up to 2 weeks in the freezer, though I’ve never had leftovers last that long. Portion into small containers for individual servings—ideal for parties or late-night cravings.
Why You’ll Love This Recipe
- No-Fuss Churn: I swear by this method—just four ingredients, no eggs or fancy gadgets. Heat the cream and milk with sugar until it’s steaming but not boiling, steep in vanilla for 20 minutes, then chill. That’s it. The ice cream maker does the rest while I’m still scraping the pot.
- Velvet Smooth Richness: The secret’s in the ratio—equal parts cream and milk—plus that pinch of salt to cut the sweetness. The result? Creamy enough to melt on your tongue but sturdy enough to scoop, with vanilla that hits like a warm hug. (Yes, even on a Tuesday night.)
- Weeknight Flexibility: This makes exactly one quart, so I can freeze half now and save the rest for when I’m craving something special. Or split it into small containers to toss in lunches—kids love it, and it’s way cheaper than store-bought pints.
- Budget-Friendly Luxury: Heavy cream and whole milk are already in my fridge, and sugar costs pennies. A little vanilla extract goes a long way, and the salt? Just a pinch. For what tastes like a gourmet dessert, this is my go-to when I want to feel fancy without breaking the bank.
Step-by-step instructions for homemade vanilla ice cream
This no-churn method delivers creamy, restaurant-quality ice cream in minutes with no ice cream maker.
Whisk Cream, Milk, Sugar, and Salt Until Smooth
In a medium bowl, combine the 1 cup heavy whipping cream, 1 cup whole milk, 0.75 cup granulated sugar, and 0.25 teaspoon salt. Using a whisk or electric mixer, beat on medium-high speed for 3-4 minutes until the sugar fully dissolves and the mixture is completely smooth. You’re looking for a homogeneous texture—no graininess should remain.
This step ensures proper emulsification, which prevents ice crystals from forming later. The sugar should dissolve completely, and the mixture should feel slightly thicker as the cream begins to stabilize. If you notice any sugar settling at the bottom, whisk it back into the mixture before proceeding.
Add Vanilla Extract and Mix Thoroughly
Remove the bowl from the mixer and stir in the 2 tablespoons pure vanilla extract using a rubber spatula. Fold it gently but thoroughly to distribute the flavor evenly. The mixture should now smell rich and aromatic—this is your quality check. If the vanilla extract is high-quality, you’ll notice a deep, complex vanilla aroma rather than an artificial scent.
Here’s the thing—vanilla extract is potent, so don’t overmix after adding it. A few gentle folds are all you need to incorporate it without developing air bubbles that could affect texture. Let the mixture sit at room temperature for 2-3 minutes while you prepare the ice bath.
Prepare the Ice Bath for Rapid Chilling
Fill a large bowl or container with 4 cups ice cubes and add the 1 cup cold water. This creates an ice bath that will chill the mixture rapidly without freezing it. Place the bowl with your cream mixture in the center of the ice bath, ensuring it’s fully submerged or nearly so. The goal is to chill the mixture to 38-40°F—just above freezing—within 15-20 minutes.
Stir the mixture gently every 3-4 minutes during chilling to prevent a skin from forming on the surface. You’ll see the mixture begin to thicken slightly as it cools. This step is critical—if the mixture isn’t properly chilled before freezing, you’ll end up with large ice crystals instead of smooth, creamy ice cream.
Freeze Until Firm (2-4 Hours)
Once the mixture reaches 38-40°F (it should feel cold to the touch but not frozen), transfer it to a 1-quart airtight container or freezer-safe bowl. Cover the surface with plastic wrap pressed directly against the mixture to minimize ice crystal formation. Place the container in the freezer and freeze for 2-4 hours, or until completely firm.
For best results, I recommend freezing for at least 3 hours to ensure a clean scoop. The ice cream should be solid enough to hold its shape when scooped but still creamy rather than rock-hard. If you’re short on time, you can speed up freezing by placing the container in the coldest part of your freezer or using a fan to circulate air around it.
Serve Immediately for Creamiest Texture
Remove the ice cream from the freezer 10-15 minutes before serving to soften slightly. This allows it to achieve that perfect scoopable consistency. Use a spoon to gently break up any ice crystals that may have formed on the surface—this ensures a smooth texture with every bite.
The result should be rich, velvety vanilla ice cream with a perfect balance of sweetness and creaminess. Serve immediately for the creamiest texture, or store in the freezer for up to 2 weeks in an airtight container. For best flavor, consume within 3-5 days when possible—fresh homemade ice cream tastes far superior to store-bought after a few days.
Pro Tips For Making 1 Quart Vanilla Ice Cream
- STRAIN THE DAIRY: Fat clumps in heavy cream and milk are the enemy of silky ice cream. After mixing your cream and milk, pour the mixture through a fine-mesh strainer into your saucepan—yes, even if it looks fine. I learned this the hard way when my first batch had tiny specks of butterfat that turned into icy grit after freezing.
- WHISK THE SUGAR FIRST: Dissolve the sugar in the warm milk mixture before adding the cream. Whisk vigorously for 30 seconds—this prevents grainy spots later. I used to just toss it in and stir, but now my ice cream has that smooth, professional texture instead of sandy patches.
- SALT THE MIXTURE: Add the pinch of salt with the vanilla extract, not after. It balances the sweetness and rounds out the flavor—trust me, it’s not just for seasoning. Skip this, and your ice cream will taste flat, even if everything else is perfect.
- CHILL THE MIX LONGER: Don’t rush the 4-hour fridge chill—give it 5 or 6 if you can. Cold mix churns faster and holds its shape better in the freezer. I used to cut corners here, and my ice cream would either turn icy or take forever to soften. Now it’s always creamy right out of the container.
Serving suggestions for this recipe
Classic Toppings
Fresh berry compote takes this ice cream to the next level—simmer 1 cup mixed berries (strawberries, blueberries, or raspberries) with 1 tbsp sugar and 1 tsp lemon juice until thickened.
The natural sweetness and acidity cut through the richness beautifully. I also love a sprinkle of crushed graham crackers or toasted almonds for crunch. 🍓
Warm Sauce Pairings
Drizzle with homemade chocolate sauce made by melting ½ cup dark chocolate chips with ¼ cup heavy cream and 1 tbsp butter. For a lighter option, try caramelized peaches—simmer 1 cup sliced peaches with 1 tbsp brown sugar and ½ tsp cinnamon until tender.
The warm fruit contrasts perfectly with the cold ice cream.
Boozy Upgrades
Add a splash of vanilla-infused bourbon or espresso liqueur to the base before freezing—just 1 tbsp enhances the flavor without overpowering. For a fun twist, mix 1 oz coffee liqueur into a scoop of ice cream and top with whipped cream.
I recommend Kahlúa or Mr. Black for the best results. 🍸
Bread & Dessert Pairings
Serve alongside warm chocolate chip cookies or shortbread cookies for a classic combo. For something lighter, try angel food cake or sponge cake—the delicate texture pairs wonderfully with the creamy ice cream. If you’re feeling adventurous, pair it with salted caramel popcorn for a sweet-and-salty crunch.
Seasonal Variations
In summer, add fresh mint leaves or toasted coconut flakes for a tropical vibe. For fall, try cinnamon-dusted pecans or pumpkin spice whipped cream. Winter calls for cranberry sauce or gingersnap crumbles—both add a festive touch. The possibilities are endless, but start with these crowd-pleasers! ✨
Make-Ahead Serving Tips
For parties, portion the ice cream into small paper cups or mason jars before freezing. Add toppings like sprinkles, crushed cookies, or fruit** to the bottom of each container so they’re ready to serve.
Store in the freezer until ready to enjoy—just let them sit for 5 minutes before serving for the perfect scoop. 💫
Nutrition facts
Frequently asked questions
Can I make this vanilla ice cream without an ice cream maker?
This recipe uses a no-churn method that works perfectly without specialized equipment. The key is rapid chilling in an ice bath before freezing—just combine 4 cups ice cubes with 1 cup cold water and chill the mixture to 38-40°F before transferring to the freezer. This guarantees a smooth, creamy texture without ice crystals.
Why does my homemade ice cream get icy after freezing?
Icy texture usually means the mixture wasn’t properly chilled before freezing. Stir the mixture gently every 3-4 minutes during the ice bath to prevent skin formation, and ensure it reaches 38-40°F before freezing. Also, press plastic wrap directly against the surface when storing to minimize air exposure. For extra creaminess, add 1 tablespoon corn syrup to the base.
How can I make this recipe dairy-free?
Swap the heavy cream for full-fat coconut milk and use unsweetened almond milk instead of whole milk. Replace the vanilla extract with vanilla bean paste or 1 teaspoon vanilla powder. The texture will be slightly lighter but still delicious. For extra richness, add 2 tablespoons coconut cream to the base.
What’s the best way to store leftover ice cream?
Transfer to an airtight container with parchment paper between layers to prevent freezer burn. Store for up to 2 weeks, but for best flavor, enjoy within 3-5 days. If the surface gets icy, stir gently before serving. For individual portions, freeze in small mason jars—they’re perfect for single servings.
Can I adjust the sweetness level?
Yes! Start with the 0.75 cup sugar as written, but reduce to 0.5 cup for less sweetness or increase to 1 cup for a richer dessert. For a more natural sweetener, replace sugar with 0.5 cup honey or 0.6 cup maple syrup. Taste before freezing—adjust gradually to avoid overwhelming the vanilla flavor.

- 32 Oz Cream Cheese Cheesecake Recipe: Silky Smoothness With No Cracking - October 11, 2026
- 8×8 Pan Dump Cake Recipe: One-Bowl Wonder with Fudgy Layers - October 11, 2026
- 10-Layer Cake Recipe: Stacked Height With Buttery Vanilla Layers - October 11, 2026