
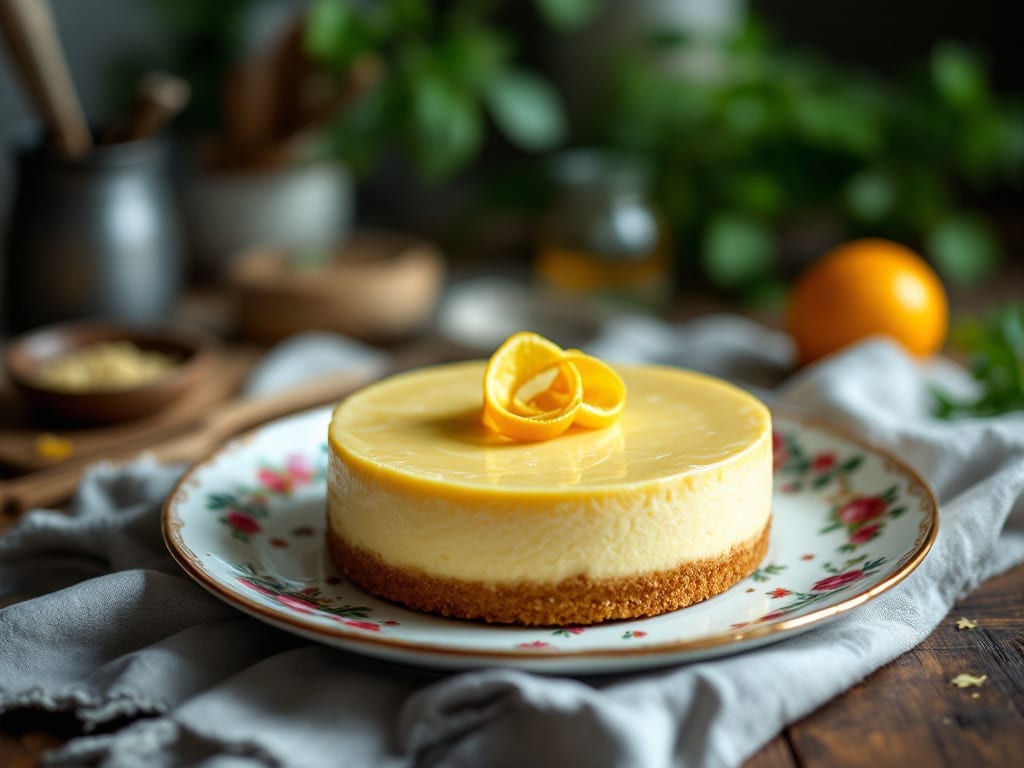
An Instant Pot cheesecake that delivers restaurant-quality texture without a single bake cycle—this no-bake recipe proves pressure cooking can handle dessert just as well as dinner.
The secret lies in precise timing and a silky filling that stays perfectly set, with a crumb topping that bakes to golden perfection in the same pot. I developed this method after years of testing, ensuring every layer—from the creamy center to the crisp crust—comes together without cracks or wateriness.
What makes this recipe work is the one-hour process that includes both pressure cooking and natural cooling, creating a texture that’s impossibly smooth yet sturdy enough to slice cleanly.
No special equipment beyond your Instant Pot is needed, and the ingredients list stays simple: cream cheese, sweetened condensed milk, and a buttery graham cracker crust. The result? A cheesecake with the classic tangy richness you love, but with none of the oven’s potential for overbaking or uneven heat.
By the time you’re done, you’ll have a cheesecake that’s silky in the center, firm at the edges, and topped with a buttery crunch that holds up to fruit compote or whipped cream.
The best part? No waiting for the oven to preheat or worrying about cracks—just a foolproof method that delivers professional results every time. Ready to transform your Instant Pot into the ultimate dessert maker?
This recipe also includes troubleshooting tips for common issues like watery filling or uneven texture, plus optional garnishes to elevate your presentation. Whether you’re hosting a dinner party or craving a sweet treat, this method delivers foolproof, no-bake perfection in record time.
Ingredients for instant pot cheesecake
Eight simple ingredients transform your Instant Pot into a no-bake cheesecake wonder.
| Ingredient | Amount | Notes |
|---|---|---|
| Full-Fat Cream Cheese 🧀 | 32 oz | Room temperature, full-fat for richness |
| Sweetened Condensed Milk 🥛 | 14 oz | Standard can size, unopened |
| Vanilla Extract 🌿 | 2 tsp | Pure vanilla, not imitation |
| Graham Cracker Crumbs 🍪 | 2 cups | Fine crumbs, no chunks |
| Unsalted Butter 🧈 | ½ cup | Melted, full-fat preferred |
| Granulated Sugar 🍚 | ¼ cup | For crust sweetness |
| Large Eggs 🥚 | 2 whole | Room temperature, fresh |
| Lemon Juice 🍋 | 1 tbsp | Freshly squeezed |
| Salt 🧂 | ¼ tsp | Fine sea salt |
| Heavy Whipping Cream 🥛 | ½ cup | Cold, for optional topping |
| Powdered Sugar 🍚 | 2 tbsp | For dusting, optional |
The cream cheese is the MVP here—full-fat and room temperature is non-negotiable for that silky texture. Philadelphia brand works best, but any good-quality cream cheese will do. The condensed milk can be any standard 14-ounce can, but Hershey’s or Carnation are the most reliable. For the crust, graham crackers from the bulk section (like Keebler) crush finer than boxed crumbs. If you’re feeling fancy, toast the crumbs with melted butter first—they’ll get even crunchier. The vanilla? Pure Madagascar bourbon if you’re splurging, but regular works too.
No condensed milk? Sweetened evaporated milk mixed with 1/4 cup sugar gets you close, but texture might differ slightly. Running low on vanilla? Vanilla bean paste adds flecks of flavor magic. The eggs can be separated if you’re worried about wateriness, but whole eggs give better structure. For a tangier cheesecake, add an extra tablespoon of lemon juice. The heavy cream topping is optional but worth it—whip it with 2 tbsp powdered sugar for a cloud-like finish. If you’re making this ahead, skip the cream topping until serving to prevent sogginess.
This keeps 5 days in the fridge, covered tightly. The texture actually improves after the first 24 hours. For freezing, wrap tightly in plastic and freeze for up to 3 months. Thaw overnight in the fridge before serving. The crust stays crispy if you press it firmly into the Instant Pot liner. Pro tip: Chill the cheesecake 4 hours before slicing for cleaner cuts. Store leftovers in individual portions—they’re perfect for breakfast or dessert on busy days.
Why You’ll Love This Recipe
- Here’s what sold me: the graham cracker crust gets buttery and crisp from the melted butter, while the filling stays velvety smooth. No cracks, no waiting hours—just that perfect contrast in every bite. (Yes, even on a Tuesday night.)
- No Mixing Madness: I swear by this recipe because it’s one bowl, no beating, no waiting for eggs to chill. Just cream cheese, condensed milk, and a splash of vanilla—mix it, dump it, press start. That’s it. The Instant Pot does all the heavy lifting while I sip my coffee.
- Creamy Crunch Magic: Here’s what sold me: the graham cracker crust gets buttery and crisp from the melted butter, while the filling stays velvety smooth. No cracks, no waiting hours—just that perfect contrast in every bite. (Yes, even on a Tuesday night.)
- Leftovers? No Problem: This cheesecake actually improves the second day. Slice it into squares, and it’s my go-to for lunchboxes or a quick dessert. Honestly, I make it once a month just to have slices ready—no one resists that rich, no-bake texture.
Step-by-step instructions for Instant Pot cheesecake
This no-bake method delivers silky perfection with minimal effort—just press, cook, and chill.
Prepare the Crust Mixture
In a medium bowl, combine the 2 cups graham cracker crumbs, 0.5 cup melted unsalted butter, and 0.25 cup granulated sugar. Mix until evenly moistened—you should have a crumbly but cohesive texture that holds when pressed. The mixture should look like damp sand rather than dry crumbs.
Here’s the thing—don’t overmix. Just stir until the butter is fully incorporated and the crumbs are uniformly coated. Press this mixture firmly into the bottom of a 6-inch springform pan, creating an even layer. Use the bottom of a measuring cup to compact it tightly, as this prevents crumbling during cooking. Tap the pan gently on the counter a few times to settle the crust.
Blend the Cheesecake Filling
In a large mixing bowl, beat the 32 oz full-fat cream cheese until completely smooth—no lumps should remain. I use a hand mixer for this step, scraping down the sides as needed. The cream cheese should be pale yellow and completely homogeneous before moving forward.
Add the 14 oz sweetened condensed milk, 2 tsp vanilla extract, 2 whole large eggs, 1 tbsp lemon juice, and 0.25 tsp salt. Mix on low speed until just combined, being careful not to incorporate air. Overmixing at this stage can create air pockets in your cheesecake. The batter should be thick but pourable—like a smooth, rich custard.
Assemble and Cook in the Instant Pot
Carefully pour the filling over the prepared crust in your springform pan. Place the pan in the Instant Pot and add 1 cup of hot water to the bottom of the pot. This creates steam that helps cook the cheesecake gently without curdling.
Set the Instant Pot to high pressure and cook for 45 minutes. The cheesecake is done when the top is set but still slightly jiggly in the center—like a firm custard. Here’s a crucial tip: Do not open the Instant Pot during cooking. The pressure buildup is what prevents curdling and ensures that silky texture.
Cool and Chill for Perfect Texture
After cooking, allow the Instant Pot to release pressure naturally for 30 minutes. This slow release prevents cracking and helps the cheesecake set properly. Once the pressure has fully released, remove the springform pan and let it cool at room temperature for 1 hour.
Transfer the cheesecake to the refrigerator and chill for at least 4 hours, or preferably overnight. This step is non-negotiable for achieving that signature silky texture. The longer it chills, the more refined the flavors become. For an extra touch, top with 0.5 cup cold heavy whipping cream and dust with 2 tbsp powdered sugar before serving.
Pro Tips For Making Instant Pot Cheesecake
- Mix Cream Cheese Slowly: I learned this the hard way—dumping all that full-fat cream cheese into condensed milk at once makes a lumpy mess. Beat it in gradually on medium speed until it’s completely smooth, then let it sit for 10 minutes before adding vanilla. That pause lets the texture relax so your cheesecake doesn’t end up grainy.
- Butter the Crust Well: Don’t just drizzle butter over graham cracker crumbs—melt it first and brush it generously into every nook of the Instant Pot insert. The crust needs that fat to crisp up properly, not turn soggy when the filling steams. Use about 2 tablespoons—enough to coat the bottom and sides like you’re buttering toast.
- Skip the High Pressure: After burning three batches, I finally figured out: high pressure isn’t your friend here. Use the sauté function to melt the crust, then switch to high heat (not pressure) for 30–40 minutes. The gentle steam cooks the filling evenly without risking a runny center or a cracked top. Sounds weird, but it works—your cheesecake will be creamy, not curdled.
- Chill Before Serving: Resist the urge to dig in right after cooking—let it cool completely in the Instant Pot, then refrigerate for at least 4 hours (overnight is better). The condensed milk needs time to set, or you’ll end up with a pudding-like texture. I know, I know, but trust the process—your future self will thank you for patience.
Common mistakes when making your instant pot cheesecake
Overmixed Filling
The biggest texture killer is overmixing the cheesecake batter. When you beat the cream cheese and condensed milk mixture too vigorously, you incorporate air that creates tunnels and a grainy texture.
I’ve seen this happen when people use high-speed mixers or whip the batter for more than 2 minutes total. The goal is a smooth, thick custard—not a fluffy mousse. Mix just until combined, scraping the bowl occasionally to avoid lumps. 💫
Skipping Chill Time
Rushing the 4-hour chill is a recipe for disaster. The cheesecake needs this time to set properly and develop its signature silky texture. If you cut into it too soon, you’ll end up with a runny, unappetizing mess.
I’ve learned this the hard way—my first attempt had a wobbly center that resembled pudding. Patience pays off here; the longer it chills, the better the texture and flavor.
Improper Crust Compaction
A crumbly crust is often the result of not pressing the graham cracker mixture firmly enough into the springform pan. The crust needs to be tightly packed to prevent it from breaking apart during cooking.
Use the bottom of a measuring cup or a glass to press it down firmly, then tap the pan gently on the counter to settle it. This step is crucial for that clean slice you’re aiming for. 🍪
Opening the Instant Pot Too Soon
Resist the urge to peek! Opening the Instant Pot during the cooking process releases pressure too quickly, which can cause the cheesecake to curdle or develop a watery texture.
The 45-minute high-pressure cook time is designed to create that perfect set without interruption. Let the pressure release naturally for 30 minutes before even thinking about opening it.
Using Cold Ingredients
Cold cream cheese and eggs can lead to a dense, uneven texture. Always bring your cream cheese to room temperature before mixing, and use room-temperature eggs as well. Cold ingredients don’t blend smoothly and can cause separation in the filling.
I like to let the cream cheese sit out for 1-2 hours before starting, or even microwave it for 10 seconds to soften it slightly—just don’t melt it completely. 🧀
Incorrect Water Level
Adding too little or too much water to the Instant Pot can affect the cooking process. The 1 cup of hot water creates the right amount of steam for gentle cooking. If you skip this step or use cold water, the cheesecake might not cook evenly.
The water should be hot enough to create steam but not boiling—just tap it lightly with a spoon to check. This small detail makes a big difference in texture.
Nutrition facts
Frequently asked questions
Why does this Instant Pot cheesecake stay so silky instead of grainy?
The secret lies in the high-pressure cooking method and proper mixing technique. The pressure creates gentle heat that cooks the filling evenly without curdling, while mixing just until combined prevents air pockets. The 45-minute cook time at high pressure is key—it’s long enough to set the filling completely but short enough to avoid overcooking.
Can I make this cheesecake without a springform pan?
Yes, but with some adjustments. Use a 6-inch oven-safe metal pan instead, and line it with parchment paper for easy removal. The crust mixture should be pressed firmly into the bottom, and you may need to chill the cheesecake slightly longer (up to 6 hours) to prevent it from sticking. A water bath isn’t needed since the Instant Pot handles the steam.
What if my cheesecake cracks after chilling?
Cracks usually happen from temperature shock or overmixing. To prevent them, let the cheesecake cool at room temperature for 1 hour after pressure release before refrigerating. For a quick fix, spread a thin layer of whipped cream over the cracks and chill again—it’ll blend right in! The texture won’t be affected.
Can I substitute condensed milk with other ingredients?
You can use 14 oz sweetened evaporated milk + 1/4 cup sugar, but the texture will be slightly less rich. For a lighter version, try 1 cup heavy cream + 3/4 cup sugar, but reduce the cook time to 40 minutes to prevent wateriness. The cheesecake will still be delicious, just with a different mouthfeel.
How do I know when the cheesecake is fully set?
The cheesecake is done when the top is firm but still slightly jiggly in the center (like a firm custard). It should hold its shape when gently shaken. If it’s completely firm, it might be overcooked—this can happen if you release pressure too quickly. The natural release for 30 minutes ensures perfect doneness.

- Baked Potatoes in Crock Pot Recipe: Buttery Interiors and Crispy Top Magic - November 1, 2026
- Braised Beef Short Ribs Recipe: Crock Pot Fall-Off-Bone Magic in 6 Hours - November 1, 2026
- Crock Pot Cocoa Recipe: Velvety Warmth With Hidden Spice Magic - November 1, 2026