
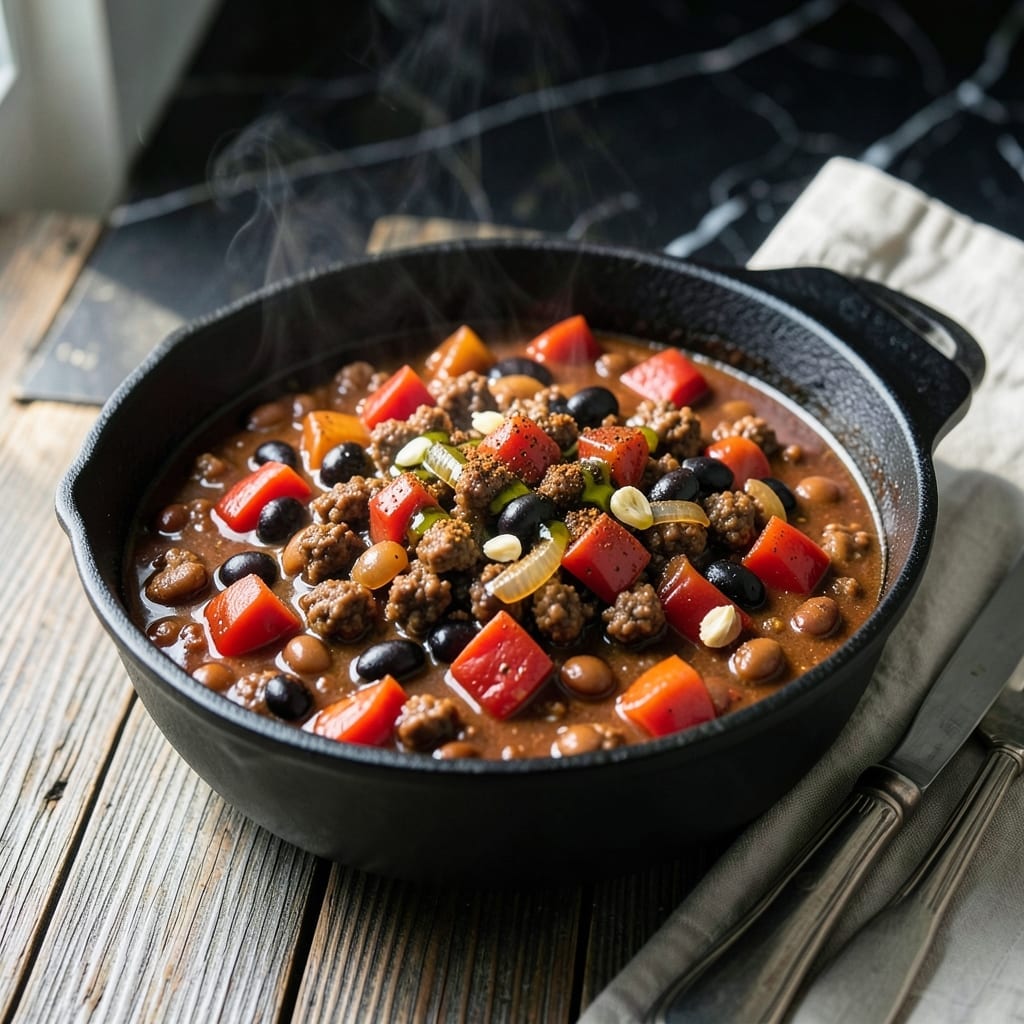
This Instant Pot chili delivers bold flavors without the all-day simmer. The pressure cooker transforms simple ingredients into a hearty meal with deep, developed taste in a fraction of traditional cooking time.
Brown the ground beef directly in the pot, then add beans, tomatoes, and spices for a one-pot solution. The sealed environment intensifies every flavor, creating a rich, satisfying dish with minimal effort.
In under 45 minutes, you’ll have a thick, robust chili that tastes like it cooked for hours. The meat becomes tender, the beans soft, and the sauce perfectly balanced with just the right amount of heat.
Serve it with your favorite toppings for a meal that’s both quick and deeply satisfying. This method proves great chili doesn’t require all day to achieve perfection.
Ingredients for Instant Pot Chilli
Pantry staples plus a quick stop at the butcher counter. Nothing exotic here.
| Ingredient | Amount | Notes |
|---|---|---|
| Ground Beef 🥩 | 1 ½ lb | 80/20 lean-to-fat ratio preferred |
| Yellow Onion 🧅 | 1 whole | Medium, finely diced |
| Garlic Cloves 🧄 | 4 cloves | Minced for depth of flavor |
| Red Bell Pepper 🌶️ | 1 whole | Seeds removed, diced |
| Kidney Beans 🫘 | 1 can | 15 oz can, drained and rinsed |
| Black Beans 🫘 | 1 can | 15 oz can, drained and rinsed |
| Diced Tomatoes 🍅 | 1 can | 28 oz can, with juices |
| Tomato Paste 🍅 | 2 tbsp | For richness and thickness |
| Beef Broth 🥣 | 2 cups | Low-sodium preferred |
| Chili Powder 🌶️ | 2 tbsp | Mild or hot variety |
| Ground Cumin 🌿 | 1 tbsp | Toasted for deeper aroma |
| Smoked Paprika 🌶️ | 1 tsp | Adds signature smoky depth |
| Salt 🧂 | 1 tsp | Kosher or sea salt preferred |
| Black Pepper 🌶️ | ½ tsp | Freshly ground for best flavor |
| Olive Oil 🫒 | 1 tbsp | For browning the beef |
The beef is key here. 80/20 ground chuck gives you that rich, meaty base—leaner blends can taste dry. Costco or butcher shops have the best quality, but grocery store stuff works in a pinch. Look for bright red color with good marbling. The onions and peppers? Any yellow onion will do, and red bell peppers add a touch of sweetness (frozen works too, no judgment).
No kidney beans? Pinto beans at a 1:1 swap work just fine. Fresh tomatoes instead of canned? Double the amount and cook a bit longer to reduce the liquid. If you’re missing chili powder, a mix of cumin, paprika, and cayenne gets you close. The smoked paprika is non-negotiable though—it’s what gives this that slow-cooked depth in 45 minutes.
Leftovers taste even better the next day once everything melds. Keeps 4-5 days in the fridge, freezes for 3 months. I like to portion it into containers for easy lunches—just reheat and top with cheese or sour cream.
Why You’ll Love This Recipe
- Set It and Forget: I toss in the beef, onions, and bell peppers, seal the lid, and walk away—no stirring, no babysitting.
- Smoky Depth: The garlic and beef simmer together under pressure, creating this rich, layered flavor that tastes like it cooked all day.
- Feeds an Army: I’ve served this chili at football parties and packed leftovers for lunch all week—always a hit.
- Budget Stretcher: Honestly, ground beef and kidney beans go so far, and it’s still hearty enough to feel like a real meal.
Step-by-Step Instructions for Instant Pot Chili
Here’s the method that delivers deep, layered flavors without the long simmer time.
Step 1: Brown the Ground Beef and Aromatics
Set your Instant Pot to the Sauté function on Normal heat. Add the 1 tbsp Olive Oil and let it heat for 30 seconds until shimmering. Add the 1.5 lb Ground Beef and cook, breaking it up with a wooden spoon, for 5-7 minutes until it’s no longer pink.
Once the beef is browned, add the diced Yellow Onion, Red Bell Pepper, and minced Garlic Cloves. Cook for another 3-4 minutes until the vegetables soften and the onion becomes translucent. This builds the flavor base that makes this dish so rich.
Step 2: Add Spices and Tomato Products
Stir in the 2 tbsp Chili Powder, 1 tbsp Ground Cumin, 1 tsp Smoked Paprika, 1 tsp Salt, and 0.5 tsp Black Pepper. Cook for 1 minute until the spices become fragrant—this blooms their flavors and ensures they’re evenly distributed.
Add the 2 tbsp Tomato Paste and cook for another 30 seconds, stirring constantly. The paste should darken slightly, which deepens its sweetness and removes the raw taste. This step is crucial for building complexity in the final dish.
Step 3: Incorporate Liquids and Beans
Pour in the 1 can Diced Tomatoes with juices, scraping the bottom of the pot to deglaze and release any browned bits. These bits, called the fond, are packed with flavor and will dissolve into the sauce.
Add the 2 cups Beef Broth, 1 can Kidney Beans, and 1 can Black Beans (both drained and rinsed). Stir everything together, making sure to scrape the bottom one last time to prevent any risk of burning during pressure cooking.
Step 4: Pressure Cook to Perfection
Secure the lid on your Instant Pot and set the valve to Sealing. Cook on High Pressure for 10 minutes. The pot will take about 10-15 minutes to come to pressure before the cooking time begins.
Once the cooking cycle completes, let the pressure release naturally for 10 minutes, then switch the valve to Venting to release any remaining pressure. This natural release helps the flavors meld together and prevents the beans from breaking apart.
Step 5: Adjust and Serve
Open the lid and give the chili a good stir. If it seems too thin, let it sit on the Sauté function for 3-5 minutes to thicken. Taste and adjust seasoning—this is the moment to fine-tune the balance of salt and spices.
Let it rest for 5 minutes before serving to allow the flavors to fully develop. The chili should have a thick, hearty consistency with tender beans and a rich, deeply flavored sauce. Serve hot with your favorite toppings.
Pro Tips For Making Instant Pot Chilli
- Brown the Beef First: I learned this the hard way—dumping raw ground beef in with everything else gives you gray, bland chili. Sear it in the Instant Pot first on “Sauté” until deeply browned, about 5-7 minutes, then drain most of the fat.
- Dice Uniformly: Cut your yellow onion, red bell pepper, and garlic into small, even pieces—about 1/4-inch. Sounds fussy, but it makes a real difference in how the flavors meld and how the chili looks.
- Skip Canned Beans: After a few mushy batches, I switched to dried kidney beans—just soak them for 2 hours first. They hold their shape better and taste fresher than canned, even if it adds a little prep time.
- Deglaze Thoroughly: Once you’ve browned the beef and veggies, pour in a splash of broth or water and scrape the bottom hard with a wooden spoon. Those browned bits are pure flavor, and skipping this step risks a “Burn” notice on your Instant Pot.
Dietary Considerations for This Dish
Gluten-Free Friendly
This dish is naturally gluten-free as written, with no wheat, barley, or rye ingredients. All canned goods, spices, and broth should be verified as certified gluten-free if you have celiac disease. I always check labels on my chili powder and beef broth just to be safe. 💪
Low-Carb Option
For a keto-friendly version, omit the kidney beans and black beans entirely. Replace with 1 lb diced zucchini or cauliflower rice to maintain texture. The ground beef and flavorful broth will still make this hearty and satisfying.
Dairy-Free Adaptation
Skip the cheese toppings or use dairy-free alternatives like cashew-based sour cream or vegan cheddar shreds. Brands like Daiya or Violife melt well. The chili itself remains rich and flavorful without any dairy at all.
Vegetarian Variation
Swap the 1.5 lb ground beef for 1.5 lb plant-based crumbles like Beyond Meat or Impossible. You can also use 1 lb lentils (dry) for a budget-friendly option. Add 1 tbsp soy sauce for umami depth. 🥗
Sodium Control
To reduce sodium, use no-salt-added canned tomatoes and beans, and opt for low-sodium beef broth. I often make my own broth to control the salt content. Taste before adding the final 1 tsp salt—you can always add more, but you can’t take it out.
Allergen Note
This recipe is free from the top 8 allergens (milk, eggs, fish, etc.) as written. However, always check your spice blends for hidden allergens like wheat or soy. When in doubt, make your own chili seasoning mix at home.
Nutrition Facts
Frequently Asked Questions
Can I use ground turkey instead of beef?
Yes! Ground turkey works perfectly. Use the same 1.5 lb amount and follow the recipe as written. The cooking time remains the same, but turkey may produce less fat to skim.
What if my chili is too thin?
Simmer it on the Sauté function for 3-5 minutes with the lid off. Mashing some beans can also help thicken it naturally.
Is it safe to double the recipe?
but don’t exceed 2/3 full capacity. Increase cooking time to 15 minutes for doubled batches. Always leave room for expansion!
How do I prevent the burn notice?
Deglaze thoroughly after browning and ensure nothing sticks to the bottom. Adding 1/2 cup extra broth can help prevent this common issue.

- 6 Oz Chocolate Chip Cookie Recipe: Perfectly Balanced Crispy Edges and Chewy Hearts - September 25, 2026
- 6-Inch Coffee Cake Recipe: Vanilla Bean Swirls and Buttery Streusel Topping - September 25, 2026
- 1 Hour Soup Recipe: Velvety Richness Without the Wait - September 25, 2026