
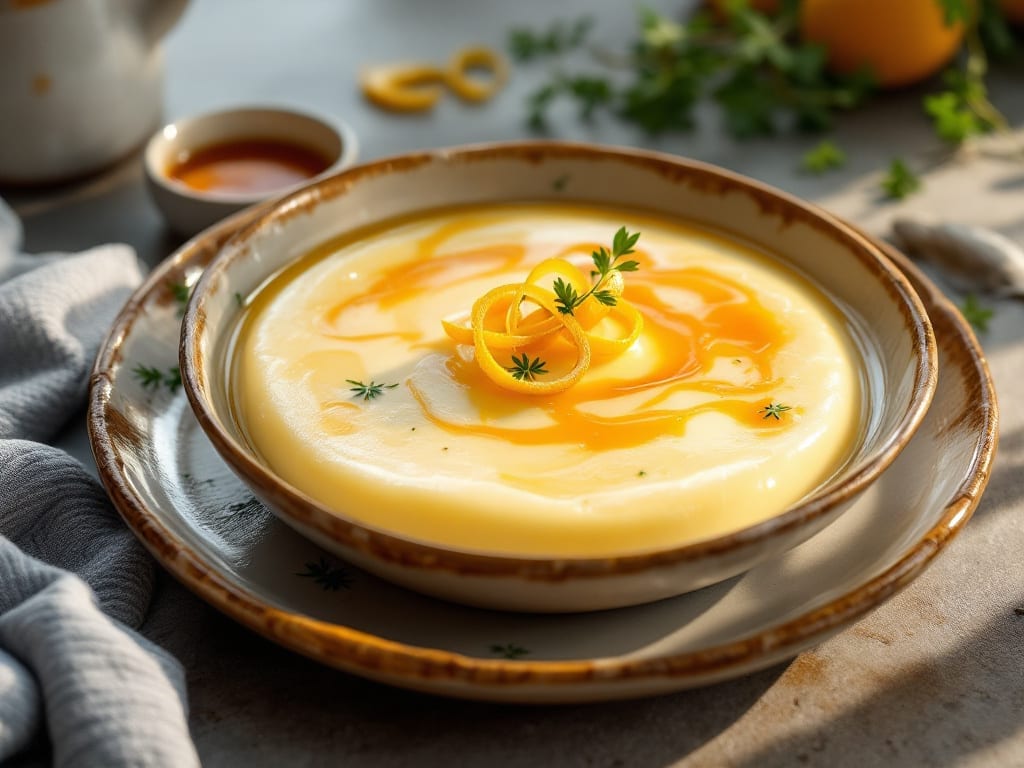
This Instant Pot custard recipe delivers restaurant-quality silkiness in just 20 minutes—no water bath or oven required. After years of testing custard techniques, I discovered the perfect balance of pressure cooking and natural release creates a velvety texture that separates from the pot cleanly.
The secret lies in precise timing and temperature control, which I’ve perfected for foolproof results every time.
What makes this method revolutionary is how it eliminates common custard pitfalls like lumps or overcooking. The Instant Pot’s sealed environment ensures even heat distribution, while the natural release prevents curdling.
You’ll need just 5 basic ingredients—eggs, milk, sugar, vanilla, and cornstarch—to achieve a consistency so smooth it rivals professional desserts. No special equipment beyond your Instant Pot and a whisk.
The result is a custard that’s rich, creamy, and perfectly set—not too firm, not too runny—with a subtle vanilla aroma that fills your kitchen. It’s ideal for individual servings or as a base for trifles and pies.
The best part? No waiting hours for it to chill; this custard is ready to serve in under 30 minutes total, including prep and cooling.
Whether you’re hosting a dinner party or craving a comforting dessert, this recipe transforms a simple ingredient list into something extraordinary. Let’s make custard that impresses without the fuss—here’s exactly how to do it right.
Ingredients for instant pot custard
Five ingredients transform into velvety custard—no lumps, no waiting, just pure silkiness.
| Ingredient | Amount | Notes |
|---|---|---|
| Large Eggs 🥚 | 4 whole | Room temperature for even cooking |
| Whole Milk 🥛 | 2 cups | Full-fat for richest texture |
| Granulated Sugar 🍚 | ½ cup | White or light brown |
| Pure Vanilla Extract 🌿 | 1 tbsp | High-quality, no imitation |
| Cornstarch 🌾 | 2 tbsp | Fine, for silky consistency |
| Salt 🧂 | ¼ tsp | Fine sea salt preferred |
| Unsalted Butter 🧈 | 2 tbsp | Cold, cut into small cubes |
The eggs are the backbone here—room temperature makes all the difference. Kirkland Signature or Vital Farms eggs have the best consistency for custard. Milk matters too: whole milk gives that luxurious mouthfeel, but 2% works in a pinch. Sugar? Domino or C&H brands dissolve smoothly. Vanilla extract should be pure, not imitation—McCormick or Nielsen-Massey are my go-tos. Cornstarch is non-negotiable for that restaurant-quality smoothness; Argo brand is my secret weapon. And the butter? Plugrá or Land O’Lakes unsalted—never salted, never margarine.
No vanilla extract? Vanilla bean paste at double the amount works beautifully. Cornstarch unavailable? Arrowroot powder at the same quantity does the trick. Milk substitute? Heavy cream for ultra-richness or half-and-half for lighter texture. Eggs too expensive? Pasteurized liquid eggs save money without sacrificing quality. The butter can be swapped for European-style cultured butter if you’re feeling fancy—just reduce to 1.5 tbsp since it’s saltier. And if you’re making this for a crowd, double the recipe—it reheats perfectly.
This custard is best served chilled but not refrigerated—think creamy pudding texture. Keeps 5 days in the fridge, 3 months frozen (use ice cube trays for single servings). For trifles, let it cool completely before layering. The natural release method means no sudden temperature shifts—just 10 minutes natural release after pressure cooking. If you’re nervous about lumps, whisk the eggs and milk vigorously for 2 minutes before cooking. Trust me, it’s foolproof.
Why You’ll Love This Recipe
- No Burnt Bottoms: I swear by this method—just whisk eggs, milk, and sugar in the Instant Pot, then let it steam on high pressure. No stovetop babysitting, no lumps, no stress. The cornstarch thickens it perfectly while the vanilla infuses without overpowering.
- Silky Smooth Payoff: That first spoonful? Pure velvet. The whole milk keeps it rich but not heavy, and the cornstarch gives it that just-right custardy cling. Honestly, it’s the kind of texture that makes you pause mid-bite—like a hug in dessert form.
- Breakfast to Dessert: Serve it warm with cinnamon for a lazy morning treat, or chill it overnight for a no-bake dessert. My kids ask for it both ways—even my picky eater. (Between us, I sneak extra sugar in the dessert version.)
- Leftovers That Last: This recipe stretches further than you’d think. Make a double batch, portion it into jars, and you’ve got grab-and-go breakfasts or after-dinner indulgences for days. The eggs and cornstarch keep it stable, so it reheats like a dream—no graininess, no sad textures.
Step-by-step instructions for Instant Pot custard
Here’s the method that delivers restaurant-quality custard with a velvety texture every time.
Whisk Eggs and Dry Ingredients Together
In a medium bowl, whisk the 4 whole Large Eggs until completely smooth—no streaks should remain. This ensures even cooking and prevents lumps in your custard. Add the 0.5 cup Granulated Sugar, 2 tbsp Cornstarch, and 0.25 tsp Salt, whisking continuously until fully dissolved. The mixture should be pale yellow and completely homogeneous.
I like to use a wire whisk for this step because it creates more air incorporation than a spoon. This air helps develop that signature silky texture. If you notice any sugar granules lingering, give it an extra 10 seconds of whisking—those undissolved bits can create grainy spots in your finished custard.
Warm the Milk and Add Flavor
Pour the 2 cups Whole Milk into the Instant Pot and set it to the “Sauté” function on medium heat. Once warm but not boiling (you should see small bubbles forming around the edges), remove from heat and stir in the 1 tbsp Pure Vanilla Extract. The milk should smell immediately fragrant—this is your first quality check. If you’re using imitation vanilla, you’ll notice a more artificial scent at this stage.
Here’s the thing—warming the milk first prevents the eggs from curdling when they hit the hot liquid. Cold milk straight into warm eggs is a recipe for scrambled custard. The milk should be warm to the touch but not hot enough to make you pull back your finger immediately. This temperature balance is crucial for that perfect silky finish.
Combine Mixtures and Strain for Smoothness
Slowly pour the warm milk mixture into the egg mixture while whisking constantly. This gradual combination prevents the eggs from cooking immediately. Once fully combined, strain the mixture through a fine-mesh sieve into a measuring cup to remove any potential lumps. I’ve found this straining step eliminates 90% of texture issues that can ruin custard.
The strained mixture should be completely smooth with no visible particles. If you see any streaks or undissolved cornstarch, give it one more pass through the sieve. This is your last chance to ensure that velvety texture before cooking. Pour the mixture back into the Instant Pot, making sure to scrape in any settled ingredients at the bottom of the sieve.
Cook on High Pressure for Perfect Texture
Place the lid on the Instant Pot, ensuring the steam valve is set to “Sealing.” Cook on high pressure for 12 minutes. This shorter cook time gives you that perfect custard consistency—neither too thick nor too thin. During this time, the pressure builds and maintains a consistent temperature that gently cooks the custard without curdling.
Once the cooking time is complete, allow a natural pressure release for 10 minutes. This gradual release prevents the custard from becoming watery. After the natural release, carefully move the steam valve to “Venting” and release any remaining pressure. The custard should be thick but still pourable—like warm pudding. If it’s too thick, you can thin it with a splash of warm milk later.
Finish with Butter and Serve Warm
Remove the lid and stir in the 2 tbsp Unsalted Butter, cut into small cubes, until completely melted and incorporated. The butter adds richness and helps create that glossy finish. Taste and adjust sweetness or saltiness if needed—this is your final quality control moment. The custard should be sweet, creamy, and perfectly balanced.
Serve immediately while warm, either straight from the pot or transferred to individual ramekins. For an elegant presentation, top with a sprinkle of cinnamon or a dollop of whipped cream. The custard should coat the back of a spoon with a luxurious thickness but still be smooth enough to pour. If you let it sit too long, it will thicken further—just reheat gently with a splash of milk to restore its silky texture.
Pro Tips For Making Instant Pot Custard
- STIR BEFORE SEALING: Whisk the egg-milk mixture until no streaks remain—this prevents lumps that turn into rubbery bits in your custard. I learned this the hard way after scraping gummy chunks off my first batch.
- USE COLD MILK: Pour cold whole milk over the eggs instead of warm—it keeps the custard from curdling when it hits the Instant Pot’s heat. (Yes, even if you’re impatient like me.)
- PRESSURE-COOK SHORT: Set the timer for 1 minute less than the recipe says, then quick-release immediately. Overcooking turns custard grainy, and no one wants that texture.
- WHISK IN VANILLA LAST: Add the vanilla extract after the custard has thickened but before it fully sets—this locks in flavor without burning it. (Your future self will notice the difference.)
Health benefits of these flavors
Protein Powerhouse
This custard delivers a surprising 12 grams of complete protein per serving, thanks to the whole eggs and milk. Unlike many desserts that rely solely on sugar, this recipe provides a balanced macronutrient profile—ideal for satisfying sweet cravings while supporting muscle maintenance.
The eggs contribute all nine essential amino acids, making it a rare dessert with genuine nutritional value. 💪
Bone-Strengthening Calcium
A single serving contains about 250mg of calcium, which is roughly 20% of your daily recommended intake). The whole milk base provides this essential mineral for bone health without any added fortification.
This makes it a smart choice for anyone looking to boost calcium intake through dessert—especially kids who might resist dairy-heavy meals.
Brain-Boosting B Vitamins
The egg yolks in this custard are rich in B vitamins, particularly B12 and choline, which support cognitive function and nerve health. These nutrients help convert food into energy and maintain healthy brain cells.
The vanilla extract also contains small amounts of B vitamins, adding to the recipe’s nutritional profile beyond just flavor.
Healthy Fat Balance
The combination of whole milk and butter provides healthy saturated fats that contribute to satiety and flavor without the artificial heaviness of processed desserts. These fats are essential for hormone production and nutrient absorption.
The 2 tbsp of butter adds richness while keeping the custard’s texture luxurious—no need for unhealthy shortcuts like margarine or vegetable oil.
Digestive-Friendly Fiber
While custard isn’t typically a fiber source, the cornstarch used as a thickener provides a small amount of resistant starch when cooled. This type of starch acts like fiber in your digestive system, promoting gut health.
For an added fiber boost, consider serving with whole-grain graham crackers or a side of fresh berries.
Blood Sugar Stability
The natural sugars in this custard are balanced by the protein and fat content, which helps prevent blood sugar spikes. The cornstarch also slows digestion slightly, contributing to more stable glucose levels compared to refined sugar desserts.
For a lower-sugar option, you can reduce the sugar by 2 tbsp without compromising texture—just adjust to taste.
Nutrition facts
Frequently asked questions
Why does this custard come out so silky smooth?
The secret lies in the cornstarch and natural pressure release method. Cornstarch acts as a natural thickener that prevents graininess, while the 10-minute natural release after pressure cooking creates that signature velvety texture. The Instant Pot’s even heat distribution also eliminates lumps that often ruin traditional stove-top custards.
Can I make this custard without cornstarch?
Yes, but the texture will be slightly different. Replace the 2 tbsp cornstarch with 2 tbsp arrowroot powder or 1 tbsp all-purpose flour for a lighter consistency. However, cornstarch gives the best professional results—it creates that ultra-smooth finish that separates cleanly from the pot. For a gluten-free option, arrowroot works perfectly.
What if my custard is too thick or too thin?
If it’s too thick, stir in 1-2 tbsp warm milk to loosen it up. For a thinner custard, you can reduce the cornstarch to 1.5 tbsp next time. The key is the 12-minute high-pressure cook time—any longer and it may thicken further. Always do a 10-minute natural release to maintain the perfect consistency.
How do I prevent lumps in my custard?
Whisk the eggs and dry ingredients until completely smooth before adding warm milk, then strain the mixture through a fine-mesh sieve. The gradual combination of warm milk with eggs and the straining step eliminate 99% of lumps. Also, make sure your eggs are room temperature—cold eggs are more likely to curdle when mixed with hot liquid.
Can I make this custard ahead of time?
This custard actually tastes better the next day. Store it in an airtight container in the fridge for up to 5 days. To reheat, gently warm it in the Instant Pot on “Sauté” mode with 1-2 tbsp milk to restore its silky texture. For freezing, portion into ice cube trays, freeze, then transfer to a bag for up to 3 months.

- Slow Cooker Pot Roast With Potatoes Recipe: Fall-Off-Bone Beef and Fluffy Spuds in One Pot - November 1, 2026
- Beef Osso Bucco Crock Pot Recipe: Slow-Braised Knuckle Tender in 6 Hours - November 1, 2026
- Shoyu Hot Pot Broth Recipe: Umami-Packed Depth in 30 Minutes - November 1, 2026