
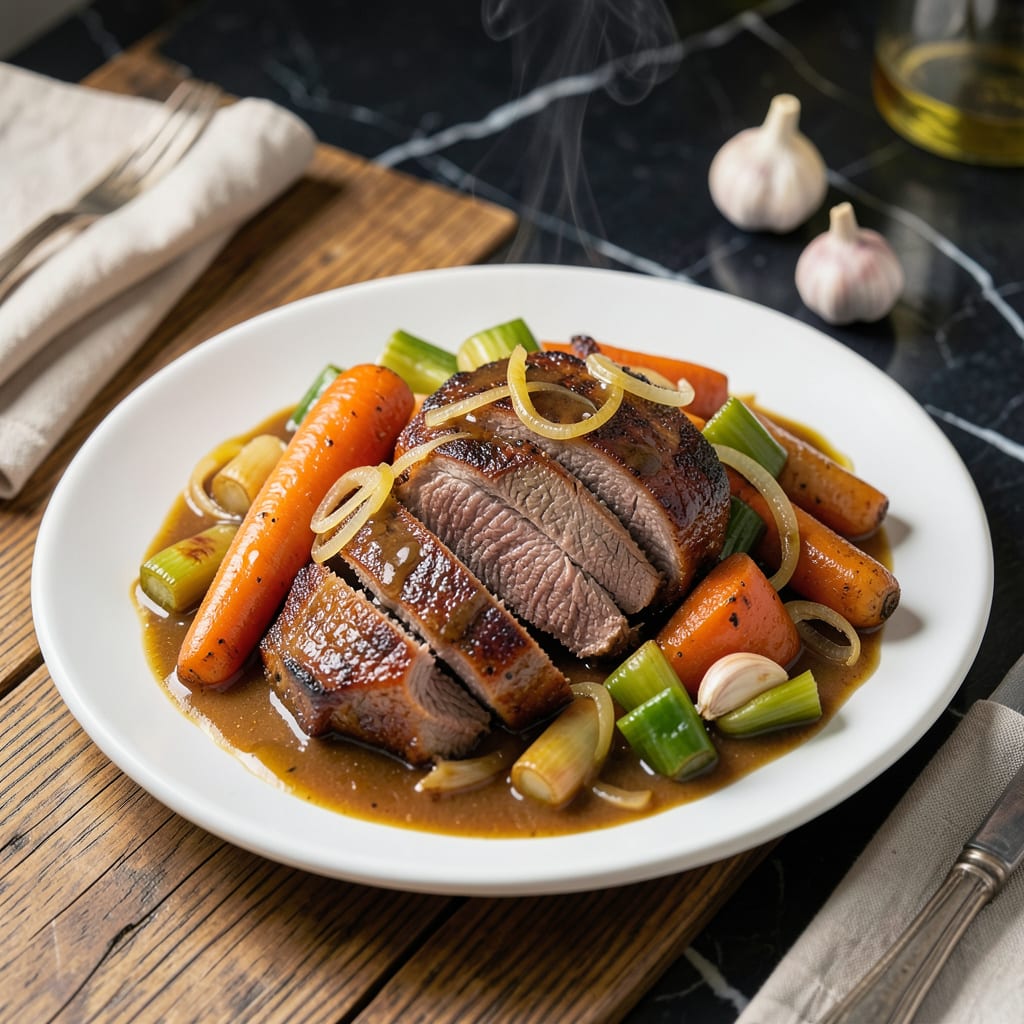
This Instant Pot Duo method transforms tough cuts into fork-tender perfection with minimal effort. The pressure cooker locks in moisture while building deep, rich flavors in the gravy.
By using the sauté function first, you develop a flavorful fond that becomes the base for an unbeatable sauce. The result is fall-apart meat and velvety gravy every time.
Ingredients for Instant Pot Duo Pot Roast
Simple ingredients build deep, rich flavors for fork-tender results every time.
| Ingredient | Amount | Notes |
|---|---|---|
| Chuck Roast 🥩 | 3 lb | Boneless, trimmed of excess fat |
| Olive Oil 🫒 | 2 tbsp | Divided for searing and sautéing |
| Yellow Onion 🧅 | 1 whole | Large, diced into chunks |
| Carrots 🥕 | 3 whole | Cut into 2-inch pieces |
| Celery Stalks 🌿 | 3 whole | Cut into 2-inch pieces |
| Garlic Cloves 🧄 | 4 cloves | Minced for depth of flavor |
| Beef Broth 💧 | 1 ½ cups | Low-sodium preferred for control |
| Red Wine 🍷 | ½ cup | Dry variety for acidity |
| Tomato Paste 🍅 | 2 tbsp | For umami richness in gravy |
| Worcestershire Sauce 💧 | 1 tbsp | Adds savory depth to sauce |
| Dried Thyme 🌿 | 1 tsp | Crushed between fingers to release oils |
| Dried Rosemary 🌿 | 1 tsp | Crushed for maximum flavor |
| Bay Leaf 🍃 | 1 whole | Removed before serving |
| Kosher Salt 🧂 | 1 ½ tsp | Divided for seasoning |
| Black Pepper 🌶️ | 1 tsp | Freshly ground preferred |
The chuck roast is non-negotiable here. Look for well-marbled cuts at your butcher or Costco—the fat renders down into the gravy, creating that signature richness. Avoid leaner cuts like round, as they won’t achieve the same tenderness. The beef broth should be low-sodium so you can control the seasoning. I prefer Better Than Bouillon for its concentrated flavor.
No red wine? Substitute with additional beef broth and 1 tbsp apple cider vinegar for acidity. If you’re avoiding alcohol entirely, unsweetened cranberry juice works surprisingly well. Fresh herbs can replace dried at a 3:1 ratio, but dried are more reliable here. For the tomato paste, those Trader Joe’s squeeze tubes are perfect—no waste, and they keep for months in the fridge.
This keeps 4-5 days in the fridge, and the flavors deepen over time. Freeze for up to 3 months in airtight containers. For best results, cool the meat in the gravy before storing—this prevents it from drying out when reheated.
Why You’ll Love This Recipe
- Set It and Forget: I dump the chuck roast, onions, carrots and celery in, seal the lid, and walk away—dinner practically cooks itself.
- Fallback-on Flavor: The beef soaks up the onion and carrot juices, turning every bite ridiculously tender and rich.
- Feeds the Week: One roast yields three nights of dinners—sandwiches, tacos, and straight-up leftovers.
- Budget Hero: A cheap chuck roast plus pantry veggies stretches to a crowd-pleasing meal.
Step-by-Step Instructions for Instant Pot Pot Roast
Here’s the method. Straightforward, tested, works every time.
Step 1: Sear the Chuck Roast
Set your Instant Pot to the Sauté function and add 1 tbsp olive oil. Once the oil begins to shimmer, add the 3 lb chuck roast and sear for 4-5 minutes per side until deeply browned. I press down gently with tongs to ensure full contact with the pot.
This browning step creates a flavorful fond that will enrich the gravy later. Don’t rush it—wait until you see a deep, mahogany crust forming before flipping. Transfer the seared roast to a plate and set aside.
Step 2: Sauté the Aromatics
Add the remaining 1 tbsp olive oil to the pot, then stir in the yellow onion, carrots, and celery stalks. Sauté for 3-4 minutes until the onion softens and begins to turn translucent.
Add the garlic cloves, tomato paste, worcestershire sauce, dried thyme, and dried rosemary. Cook for 1 minute, stirring constantly, until the mixture becomes fragrant. The tomato paste should darken slightly in color.
Step 3: Deglaze and Pressure Cook
Pour in the red wine and scrape the bottom of the pot with a wooden spoon to release any browned bits. Let the wine simmer for 2 minutes to cook off the alcohol. Then add the beef broth, bay leaf, 1 tsp kosher salt, and 1 tsp black pepper.
Return the seared roast to the pot, along with any accumulated juices. Secure the lid, set the valve to Sealing, and cook on High Pressure for 60 minutes. The pot will take about 10-15 minutes to come to pressure before the cooking time begins.
Step 4: Natural Release and Shred
After the cooking time completes, allow the pressure to release naturally for 15 minutes. This gradual release helps the meat retain moisture and become fork-tender. Quick-releasing the pressure could result in tough meat.
Carefully open the lid and remove the bay leaf. Use two forks to shred the chuck roast directly in the pot, allowing it to soak up the rich cooking liquid. Taste and adjust seasoning with the remaining ½ tsp kosher salt if needed.
The meat should pull apart effortlessly, and the gravy should be thick enough to coat the back of a spoon. If it’s too thin, simmer on the Sauté function for 3-4 minutes to reduce slightly.
Pro Tips For Making Instant Pot Duo Pot Roast
- Sear the Chuck: I learned this the hard way—skipping the sear leaves your pot roast bland. Use the sauté function with 2 tablespoons olive oil to brown the chuck roast on all sides before pressure cooking.
- Cut Vegetables Evenly: After burning a few carrots, I now chop onions, carrots, and celery into uniform 1-inch pieces so they cook at the same rate as the roast.
- Avoid Overfilling: Resist the urge to cram in extra veggies—the Instant Pot Duo needs at least 1 cup of liquid and room for steam, or you’ll get the dreaded “burn” error.
- Use Natural Release: Sounds weird, but it works: Let the pressure release naturally for 10 minutes before quick-releasing to keep the chuck roast tender instead of tough.
Storing and Reheating This Dish
Refrigerator Storage
Let the pot roast cool completely in its gravy, then transfer to airtight containers. It keeps beautifully in the fridge for 4-5 days. The flavors actually deepen over time as the meat soaks up the rich cooking liquid. ❄️
Freezer Storage
For longer storage, portion into freezer-safe containers or heavy-duty bags. It freezes well for up to 3 months without losing quality. I recommend using quart-size freezer bags—they stack efficiently and thaw faster than large containers.
Stovetop Reheating
My preferred method: warm in a pot over medium-low heat for 10-15 minutes, stirring occasionally. Add a splash of beef broth if the gravy seems thick. This gentle method preserves the meat’s tenderness. 🔥
Microwave Reheating
For quick meals, microwave individual portions covered with a damp paper towel. Heat on 70% power in 2-minute intervals, stirring between each, until reaching 165°F. The damp towel prevents drying out.
Make-Ahead Tip
This dish reheats so well that I often make it a day ahead. The overnight rest allows the meat to absorb more of the gravy’s flavor. Just cool, store, and reheat using your preferred method the next day.
Nutrition Facts
Frequently Asked Questions
Can I use a different cut of beef?
Stick with well-marbled cuts like brisket or short ribs. Lean cuts won’t achieve the same tenderness. Chuck roast is ideal because the fat renders into the gravy during pressure cooking.
What if my gravy is too thin?
Simmer on the Sauté function for 3-4 minutes to reduce. For thicker results, mix 1 tbsp cornstarch with 1 tbsp water and stir in during simmering.
How do I prevent the meat from drying out?
Always allow a 15-minute natural release. Quick-releasing causes tough meat. Also, shred directly in the pot so it soaks up the cooking liquid.
Can I cook this with frozen meat?
Yes, but add 10 minutes to the cook time. Thawing first ensures more even cooking. Never exceed 50% capacity when pressure cooking frozen foods.

- 4C Bread Crumbs Meatballs Recipe: Crispy Crust and Juicy Centers - September 25, 2026
- 6 Oz Chocolate Chip Cookie Recipe: Perfectly Balanced Crispy Edges and Chewy Hearts - September 25, 2026
- 6-Inch Coffee Cake Recipe: Vanilla Bean Swirls and Buttery Streusel Topping - September 25, 2026