
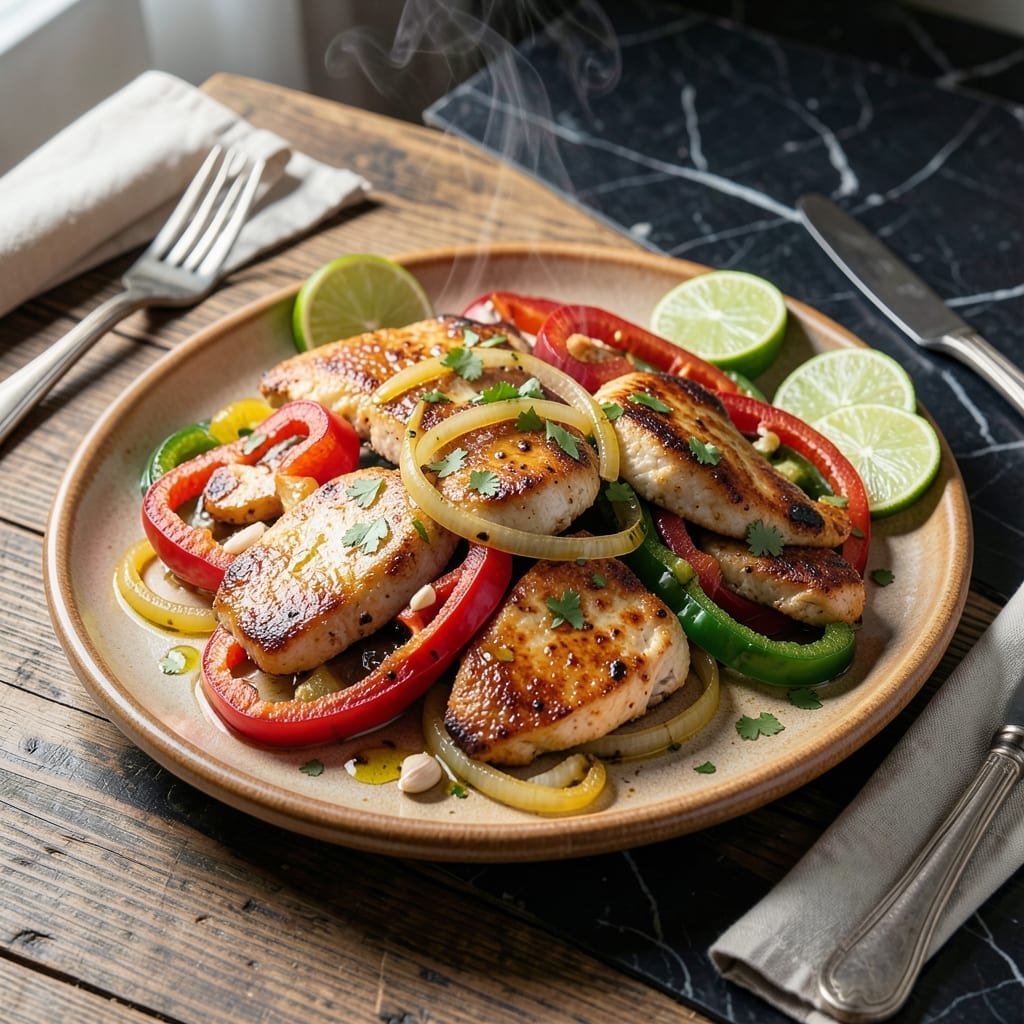
This Instant Pot method delivers all the bold, sizzling flavors of classic fajitas without the stovetop hassle. The pressure cooker transforms tough cuts of meat into tender, flavorful strips while keeping the peppers and onions perfectly crisp-tender.
I’ve perfected this technique to ensure the spices bloom and the meat cooks evenly, all in about 20 minutes. No more hovering over a hot skillet or worrying about uneven cooking—just set it and let the Instant Pot do the work.
What you’ll get is a dish packed with smoky, savory depth, ready to be piled into warm tortillas with your favorite toppings. The best part? Cleanup is a breeze, with only one pot to wash.
The aroma alone will have everyone gathering around the table before it’s even done.
Ingredients for Instant Pot Fajita
Pantry staples plus fresh peppers and onions bring this dish to life.
| Ingredient | Amount | Notes |
|---|---|---|
| Chicken Breast 🍗 | 1 ½ lb | Boneless, skinless, sliced into strips |
| Bell Peppers 🌶️ | 2 whole | Assorted colors, sliced |
| Yellow Onion 🧅 | 1 whole | Thinly sliced |
| Olive Oil 🫒 | 2 tbsp | Divided for cooking |
| Lime Juice 🍈 | 2 tbsp | Freshly squeezed |
| Garlic Cloves 🧄 | 3 cloves | Minced |
| Chili Powder 🌶️ | 1 tbsp | For authentic fajita flavor |
| Ground Cumin 🌿 | 1 tsp | Toasted for depth |
| Smoked Paprika 🌶️ | 1 tsp | Adds smoky depth |
| Dried Oregano 🍃 | 1 tsp | Mexican oregano preferred |
| Salt 🧂 | 1 tsp | Kosher or sea salt |
| Black Pepper 🌶️ | ½ tsp | Freshly ground |
| Beef Broth 🍲 | ¼ cup | Low-sodium preferred |
| Flour Tortillas 🌮 | 8 pieces | Warmed for serving |
The chicken is the star here. Boneless, skinless breasts stay juicy under pressure, but thighs work too (they’re more forgiving). I grab mine from Costco for bulk savings, but any supermarket will do. Look for evenly sized pieces—they’ll cook uniformly. The peppers? Any color combo adds visual appeal, but red and green give that classic fajita look.
No chicken? Shrimp or skirt steak cook fast and taste amazing. Swap chili powder for taco seasoning if that’s what you’ve got. Fresh garlic is best, but jarred minced works in a pinch. The lime juice brightens everything up—bottled is fine (just don’t tell the purists). Want more heat? Add a diced jalapeño with the onions.
Leftovers keep 4-5 days in the fridge, and the flavors deepen overnight. Freeze cooked chicken and veggies for up to 3 months. Reheat in a skillet with a splash of broth to revive the sizzle.
Why You’ll Love This Recipe
- Set It & Forget: I toss in the chicken, peppers, and onion, press a button, and walk away—dinner practically makes itself.
- Zesty Kick: That lime juice brightens every bite, and the peppers soak up the olive oil like little flavor sponges.
- Feeds the Week: I double the batch and pack leftovers for lunch all week—no sad desk salads here.
Step-by-Step Instructions for Instant Pot Fajitas
Get that classic sizzle and flavor with minimal effort and maximum payoff.
Step 1: Sear the Chicken and Vegetables
Set your Instant Pot to Sauté mode and add 1 tbsp olive oil. When the oil starts to shimmer, add the 1.5 lb chicken breast strips in a single layer. Don’t stir for 2-3 minutes—you want a nice golden sear on the first side.
Flip the chicken and add the 2 whole bell peppers and 1 whole yellow onion slices. Cook for another 3-4 minutes, stirring occasionally, until the chicken is lightly browned all over and the vegetables are starting to soften. The chicken doesn’t need to be fully cooked at this point—it’ll finish in the pressure cooker.
Step 2: Add Aromatics and Spices
Push the chicken and vegetables to one side of the pot. Add the remaining 1 tbsp olive oil to the empty space, then toss in the 3 cloves minced garlic cloves. Cook for 30 seconds until fragrant—just until the garlic starts to turn golden at the edges.
Sprinkle the 1 tbsp chili powder, 1 tsp ground cumin, 1 tsp smoked paprika, 1 tsp dried oregano, 1 tsp salt, and 0.5 tsp black pepper evenly over everything. Stir well to coat the chicken and vegetables completely with the spices. This is where all that fajita flavor develops.
Step 3: Deglaze and Pressure Cook
Pour the 0.25 cup beef broth into the pot and use a wooden spoon to scrape up any browned bits from the bottom. This deglazing step is crucial—it prevents the “burn” notice and incorporates all that flavor into your dish.
Secure the lid, set the valve to Sealing, and cook on High Pressure for 5 minutes. It’ll take about 10-12 minutes to come to pressure, then the cooking time will begin. You’ll know it’s working when you hear that satisfying hiss of the pressure building.
Step 4: Quick Release and Finish
When the cooking time is up, perform a quick pressure release by turning the valve to Venting. Be careful of the steam—stand back and let it release completely before opening the lid. Once safe, open the lid and stir in the 2 tbsp lime juice.
The chicken should be fully cooked and tender, and the peppers and onions should be soft but still have a little bite. If there’s excess liquid, set the Instant Pot to Sauté mode for 2-3 minutes to let it reduce slightly. Taste and adjust seasoning if needed.
Step 5: Serve with Warm Tortillas
Transfer the fajita mixture to a serving bowl. Warm the 8 pieces flour tortillas in a dry skillet over medium heat for 30 seconds per side or wrap them in a damp towel and microwave for 30 seconds.
Serve the fajitas family-style with the warm tortillas on the side. Each person can build their own, piling the chicken and vegetables high and squeezing a little extra lime on top. The tortillas should be soft and pliable, ready to hold all that delicious filling without tearing.
Pro Tips For Making Instant Pot Fajita
- Sear Chicken First: I learned this the hard way—searing the chicken breast in the Instant Pot on sauté mode for 3-4 minutes per side before pressure cooking locks in juices and adds depth.
- Slice Peppers Thin: Cut bell peppers into ¼-inch strips so they soften but still hold texture after pressure cooking. Thick cuts stay crunchy and uneven.
- Deglaze Well: After sautéing, pour in ¼ cup water or broth and scrape the bottom hard to avoid the “burn” error—those browned bits are flavor gold.
- Add Lime Last: Stir in lime juice after pressure cooking to keep the chicken tender. Adding it early can make the meat tough, and nobody wants chewy fajitas.
Storing and Reheating instant pot fajita
Refrigerator Storage
Let your fajitas cool for no more than 2 hours before transferring to airtight containers. They’ll keep in the fridge at 40°F or below for up to 4-5 days. Honestly, I think they taste even better the next day as the flavors meld. ❄️
Freezer Storage
For longer storage, freeze cooked chicken and vegetables together in quart-sized freezer bags for up to 3 months. Squeeze out excess air to prevent freezer burn. I always label mine with the date so I don’t forget.
Stovetop Reheating
My preferred method: reheat in a skillet over medium heat with a splash of beef broth for 5-7 minutes. This revives the sizzle and prevents drying. Stir occasionally until everything is heated through to 165°F. 🔥
Microwave Reheating
For quick meals, microwave individual portions covered with a damp paper towel. Heat on 70% power for 2-3 minutes, stir, then continue in 30-second bursts until hot. Add a squeeze of lime to brighten the flavors.
Tortilla Revival
Warm tortillas separately to prevent sogginess. Heat in a dry skillet for 30 seconds per side or wrap in a damp towel and microwave for 20-30 seconds. This keeps them soft and pliable for serving.
Nutrition Facts
Frequently Asked Questions
Can I use frozen chicken for this?
Yes! Add 5 minutes to the pressure cooking time. Ensure chicken is thawed enough to separate into strips for even cooking.
Why do I need to deglaze the pot?
Deglazing prevents the “burn” error and incorporates flavorful browned bits into your dish. Use 0.25 cup broth and scrape the bottom thoroughly.
Can I make this vegetarian?
Swap chicken for portobello mushrooms or extra-firm tofu. Reduce cooking time to 3 minutes under pressure.
How do I prevent soggy tortillas?
Warm tortillas separately just before serving. Use a dry skillet for 30 seconds per side or microwave wrapped in a damp towel.

- 4C Bread Crumbs Meatballs Recipe: Crispy Crust and Juicy Centers - September 25, 2026
- 6 Oz Chocolate Chip Cookie Recipe: Perfectly Balanced Crispy Edges and Chewy Hearts - September 25, 2026
- 6-Inch Coffee Cake Recipe: Vanilla Bean Swirls and Buttery Streusel Topping - September 25, 2026