
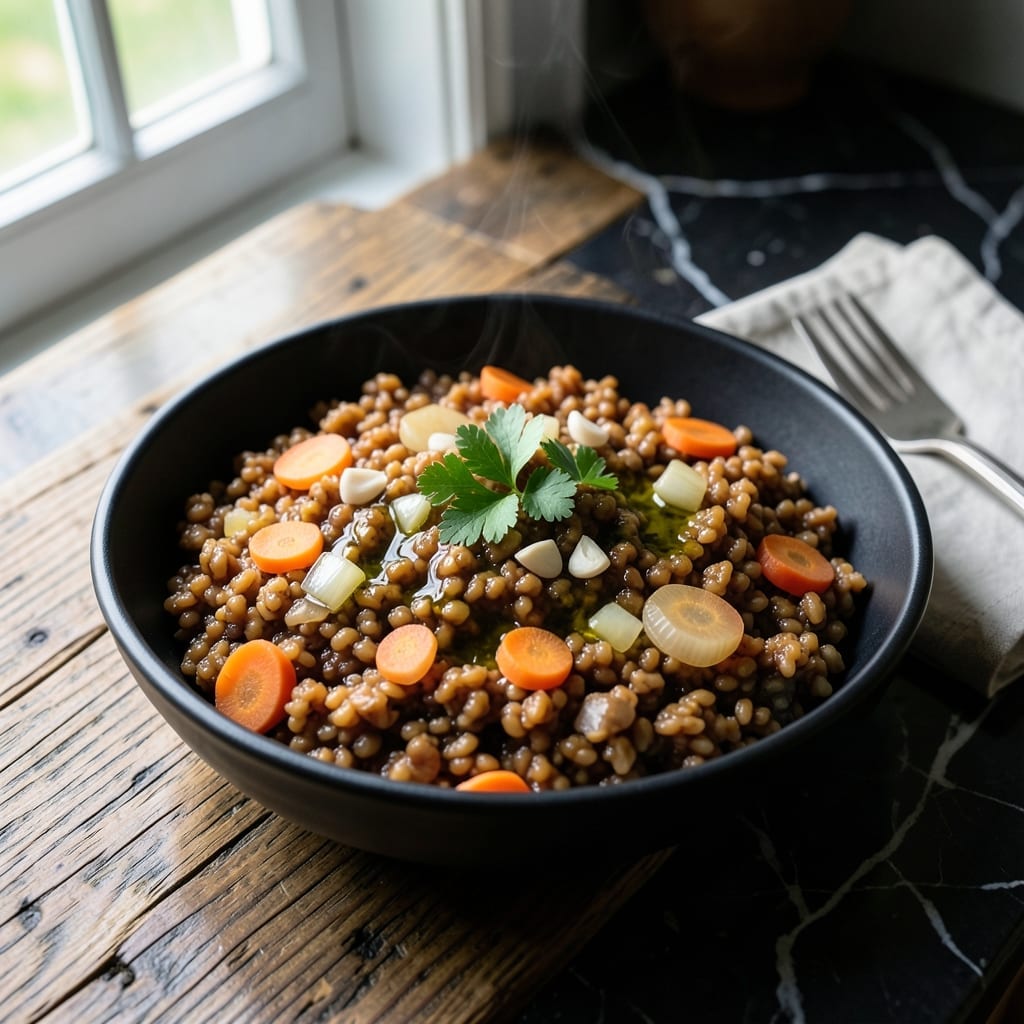
This pressure cooker method delivers perfectly cooked farro with minimal effort and maximum flavor.
Farro’s natural nuttiness shines when cooked in vegetable broth instead of water, absorbing rich, savory notes. The Instant Pot cuts traditional stovetop time in half while ensuring consistent, tender yet chewy results every time.
No soaking required—just rinse, pressure cook for 10 minutes, and let the pot do the work. The grain holds its shape beautifully, making it ideal for salads, soups, or as a hearty side.
Vegan by design, this farro adapts easily to any meal. Serve warm or chilled, depending on your preference.
Ingredients for Instant Pot Farro
Simple, wholesome ingredients transform into perfectly cooked farro with rich, savory depth in minutes.
| Ingredient | Amount | Notes |
|---|---|---|
| Farro 🌾 | 1 ½ cups | Rinsed thoroughly before cooking |
| Vegetable Broth 🥕 | 3 ½ cups | Low-sodium preferred for control |
| Extra-Virgin Olive Oil 🫒 | 1 tbsp | For sautéing and finishing |
| Yellow Onion 🧅 | 1 whole | Finely diced for even flavor |
| Garlic Cloves 🧄 | 3 cloves | Minced for maximum aroma |
| Carrots 🥕 | 2 whole | Peeled and diced small |
| Celery Stalks 🌿 | 2 whole | Diced for mirepoix base |
| Bay Leaf 🍃 | 1 whole | Dried, removed before serving |
| Sea Salt 🧂 | ½ tsp | Adjust to taste after cooking |
| Freshly Ground Black Pepper 🌶️ | ¼ tsp | Added at the end |
| Fresh Parsley 🌿 | ¼ cup | Chopped for garnish |
| Lemon Juice 🍋 | 1 tbsp | Freshly squeezed for brightness |
The farro is the foundation—look for semi-pearled or pearled varieties at Whole Foods or well-stocked markets for consistent texture. Vegetable broth quality matters; Better Than Bouillon or Imagine Foods brands deliver robust flavor without overpowering. Organic farro often has superior nuttiness, but conventional works if that’s what’s available. Always check the label for cooking time—some brands vary slightly.
No fresh herbs? Dried parsley at one-third the amount works in a pinch. Short on broth? Water plus a vegetable bouillon cube gets you close. The onion, carrot, and celery can be swapped for 2 cups pre-diced mirepoix from Trader Joe’s. For extra richness, stir in a splash of white wine before pressure cooking (use a dry variety like Sauvignon Blanc).
Cooked farro keeps 5 days refrigerated in an airtight container. Freeze for up to 3 months in portioned bags for quick meals. The grain absorbs flavors as it cools, making leftovers even more delicious the next day.
Why You’ll Love This Recipe
- Set and Forget: The Instant Pot does all the work while I prep the rest of dinner.
- Rich Garlic Depth: Sautéed onion and garlic in olive oil bloom into this nutty farro—simple but packed with flavor.
- Meal Prep Hero: I make a big batch on Sunday and toss it into salads, soups, or grain bowls all week.
- Budget Stretcher: Farro cooks up plump and hearty, so a little goes a long way for leftovers.
Step-by-Step Instructions for Instant Pot Farro
This pressure-cooked method delivers perfectly tender farro with minimal hands-on time.
Step 1: Sauté Aromatics for Depth of Flavor
Select the “Sauté” function on your Instant Pot and add the 1 tbsp Extra-Virgin Olive Oil. When the oil shimmers, add the finely diced Yellow Onion and cook, stirring occasionally, for 3-4 minutes until translucent and just beginning to soften.
Add the minced Garlic Cloves and cook for an additional 30 seconds until fragrant. Be careful not to let the garlic brown, as this can impart a bitter flavor. The goal here is to build a flavorful base that will infuse the farro during cooking.
Stir in the diced Carrots and diced Celery Stalks, cooking for another 2 minutes to soften slightly. The vegetables should release their moisture but not take on color.
Step 2: Toast the Farro for Nutty Flavor
Add the 1.5 cups Farro to the pot and stir to coat it evenly with the oil and aromatics. Toast the farro for 2-3 minutes, stirring constantly, until the grains appear slightly glossy and emit a nutty aroma.
This toasting step is critical—it enhances the farro’s natural nuttiness and prevents it from turning mushy during pressure cooking. You’ll know it’s ready when the farro makes a faint crackling sound and the grains look slightly opaque.
Step 3: Pressure Cook to Perfection
Pour in the 3.5 cups Vegetable Broth and add the Bay Leaf and 0.5 tsp Sea Salt. Stir well to ensure the farro is fully submerged in the liquid. Secure the lid, set the valve to “Sealing,” and select the “High Pressure” setting for 10 minutes.
The Instant Pot will take about 10-12 minutes to come to pressure before the cooking time begins. Once the timer goes off, allow the pressure to release naturally for 10 minutes, then manually release any remaining pressure. The farro should be tender but still retain a slight chew.
If any liquid remains after cooking, drain it carefully, as farro can absorb varying amounts of broth depending on the brand.
Step 4: Finish and Serve
Remove the Bay Leaf and discard it. Stir in the 1 tbsp Lemon Juice and 0.25 tsp Freshly Ground Black Pepper. Taste and adjust seasoning with additional Sea Salt if needed—the farro should have a bright, balanced flavor.
Transfer the farro to a serving dish and garnish with the 0.25 cup Fresh Parsley. The parsley adds a pop of color and freshness that complements the earthy farro beautifully. Serve warm as a side dish or as a base for salads or grain bowls.
Pro Tips For Making Instant Pot Farro
- Rinse the Farro: I learned this the hard way—unrinsed farro can taste bitter and leave a cloudy residue in your broth. A quick 30-second rinse under cold water removes excess starch and ensures a cleaner flavor.
- Sauté the Aromatics: Cook the onion and garlic in olive oil for 2-3 minutes until soft before adding farro. It builds a deeper flavor base than just dumping everything in at once—sounds simple, but it actually changes the outcome.
- Use the Right Ratio: Stick to 1 cup farro to 2.5 cups vegetable broth for perfect texture. Too much liquid and you’ll get mushy farro; too little and it stays chewy. I skip measuring cups now and just use the Instant Pot’s markings.
- Natural Release Only: After cooking, let the pressure release naturally for 10 minutes. Quick-releasing can make the farro tough and unevenly cooked—I ruined two batches before I finally figured this out.
Storing and Reheating This Dish
Refrigerator Storage
Let your farro cool for no more than 2 hours before transferring to airtight containers. I use glass Pyrex with snap-on lids. Store at 40°F or below for up to 5 days. The flavors deepen as the grain absorbs the broth. ❄️
Freezer Storage
Farro freezes beautifully for up to 3 months without texture loss. I recommend quart-size freezer bags because they lay flat and thaw quickly. Leave 1 inch headspace for expansion and squeeze out excess air to prevent freezer burn.
Stovetop Reheating
This is my preferred method for maintaining texture. Heat farro in a skillet with 2 tbsp water or vegetable broth over medium-low heat for 5-7 minutes, stirring occasionally. Taste and adjust seasonings before serving. 🔥
Microwave Reheating
For quick meals, microwave individual portions covered with a damp paper towel. Heat on 70% power for 1-2 minutes, stir, then continue in 30-second intervals until reaching 165°F. Add a splash of broth if it looks dry.
Nutrition Facts
Frequently Asked Questions
Do I need to rinse farro before cooking?
Yes, always rinse farro thoroughly under cold water to remove excess starch. This prevents the grains from becoming gummy during cooking.
Can I use water instead of broth?
You can, but the farro will lack depth. If using water, add 1 tsp salt and 1 tsp soy sauce per 3.5 cups for better flavor.
Why is my farro mushy?
Overcooking or using too much liquid causes mushiness. Stick to 10 minutes high pressure with 3.5 cups broth for 1.5 cups farro.
What if my Instant Pot doesn’t reach pressure?
Check the silicone ring is properly seated and the valve is set to “Sealing.” Also ensure there’s enough liquid—at least 1 cup minimum.

- 4C Bread Crumbs Meatballs Recipe: Crispy Crust and Juicy Centers - September 25, 2026
- 6 Oz Chocolate Chip Cookie Recipe: Perfectly Balanced Crispy Edges and Chewy Hearts - September 25, 2026
- 6-Inch Coffee Cake Recipe: Vanilla Bean Swirls and Buttery Streusel Topping - September 25, 2026