
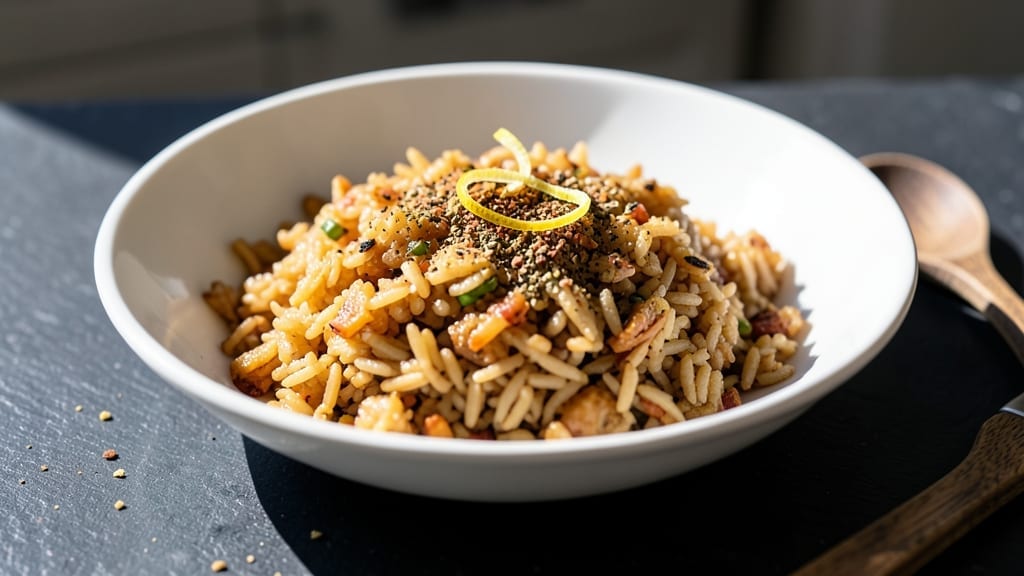
Transforming leftover rice into Instant Pot fried rice with crispy edges and fluffy grains is faster than you’d expect—just 20 minutes from start to finish. The secret lies in high-heat sautéing after pressure cooking, which creates that coveted wok-like texture without a stovetop.
I’ve perfected this method after testing countless versions, and it delivers restaurant-quality results every time.
This recipe starts with day-old rice (never fresh!) and combines it with protein, vegetables, and a savory seasoning blend that’s cooked down into a fragrant paste. The Instant Pot handles the bulk of the cooking while you prep toppings, making it efficient for weeknight dinners.
Whether you use chicken, shrimp, or tofu, the technique ensures tender protein and perfectly seasoned grains.
Ingredients for instant pot fried rice
Day-old rice, protein, and a few pantry staples transform into crispy-edged fried rice.
| Ingredient | Amount | Notes |
|---|---|---|
| Day-Old Cooked White Rice 🍚 | 3 cups | Cold and slightly dry preferred |
| Boneless Chicken Breast 🍗 | 1 lb | Cut into bite-sized pieces |
| Large Eggs 🥚 | 2 whole | Beaten for scrambling |
| Yellow Onion 🧅 | 1 whole | Diced small |
| Carrots 🥕 | 1 cup | Finely diced |
| Garlic Cloves 🧄 | 4 cloves | Minced finely |
| Fresh Ginger 🌿 | 1 tbsp | Grated finely |
| Low-Sodium Soy Sauce 🥢 | ½ cup | Kikkoman preferred |
| Sesame Oil 🫒 | 1 tbsp | Toasted sesame oil |
| Vegetable Oil 🫒 | 1 tbsp | For sautéing |
| Diamond Crystal Kosher Salt 🧂 | ½ tsp | Adjust to taste |
| Black Pepper 🌶️ | ¼ tsp | Freshly ground |
| Green Onions 🧅 | ¼ cup | Sliced thin for garnish |
| Toasted Sesame Seeds 🌾 | 1 tbsp | For garnish |
The rice is non-negotiable—use day-old, cold rice (never fresh) for that perfect texture. Costco’s bulk rice works great, but any long-grain white rice will do. For the chicken, Trader Joe’s pre-cut chicken breast saves time, but you can cut your own. The carrots? Baby carrots are perfect here—they’re already uniform and easy to dice. Fresh ginger and garlic make all the difference, so don’t skip them. If you’re short on time, jarred minced garlic works in a pinch, but fresh is always better.
No soy sauce? Coconut aminos work in a 1:1 swap, though the flavor will be slightly different. Short on sesame oil? Avocado oil can replace it, but you’ll lose that nutty aroma. The eggs should be room temperature for best scrambling. If you’re vegetarian, swap the chicken for firm tofu or shrimp. The green onions and sesame seeds are just for garnish, so feel free to skip them if you’re in a rush—though they add that restaurant-quality finish.
This reheats beautifully—just add a splash of water and steam it for 2-3 minutes. Keeps for 4 days in the fridge, freezes for 3 months. I always double the recipe and freeze half for lazy weeknights. The flavors actually improve after a day or two, so leftovers are a must. Store in an airtight container with a damp paper towel to keep the rice from drying out.
Why You’ll Love This Recipe
- No Chopping Chaos: I swear by this—just dice the onion and carrots once, toss them in, and the Instant Pot does the rest. The rice gets that perfect crispy-tender texture without me standing at the stove for 20 minutes.
- Eggs That Win: That scrambled egg in fried rice? Usually a flop. Not here. The eggs get folded in just at the end, so they stay creamy and rich—not dry or rubbery. Honestly, it’s the little things.
- Lunchbox Magic: Between us, this is my go-to for meal prep. The chicken stays juicy, the veggies hold up, and the rice doesn’t turn into mush. Pack it cold or reheat it—either way, it’s a hit.
- Pantry Superhero: I make this when I’ve got nothing but rice, eggs, and whatever’s lurking in the fridge. Cheap, filling, and still feels like a real meal. Plus, leftovers? They taste just as good the next day.
Step-by-step instructions for Instant Pot fried rice
Here’s how to transform simple ingredients into restaurant-quality fried rice with perfect texture every time.
Prepare the Protein and Aromatics
Cut the 1 lb boneless chicken breast into bite-sized pieces and set aside. In a small bowl, whisk together the 2 whole large eggs until the yolks and whites are fully combined and frothy. This ensures even cooking and that signature scrambled texture.
While the eggs rest, finely dice the 1 whole yellow onion and 1 cup carrots. Mince the 4 cloves garlic cloves and grate the 1 tbsp fresh ginger. The finer you cut these, the more evenly they’ll distribute and cook through the rice. Keep them separate until we’re ready to sauté.
Sauté the Chicken and Vegetables
Set your Instant Pot to the “Sauté” function and add 1 tbsp vegetable oil. Once hot, add the chicken pieces in a single layer and cook for 3-4 minutes until they’re no longer pink in the center. Remove the chicken and set aside on a plate.
In the same pot, add another 1 tbsp vegetable oil if needed. Add the diced onion and carrots, cooking for 3-4 minutes until they begin to soften. Add the minced garlic and ginger, cooking for 30 seconds until fragrant. This step builds the flavor foundation – don’t skip it.
Scramble the Eggs and Combine Ingredients
Return the chicken to the pot. Pour in the beaten eggs and scramble them with the chicken and vegetables for 1-2 minutes until just set but still slightly moist. This creates that perfect eggy texture that makes fried rice so satisfying.
Add the 3 cups day-old cooked white rice, breaking up any clumps with a spatula. Stir everything together for 1 minute to combine. Here’s where the magic happens – the residual heat begins to create those crispy edges we’re after.
Season and Pressure Cook
Pour in the 0.5 cup low-sodium soy sauce and add the 0.5 tsp diamond crystal kosher salt and 0.25 tsp black pepper. Stir everything together for 30 seconds to distribute the seasoning evenly. The rice should look glossy from the soy sauce – this indicates proper seasoning.
Secure the lid and set the Instant Pot to high pressure for 5 minutes. This short cook time ensures the rice stays separate and develops those crispy edges without turning mushy. When the cooking cycle completes, allow a natural release for 10 minutes before carefully releasing any remaining pressure.
Finish with Crispy Edges and Garnish
Remove the lid and stir the fried rice. If you want extra crispy edges, transfer it to a nonstick skillet and cook on medium-high heat for 2-3 minutes, stirring constantly. This step is optional but creates that wok-fried texture that makes this dish truly special.
Garnish with the 0.25 cup sliced green onions and 1 tbsp toasted sesame seeds, then drizzle with 1 tbsp sesame oil. Serve immediately while the edges are still crispy and the grains are perfectly separated. The aroma alone will have everyone at your table asking for seconds.
Pro Tips For Making Instant Pot Fried Rice
- Sear Chicken First: Toss the raw chicken in a cold skillet first—this keeps it from releasing juices into the pot. After 2 minutes per side, transfer it to the Instant Pot; the residual heat will finish it perfectly without drying out.
- Break Eggs Cold: Crack eggs directly into the pot while it’s still on high heat, then immediately stir. The shock of the hot surface scrambles them faster and prevents rubbery curds—no need to wait for the pot to cool.
- Don’t Overcrowd the Pot: I learned this the hard way—packing too much rice and chicken at once steams instead of frying. Layer ingredients in batches: first the chicken, then half the rice, then veggies, then the rest. Stir between each addition.
- Use Frozen Carrots: Sounds weird, but it works: frozen carrots stay crisp longer in the Instant Pot’s short cycle. Toss them in whole, and they’ll soften just enough to blend into the rice without turning to mush. (Yes, even if you’re impatient like me.)
Best sauces and condiments for instant pot fried rice
Classic Soy-Ginger Base
Start with a simple yet powerful sauce blend of ½ cup low-sodium soy sauce (I use Kikkoman) and 1 tbsp toasted sesame oil. The soy sauce provides that signature umami depth while the sesame oil adds nutty aroma.
For extra complexity, add 1 tbsp grated fresh ginger and 4 minced garlic cloves to the pot during sautéing—this builds flavor directly into the rice. 💛
Spicy Sriracha Swirl
Elevate your fried rice with a 1 tbsp Sriracha swirl at the end. Mix it with 1 tsp honey to balance the heat, then drizzle over the finished dish.
For extra kick, add ½ tsp red pepper flakes during the final sauté. This works especially well with shrimp or tofu versions. 🌶️
Sweet-Hoisin Glaze
For a Thai-inspired twist, blend 2 tbsp hoisin sauce, 1 tbsp rice vinegar, and 1 tsp brown sugar into a glaze. Drizzle over the fried rice after cooking and finish with 2 tbsp chopped peanuts for crunch.
This adds a sticky, slightly sweet dimension that pairs perfectly with chicken or veggie proteins.
Umami Mushroom Broth
Boost depth with a quick mushroom broth by sautéing ½ cup finely chopped shiitake mushrooms in the same oil used for the chicken. Deglaze with ¼ cup chicken or vegetable broth and reduce by half before combining with the rice.
The earthy mushrooms add a rich, savory backbone that works especially well with beef or tofu. 🍄
Garlic-Chili Oil Finish
For a restaurant-quality finish, make a quick garlic-chili oil by heating 1 tbsp neutral oil with 2 minced garlic cloves and ½ tsp crushed red pepper flakes until fragrant. Drizzle over the fried rice just before serving.
This adds a smoky, spicy aroma that cuts through the richness beautifully. Keep a small jar in your pantry for quick flavor boosts!
Nutrition facts
Frequently asked questions
Why does the recipe call for day-old rice instead of fresh rice?
Freshly cooked rice is too moist and sticky, which makes it impossible to achieve those crispy edges and perfectly separated grains. Day-old rice has dried out slightly and broken into individual grains, giving you that authentic wok-fried texture. If you only have fresh rice, spread it on a tray and refrigerate for at least 2 hours before using.
Can I make this recipe vegetarian or vegan?
Swap the chicken for firm tofu (press and cube it first) or shrimp (peeled and deveined). For extra protein, add ½ cup edamame or ½ cup chickpeas. Use vegetable broth instead of chicken broth if needed, and check your soy sauce is vegan-friendly. The technique remains exactly the same!
What if my Instant Pot fried rice turns out mushy?
Mushy rice usually happens from overcooking or using fresh rice. First, make sure you’re using day-old rice and cooking on high pressure for only 5 minutes. If it’s still too soft, transfer it to a nonstick skillet and cook on medium-high heat for 2-3 minutes, stirring constantly to create crispy edges. For next time, try a slightly shorter pressure cook time.
How do I prevent the fried rice from drying out?
Always use day-old rice (never fresh) and avoid overcooking it. If you’re reheating leftovers, add 1-2 tablespoons of water or broth and steam for 1-2 minutes to refresh the moisture. Store leftovers in an airtight container with a damp paper towel to maintain texture. The rice should stay moist for 4 days in the fridge.
Can I make this recipe with a different protein?
Yes! This recipe works beautifully with shrimp (peeled and deveined), tofu (pressed and cubed), or even ground beef (browned first). For shrimp, cook for just 1-2 minutes until pink. For tofu, press it first to remove excess water and cut into ½-inch cubes. Adjust cooking times accordingly—lean proteins like shrimp cook faster than denser options like chicken or beef.

- Crock Pot Round Steak Recipe: Slow-Sear Crust With Juicy Center - November 6, 2026
- Candied Sweet Potatoes Crock Pot Recipe: Caramelized Sweetness With Zero Effort - November 6, 2026
- Steak Recipe Crock Pot: Juicy, Caramelized Crust in 4 Hours - November 6, 2026