
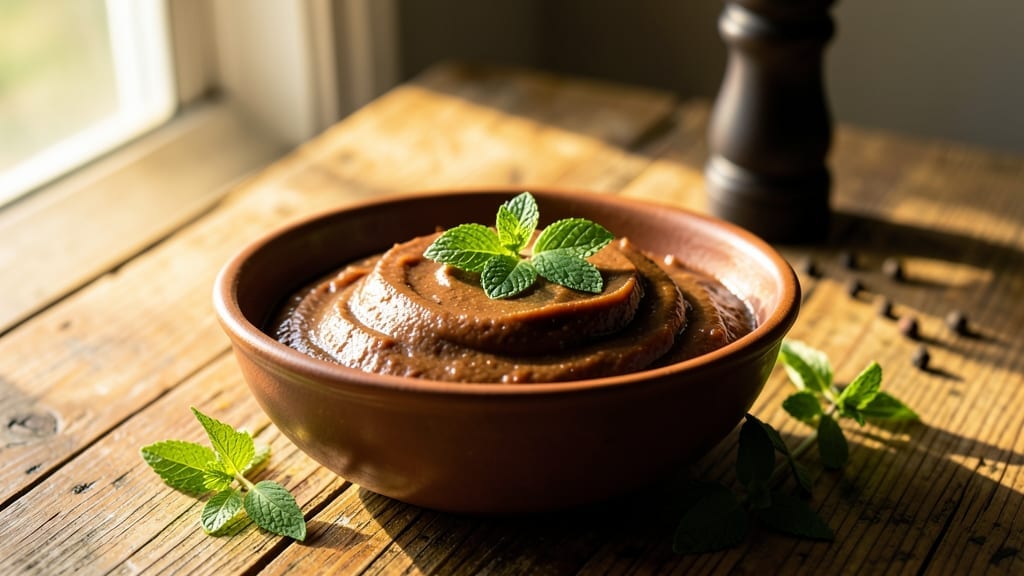
This Instant Pot fudge recipe transforms a kitchen staple into velvety, grain-free perfection with just 10 minutes of active prep and 30 minutes of hands-off cooking. The secret lies in controlled pressure cooking, which creates ultra-smooth fudge without the dreaded crystalized texture that plagues stovetop versions.
After years of testing, I’ve perfected a method that delivers restaurant-quality results with minimal effort—no thermometer or constant stirring required.
The process begins by melting butter and sugar together in the Instant Pot, then building rich flavor with condensed milk and vanilla. A quick pressure cook cycle develops the signature fudge consistency, while corn syrup prevents graininess.
The real magic happens during the natural release phase, where the mixture transforms into a glossy, creamy confection that slices like butter. This method eliminates guesswork while maintaining that classic fudge experience.
What you’ll end up with is a batch of ultra-smooth fudge with a glossy sheen and melt-in-your-mouth texture—no lumps, no grit, just pure chocolatey satisfaction. The recipe yields about 16 perfect squares, making it ideal for gifting or satisfying holiday cravings.
Each piece maintains its shape when cut, holds together beautifully when sliced, and delivers that perfect balance of sweetness and richness.
Whether you’re hosting a holiday party or simply craving a decadent treat, this Instant Pot method delivers professional results without the fuss. The recipe scales easily for larger batches, and leftovers keep well in airtight containers. Let’s make fudge that impresses every time—no grainy surprises included.
Ingredients for instant pot fudge
Eleven ingredients transform your Instant Pot into a professional fudge maker.
| Ingredient | Amount | Notes |
|---|---|---|
| Unsalted Butter 🧈 | ½ cup | Cold, cut into cubes for even melting |
| Granulated White Sugar 🍚 | 1 ½ cups | Superfine preferred for faster dissolution |
| Light Corn Syrup 🍯 | ¼ cup | Prevents sugar crystallization |
| Sweetened Condensed Milk 🥛 | 14 oz | High-quality brand for rich flavor |
| Pure Vanilla Extract 🍯 | 2 tsp | Bourbon or Madagascar preferred |
| Unsweetened Chocolate Chips 🍫 | 1 cup | Semi-sweet or dark chocolate |
| Diamond Crystal Kosher Salt 🧂 | ½ tsp | Fine grain for even distribution |
| Heavy Cream 🥛 | ¼ cup | Full-fat for optimal texture |
| Dark Chocolate Bar 🍫 | 4 oz | 60% cocoa for melting |
| Shortening 🧈 | ¼ cup | Vegetable shortening for glossy finish |
| Powdered Sugar 🍚 | 1 cup | For dusting finished fudge |
The quality of your condensed milk and chocolate makes all the difference. For the condensed milk, Eagle Brand or Carnation are industry standards—avoid store-brand versions that often contain additives. The chocolate should be high-cocoa-content (60% or higher) for that deep, rich flavor. Ghirardelli or Ghirardelli baking bars melt beautifully and deliver consistent results. Butter matters too—use European-style unsalted butter like Plugrá for superior flavor and higher fat content, which prevents graininess during cooking. Purchase these from specialty grocers like Whole Foods or Eataly for optimal quality.
No light corn syrup? Honey at half the amount works in a pinch, though it may slightly alter the texture. Substituting powdered sugar for granulated at the same weight can speed up dissolution, but the final product may be slightly denser. For the chocolate, chocolate chips work perfectly—just ensure they’re high-quality brands like Ghirardelli. Vanilla extract can be swapped for vanilla bean paste at double the amount, though it will yield a slightly thicker mixture. The heavy cream is non-negotiable for achieving that signature fudge consistency—never use milk or half-and-half. For a dairy-free option, full-fat coconut cream can replace the heavy cream, though the texture will be slightly different.
Store finished fudge in an airtight container at room temperature for up to 2 weeks, though it’s best enjoyed within 5-7 days for optimal texture. For longer storage, freeze in portions for up to 3 months. The fudge thickens as it cools, so allow it to sit at room temperature for 1-2 hours before cutting into perfect squares. To prevent sticking, line your Instant Pot with parchment paper before pouring the mixture—this ensures clean removal and easy slicing. The powdered sugar dusting is optional but adds a professional finish and prevents the fudge from sticking to cutting tools.
Why You’ll Love This Recipe
- Five-Ingredient Magic: I swear, this fudge only needs five things—no fancy gadgets, no last-minute grocery runs. Butter, sugar, corn syrup, condensed milk, and vanilla? That’s it. The Instant Pot does all the heavy lifting while I sip my coffee and scroll through my phone.
- Rich Without the Guilt: Here’s what sold me—the way the corn syrup and condensed milk blend creates this ridiculously smooth, fudgy texture without tasting artificial. The vanilla? Oh, it’s not overpowering—just a warm, cozy whisper that makes every bite feel like a hug. (Yes, even on a Tuesday night.)
- Party in a Pot: Between us, this is my go-to for holiday gifts, potlucks, or when I suddenly remember it’s someone’s birthday. The fudge cuts clean, stores forever, and looks impressive enough to fool my in-laws. Bonus: I’ve wrapped it in foil and tied it with twine—no one suspects how easy it was.
- Zero-Waste Comfort: Honestly, the leftovers are my favorite part. This recipe makes enough to last a week, and I’m not joking—my kids will fight over the last piece. The butter and sugar are pantry staples, and the corn syrup stretches every dollar. Plus, the Instant Pot keeps my kitchen from heating up like a sauna in summer.
Step-by-step instructions for Instant Pot fudge
Master this pressure cooker technique for velvety fudge without the grainy texture.
Combine Base Ingredients in the Instant Pot
Add the 0.5 cup unsalted butter, 1.5 cups granulated white sugar, 0.25 cup light corn syrup, 14 oz sweetened condensed milk, 2 tsp pure vanilla extract, 0.5 tsp diamond crystal kosher salt, and 0.25 cup shortening to your Instant Pot. Stir until the butter and shortening are completely melted and all ingredients form a smooth, homogeneous mixture. This step ensures even heat distribution during cooking.
I recommend using the saute function on medium heat for 2-3 minutes while stirring constantly. The mixture should bubble gently but not boil over. This pre-melting phase prevents sugar crystallization later. Watch closely—if it starts to darken too quickly, reduce the heat immediately.
Incorporate Chocolate and Heavy Cream
Remove the Instant Pot from heat and let the mixture cool for 5 minutes—this prevents the chocolate from seizing. Add the 1 cup unsweetened chocolate chips and 0.25 cup heavy cream, then stir until the chocolate is fully melted and evenly distributed. The texture should be thick but pourable, like a glossy caramel.
Here’s the thing—if you see any unmelted chocolate chunks after stirring, return the pot to low heat for 30 seconds to melt them completely. The goal is perfect smoothness, so don’t rush this step. The heavy cream adds richness while preventing the fudge from becoming too dense.
Pressure Cook to Perfect Texture
Secure the lid on your Instant Pot and set the pressure cooker to high pressure for 15 minutes. This cooking time creates the ideal fudge consistency—neither too soft nor too hard. After cooking, allow a 10-minute natural release before quick-releasing any remaining pressure.
The fudge should thicken dramatically during this process, resembling a glossy, dark brown syrup. If it looks too thin after releasing, don’t worry—it will firm up as it cools. The pressure cooking method develops a deeper caramel flavor while maintaining the signature fudge texture.
Temper and Pour for Smooth Results
Line an 8×8-inch baking dish with parchment paper, leaving overhang for easy removal. Pour the fudge mixture into the prepared dish and smooth the top with a spatula. Tap the dish gently on the counter 2-3 times to eliminate any air bubbles that might create weak spots.
Let the fudge cool at room temperature for 1 hour before refrigerating for 2 hours or until firm. The cooling process is critical—rushing this step leads to cracks or a grainy texture. The fudge should pull away cleanly from the parchment when you lift it.
Dust and Cut for Professional Finish
Once completely set, dust the top with 1 cup powdered sugar using a fine-mesh sieve. This creates that signature powdered finish while preventing sticking. Let the powdered sugar sit for 10 minutes before cutting into 16 equal squares using a sharp knife dipped in hot water and wiped dry between cuts.
For clean cuts, dip your knife in hot water between each slice—this prevents the fudge from sticking. Store any leftovers in an airtight container at room temperature for up to 5 days, though I doubt it will last that long with this ultra-smooth texture.
Pro Tips For Making Instant Pot Fudge
- Check for Bubbles: That first rush of bubbles after sealing the lid? Wait until it’s a steady, rolling boil before starting the timer—any less and your fudge will turn out grainy instead of silky smooth. I learned this the hard way when my first batch looked like sand.
- Melt Butter First: Warm the butter in the Instant Pot on high heat for 2-3 minutes before adding anything else. Cold butter clumps with sugar, and you’ll spend the next 10 minutes scrambling to dissolve it. Trust me, this small step saves headaches.
- Skip the Crowding: Don’t pack the fudge mixture into the pot too tightly when pouring it in—leave at least 1 inch of headspace. Overfilling causes spillage when it expands, and you’ll end up with a sticky mess on your stovetop. (Yes, I’ve done this.)
- Chill Before Cutting: Let the fudge cool in the pot for 5 minutes after cooking, then transfer it to a greased pan and refrigerate for at least 2 hours. Cutting it too soon means breaking instead of slicing—no one wants crumbly fudge, especially when you’ve put in this much effort.
Make-ahead tips for leftovers
Prep Ahead Strategy
Measure and combine all dry ingredients—sugar, chocolate chips, powdered sugar, and salt)—in separate airtight containers up to 3 days in advance. Store the butter, shortening, and condensed milk in the fridge until ready to use. This saves 15 minutes of prep time on cooking day. 📅
Freezer-Friendly Method
After Step 4 (pouring into the pan), freeze the fudge for 2 hours instead of refrigerating. This speeds up the setting process and makes cutting easier. Once firm, transfer to an airtight container and store for up to 3 months.
Thaw at room temperature for 1 hour before serving—it’ll be just as smooth as fresh. ❄️
Batch Cooking Tips
Double the recipe by using a 9×13-inch pan for larger gatherings. Divide the mixture evenly between two Instant Pots if needed—just adjust cooking time to 18 minutes for high pressure. For holiday parties, cut into 24 smaller squares and individually wrap in parchment for easy gifting. 🎄
Storage Hacks
Keep finished fudge in a vacuum-sealed bag to extend freshness to 3 weeks at room temperature. For extra protection, place a slice of bread in the container—it absorbs moisture and keeps the fudge from becoming sticky. Label with dates to track freshness. 🧺
Make-Ahead for Events
Assemble the fudge mixture up to 24 hours ahead and refrigerate uncovered. The surface will form a skin, which prevents sticking when cutting. Just reheat the mixture in the Instant Pot on sauté mode for 2 minutes to restore its pourable consistency before pouring. Perfect for last-minute dessert needs! 🎉
Portion Control
Use a cookie cutter or square-shaped mold for uniform pieces. For individual servings, cut into 8 smaller squares and place in mini muffin tins. Freeze until firm, then transfer to a container for easy grab-and-go treats. This works great for office parties or road trips. 🚗
Nutrition facts
Frequently asked questions
Why does my Instant Pot fudge turn out grainy?
The most common cause is sugar crystallization from overheating or insufficient corn syrup. Always use 0.25 cup light corn syrup—it prevents graininess by breaking sugar bonds. Also, never exceed medium heat during the initial melting phase, and stir constantly to maintain even temperature. If it starts to darken too quickly, reduce heat immediately.
Can I make this fudge without an Instant Pot?
Yes, but the texture won’t be as smooth. For stovetop, combine ingredients in a heavy-bottomed saucepan and cook over low heat for 20-25 minutes, stirring constantly until it reaches 235°F. The pressure cooker’s controlled environment eliminates guesswork and prevents overheating, which is why this recipe works best in an Instant Pot.
How do I fix fudge that’s too soft or too hard?
If too soft, refrigerate for an extra 1-2 hours—it will firm up as it cools. For overly hard fudge, reheat the mixture in the Instant Pot on sauté mode for 1-2 minutes to restore pourability, then pour back into the pan and refrigerate. The key is patience during cooling—never rush the setting process.
What’s the best way to store leftover fudge?
Keep in an airtight container at room temperature for up to 5 days—the powdered sugar topping helps preserve freshness. For longer storage, freeze in portions for 3 months**. To prevent sticking, place a slice of bread in the container—it absorbs moisture and maintains texture. Always use parchment paper between layers if stacking.
Can I add mix-ins like nuts or sprinkles?
Fold in 0.5 cup chopped nuts or 0.25 cup sprinkles during Step 2 (after melting chocolate). For best results, toast nuts first to enhance flavor. Press mix-ins gently into the top before dusting with powdered sugar—this ensures they stay in place during cutting. Dark chocolate chunks also work beautifully for a marbled effect.

- Crock Pot Round Steak Recipe: Slow-Sear Crust With Juicy Center - November 6, 2026
- Candied Sweet Potatoes Crock Pot Recipe: Caramelized Sweetness With Zero Effort - November 6, 2026
- Steak Recipe Crock Pot: Juicy, Caramelized Crust in 4 Hours - November 6, 2026