
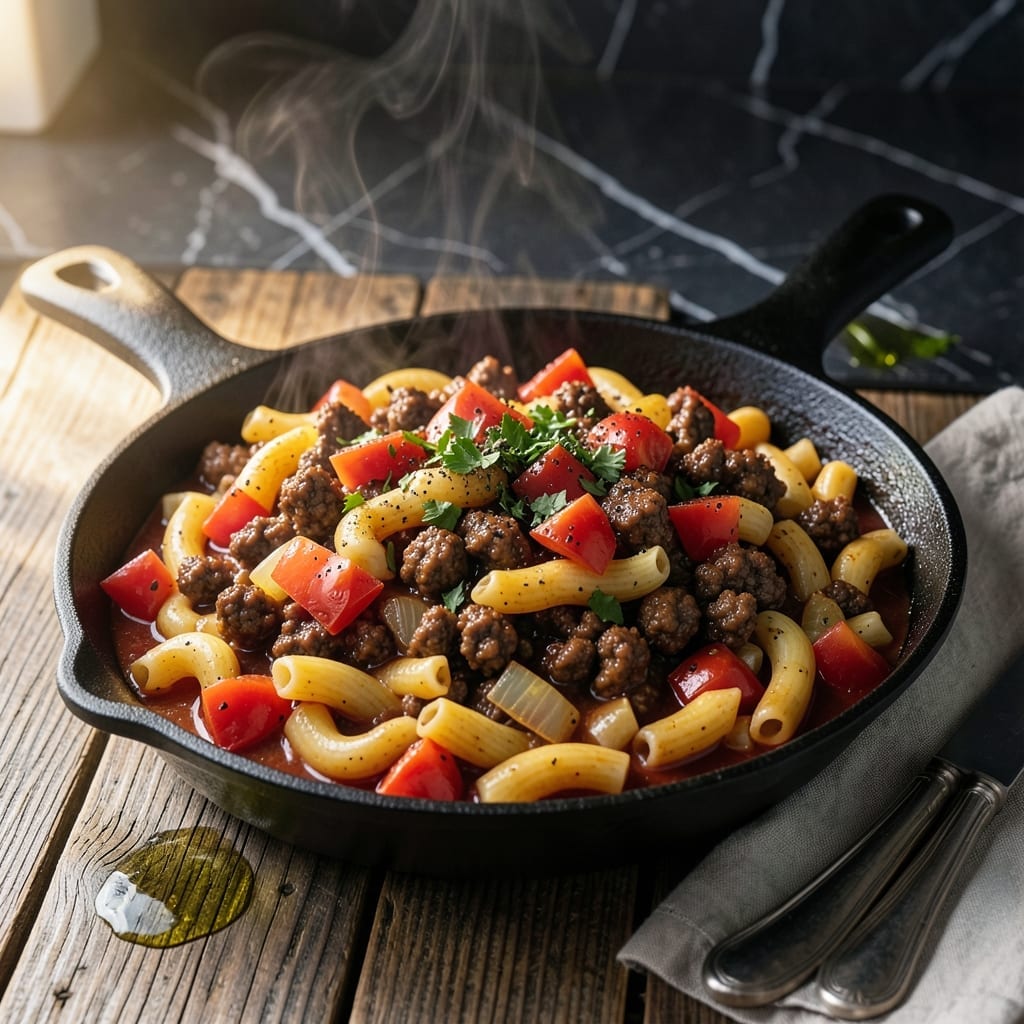
This Instant Pot goulash delivers one-pot convenience with all the hearty flavors of a slow-cooked meal. The pressure cooker transforms ground beef, pasta, and tomatoes into a rich, satisfying dish without the long simmer.
I’ve streamlined the process to fit a busy weeknight schedule—no need to babysit the stove. Just brown the meat, add the ingredients, and let the Instant Pot work its magic in under 30 minutes.
The result is a thick, flavorful goulash with tender pasta, savory beef, and a tomato base that tastes like it’s been cooking for hours. It’s comfort food made simple, with minimal cleanup.
Perfect for feeding a family or meal prepping for the week. Here’s how to make it.
Ingredients for Instant Pot Goulash
Ground beef, pasta, and tomatoes come together for this hearty one-pot meal.
| Ingredient | Amount | Notes |
|---|---|---|
| Ground Beef 🥩 | 1 lb | 80/20 lean-to-fat ratio preferred |
| Elbow Macaroni 🍝 | 2 cups | Uncooked, or any short pasta |
| Canned Diced Tomatoes 🍅 | 2 cans | 14.5 oz each, undrained |
| Tomato Sauce 🍅 | 1 can | 15 oz can |
| Beef Broth 🥣 | 2 cups | Low-sodium preferred |
| Yellow Onion 🧅 | 1 whole | Medium-sized, finely diced |
| Garlic Cloves 🧄 | 3 cloves | Minced or pressed |
| Worcestershire Sauce 🫒 | 1 tbsp | Adds depth of flavor |
| Dried Oregano 🌿 | 1 tsp | Mediterranean oregano preferred |
| Dried Basil 🍃 | 1 tsp | Crushed for better release |
| Paprika 🌶️ | 1 tsp | Sweet or smoked variety |
| Salt 🧂 | 1 tsp | Adjust to taste after cooking |
| Black Pepper 🌶️ | ½ tsp | Freshly ground preferred |
| Bay Leaf 🌿 | 1 whole | Remove before serving |
The ground beef is key here—80/20 lean-to-fat ratio gives you the best flavor and texture. Costco or Sams Club have it in bulk if you’re making a double batch. For the tomatoes, San Marzano canned tomatoes are ideal, but any diced tomatoes will work. The pasta should be a short shape like elbow macaroni so it holds up during pressure cooking.
No elbow macaroni? Any short pasta like penne or rotini works just as well. Out of beef broth? Chicken broth at equal amount or even water in a pinch (just boost the seasoning). Want more depth? Add 1 tsp of soy sauce along with the Worcestershire. The bay leaf is optional but adds a nice subtle background note.
This goulash keeps in the fridge for 4-5 days and actually tastes better the next day. Freeze leftovers for up to 3 months—just thaw overnight before reheating. Perfect for meal prep.
Why You’ll Love This Recipe
- One Pot Magic: I just brown the beef, dump everything else in, and let the Instant Pot do the work.
- Rich Tomato Depth: The combo of diced tomatoes and sauce with the beef broth creates this hearty, savory base that soaks right into the macaroni.
- Weeknight Hero: Between us, this is my go-to for busy evenings when I need to feed everyone fast.
- Budget Stretcher: Ground beef and pantry staples make this ridculously affordable, and leftovers taste even better the next day.
Step-by-Step Instructions for Instant Pot Goulash
This one-pot method delivers hearty, flavorful results with minimal cleanup and effort.
Step 1: Sauté the Aromatics and Brown the Beef
Set the Instant Pot to the Sauté function on Normal heat. Add the finely diced yellow onion and cook for 2-3 minutes until it softens and becomes translucent. I stir occasionally to prevent sticking and ensure even cooking.
Add the ground beef, breaking it up with a wooden spoon as it browns. Cook for 5-6 minutes until the beef is no longer pink and starts to develop light brown edges. Drain any excess fat if desired, though I typically leave about 1 tablespoon for flavor.
Step 2: Build the Flavor Base
Stir in the minced garlic cloves and cook for 30 seconds until fragrant—this prevents the garlic from burning. Immediately add the Worcestershire sauce, dried oregano, dried basil, paprika, salt, and black pepper. Stir well to coat the beef and onions evenly with the spices.
Pour in the beef broth and use a wooden spoon to scrape up any browned bits from the bottom of the pot. These bits, known as fond, add depth of flavor to the dish. Add the bay leaf at this stage to infuse the broth with its subtle aroma.
Step 3: Add Remaining Ingredients and Pressure Cook
Add the canned diced tomatoes (undrained) and tomato sauce to the Instant Pot, stirring to combine all the ingredients. Then, add the elbow macaroni, pushing it down gently into the liquid so it’s mostly submerged. This ensures even cooking and prevents burning.
Secure the lid, set the valve to Sealing, and cook on High Pressure for 4 minutes. The Instant Pot will take about 10-15 minutes to come to pressure before the cooking time begins. Once done, let the pressure release naturally for 5 minutes, then quick-release any remaining pressure.
Step 4: Finish and Serve
Carefully open the lid and remove the bay leaf. Stir the goulash well—the pasta should be tender and the sauce thickened. If it seems too thick, stir in a splash of beef broth or water to reach your desired consistency.
Let it sit for 2-3 minutes to allow the flavors to meld together. Taste and adjust the seasoning with additional salt or pepper if needed. Serve hot, garnished with extra dried basil or grated Parmesan cheese if desired.
Pro Tips For Making Instant Pot Goulash
- Brown the Beef Well: Take the extra 5 minutes to fully brown the ground beef in the Instant Pot before adding liquids—it deepens the flavor and prevents a greasy texture. I learned this the hard way after my first few batches tasted flat.
- Use Less Macaroni: Cut the elbow macaroni to 1 ½ cups max for a 6-quart pot, as it expands more than you’d expect and can turn mushy. After overcooking a few batches, I finally got the ratio right.
- Deglaze Thoroughly: Scrape the bottom of the pot after browning the beef to loosen all the browned bits, or you’ll risk a burn notice. Sounds tedious, but it saves you from restarting the whole process.
- Skip Pre-Cooked Noodles: Toss the uncooked macaroni straight into the pot with the other ingredients—it absorbs the flavors better and cooks perfectly in the pressure cycle. I was skeptical until I tried it, but it works every time.
Make-Ahead Tips for Leftovers
Prep Ahead Strategy
You can chop the yellow onion and mince the garlic cloves up to 2 days ahead. Store them in airtight containers in the fridge. I like using OXO Good Grips containers—they keep everything fresh. 💡
Brown Beef Early
Brown the ground beef and onions in advance, then refrigerate the cooked mixture for up to 24 hours. This saves time on busy nights. Just reheat briefly on Sauté mode before adding the remaining ingredients.
Freezer-Friendly Batches
Cook a double batch and freeze portions in quart-sized freezer bags for up to 3 months. Lay them flat to save space and thaw overnight in the fridge before reheating. I always label with the date to track freshness.
Reheating Tips
Reheat on the stovetop over medium-low heat with a splash of beef broth to restore creaminess. Microwave works too—cover with a damp paper towel and stir every 2 minutes until hot. ❄️
Pasta Adjustments
If making ahead, undercook the pasta by 1 minute to prevent mushiness when reheated. Alternatively, cook the pasta separately and combine it with the sauce just before serving.
Flavor Boost
Stir in an extra 1 tsp Worcestershire sauce or a pinch of smoked paprika when reheating to revive the flavors. This trick makes leftovers taste just as good as the first serving.
Nutrition Facts
Frequently Asked Questions
Can I use ground turkey instead of beef?
Yes! Ground turkey works perfectly. Use the same 1 lb amount and cook time. The flavor will be slightly milder, so consider adding an extra 1 tsp of Worcestershire sauce for depth.
Why did my pasta turn out mushy?
This usually happens if the pasta sits in the liquid too long after cooking. Stir immediately after pressure cooking and let it rest for only 2-3 minutes before serving to prevent over-softening.
Can I make this without tomatoes?
Not recommended, as tomatoes are key for texture and acidity. For a tomato-free version, try substituting with 1 cup of pumpkin puree and extra broth, but the flavor profile will differ significantly.

- 4C Bread Crumbs Meatballs Recipe: Crispy Crust and Juicy Centers - September 25, 2026
- 6 Oz Chocolate Chip Cookie Recipe: Perfectly Balanced Crispy Edges and Chewy Hearts - September 25, 2026
- 6-Inch Coffee Cake Recipe: Vanilla Bean Swirls and Buttery Streusel Topping - September 25, 2026