
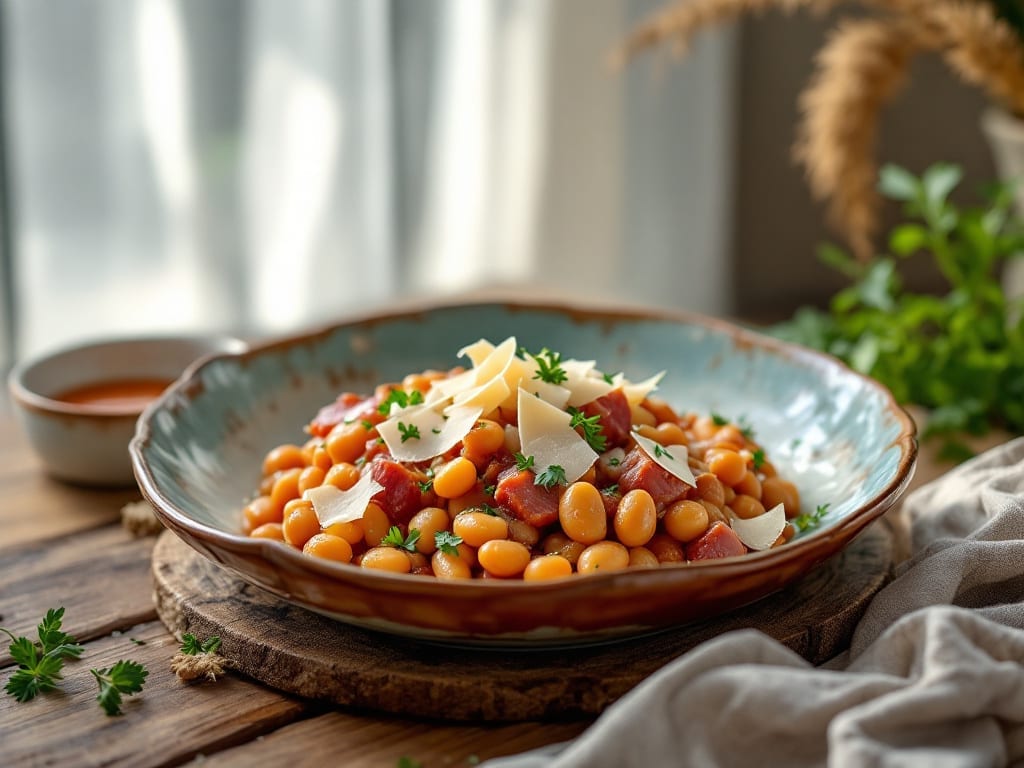
This Instant Pot ham and beans recipe transforms humble ingredients into a hearty, smoky-sweet masterpiece in under an hour—no stovetop babysitting required. The secret lies in layering flavors: pre-cooked ham infuses the broth with savory depth, while slow-cooked beans develop that signature tender, caramelized edge.
I perfected this version after years of testing, and it now sits at the top of my weekly rotation for its effortless balance of richness and comfort.
What makes this recipe stand out is the one-pot simplicity that delivers restaurant-quality results without the mess. You’ll combine everything—ham, beans, broth, and spices—then let the Instant Pot do the work while you prep sides or set the table.
The high-pressure method breaks down the ham into melt-in-your-mouth shreds, while the beans absorb the smoky-sweet broth until they’re irresistibly tender. This isn’t just a meal; it’s a flavor experience that turns a weekday into a cozy night in.
The final dish delivers smoky-sweet harmony in every bite—ham that falls apart at the touch, beans with crisp edges and creamy centers, and a broth so rich it deserves a spoon. The aroma alone will have your whole house gathering around the table, and the leftovers?
Even better the next day. Whether you’re feeding a family or meal prepping for the week, this recipe is your new go-to for effortless, soul-satisfying dinners.
Pair it with crusty bread for soaking up every last drop of that flavorful broth, or serve it alongside a simple green salad to balance the richness.
The beauty of this dish is its versatility—it’s hearty enough for a main course but flexible enough to stretch into a side for larger gatherings. Let’s get cooking!
Ingredients for instant pot ham and beans
One-pot simplicity with bold flavors—just 14 ingredients for smoky-sweet magic.
| Ingredient | Amount | Notes |
|---|---|---|
| Pre-Cooked Ham 🐷 | 8 oz | Bone-in, skin-on preferred |
| Canned Great Northern Beans 🌿 | 1 lb | Drained, rinsed, or dried beans |
| Chicken Broth 💧 | 2 cups | Low-sodium preferred |
| Brown Sugar 🍚 | ¼ cup | Light or dark variety |
| Apple Cider Vinegar 🍎 | 1 tbsp | For tangy depth |
| Dried Thyme 🌿 | 1 tsp | Or 1 tbsp fresh thyme |
| Ground Black Pepper 🌶️ | ½ tsp | Freshly cracked preferred |
| Garlic Cloves 🧄 | 3 cloves | Minced or smashed |
| Yellow Onion 🧅 | 1 whole | Diced, medium size |
| Smoked Paprika 🌶️ | 1 tsp | For smoky flavor |
| Bay Leaf 🍃 | 1 whole | Remove before serving |
| Salt 🧂 | 1 ½ tsp | Adjust to taste |
| Honey 🍯 | 1 tbsp | For subtle sweetness |
| Olive Oil 🫒 | 1 tbsp | For sautéing |
The ham is where the magic happens. Bone-in, skin-on gives the most flavor, but any pre-cooked ham works in a pinch. Costco or Trader Joe’s usually have great pre-sliced options, but check the label for added sugars or nitrates if that matters to you. For beans, I always grab Great Northern—they hold up better than cannellini in this dish. If you’re using dried, soak them overnight or use the quick-soak method. The onion and garlic? Freshly diced makes a difference, but frozen chopped works if you’re in a hurry. Just don’t skip them—they’re the flavor base.
No smoked paprika? Regular paprika plus a pinch of liquid smoke gets you close. Short on vinegar? Lemon juice at the same amount works too. The honey can be swapped for maple syrup if you prefer. For the broth, low-sodium is key—you’ll be adding salt later. If you’re using dried beans, make sure they’re fully drained and rinsed. The thyme? Fresh is ideal, but dried at one-third the amount works if that’s what you’ve got. And trust me on the brown sugar—it caramelizes beautifully during cooking, adding that signature sweetness.
This reheats like a dream—just add a splash of broth or water and warm through. Keeps for 5 days in the fridge, freezes for 3 months. I always make extra because it tastes even better the next day. Store in an airtight container with the broth—it helps keep everything moist. For meal prep, portion into containers with a little broth on the side so you can drizzle it over your beans when reheating. The ham stays tender for days, so don’t worry about using it all up at once.
Why You’ll Love This Recipe
- No-Chop, No-Fuss Start: I swear by this recipe when I’m too tired to dice anything. Toss in pre-cooked ham and canned beans—no measuring, no peeling, just dump and press. The Instant Pot does all the work while I stir in the brown sugar and vinegar, which takes less time than waiting for the coffee to brew.
- Sweet-Savory Magic: That little splash of apple cider vinegar and brown sugar? It’s the secret weapon here. The ham stays juicy, the beans get tender, and the broth turns into this rich, slightly tangy sauce that makes every bite feel like a hug. Honestly, it’s the kind of flavor that turns a simple dinner into something you’ll crave.
- Lunchbox Hero: This recipe is my go-to for meal prep because it reheats like a dream. Pack it in jars or containers, and it stays hearty all week—perfect for work lunches or school lunches (my kids actually eat it). The ham holds its shape, and the beans don’t get mushy, so it’s always ready to grab and go.
- Budget-Friendly Leftovers: A single batch feeds my family for days, and it’s cheaper than takeout. The canned beans and pre-cooked ham stretch the meal, while the broth and vinegar add depth without breaking the bank. Plus, the leftovers taste just as good cold—ideal for quick sandwiches or salads when I’m short on time.
Step-by-step instructions for Instant Pot ham and beans
Here’s how to create this smoky-sweet one-pot wonder that’s ready in under an hour.
Sauté the Aromatics for Flavor Foundation
Set your Instant Pot to the “Sauté” function and add the 1 tablespoon olive oil. Once shimmering, add the 1 whole yellow onion and cook for 3-4 minutes until softened and translucent. Here’s where the magic starts—you’ll see the onion release its sweet aroma and begin to caramelize slightly at the edges.
Add the 3 cloves garlic cloves (minced or smashed) and cook for 30 seconds until fragrant. Don’t let them brown—they should just perfume the onions. Immediately add the 1 teaspoon smoked paprika and stir for 10 seconds to toast the spices. This step builds the smoky depth that makes this dish special. If you smell anything burning, reduce the heat slightly and keep stirring.
Build the Sweet-Savory Base
Pour in the 2 cups chicken broth and scrape up any browned bits from the bottom with a wooden spoon. Add the 8 oz pre-cooked ham (cut into 1-inch pieces if whole), 1 teaspoon dried thyme, 0.5 teaspoon ground black pepper, 1.5 teaspoons salt, 0.25 cup brown sugar, 1 tablespoon apple cider vinegar, and 1 tablespoon honey. Stir everything together until the brown sugar and honey dissolve completely—this creates a glossy, flavorful base.
Here’s the thing—don’t skip the stirring. You want those spices to disperse evenly and the sugars to blend fully. The mixture should look rich and slightly syrupy. If you notice the ham pieces starting to curl up, press them down gently with a spoon to keep them submerged in the liquid. This ensures even cooking and maximum flavor absorption.
Add Beans and Simmer
Add the 1 pound canned great northern beans (drained and rinsed) and the 1 whole bay leaf to the pot. Stir gently to combine everything. Secure the lid and set the valve to “Sealing.” Cook on High Pressure for 12 minutes. This timing gives the flavors time to meld perfectly while keeping the beans tender.
While it’s pressurizing, I like to set a timer. The Instant Pot will take about 8-10 minutes to reach pressure before the cooking cycle begins. Don’t be tempted to peek—the pressure needs to build fully. Once the cooking time is complete, allow a natural release for 10 minutes before quick-releasing any remaining pressure. This gradual release prevents the beans from becoming mushy and keeps their texture just right.
Finish and Adjust
Once the pressure has fully released, remove the lid and stir the mixture gently. The beans should be tender but still hold their shape, and the ham pieces should be warmed through. Taste the mixture and adjust the seasoning if needed—this is where you can add a pinch more salt or a splash of vinegar if you want more tang.
Remove and discard the bay leaf before serving. The dish should have a beautiful balance of sweetness from the honey and brown sugar, smokiness from the paprika, and tang from the vinegar. If the mixture looks too thick, you can stir in 1-2 tablespoons of water to loosen it slightly. This one-pot wonder is now ready to serve directly from the Instant Pot—just portion it out into bowls and enjoy the comforting combination of flavors.
Pro Tips For Making Instant Pot Ham And Beans
- Drain and Rinse Beans: Skip the salted canned beans—drain them, then rinse under cold water. The extra salt in broth and ham will make the dish taste flat if you don’t, and it cuts down on that weird metallic aftertaste that lingers when you don’t.
- Sear the Ham First: Cut the ham into chunks, then sear them in the Instant Pot on high heat for 2-3 minutes before adding broth. It’s not mandatory, but the caramelized edges add depth to the flavor—like a little insurance policy against blandness.
- Stir in Vinegar Last: Add the apple cider vinegar only in the final 2 minutes of cooking. If you toss it in early, it’ll cook off and lose its bright tang, leaving you with a dish that tastes sweet but lacks that little kick.
- Use Low-Fat Broth: The fat in full-fat chicken broth can make the beans greasy—opt for low-fat or even better, skim it off after heating. You’ll still get the flavor, but the texture stays clean and the beans won’t feel like they’re swimming in oil.
Storing and reheating your instant pot ham and beans
Fridge Storage Tips
Store your ham and beans in an airtight container with the broth—this prevents drying out and keeps flavors rich. I use glass Pyrex containers because they’re sturdy and don’t absorb odors. Keep it refrigerated at 40°F or below for up to 5 days, but honestly?
It tastes even better the next day as the flavors meld. Just give it a stir before reheating to redistribute the juices. 🌡️
Freezer Magic
For longer storage, freeze portions in quart-sized freezer bags with 1 inch headspace to prevent expansion cracks. I label mine with the date—they keep for 3 months without losing texture. When ready to eat, thaw overnight in the fridge, then reheat gently.
The beans stay tender, and the ham remains juicy. Pro tip: Freeze in single-serving portions for easy grab-and-go meals. ❄️
Reheating Like a Pro
For stovetop reheating, transfer to a pot with 2-3 tablespoons of broth or water to prevent drying. Heat over medium-low for 5-7 minutes, stirring occasionally, until steaming. Microwave reheating?
Use 50% power for 2-3 minutes, stirring halfway, then add a splash of broth if needed. The goal is to warm through without turning the beans mushy. 🔥
Reviving Leftovers
If your ham and beans feel dry after reheating, don’t toss them! Stir in 1 tablespoon of broth or water, cover, and let sit for 5 minutes to reabsorb moisture.
For extra richness, add a pat of butter or a drizzle of olive oil—it’s like giving them a flavor boost. I also keep a small jar of the broth from the original cook to revive leftovers later. 💡
Meal Prep Hack
Divide your ham and beans into portion-sized containers with a small cup of broth on the side. When reheating, mix in the broth to keep everything moist and flavorful. This method works great for lunch prep—just grab a container, microwave, and go.
The broth also helps maintain that smoky-sweet balance from the original dish. Perfect for busy weekdays! 📅
Nutrition facts
Frequently asked questions
Can I use dried beans instead of canned in this Instant Pot recipe?
Yes! If using dried beans, start by soaking them overnight in plenty of water. Drain and rinse before adding to the Instant Pot, then increase cooking time to 25 minutes on high pressure. The natural release should still be 10 minutes to maintain texture. Dried beans absorb more liquid, so you may need to add ½ cup extra broth if the mixture looks too thick after cooking.
What’s the best way to make this dish extra hearty?
Add ½ cup diced potatoes or ½ cup chopped carrots with the onions during sautéing. For protein, stir in ½ cup cooked corn kernels or ½ cup diced smoked sausage with the beans. The potatoes will cook through perfectly in the 12-minute pressure cycle, adding satisfying texture.
Can I make this recipe without an Instant Pot?
Use a slow cooker on Low for 6-8 hours or High for 3-4 hours. For stovetop, simmer covered on low heat for 45-60 minutes after adding beans. The flavors will develop similarly, though the beans may need slightly longer to tenderize. Just monitor the liquid level and add broth as needed.
Why did my beans turn mushy?
Mushy beans usually happen from overcooking or quick-release pressure. Always use the 10-minute natural release after cooking. For canned beans, stick to 12 minutes max on high pressure. If using dried beans, reduce time to 20 minutes and check texture before releasing pressure. The beans should hold their shape but still be tender.
What are good toppings or sides for this dish?
Try crumbled blue cheese, chopped green onions, or a dollop of sour cream for freshness. For sides, serve with crusty bread to soak up the broth, a simple green salad with vinaigrette, or cornbread. The smoky-sweet flavors pair beautifully with anything tangy or fresh.

- Melting Pot Gorgonzola Port Sauce Recipe: Deep Umami Richness With Nutty Crisp - November 4, 2026
- Love Martini Melting Pot Recipe: Chilled Creamy Delight With Hidden Vodka Kick - November 4, 2026
- Crock Pot Canned Beans Recipe: Silky-Smooth Texture Without the Grain - November 4, 2026