
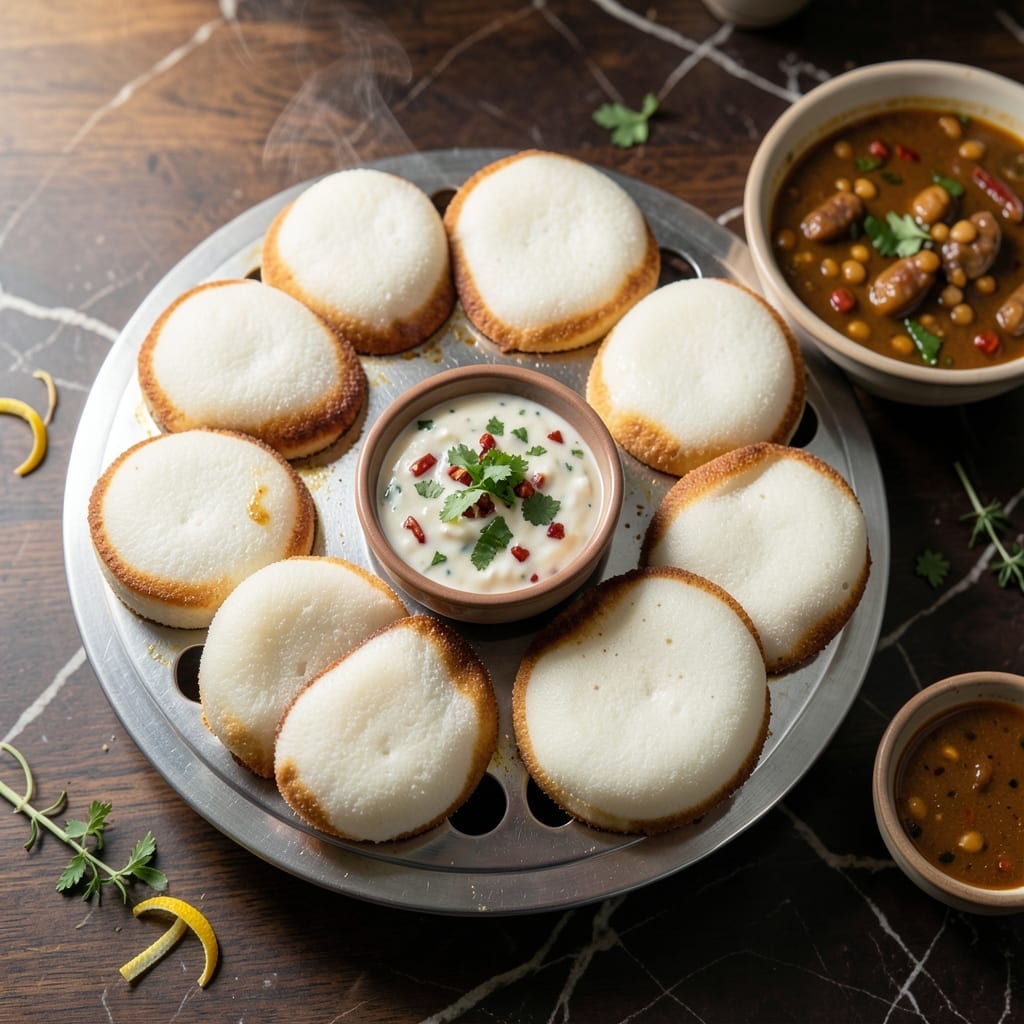
There’s something deeply comforting about soft, fluffy idli—those pillowy steamed cakes that define South Indian breakfasts. This Instant Pot method preserves tradition while simplifying the process, delivering perfectly tender results without the hassle of a traditional steamer.
The secret lies in the fermentation and precise steaming. With just a few simple ingredients and the right timing, you’ll achieve that signature light, airy texture every time. No special equipment, just your Instant Pot and a little patience.
What emerges are delicate, snow-white idli with a slightly tangy flavor, ready to pair with coconut chutney or sambar. The Instant Pot’s controlled environment ensures even cooking, eliminating the guesswork of stovetop methods.
This approach honors the dish’s roots while making it accessible for modern kitchens. Let’s bring this beloved comfort food to your table.
Ingredients for Instant Pot Idli
Simple, traditional ingredients for pillowy, tangy steamed perfection every time.
| Ingredient | Amount | Notes |
|---|---|---|
| Idli Rice 🌾 | 2 cups | Parboiled, or idli rava |
| Urad Dal 🥣 | ¾ cup | Whole, black gram lentils |
| Fenugreek Seeds 🌿 | 1 tsp | For fermentation boost |
| Salt 🧂 | 1 ½ tsp | Adjust to taste after fermentation |
| Water 💧 | 1 ½ cups | For soaking and grinding |
| Coconut Oil 🥥 | 1 tbsp | For greasing molds |
| Curry Leaves 🍃 | 10 pieces | Optional, for flavor |
| Green Chilies 🌶️ | 2 whole | Finely chopped, optional |
| Ginger 🌿 | 1 whole | 1-inch piece, grated |
| Asafoetida 🧂 | ¼ tsp | Pinch, for tempering |
The rice and urad dal are non-negotiable here. Indian grocery stores carry both—look for parboiled idli rice (sometimes labeled idli rava) and whole urad dal with the black skin on. Fenugreek seeds are tiny but mighty for fermentation. Patel Brothers or H-Mart are great spots to grab these. If you’ve got a pressure cooker at home, you’re already halfway there.
No urad dal? Split mung beans work in a pinch (texture will differ slightly). Short on time? Pre-mixed idli batter from the store gets you close, but the homemade version is worth the effort. The coconut oil can be swapped for neutral oil, but it adds a subtle sweetness that’s classic. Curry leaves and asafoetida are traditional but optional—skip them if you can’t find them.
Soaked rice and dal keep in the fridge for 24 hours before grinding. Fermented batter stays good for 48 hours refrigerated. Cooked idli reheat beautifully in the microwave with a splash of water. Always store batter in a large bowl—it expands as it ferments.
Why You’ll Love This Recipe
- Set It and Forget: I toss everything in the Instant Pot, press a button, and let the urad dal and rice ferment and steam hands-off—no stove babysitting required.
- That Fermented Tang: Honestly, the fenugreek seeds do magic here, giving the idli that signature slightly sour kick that pairs perfectly with the fluffy texture.
- Breakfast to Dinner: I make a big batch on Sunday and we’re set for quick breakfasts, lunchboxes, or even a light dinner with chutney.
- Pocket-Friendly Feast: Idli rice and urad dal are budget staples, and one cup of batter stretched into a dozen soft idlis—my wallet loves it.
Step-by-Step Instructions for Instant Pot Idli
Here’s how I make fluffy, restaurant-worthy idlis using my Instant Pot—no fermentation stress required.
Step 1: Soak and Prepare the Batter Base
Rinse the 2 cups Idli Rice and 0.75 cup Urad Dal separately under cold water until the water runs clear. Drain thoroughly, then combine them in a large bowl with the 1 tsp Fenugreek Seeds. Add the 1.5 cups Water and stir to submerge everything completely.
Cover and let soak at room temperature for at least 6 hours (overnight is ideal). The rice and dal will double in volume and soften significantly. I’ve found that soaking longer than 8 hours can lead to overly sour batter, so stick to this window for best results.
Step 2: Grind and Ferment the Batter
Drain the soaked rice and dal, reserving any excess water. Grind the urad dal first with a little of the reserved water until smooth and fluffy—this takes about 10-12 minutes in a high-speed blender. Transfer to a large bowl, then grind the rice with the remaining water until it resembles fine semolina.
Combine both mixtures, add the 1.5 tsp Salt, and whisk vigorously for 2-3 minutes to incorporate air. The batter should be thick but pourable. Cover and ferment in a warm place for 8-12 hours until it rises slightly and develops a tangy aroma. In cooler weather, I place it in my turned-off oven with the light on to maintain warmth.
Step 3: Prepare the Idli Molds and Tempering
Grease the idli molds with the 1 tbsp Coconut Oil to prevent sticking. If using the optional flavor boosters, prepare a quick tempering: heat a teaspoon of oil in a small pan, add the 0.25 tsp Asafoetida, 10 pieces Curry Leaves, finely chopped 2 whole Green Chilies, and grated 1 whole Ginger. Sauté for 30 seconds until fragrant, then mix into the batter for extra depth.
Give the batter a final stir—it should have a slightly bubbly texture and a pleasant sour smell. If it’s too thick, add 1-2 tablespoons of water to adjust the consistency. The batter is ready when it’s aerated and holds its shape briefly before spreading.
Step 4: Steam in the Instant Pot
Pour 1.5 cups Water into the Instant Pot and place the trivet inside. Arrange the greased idli molds in the steamer basket or on the trivet. Pour the batter into each mold, filling them about ¾ full—they’ll expand as they cook.
Secure the lid, set the valve to sealing, and steam on high pressure for 10 minutes. Allow a natural pressure release for 5 minutes, then quick-release any remaining pressure. The idlis are done when a toothpick inserted in the center comes out clean and the tops are slightly domed and matte white.
Step 5: Rest and Serve
Let the idlis rest in the molds for 2-3 minutes after steaming—this helps them firm up and release easily. Run a spoon around the edges to loosen, then gently remove each idli from the mold.
Serve warm with coconut chutney or sambar. The texture should be soft, spongy, and slightly springy with no raw taste. If they’re dense, your batter may need more fermentation time next round. Enjoy these pillowy delights fresh—they’re best hot off the steamer!
Pro Tips For Making Instant Pot Idli
- Soak Overnight: I learned this the hard way—soak the urad dal and idli rice for at least 6-8 hours, or overnight. Skimping on time leads to dense, under-fermented idlis that just don’t fluff up right.
- Use Warm Water: Always grind the urad dal with warm water—about 110°F. It kickstarts fermentation and gives the batter that perfect light, airy texture.
- Skip Overfilling: Resist the urge to fill idli molds to the brim. Leave ¼ inch at the top, or they’ll overflow and stick to the pot—yes, even if you’re impatient like me.
- Rest the Batter: After mixing, let the batter rest for 10-15 minutes before pouring into molds. It settles the air bubbles and makes the idlis uniformly soft.
Perfect Pairings for instant pot idli
Classic Chutney Pairings
You can’t go wrong with coconut chutney—its creamy texture and mild sweetness balance the idli’s tang. I blend 1 cup grated coconut with 2 tbsp roasted chana dal and 1 green chili for perfect consistency. A tempering of mustard seeds and curry leaves adds depth. 💛
Sambar Companions
The ultimate South Indian duo pairs these idlis with vegetable sambar. Simmer 1 cup toor dal with 2 cups mixed vegetables and 1 tsp sambar powder for an authentic touch. The tangy, spiced lentil stew soaks beautifully into the fluffy idlis.
Modern Dips
For a fusion twist, try a mint-coriander chutney with yogurt. Blend ½ cup mint leaves, ½ cup cilantro, and ¼ cup plain yogurt for a refreshing dip. I love how this bright green sauce adds vibrant color to the plate.
Spicy Accompaniments
Add heat with tomato-onion chutney—sauté 2 chopped tomatoes and 1 diced onion with 1 tsp red chili powder. This chunky, spicy condiment contrasts wonderfully with the soft idlis. Adjust the heat level to your preference.
Breakfast Combos
Serve with filter coffee for a traditional South Indian breakfast. The strong, aromatic brew cuts through the idli’s mildness. I use Malabar Gold blend for authentic flavor. A side of podi idli with gunpowder spice mix makes it extra special. ☕
Kids’ Favorites
For picky eaters, offer sugar syrup or condensed milk drizzle. My kids love dipping warm idlis in 2 tbsp sugar dissolved in ¼ cup water. It’s a sweet treat that transforms the dish into a dessert-like experience.
Nutrition Facts
Frequently Asked Questions
Why does my batter not ferment well?
Fermentation needs warmth. Place the bowl in a turned-off oven with the light on, or near a warm spot in your kitchen. Avoid cold areas.
Can I use regular rice instead of idli rice?
Yes, but the texture will differ. Parboiled rice works best. For regular rice, soak longer and expect slightly denser idlis.
How do I prevent idlis from sticking to molds?
Grease molds thoroughly with coconut oil before pouring batter. Let idlis rest for 2-3 minutes after steaming before removing.
Can I make idlis without fermenting the batter?
Fermentation is key for fluffy texture and tangy flavor. Skipping it results in dense, flat idlis. Allow at least 8 hours for best results.

- 4C Bread Crumbs Meatballs Recipe: Crispy Crust and Juicy Centers - September 25, 2026
- 6 Oz Chocolate Chip Cookie Recipe: Perfectly Balanced Crispy Edges and Chewy Hearts - September 25, 2026
- 6-Inch Coffee Cake Recipe: Vanilla Bean Swirls and Buttery Streusel Topping - September 25, 2026