
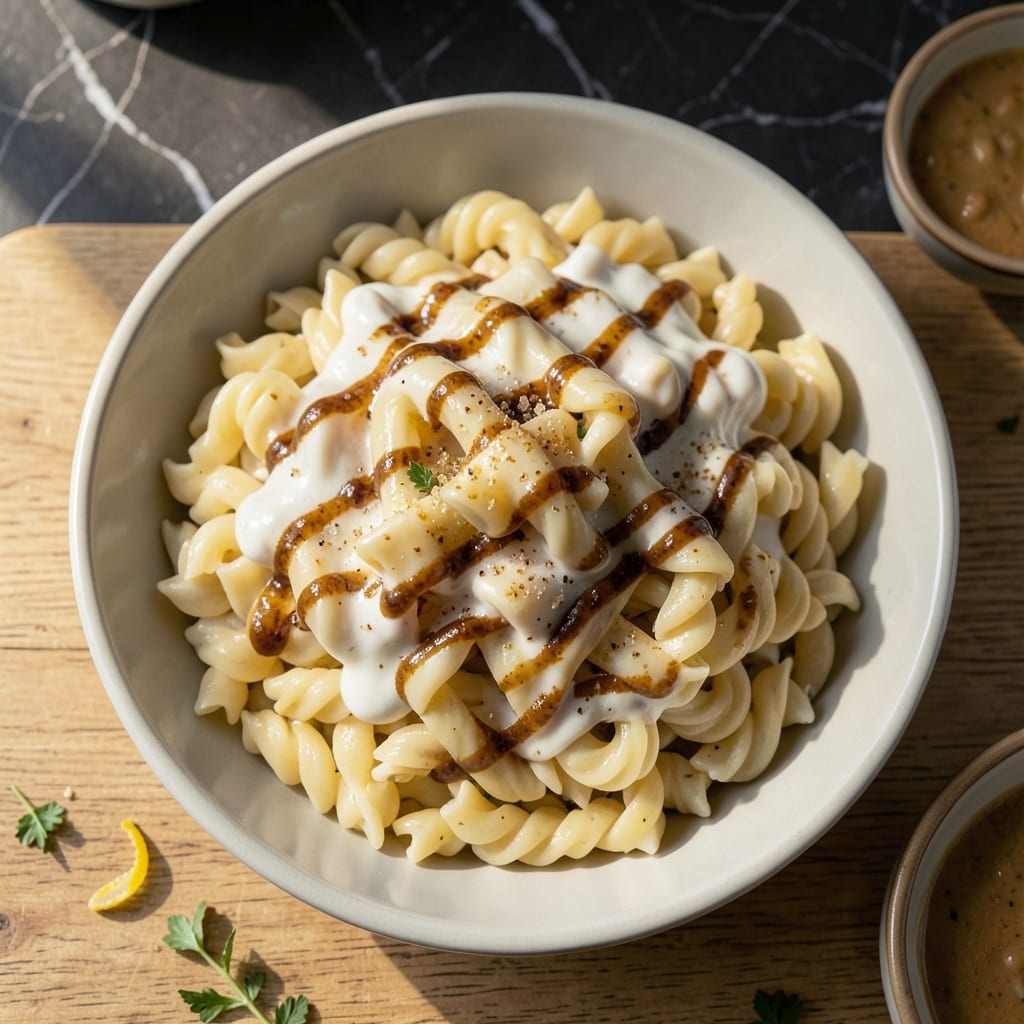
I developed this Instant Pot method to create a creamy pasta salad without heating up the kitchen. The pressure cooker handles the pasta perfectly while keeping it firm enough for cold serving.
What sets this apart is the ability to cook pasta and blend it with dressing while still warm, allowing flavors to meld completely. The result is a salad that tastes marinated for hours in a fraction of the time.
You’ll get al dente pasta coated in a rich, tangy dressing with crisp vegetables throughout. The texture stays ideal even after refrigeration, making it perfect for meal prep.
This approach eliminates the need for boiling pots and colanders. The entire process happens in one appliance with minimal cleanup.
Ingredients for Instant Pot Pasta Salad
Pantry staples plus fresh veggies make this cold pasta dish sing.
| Ingredient | Amount | Notes |
|---|---|---|
| Rotini Pasta 🍝 | 12 oz | Or any short pasta shape |
| Mayonnaise 🥣 | ¾ cup | Full-fat for creaminess |
| Sour Cream 🥛 | ½ cup | Adds tangy richness |
| White Vinegar 💧 | 2 tbsp | For acidity balance |
| Dijon Mustard 🟡 | 1 tbsp | Smooth, not grainy |
| Granulated Sugar 🍚 | 1 tsp | Balances dressing flavors |
| Cherry Tomatoes 🍅 | 1 cup | Halved for texture |
| Bell Pepper 🌶️ | 1 whole | Diced, any color |
| English Cucumber 🥒 | 1 whole | Seeds removed, diced |
| Red Onion 🧅 | ½ whole | Finely diced for bite |
| Fresh Parsley 🌿 | ¼ cup | Chopped for garnish |
| Salt 🧂 | 1 tsp | Adjust to taste |
| Black Pepper 🌶️ | ½ tsp | Freshly ground preferred |
| Water 💧 | 3 cups | For pressure cooking pasta |
The pasta shape matters—rotini or penne hold dressing best. I grab Barilla from any grocery store (the blue box). For the veggies, farmers market produce has better crunch, but supermarket stuff works fine too. The key is dicing everything small and uniform so each bite has a little of everything. Don’t skip the cucumber seeds removal—watery salad is sad salad.
No mayonnaise? Greek yogurt at a 1:1 swap works (use full-fat). Out of Dijon? Yellow mustard in a pinch, but add an extra pinch of sugar. Fresh herbs? Dried parsley at half the amount (or skip it). The vinegar can be apple cider if that’s what you’ve got. For extra creaminess, some people add a splash of pasta water—totally optional.
This keeps 4-5 days in the fridge (the flavors actually improve). Store in an airtight container—glass is best. Don’t dress it until it’s completely cool, or the pasta will absorb all the dressing. Perfect for meal prep—holds up great.
Why You’ll Love This Recipe
- One-Pot Wonder: I toss everything in the Instant Pot—no boiling, no draining, just set it and forget it.
- Creamy Tangy Bite: The mix of mayo, sour cream, and a hint of Dijon gives it that rich, zesty kick I crave.
- Meal Prep Magic: I make a big batch on Sunday and it stays fresh all week—lunches sorted.
- Budget Stretcher: Rotini and a few pantry staples feed my whole family without breaking the bank.
Step-by-Step Instructions for Instant Pot Pasta Salad
Here’s how I make this creamy dish with minimal effort and maximum flavor.
Step 1: Pressure Cook the Rotini Pasta
Add the 12 oz Rotini Pasta and 3 cups Water to your Instant Pot. Stir gently to ensure the pasta is fully submerged. Secure the lid and set the valve to sealing position.
Cook on high pressure for 4 minutes. I know it seems short, but the pasta continues cooking during the pressure release. Once the timer beeps, immediately switch to quick release—this prevents the pasta from overcooking and turning mushy.
Drain the pasta in a colander and rinse under cold water for 30 seconds to stop the cooking process. This also washes away excess starch that could make your salad gummy. Shake the colander gently to remove as much water as possible.
Step 2: Prepare the Creamy Dressing
In a large bowl, whisk together the 0.75 cup Mayonnaise, 0.5 cup Sour Cream, 2 tbsp White Vinegar, 1 tbsp Dijon Mustard, and 1 tsp Granulated Sugar. The vinegar adds a bright tang that balances the richness of the mayo and sour cream.
Season with 1 tsp Salt and 0.5 tsp Black Pepper. Taste and adjust the seasoning if needed—remember, the pasta will absorb some of the saltiness. The dressing should be smooth and creamy, with a slight sheen.
Here’s the thing—this dressing is thick, which is perfect for coating the pasta and veggies without making the salad watery. If it seems too thick, you can thin it with a splash of cold water, but I usually find it’s just right.
Step 3: Chop and Prep the Fresh Veggies
While the pasta cooks and cools, prep your vegetables. Halve the 1 cup Cherry Tomatoes—if they’re large, quarter them for better distribution. Dice the 1 whole Bell Pepper into ¼-inch pieces for a nice, fine texture.
Cut the 1 whole English Cucumber in half lengthwise and scoop out the seeds with a spoon. Dice the cucumber into similar-sized pieces as the bell pepper. Finely dice the 0.5 whole Red Onion—this ensures it blends well without overpowering any single bite.
Chop the 0.25 cup Fresh Parsley finely. This adds a pop of color and freshness that ties everything together. I like to add a little extra parsley at the end for garnish, but that’s optional.
Step 4: Combine and Chill
Add the cooled pasta to the bowl with the dressing and toss until every piece is evenly coated. The dressing should cling to the pasta, creating a glossy finish. Now fold in the chopped Cherry Tomatoes, Bell Pepper, English Cucumber, and Red Onion.
Gently stir in the Fresh Parsley. The veggies should be evenly distributed throughout the salad. Cover the bowl with plastic wrap and refrigerate for at least 1 hour—this lets the flavors meld together and the pasta absorb the dressing.
I always taste it again before serving and adjust the seasoning if needed. Sometimes a pinch more salt or a splash of vinegar brings everything into balance.
Pro Tips For Making Instant Pot Pasta Salad
- Undercook the Pasta: Cook the rotini 1-2 minutes less than the package says—I learned this the hard way after ending up with mushy pasta salad that soaked up too much dressing.
- Chill Before Dressing: Let the pasta cool completely in a colander for 10 minutes before mixing with mayo and sour cream, or you’ll get a greasy, separated mess.
- Balance the Tang: Start with 1 tablespoon each of vinegar and Dijon, then adjust—I used to overdo the vinegar and regret it when the salad tasted harsh.
- Use Full-Fat Dairy: Skip low-fat sour cream; the full-fat version actually changes the outcome, keeping the dressing creamy instead of watery.
Essential Equipment for Perfect Results
Instant Pot Essentials
You’ll need a 6-quart or 8-quart Instant Pot—I use my Duo Crisp which handles pressure cooking perfectly. The size matters because pasta expands significantly. A 3-quart won’t have enough capacity for this recipe. 💡
Mixing Bowls
A large mixing bowl (at least 4-quart capacity) is crucial for tossing the pasta and veggies with dressing. I prefer stainless steel for durability, but glass works too. Ensure it’s big enough to mix without spilling.
Cutting Tools
A sharp 8-inch chef’s knife makes veggie prep efficient. I use my Wüsthof for all dicing tasks. Pair it with a cutting board that has a groove to catch juices from tomatoes and cucumbers, preventing messes.
Colander Requirement
A fine-mesh colander is essential for draining pasta without losing small pieces. Rinse the pasta under cold water immediately after cooking to stop the process. This preserves the perfect al dente texture for your salad.
Measuring Tools
Accurate measurements ensure consistent results. I use OXO Good Grips measuring cups and spoons—they’re comfortable and precise. A liquid measuring cup helps with the water for cooking pasta. 🔥
Storage Solutions
For chilling, use airtight containers—I prefer glass Pyrex with snap-on lids. These allow you to see the salad, prevent absorption of fridge odors, and are perfect for meal prep. Store leftovers for up to 5 days.
Nutrition Facts
Frequently Asked Questions
Can I use a different pasta shape?
Yes, but stick to short shapes like penne or fusilli. They hold dressing better than long pasta. Avoid delicate shapes like angel hair that can turn mushy in the pressure cooker.
Why do I need to rinse the pasta after cooking?
Rinsing stops the cooking process immediately and removes excess starch. This prevents your salad from becoming gummy or sticky. Use cold water for 30 seconds for best results.
How long can I store this in the fridge?
It keeps well in an airtight container for 4-5 days. The flavors actually improve after a day as they meld together. Stir before serving if it seems dry.

- 4C Bread Crumbs Meatballs Recipe: Crispy Crust and Juicy Centers - September 25, 2026
- 6 Oz Chocolate Chip Cookie Recipe: Perfectly Balanced Crispy Edges and Chewy Hearts - September 25, 2026
- 6-Inch Coffee Cake Recipe: Vanilla Bean Swirls and Buttery Streusel Topping - September 25, 2026