
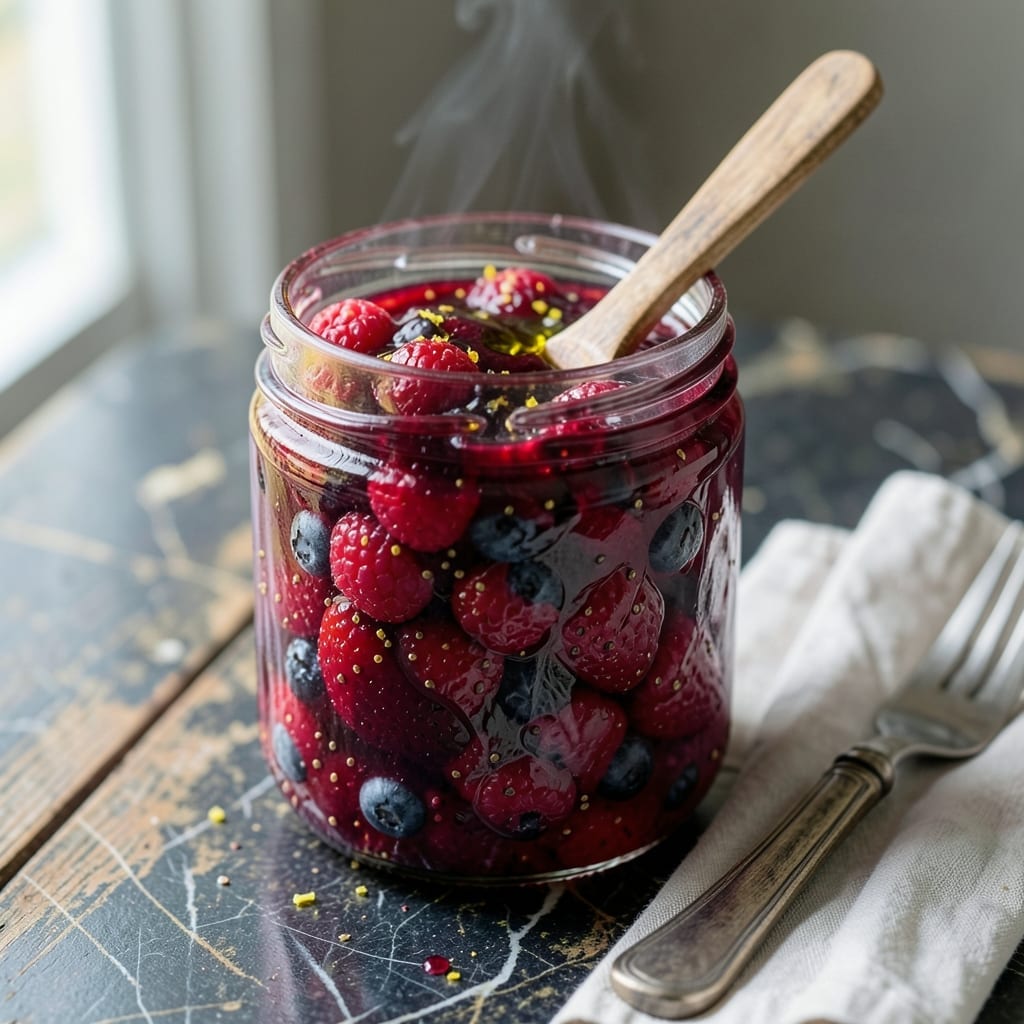
Homemade jam doesn’t need hours of stirring or special equipment. This Instant Pot method delivers perfectly set fruit preserves with minimal effort and maximum flavor.
The pressure cooker concentrates natural fruit pectin, creating thick, glossy jam without added preservatives. Small batches mean you can experiment with seasonal fruits and customize sweetness to taste.
You’ll get vibrant, spreadable jam that captures peak fruit flavor in every spoonful. The vegan recipe uses just fruit, sugar, and lemon juice—nothing artificial.
Store in sterilized jars for up to a year, or enjoy immediately on toast, yogurt, or as a glaze for meats. This technique works with any berry or stone fruit.
Ingredients for Instant Pot Jam
Seven simple ingredients deliver vibrant, spreadable jam with minimal effort and maximum flavor.
| Ingredient | Amount | Notes |
|---|---|---|
| Fresh Berries 🍓 | 4 cups | Strawberries, raspberries, or blueberries work well |
| Granulated Sugar 🍚 | 2 cups | Adjust to taste for sweetness |
| Lemon Juice 🍋 | ¼ cup | Freshly squeezed preferred |
| Lemon Zest 🍋 | 1 tbsp | From 1-2 lemons |
| Water 💧 | ¼ cup | For pressure cooking |
| Chia Seeds 🌿 | 1 tbsp | Optional natural thickener |
| Vanilla Extract 🌿 | 1 tsp | Pure extract for best flavor |
The fruit is the star here. Farmers market berries in peak season yield the best flavor, but frozen works in a pinch (no need to thaw). For stone fruits like peaches or plums, use ripe but firm specimens—overripe fruit can make jam too runny. I always grab my berries from Whole Foods or a local CSA when available. Look for organic if possible, especially for thin-skinned fruits like strawberries.
No chia seeds? Skip them entirely—the natural pectin in fruit will still set the jam. Want less sugar? Use half the quantity and add 1 tsp of pomona pectin for every cup of fruit. The lemon juice is non-negotiable though—it’s doing double duty as both flavor enhancer and preservative. For a citrus twist, swap lime juice for lemon in equal amounts.
Jam keeps in sterilized jars for up to 1 year unopened, 3 weeks once opened. Store in the fridge after opening. For immediate use, keep in an airtight container for 1 week. The flavors actually deepen after a day or two, so resist devouring it all immediately.
Why You’ll Love This Recipe
- Set and Forget: I dump the berries, sugar, and a squeeze of lemon in the Instant Pot, press a button, and walk away. No stirring, no monitoring—just perfect jam every time.
- Bright and Zesty: That pop of lemon zest and juice balances the sweetness of the berries so well. Honestly, it tastes like summer in a jar.
- Gift or Toast: I slather it on morning toast or tie a ribbon on a jar for a thoughtful homemade gift. Between us, it’s always a hit.
- Pantry Staple: One batch makes enough to last for weeks, and it’s way cheaper than store-bought. I’ll be real: my family goes through it fast.
Step-by-Step Instructions for Instant Pot Jam
This streamlined method delivers perfectly set jam with minimal effort and maximum flavor.
Step 1: Prepare the Berries and Aromatics
Begin by thoroughly washing the 4 cups Fresh Berries. I recommend using strawberries, raspberries, or blueberries for optimal results. For strawberries, hull and quarter them; raspberries and blueberries can be used whole. Place the prepared berries in the Instant Pot insert.
Add the 0.25 cup Lemon Juice, 1 tbsp Lemon Zest, and 2 cups Granulated Sugar to the berries. Stir gently to combine, ensuring the sugar begins to dissolve. The lemon juice and zest brighten the berry flavor and help balance the sweetness.
Step 2: Add Remaining Ingredients and Pressure Cook
Pour in the 0.25 cup Water and add the 1 tbsp Chia Seeds and 1 tsp Vanilla Extract. Stir once more to distribute the ingredients evenly. The chia seeds act as a natural thickener, while the vanilla extract adds depth to the jam’s flavor profile.
Secure the lid on the Instant Pot, ensuring the valve is set to sealing. Cook on high pressure for 1 minute. Yes, just one minute—the pressure cooking process intensely concentrates the flavors and softens the berries rapidly. The pot will take approximately 10-12 minutes to come to pressure before the timer begins.
Step 3: Natural Release and Thicken
Once the cooking cycle completes, allow the pressure to release naturally for 10 minutes. This gradual release prevents the jam from boiling over and helps it begin to thicken. After 10 minutes, carefully switch the valve to venting to release any remaining pressure.
Open the lid and give the jam a stir. At this point, it will still appear somewhat liquid. Switch the Instant Pot to the sauté function on normal heat. Simmer uncovered for 10-15 minutes, stirring frequently, until the jam thickens to your desired consistency. You’ll notice it coating the back of a spoon when it’s ready.
Step 4: Test and Cool
To confirm the jam has set properly, place a small spoonful on a chilled plate. If it wrinkles slightly when pushed with a finger, it’s done. If not, continue simmering for another 2-3 minutes and test again.
Once the jam reaches the perfect consistency, turn off the Instant Pot. Allow the jam to cool in the pot for 5 minutes, then transfer it to clean, sterilized jars. Let it cool completely at room temperature. As it cools, the jam will continue to thicken further, achieving a glossy, spreadable texture.
Pro Tips For Making Instant Pot Jam
- Mash the Berries: Use a potato masher to break down the berries before pressure cooking—this releases pectin naturally and helps thicken the jam without extra additives.
- Sugar Last: Add the sugar after the berries release their juice during the sauté step, not before. This prevents scorching and ensures even dissolution.
- Vent Carefully: After cooking, let the pressure release naturally for 10 minutes, then quick-release the rest. Skipping this can cause splattering from the thick, hot jam.
- Test for Set: Spoon a bit onto a chilled plate—if it wrinkles when pushed with a finger after a minute, it’s ready. If not, cook a few more minutes on sauté mode.
Storing and Reheating Leftovers
Refrigerator Storage
Once cooled completely, transfer your jam to an airtight container—I use Ball mason jars. Store in the fridge for up to 3 weeks. The flavors deepen after 24-48 hours, so try to wait before diving in. ❄️
Freezer Storage
For longer storage, freeze in small jars or silicone molds for up to 6 months. Leave ½ inch headspace for expansion. Thaw overnight in the fridge before using—it retains the same vibrant color and texture.
Sterilized Jars
For shelf-stable storage, use sterilized jars and process in a water bath for 10 minutes. This seals the jars for up to 1 year unopened. I recommend Bernardin jars for their reliable lids.
Reheating for Glazes
To use as a glaze, gently warm in a saucepan over low heat with 1-2 tbsp water to thin. Stir frequently to prevent burning. Perfect for brushing on pastries or meats.
Reviving Thick Jam
If your jam thickens too much in storage, stir in 1-2 tsp warm water until it reaches your desired consistency. This works especially well for jam stored in the fridge.
Room Temperature Tip
Once opened, always return unused jam to the fridge immediately. Room temperature storage after opening can lead to spoilage within 2-3 days. 💡
Nutrition Facts
Frequently Asked Questions
Can I use frozen fruit instead of fresh?
Yes! Frozen berries work perfectly—no need to thaw first. Just reduce the water to 2 tablespoons since frozen fruit releases liquid as it cooks. The texture will be identical to fresh.
Why does my jam seem runny after cooking?
It thickens as it cools. If still too thin, simmer uncovered on sauté mode for 5-10 minutes longer. For a natural boost, add 1 tsp chia seeds and stir well.
How can I make sugar-free jam?
Swap sugar for 1:1 monk fruit sweetener or erythritol. Add 1 tsp Pomona pectin per cup of fruit to help it set. Flavor may be less vibrant but still delicious.
Do I need to sterilize jars for fridge storage?
No, just use clean airtight containers. For shelf-stable storage, sterilize jars and process in a water bath for 10 minutes. This extends shelf life to 1 year.

- 4C Bread Crumbs Meatballs Recipe: Crispy Crust and Juicy Centers - September 25, 2026
- 6 Oz Chocolate Chip Cookie Recipe: Perfectly Balanced Crispy Edges and Chewy Hearts - September 25, 2026
- 6-Inch Coffee Cake Recipe: Vanilla Bean Swirls and Buttery Streusel Topping - September 25, 2026