
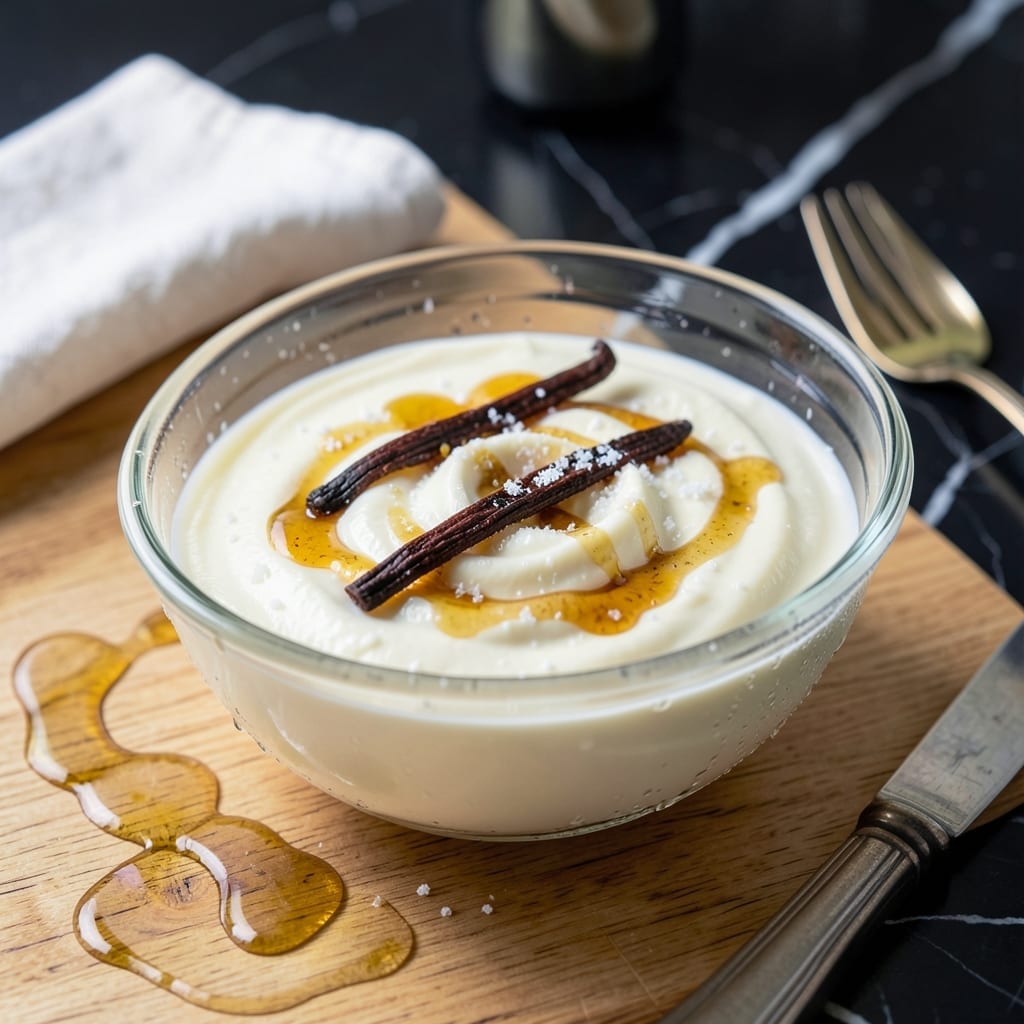
Making yogurt at home has never been easier than with this hands-free method. The Instant Pot handles the entire process with precision, delivering consistent results every time.
This technique produces creamy, thick yogurt without the need for constant monitoring. The controlled environment ensures perfect fermentation, creating the ideal texture you expect from quality yogurt.
With just milk and a small amount of starter, you’ll transform simple ingredients into rich, tangy yogurt. The process requires minimal effort but yields professional-quality results that surpass store-bought versions.
The beauty lies in its simplicity: set it and forget it, then enjoy the fruits of your patience. This method proves that homemade yogurt can be both accessible and exceptional.
Ingredients for Instant Pot Yoghurt
Just milk, starter, and a few extras create this rich, tangy Instant Pot treat.
| Ingredient | Amount | Notes |
|---|---|---|
| Whole Milk 🥛 | 8 cups | Full-fat for creaminess |
| Plain Yogurt with Live Cultures 🥣 | 2 tbsp | Store-bought as starter |
| Granulated Sugar 🍚 | 1 tbsp | Optional for sweetness |
| Vanilla Extract 🌿 | 1 tsp | Pure for best flavor |
| Honey 🍯 | 2 tbsp | Adjust to taste preference |
| Gelatin 💊 | 1 tsp | Unflavored for thickness |
| Water 💧 | ¼ cup | For dissolving gelatin |
The milk quality is everything here. Whole milk from a trusted dairy (I prefer Organic Valley or Darigold) gives you that ultra-creamy texture. Avoid ultra-pasteurized—it won’t ferment properly. The live cultures in your starter yogurt must be active, so check the label for “contains live and active cultures.” Fage or Stonyfield are reliable choices. For the gelatin, Great Lakes brand is the gold standard.
No plain yogurt on hand? Use buttermilk at half the amount as your starter. Skipping the sugar? Maple syrup or agave work just as well. For a thicker result without gelatin, strain through a cheesecloth for 2-3 hours. The vanilla is optional, but Madagascar bourbon vanilla adds depth. If you’re avoiding animal products, swap gelatin for agar powder at the same ratio.
Fresh yogurt keeps for 10-14 days in the fridge. Use a clean spoon every time to prevent contamination. Freeze extras in ice cube trays for up to 3 months—perfect for smoothies.
Why You’ll Love This Recipe
- Set and Forget: I just pour in the whole milk, press a button, and walk away—no stirring, no monitoring, just creamy yogurt hours later.
- Creamy Vanilla Bliss: The vanilla and honey turn plain yogurt into something rich and slightly sweet, like a dessert I can eat for breakfast.
- Meal Prep Hero: I make a big batch on Sunday and it’s ready for smoothies, parfaits, or just eating straight from the jar all week.
- Pocket-Friendly Luxury: Homemade yogurt costs half what store-bought does, and honestly, it tastes twice as good.
Step-by-Step Instructions for Instant Pot Yoghurt
This method ensures perfectly thick, creamy results with minimal hands-on time.
Step 1: Pasteurize the Whole Milk
Pour the 8 cups Whole Milk into the Instant Pot liner. Secure the lid, set the valve to “Sealing,” and select the “Yogurt” function. Press the button until the display reads “Boil.” This setting will heat the milk to 180°F, effectively pasteurizing it to create an ideal environment for the cultures.
The process takes approximately 30-40 minutes depending on your model. You’ll see steam escaping and the milk will eventually reach a gentle boil. Once complete, the Instant Pot will beep and display “Yogt” (yogurt). This step eliminates competing bacteria that could interfere with fermentation.
Step 2: Cool and Temper the Milk
Remove the liner from the Instant Pot and let the milk cool to 110°F. Use a clean thermometer to monitor the temperature accurately. This cooling phase typically takes 30-45 minutes at room temperature. Stirring occasionally can help distribute the heat evenly and speed up the process.
While the milk cools, dissolve the 1 tsp Gelatin in the 0.25 cup Water and set aside. In a small bowl, whisk together the 2 tbsp Plain Yogurt with Live Cultures, 1 tbsp Granulated Sugar, 1 tsp Vanilla Extract, and 2 tbsp Honey. This mixture will serve as your starter culture.
Step 3: Inoculate and Incubate
Once the milk reaches 110°F, whisk in the gelatin mixture until fully dissolved. Then, add about 1 cup of the warm milk to the yogurt mixture, tempering it to match the temperature of the remaining milk. Pour this back into the Instant Pot liner and stir thoroughly to distribute the cultures evenly.
Return the liner to the Instant Pot, secure the lid, and select the “Yogurt” function again. This time, adjust the time to 8 hours for incubation. The longer incubation period enhances the tanginess and thickness. Ensure the valve is set to “Sealing” and resist the urge to check on it—consistent temperature is crucial for proper fermentation.
Step 4: Chill and Thicken
After incubation, the yogurt will resemble a thin custard. Transfer the liner to the refrigerator and let it chill for at least 4 hours. This cooling process allows the yogurt to set fully and develop its characteristic creamy texture. The gelatin aids in achieving that desirable thickness without additional straining.
Once chilled, give it a gentle stir. The yogurt should be smooth, slightly tangy, and hold its shape when spooned. If it appears too thin, allow it to chill for an additional 1-2 hours. The result will be a rich, velvety yogurt with balanced sweetness from the honey and vanilla.
Pro Tips For Making Instant Pot Yoghurt
- Boil the Milk: Heat the whole milk to 180°F in the Instant Pot first—this kills off competing bacteria and helps the yogurt set thicker. I learned this the hard way after my first few batches turned out runny.
- Use Fresh Starter: Always use plain yogurt with live cultures that’s less than a week old, or the bacteria may be too weak. Sounds weird, but it works every time for consistent results.
- Skip the Peek: Resist the urge to stir or check the yogurt while it’s incubating—disturbing it can break the delicate process. After ruining a batch by opening the lid too soon, I now set a timer and walk away.
- Sweeten After: Add sugar, honey, or vanilla only after the yogurt has fully set and cooled, or the high heat can kill the cultures. My grandmother swore by this, and she was right—it keeps the texture perfect.
Dietary Considerations for instant pot yoghurt
Dairy-Free Options
For a dairy-free version, swap the whole milk for coconut milk (full-fat canned). Use 2 cans (13.5 oz each) and follow the same process. The result will be rich and tangy with a subtle coconut flavor. I love this for a tropical twist. 🌴
Vegan Adaptations
Replace the gelatin with agar powder at a 1:1 ratio for a plant-based thickener. Ensure your starter yogurt is also dairy-free—Silk or So Delicious brands work well. The texture will be slightly different but just as delicious.
Sugar-Free Version
Skip the granulated sugar and honey entirely for a no-sugar-added option. The natural lactose in milk will still ferment, creating a tangy yogurt. Add stevia or monk fruit after fermentation if you prefer sweetness.
Lactose-Free Choice
Use lactose-free whole milk to make this recipe digestible for those with sensitivities. The lactose is pre-digested, but the cultures will still thrive. Lactaid brand is widely available and reliable.
Protein Boost
For extra protein, stir in 1 scoop unflavored whey or plant-based protein powder after incubation. This adds about 20g protein per serving without altering the texture significantly. I find it blends smoothly when whisked vigorously. 💪
Lower-Fat Option
Replace whole milk with 2% milk for a lighter version. The yogurt will be less creamy but still tangy and enjoyable. For best results, add 1 tbsp powdered milk to boost thickness and richness.
Nutrition Facts
Frequently Asked Questions
Can I use skim milk instead of whole?
You can, but the yogurt will be thinner and less creamy. Whole milk produces the best texture. For thicker results with skim, add 1 tbsp powdered milk per 8 cups.
How do I know when it’s done fermenting?
After 8 hours, it should resemble thin custard. If it’s too runny, incubate for 1-2 more hours. The longer it ferments, the tangier it becomes.
Why did my yogurt turn out grainy?
This usually happens if the milk wasn’t cooled to 110°F before adding starter. Always use a thermometer and stir gently. Whisking too vigorously can also cause graininess.
Can I reuse my homemade yogurt as starter?
Yes! Use 2 tbsp from your last batch as starter for the next. After 5-6 generations, use fresh store-bought yogurt to maintain strong cultures.

- 4C Bread Crumbs Meatballs Recipe: Crispy Crust and Juicy Centers - September 25, 2026
- 6 Oz Chocolate Chip Cookie Recipe: Perfectly Balanced Crispy Edges and Chewy Hearts - September 25, 2026
- 6-Inch Coffee Cake Recipe: Vanilla Bean Swirls and Buttery Streusel Topping - September 25, 2026