
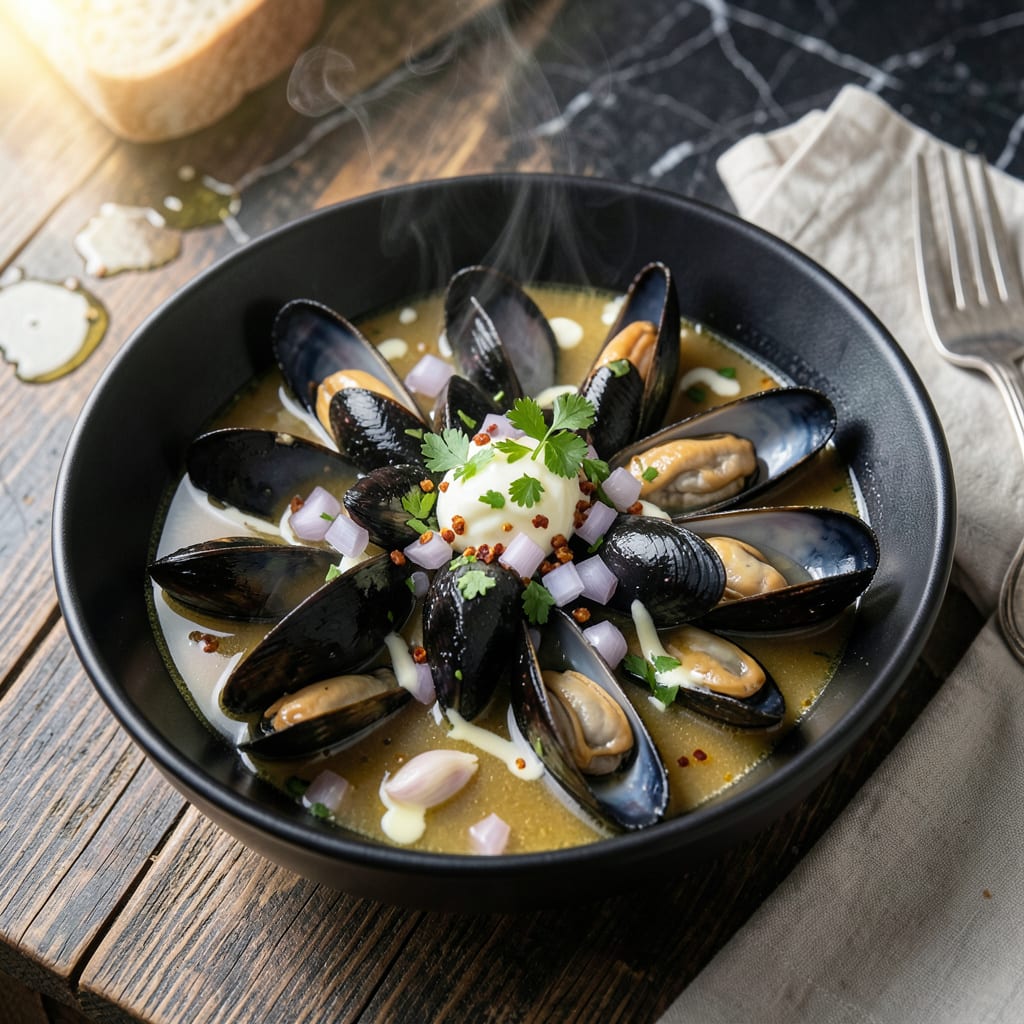
This recipe transforms fresh mussels into tender, wine-infused perfection in just 15 minutes using your Instant Pot.
Garlic, white wine, and herbs create a fragrant broth that enhances the natural sweetness of the mussels, delivering restaurant-quality results with minimal effort.
Ingredients for Instant Pot Mussels
Fresh shellfish and aromatic herbs create this elegant seafood dish with minimal effort.
| Ingredient | Amount | Notes |
|---|---|---|
| Fresh Mussels 🦪 | 2 lb | De-bearded, scrubbed clean |
| Dry White Wine 🍷 | 1 cup | Sauvignon Blanc or Pinot Grigio |
| Garlic Cloves 🧄 | 6 cloves | Minced for aromatic base |
| Unsalted Butter 🧈 | 4 tbsp | For finishing the sauce |
| Shallots 🧅 | 2 whole | Finely diced for sweetness |
| Fresh Parsley 🌿 | ¼ cup | Chopped, for garnish |
| Fresh Thyme Sprigs 🍃 | 4 whole | Or 1 tsp dried thyme |
| Bay Leaves 🌿 | 2 whole | For depth of flavor |
| Crushed Red Pepper Flakes 🌶️ | ½ tsp | Adjust to heat preference |
| Lemon 🍋 | 1 whole | Zested and juiced |
| Sea Salt 🧂 | 1 tsp | Or to taste for seasoning |
| Freshly Ground Black Pepper 🌶️ | ½ tsp | For finishing the dish |
| Heavy Cream 🥛 | ¼ cup | Optional for richness |
[recipeingredientscaler]
The mussels are the star, so source them from a reputable fishmonger or Whole Foods market counter. Look for closed shells with a fresh ocean scent—discard any that are open or chipped. PEI mussels are widely available and consistently good. The wine should be something you’d drink; avoid cooking wines with added salt. Fresh herbs make a noticeable difference, but dried will work in a pinch.
No white wine? Substitute with dry vermouth or chicken stock plus a splash of lemon juice. Shallots can be replaced with yellow onion at a 1:1 ratio. For a dairy-free version, skip the butter and cream or use vegan alternatives. The red pepper flakes add subtle heat—omit entirely for a milder broth. Fresh parsley is ideal, but cilantro or chives offer different but complementary flavors.
Mussels are best cooked the day of purchase. Store them in the fridge covered with a damp towel for up to 24 hours. Leftovers keep 2-3 days refrigerated, but the texture changes slightly. The broth freezes well for up to 3 months, though the mussels themselves don’t freeze as successfully.
Why You’ll Love This Recipe
- Set It & Forget: I dump everything in the Instant Pot and walk away—no babysitting the stove, no stirring, just perfect mussels every time.
- Wine-Butter Magic: The white wine and butter create this rich, garlicky broth that’s so good I soak up every last drop with crusty bread.
- Weeknight Fancy: Honestly, it feels like a restaurant meal but takes less time than ordering takeout.
- Budget Seafood Fix: Fresh mussels are cheaper than you’d think, and one batch feeds us for two meals with zero waste.
Step-by-Step Instructions for Instant Pot Mussels
This method delivers perfectly tender mussels with a rich, aromatic broth in record time.
Step 1: Sauté Aromatics to Build Flavor Base
Set the Instant Pot to Sauté mode. Add the 2 whole Shallots (finely diced) and cook for 2-3 minutes until translucent and fragrant. Stir in the 6 cloves Garlic Cloves (minced) and 0.5 tsp Crushed Red Pepper Flakes, cooking for an additional 30 seconds until the garlic releases its aroma.
This step creates the aromatic foundation for your dish. Be careful not to let the garlic brown—it should soften and smell sweet, not bitter. The shallots will sweaten as they cook, balancing the heat from the red pepper flakes.
Step 2: Deglaze and Add Remaining Ingredients
Pour in the 1 cup Dry White Wine and use a wooden spoon to scrape up any browned bits from the bottom of the pot. Add the 4 whole Fresh Thyme Sprigs, 2 whole Bay Leaves, 1 tsp Sea Salt, and the 1 whole Lemon (zested and juiced).
This deglazing step ensures all the flavorful fond is incorporated into the sauce. The wine will reduce slightly as it simmers, intensifying its flavor. The lemon zest adds brightness, while the juice provides acidity to balance the richness of the mussels.
Arrange the 2 lb Fresh Mussels in the pot, discarding any that are open and don’t close when tapped. Secure the lid and set the valve to Sealing.
Step 3: Pressure Cook to Perfection
Select the Pressure Cook or Manual setting and set the timer for 3 minutes on High Pressure. The Instant Pot will take approximately 8-10 minutes to come to pressure before the timer starts.
Once the cooking cycle completes, immediately perform a Quick Release by turning the valve to Venting. This stops the cooking process instantly, preventing the mussels from overcooking and becoming rubbery. The mussels are done when their shells open fully.
Step 4: Finish with Butter and Cream
Carefully remove the lid, tilting it away from you to avoid the hot steam. Discard any mussels that remain closed. Stir in the 4 tbsp Unsalted Butter until melted, then add the 0.25 cup Heavy Cream and 0.5 tsp Freshly Ground Black Pepper.
The butter enriches the sauce, while the cream adds a velvety texture. Taste and adjust the seasoning if needed, though the mussels and wine should provide plenty of flavor. The sauce will thicken slightly as it cools, coating the mussels beautifully.
Sprinkle with the 0.25 cup Fresh Parsley (chopped) and serve immediately in bowls with plenty of the fragrant broth. Each bite should be tender, with a briny sweetness complemented by the wine-infused sauce.
Pro Tips For Making Instant Pot Mussels
- Deglaze First: After sautéing shallots and garlic, pour in a splash of wine to scrape up the browned bits—this adds depth to the broth and prevents sticking.
- Purge the Mussels: Rinse mussels under cold water and pull off any beards, but also soak them in salted water for 20 minutes to remove grit. I learned this the hard way after crunching on sand.
- Skip the Overcrowding: Don’t dump all the mussels in at once—cook in batches if needed. Steaming too many at once lowers the temperature and leads to uneven cooking.
- Finish with Butter: Stir in the unsalted butter at the very end, off the heat, so it melts into a silky sauce instead of separating. Sounds simple, but it actually changes the outcome.
Make-Ahead Tips for This Recipe
Prep Ahead Strategy
You can prep all your aromatics the night before—dice the 2 shallots, mince the 6 garlic cloves, and chop the ¼ cup parsley. Store them in separate containers in the fridge. The wine and broth ingredients can be measured and set aside too. 💡
Mussel Prep Timing
Clean and debeard the 2 lb mussels just before cooking—they’re best when super fresh. If you must prep them earlier, store them in the fridge covered with a damp towel for up to 2 hours max. Any longer and they’ll start to deteriorate.
Broth Freezing
The leftover broth freezes beautifully for up to 3 months. I pour it into ice cube trays for easy portioning, then transfer to a freezer bag. It’s perfect for quick seafood sauces or risottos later.
Partial Cook Method
For a head start, sauté the aromatics and deglaze with wine the night before. Refrigerate the mixture, then add the mussels and pressure cook as directed. This cuts your active cooking time to just 5 minutes the next day. ⏰
Reheating Leftovers
Store cooked mussels in their broth in an airtight container for up to 2 days. Reheat gently on the stove over low heat for 3-4 minutes—microwaving can make them rubbery. Discard any that don’t reheat thoroughly.
Nutrition Facts
Frequently Asked Questions
Can I use frozen mussels instead?
Yes, but thaw them completely in the fridge overnight first. Frozen mussels may release more liquid, so reduce the wine to 3/4 cup. The texture won’t be quite as firm as fresh.
What if some mussels don’t open after cooking?
Discard any unopened mussels immediately—they may be unsafe to eat. This happens occasionally even with fresh shellfish. Always check before serving.
Can I make this without wine?
Substitute with 1 cup seafood stock plus 1 tablespoon lemon juice. The acidity mimics wine’s brightness. Chicken stock works in a pinch.
How do I know when they’re done?
The mussels are ready when their shells open fully after 3 minutes of pressure cooking. The Instant Pot’s quick release stops cooking immediately to prevent overcooking.

- 4C Bread Crumbs Meatballs Recipe: Crispy Crust and Juicy Centers - September 25, 2026
- 6 Oz Chocolate Chip Cookie Recipe: Perfectly Balanced Crispy Edges and Chewy Hearts - September 25, 2026
- 6-Inch Coffee Cake Recipe: Vanilla Bean Swirls and Buttery Streusel Topping - September 25, 2026