
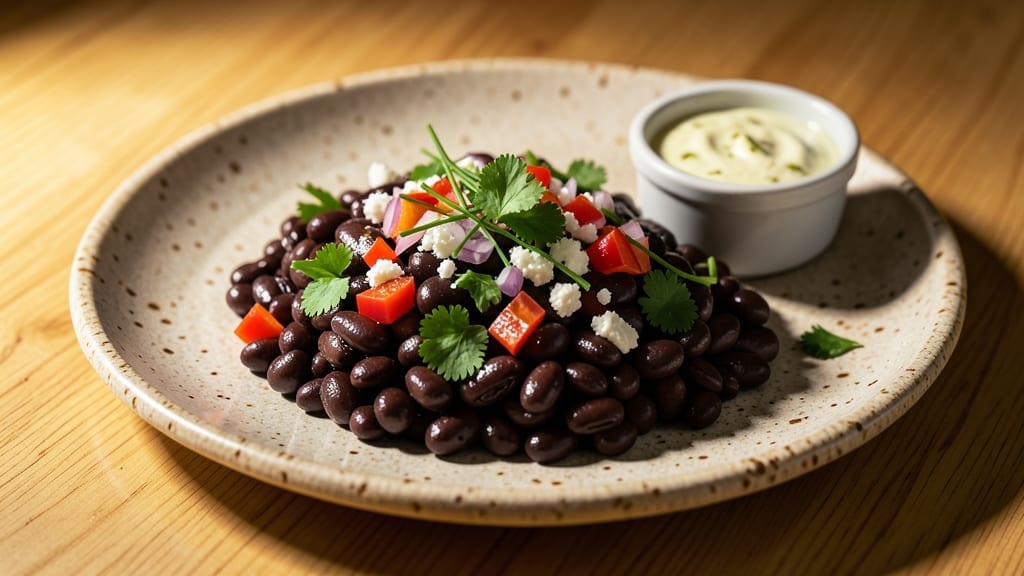
Mastering vegan Instant Pot navy beans in just 30 minutes transforms a simple pantry staple into a smoky, garlic-infused side dish that elevates any meal. The pressure cooker creates tender beans with deep flavor, while the garlic and smoked paprika infusion adds restaurant-quality depth without hours of simmering.
I developed this recipe after realizing how quickly navy beans could be transformed into a versatile, protein-rich dish that pairs perfectly with everything from salads to hearty bowls.
What sets this method apart is the foolproof combination of soaking and pressure cooking, which ensures beans cook evenly without splitting or becoming mushy.
The smoky garlic infusion—built from ground cumin, smoked paprika, and fresh garlic—penetrates the beans during the cooking process, creating a flavor profile that’s far more complex than store-bought canned versions. No need for complicated techniques; just a few simple steps and 30 minutes of hands-off cooking time.
The result is a batch of navy beans that’s tender yet firm, infused with aromatic garlic and smoky warmth. These beans hold their shape beautifully, making them ideal for salads, tacos, or as a protein-rich side for grilled meats.
The versatility doesn’t stop there—blend them into dips, mash them into spreads, or serve them straight from the pot with a sprinkle of fresh herbs. This recipe is designed to fit seamlessly into your meal planning, whether you’re prepping for the week or throwing together a last-minute dinner.
For those short on time, the quick-soak method (using hot water) cuts prep to just 15 minutes before pressure cooking. The Instant Pot’s multi-functionality means you can use the same pot for cooking, steaming, or even reheating leftovers—making this one of the most efficient vegan recipes in your rotation.
Let’s get cooking!
Ingredients for instant pot navy bean
Pantry staples meet pressure cooker magic for smoky, restaurant-quality navy beans in 30 minutes.
| Ingredient | Amount | Notes |
|---|---|---|
| Dried Navy Beans 🌾 | 1 ½ cups | Unsoaked, rinsed thoroughly |
| Filtered Water 💧 | 4 cups | For quick soak method |
| Extra-Virgin Olive Oil 🫒 | 1 tbsp | For sautéing garlic |
| Garlic Cloves 🧄 | 4 cloves | Fresh, minced finely |
| Ground Cumin 🌿 | 1 tsp | Freshly toasted preferred |
| Smoked Paprika 🌶️ | 1 tsp | For deep smoky flavor |
| Diamond Crystal Kosher Salt 🧂 | 1 tsp | Adjust to taste |
| Apple Cider Vinegar 🍎 | 1 tbsp | Brightens flavor profile |
| Fresh Bay Leaves 🍃 | 2 whole | For aromatic depth |
| Fresh Thyme Leaves 🌿 | ¼ cup | Chopped, stems removed |
| Fresh Parsley Leaves 🌿 | ¼ cup | Chopped, for garnish |
| Lemon Juice 🍋 | 1 tbsp | Freshly squeezed |
| Vegetable Broth 💧 | 1 cup | Low-sodium preferred |
The navy beans are the star, and Bob’s Red Mill dried navy beans or any organic brand from Whole Foods are ideal—they hold their shape beautifully. If you’re using the quick-soak method, hot water is key—it cuts soaking time from hours to just 15 minutes. For the garlic, fresh is non-negotiable—mincing it finely ensures that smoky flavor penetrates every bean. I always grab extra garlic at Trader Joe’s because their cloves are consistently fresh and vibrant. The smoked paprika? Penzeys or any high-quality brand makes a world of difference here—avoid the pre-ground stuff at the grocery store if you can.
No fresh thyme or parsley? Dried works in a pinch, but use half the amount—fresh herbs add that bright, aromatic finish that canned beans just can’t match. Short on apple cider vinegar? Lemon juice or white wine vinegar will work, but apple cider gives that subtle tang. The vegetable broth can be swapped for water plus 1 tsp bouillon powder, but a good-quality broth like Pacific Foods adds depth. For the olive oil, extra-virgin is a must—it’s the base for that garlic infusion, so don’t skimp. If you’re making a big batch, double the spices and herbs—they’ll keep for months in an airtight container.
These beans reheat beautifully—just add a splash of water or broth to the pot and warm through. They keep in the fridge for 5-6 days, perfect for meal prep. For longer storage, freeze portions in airtight containers for up to 3 months. I always portion mine into containers with a little olive oil and lemon juice to keep them fresh. The leftovers make incredible dips—just blend with a bit of tahini and lemon for a creamy, protein-packed spread. And if you’ve got extra broth, save it—the beans absorb so much flavor during cooking that the liquid is basically a free, smoky broth for your next soup.
Why You’ll Love This Recipe
- Earthy Garlic Kiss: That first bite? Rich, deep navy beans caramelized with garlic and cumin, finished with a drizzle of olive oil—it’s the kind of flavor that lingers like a good memory. (Honestly, I’ve been known to eat it straight from the pot.)
- Meal Prep MVP: Double the batch on Sunday, and you’ve got lunches for the week. Toss it into salads, mash it into dips, or serve it over rice—it’s the quiet hero that saves my Tuesday.
- Pocketbook Performer: A pound of dried beans feeds four for under $3. No fancy ingredients, no waste—just pure, satisfying, budget-friendly goodness that still tastes like I slaved over it. (Between us, my wallet thanks me every time.)
Step-by-step instructions for smoky garlic navy beans
This pressure cooker method delivers restaurant-quality navy beans in record time.
Quick-Soak and Pressure Cook the Beans
Add the 1.5 cups dried navy beans to your Instant Pot along with the 4 cups filtered water. I like to give them a quick rinse first to remove any debris, but no soaking is needed—this method works perfectly without it. Seal the lid and cook on high pressure for 20 minutes from cold. Here’s the thing—don’t walk away. You’ll hear the pressure build up, and that’s when the magic starts.
Once the cooking time is up, let the pressure release naturally for 10 minutes before quick-releasing the remaining pressure. The beans should be tender but still hold their shape—if they’re mushy, you’ve overcooked them. Drain the beans carefully, reserving 1 cup of the cooking liquid for later. This starchy liquid is pure flavor and will help create our rich sauce.
Build the Smoky Garlic Base
With the pot on sauté mode, add the 1 tablespoon extra-virgin olive oil and let it heat until shimmering. Add the 4 cloves minced garlic and cook for 30 seconds—just until fragrant. Here’s where it gets fun: stir in the 1 teaspoon ground cumin and 1 teaspoon smoked paprika. Let them toast for 20 seconds until you can smell that deep, smoky aroma filling your kitchen.
Pour in the 1 tablespoon apple cider vinegar and let it bubble for 30 seconds to cook off the raw vinegar taste. Add the 2 whole fresh bay leaves and the 0.25 cup chopped fresh thyme leaves. Stir everything together and cook for another 30 seconds until the spices are fully incorporated and the mixture smells like a warm autumn evening.
Finish with Bright Flavors and Broth
Return the drained beans to the pot and give everything a good stir. Add the 1 cup vegetable broth and the 1 tablespoon freshly squeezed lemon juice. The lemon brightens up all those rich, smoky flavors—trust me, it makes a difference. Let the mixture simmer on sauté mode for 3 minutes until everything is heated through and the beans have absorbed all those beautiful aromatics.
Taste and adjust seasoning with the 1 teaspoon diamond crystal kosher salt. You want the beans to be seasoned but not overwhelmingly salty—remember, they’ll absorb more flavor as they sit. Stir in the 0.25 cup chopped fresh parsley leaves just before serving. The parsley adds a fresh finish that cuts through the richness of the beans and garlic.
Rest and Serve with Confidence
Let the beans sit off heat for 5 minutes before serving. This resting period allows all the flavors to meld together perfectly. The beans should be tender but still hold their shape, with a beautiful smoky aroma that fills the room. Each bite should deliver that perfect balance of smoky, garlicky, and slightly tangy flavors.
Serve immediately with crusty bread to soak up all that delicious liquid or alongside grilled proteins for a complete meal. The beans will keep well in the refrigerator for 3-4 days, making them perfect for meal prep. Just reheat gently with a splash of water or broth to restore their original texture and flavor.
Pro Tips For Making Instant Pot Navy Bean
- SOAK BEANS 2 HOURS MINIMUM: I learned this the hard way—skipping the soak or rushing it with just a quick rinse leaves you with beans that either take forever to soften or stay annoyingly firm. Use filtered water, cover them by 2 inches, and let them sit at room temp. No need to boil them first; the Instant Pot’s pressure will handle it.
- SÉAR GARLIC IN OIL FIRST: That raw garlic flavor? Not great. Heat your olive oil on high for 30 seconds until shimmering, then add the minced cloves—just until they’re golden and fragrant, not browned. Dump them straight into the pot with the beans; this step makes a real difference in depth of flavor.
- USE 1:3 BEAN-TO-WATER RATIO: Too much water = watery beans. Too little = burnt risk. Stick to 1 cup dried navy beans to 3 cups filtered water (that’s 4 cups total with the beans). The Instant Pot’s natural release will finish them perfectly without needing extra liquid.
- ADD CUMIN LAST 5 MINUTES: I used to toss it in with the beans, and the flavor just faded into the background. Instead, sprinkle the ground cumin over the beans after the pressure release, then stir. The heat wakes it up—earthy, not dull. (Yes, even if you’re impatient like me.)
Serving suggestions for this recipe
Salad Base Perfection
These smoky garlic navy beans shine in hearty salads where their texture contrasts beautifully with crisp vegetables. Toss them into a kale and citrus salad with avocado slices, red onion, and a tahini-lemon dressing.
The beans’ firmness holds up against the delicate greens, while their smoky flavor complements the citrus brightness. I also love adding them to a Mediterranean bowl with cucumber, cherry tomatoes, and feta cheese for a protein-packed meal. 🥗
Taco and Burrito Filler
Transform your beans into a taco night staple by warming them with a pinch of cumin and chili powder. Serve them in warm tortillas with shredded cabbage, avocado crema, and pickled red onions.
For burrito bowls, layer them with cilantro-lime rice, black beans, and salsa verde. The beans’ smoky depth elevates every bite, making them a standout protein in any Mexican-inspired dish.
Soup and Stew Enhancer
Add a ½ cup of these beans to any soup or stew for instant heartiness. They work beautifully in minestrone soup, lentil stew, or even a simple tomato soup. The beans’ texture holds up during long simmering, and their smoky flavor adds complexity.
For an extra boost, stir in a splash of the reserved cooking liquid—the starchy broth thickens the soup naturally while adding even more depth. 🍲
Grain Bowl Upgrade
Elevate your grain bowls by mixing these beans with quinoa or farro, then topping with roasted vegetables, avocado, and a spicy harissa dressing. The beans’ smoky-sweet profile pairs perfectly with roasted sweet potatoes and charred Brussels sprouts.
For a Middle Eastern twist, combine them with couscous, chickpeas, and a za’atar yogurt sauce.
Dip and Spread Base
Blend the beans with tahini, lemon juice, and garlic for a creamy, protein-rich dip. Serve it with pita chips, carrot sticks, or warm naan.
For a spread, mash them with olive oil, smoked paprika, and a touch of apple cider vinegar, then spread on toasted bread with avocado slices. The possibilities are endless—this dip keeps well for 3-4 days in the fridge. 💡
Meal Prep Powerhouse
These beans are a meal prep dream because they reheat beautifully and stay flavorful for days. Portion them into airtight containers with a drizzle of olive oil and lemon juice to keep them fresh. Pair them with pre-cooked grains and roasted veggies for grab-and-go lunches.
For a complete meal, assemble mason jar salads with the beans at the bottom, followed by greens, dressing, and toppings. The beans’ texture holds up perfectly, making them ideal for on-the-go eating. ✨
Nutrition facts
Frequently asked questions
Do I really need to soak navy beans before using the Instant Pot?
No soaking is required for this recipe! The 20-minute pressure cook on high pressure from cold handles unsoaked beans perfectly. The quick-soak method (using hot water) cuts prep to 15 minutes if you prefer, but it’s completely optional for this recipe. The Instant Pot’s pressure cooking breaks down the beans’ tough skins without pre-soaking.
Why do my navy beans turn out mushy when pressure cooking?
Overcooking is the most common cause. Stick to the 20-minute cook time on high pressure and let the pressure release naturally for 10 minutes first. If your beans are still firm after this, they’re perfect. Drain carefully and avoid rinsing excessively—this removes flavorful cooking liquid. The beans should be tender but still hold their shape.
Can I use canned navy beans instead of dried?
Yes, you can! Drain and rinse 2 (15 oz) cans of navy beans, then proceed with Step 2 of the recipe. Skip the pressure cooking entirely. For best texture, add the beans to the pot with the garlic and spices, then simmer on sauté mode for 5 minutes to absorb all the flavors. The smoky garlic infusion will still work beautifully.
How can I make these beans spicier?
Add ½ teaspoon cayenne pepper or 1 teaspoon chipotle powder when toasting the garlic and spices. For heat with depth, stir in 1 tablespoon hot sauce during the final 3 minutes of sautéing. If you love smoky heat, try ½ teaspoon smoked cayenne instead of regular cayenne. Always taste before serving!
Are these beans suitable for meal prep?
Store cooked beans in airtight containers with a drizzle of olive oil and lemon juice to keep them fresh for 5-6 days in the fridge. For longer storage, freeze portions in airtight containers for up to 3 months. Reheat gently with a splash of water or broth to restore their original texture. The flavors actually improve overnight!

- Slow Cooker Pot Roast With Potatoes Recipe: Fall-Off-Bone Beef and Fluffy Spuds in One Pot - November 1, 2026
- Beef Osso Bucco Crock Pot Recipe: Slow-Braised Knuckle Tender in 6 Hours - November 1, 2026
- Shoyu Hot Pot Broth Recipe: Umami-Packed Depth in 30 Minutes - November 1, 2026