
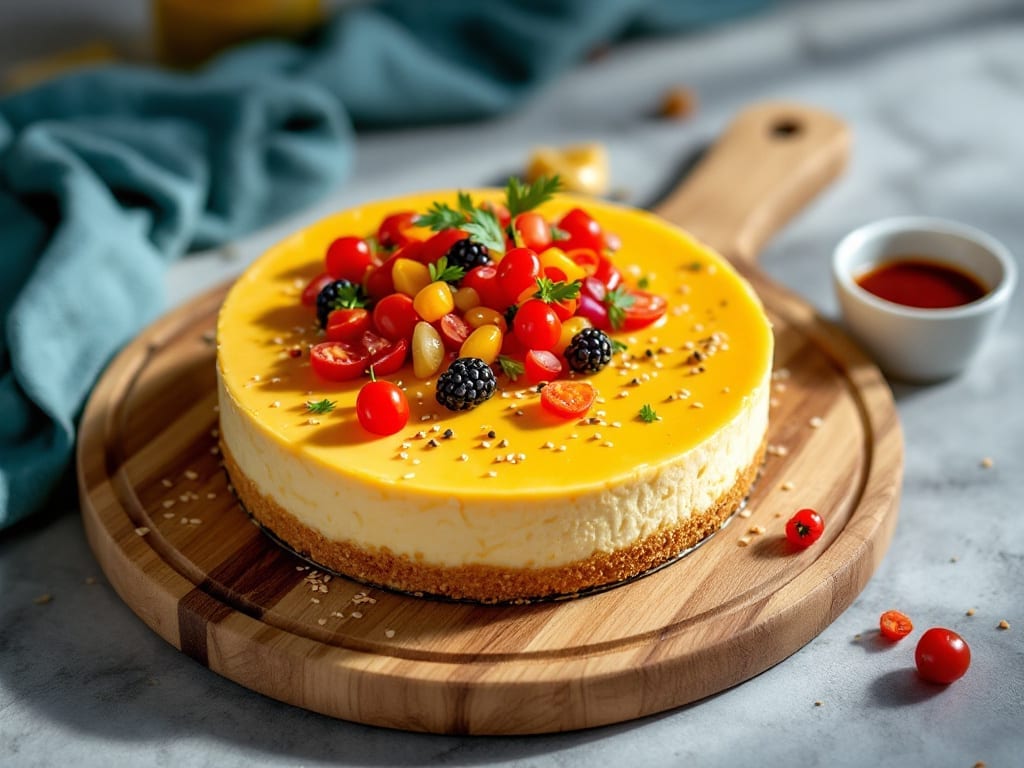
Mastering an Instant Pot New York cheesecake that delivers that signature silky texture without a watery center has taken me years of testing—and this recipe finally cracked the code. The secret lies in precise temperature control and a foolproof method that transforms your Instant Pot into a reliable dessert maker.
What makes this version truly special is how it replicates the classic dense, creamy texture while adapting to the unique cooking environment of an Instant Pot.
This recipe starts with a sturdy graham cracker crust that stays perfectly intact, even through the pressure-cooking process. The filling combines cream cheese, sour cream, and a touch of cornstarch to create that signature smooth, jiggly center without separating.
The key is cooking it at the right temperature—low pressure ensures gentle heat distribution, while the natural steam from the sour cream keeps everything lusciously moist.
By the time you remove the lid, you’ll have a cheesecake with a rich, velvety interior that holds its shape when sliced, topped with a smooth, crack-free surface.
The aroma alone will have everyone gathering in the kitchen, and each bite delivers that familiar New York cheesecake experience—just without the risk of a soggy disaster.
This method works for both beginners and experienced bakers, producing a dessert that’s impressive enough for company but simple enough for a weeknight treat.
Serve it chilled with fresh berries, caramel drizzle, or a dusting of powdered sugar for that classic presentation. The best part? No water bath, no watery mess, and no waiting hours for it to set properly. Let’s get started on your perfect Instant Pot cheesecake.
Ingredients for instant pot new york cheesecake
Eight essential ingredients transform your Instant Pot into a New York cheesecake maker.
| Ingredient | Amount | Notes |
|---|---|---|
| Graham Cracker Crumbs 🍪 | 2 cups | Finely crushed, for sturdy crust |
| Unsalted Butter 🧈 | ½ cup | Melted, full-fat preferred |
| Granulated Sugar 🍚 | ¼ cup | For crust sweetness |
| Large Eggs 🥚 | 2 whole | Room temperature, for crust |
| Full-Fat Cream Cheese 🧀 | 32 oz | Room temperature, 8 oz blocks |
| Sour Cream 🥛 | 1 cup | Full-fat for creaminess |
| Granulated Sugar 🍚 | 1 ½ cups | For filling sweetness |
| Cornstarch 🌾 | 2 tbsp | Prevents separation |
| Vanilla Extract 🌸 | 2 tsp | Pure, high-quality preferred |
| Large Eggs 🥚 | 3 whole | Room temperature, for filling |
| Lemon Juice 🍋 | 1 tbsp | Freshly squeezed |
| Salt 🧂 | ½ tsp | Fine sea salt |
| Powdered Sugar 🍚 | ½ cup | For final dusting |
The crust starts with graham cracker crumbs—Honey Maid or Nabisco work best for that buttery, sturdy base. Look for whole graham crackers (not honey oat) at Walmart or Target for the best texture. Butter matters here too: Land O’Lakes or Plugrá give that rich flavor without overpowering. Melt it slowly to avoid burning. The cream cheese is non-negotiable—Philadelphia brand is the gold standard, but Kraft works in a pinch. Room temperature is critical for both the cream cheese and eggs to blend smoothly without lumps.
No sour cream? Full-fat Greek yogurt works in a bind (though texture differs slightly). Cornstarch is the secret weapon—it keeps the filling silky instead of grainy. Vanilla extract should be pure, not imitation. Lemon juice brightens the whole dessert, so don’t skip it. For the crust, brown sugar can replace half the granulated sugar if you prefer a deeper caramel note. Powdered sugar for dusting? Confectioners’ sugar from Domino or Sugar ‘n Spice is ideal—pre-sifted saves time. The eggs must be room temperature (take them out 30 minutes before mixing).
Store the crust components separately in airtight containers for up to 3 days. The filling mixture keeps in the fridge for 24 hours before baking. Once baked, this cheesecake stays fresh for 4-5 days in the fridge. For longer storage, freeze the whole cake (with parchment) for up to 2 months. Thaw overnight in the fridge before serving. Reheat slices for 10-15 seconds in the microwave—just until warm, never fully melted.
Why You’ll Love This Recipe
- No Mixing Madness: The crust just needs butter and crumbs—melt, press, done. No food processor, no overworking, just three minutes of hands-on time before you walk away.
- Creamy Without Compromise: Full-fat cream cheese and sugar blend effortlessly in the Instant Pot, giving you that signature dense, velvety texture without a single lump. (Yes, even if you’re not a pro at mixing.)
- Party in a Pot: This keeps beautifully for days—slice it for potlucks, pack it for birthdays, or just stash it in the fridge for when you forget to plan ahead. The crust stays crisp even after refrigeration.
- Budget-Friendly Luxury: Graham crackers and cream cheese stretch further than you’d think, and the sugar-butter crust costs pennies compared to store-bought crusts. Fancy dessert that won’t break the bank? Check.
Step-by-step instructions for Instant Pot New York cheesecake
Here’s the method for a perfectly set cheesecake with a sturdy crust and velvety filling.
Prepare the Crust Mixture
In a medium bowl, combine the 2 cups graham cracker crumbs, 0.5 cup melted unsalted butter, and 0.25 cup granulated sugar. Mix thoroughly with a silicone spatula until the crumbs are evenly moistened and the texture resembles damp sand. This ensures the crust will hold together firmly during pressure cooking.
Press the mixture firmly into the bottom of a 6-quart Instant Pot using your fingers or a small measuring cup. Create even pressure by compacting the crumbs in concentric circles, working from the outer edge toward the center. This prevents cracking during cooking and creates a solid foundation for the filling.
Mix the Cheesecake Filling
In a large mixing bowl, beat the 32 oz full-fat cream cheese and 1 cup sour cream together until completely smooth and free of lumps. I use the paddle attachment on medium speed for about 2 minutes – this prevents graininess in the final texture. The mixture should be light and fluffy, almost like whipped cream.
Gradually add the 1.5 cups granulated sugar, 2 tbsp cornstarch, 2 tsp vanilla extract, 3 whole large eggs, 1 tbsp lemon juice, and 0.5 tsp salt. Mix on low speed just until combined – about 30 seconds. Overmixing incorporates too much air, which can cause the cheesecake to sink in the center during cooking.
Assemble and Cook in the Instant Pot
Pour the filling mixture evenly over the prepared crust in the Instant Pot. Use a spatula to spread it into an even layer, leaving about 1/2 inch of space at the top edge. This prevents overflow during pressure cooking and allows for even setting.
Place the Instant Pot lid on high pressure and set the timer for 45 minutes. When the cooking cycle completes, allow the pressure to release naturally for 15 minutes before quick-releasing any remaining pressure. This gradual release prevents the cheesecake from developing a watery center while allowing it to set properly.
Chill and Finish
Remove the cheesecake from the Instant Pot and transfer it to the refrigerator to chill for at least 4 hours, preferably overnight. This extended chilling time allows the filling to fully set and develop its signature silky texture. The cheesecake should be completely firm when ready to serve.
Before serving, dust the top with 0.5 cup powdered sugar using a fine-mesh sieve. This creates an elegant finish while adding a subtle sweetness that complements the rich filling. Cut into slices using a hot knife for clean, professional-looking portions.
Pro Tips For Making Instant Pot New York Cheesecake
- Melt Butter Slowly: If you dump melted butter into the graham cracker crumbs all at once, you’ll end up with a wet, clumpy crust that won’t set properly. Microwave the butter in 15-second bursts, stirring between each, until it’s just liquid but not hot—you want it warm enough to soften the crumbs but not steam them into mush.
- Room-Temp Cream Cheese: I used to just pull the cream cheese out of the fridge and mix it straight into the batter. Big mistake—it lumps up and makes the cheesecake dense. Let the blocks sit on the counter for 30 minutes first, then cut them into chunks before blending. The texture will be silky, not grainy.
- Avoid Overmixing Eggs: Once you start beating the eggs into the cream cheese mixture, stop when the batter is just combined—no streaks of egg yolk left. Overmixing adds air that collapses during pressure cooking, leading to a sunken center. Stir until it looks like thick pudding, then call it done.
- Pressure Cook 20 Minutes: The recipe might say 15 minutes, but trust me, 20 is the magic number for a fully set cheesecake with no jiggle. The center should be just slightly wobbly when you open the pot—it’ll firm up as it cools. If you rush it, you’ll end up with a runny middle that’s more pudding than cake.
Perfect pairings for these flavors
Classic Toppings
Fresh strawberries or raspberries add vibrant color and natural sweetness that cuts through the richness. I slice them into thin rounds and arrange them in a circular pattern on top before dusting with powdered sugar.
For a more decadent touch, drizzle dark chocolate ganache (melt 4 oz dark chocolate with ¼ cup heavy cream) over the top for a glossy finish. 🍓
Caramel Drizzle
Homemade caramel sauce elevates this dessert to restaurant quality. Simmer 1 cup granulated sugar with ¼ cup water and ¼ cup heavy cream until golden, then drizzle generously over chilled slices.
For extra flair, sprinkle flaky sea salt (like Maldon) on top to balance the sweetness. I use a squeeze bottle for clean, even drizzles that look professional.
Coffee Infusion
Add 1 tsp instant espresso powder to the filling mixture for a subtle coffee note that pairs beautifully with the vanilla. This works especially well if you serve it with a shot of cold brew coffee on the side.
For presentation, dust with cocoa powder instead of powdered sugar. The coffee flavor becomes more pronounced as it chills, making it perfect for coffee lovers.
Citrus Twist
Brighten each slice with a zest strip of lemon or orange on the side. I also add 1 tbsp lemon zest to the filling for a subtle citrus aroma that enhances the vanilla.
For a garnish, arrange thin orange supremes (peels only) in a decorative pattern. The acidity from the citrus prevents the cheesecake from tasting too heavy. 🍊
Spiced Variations
For a fall twist, add ½ tsp ground cinnamon and ¼ tsp nutmeg to the filling mixture. Top with candied pecans (toss ½ cup chopped pecans with 1 tbsp brown sugar and 1 tsp melted butter, then bake at 350°F for 8-10 minutes).
The warm spices complement the creamy texture beautifully, making this a seasonal favorite.
Boozy Upgrades
Swap 1 tbsp of the lemon juice for 1 tbsp Grand Marnier or Kahlúa for a sophisticated touch. The alcohol burns off during cooking but leaves behind a subtle, elegant aroma.
Serve with a chilled glass of Sauternes or Moscato d’Asti for a dessert wine pairing that enhances the flavors. 🍷
Nutrition facts
Frequently asked questions
Why does my Instant Pot cheesecake come out watery?
The most common cause is overcooking or quick-releasing the pressure too soon. Always let the pressure release naturally for 15 minutes after cooking, then quick-release. Also, ensure your cream cheese and eggs are at room temperature—cold ingredients can cause separation. The cornstarch in the recipe helps prevent this, but proper chilling (4+ hours) is key for setting.
Can I make this in a smaller Instant Pot?
This recipe is designed for a 6-quart Instant Pot, which gives the cheesecake proper room to set. In a 3-quart model, the filling will be too thick and may not cook evenly. If you must use a smaller pot, reduce the filling by 25% (about 8 oz cream cheese) and increase chilling time to 6 hours to compensate for the shallower depth.
How do I fix a cracked top?
Cracks usually happen from overmixing or sudden temperature changes. To salvage it, spread a thin layer of chocolate ganache or caramel sauce over the cracks before chilling—they’ll disappear under the topping. For prevention, mix the filling just until combined (30 seconds on low) and avoid opening the Instant Pot lid during the natural release phase.
Can I substitute cream cheese with something else?
For a lighter texture, you can replace 4 oz of the cream cheese with 4 oz mascarpone cheese, but the flavor will be slightly tangier. Never use low-fat or Neufchâtel—full-fat is essential for the signature richness. If you’re out of sour cream, Greek yogurt works in a pinch, though it may make the cheesecake slightly denser. Always keep the total fat content high for that classic New York style.
Why does my crust get soggy?
Soggy crusts happen when the filling isn’t fully set before chilling or when the butter in the crust isn’t fully melted. Press the crust firmly into the pot and let it sit for 10 minutes before adding the filling. For extra insurance, blind-bake the crust for 5 minutes in the Instant Pot on high pressure (no filling) to create a moisture barrier. Chill the cheesecake overnight for the best results.

- Braised Beef Short Ribs Recipe: Crock Pot Fall-Off-Bone Magic in 6 Hours - November 1, 2026
- Crock Pot Cocoa Recipe: Velvety Warmth With Hidden Spice Magic - November 1, 2026
- White Queso Crock Pot Recipe: Ultra-Smooth Melt Without the Grain - November 1, 2026