
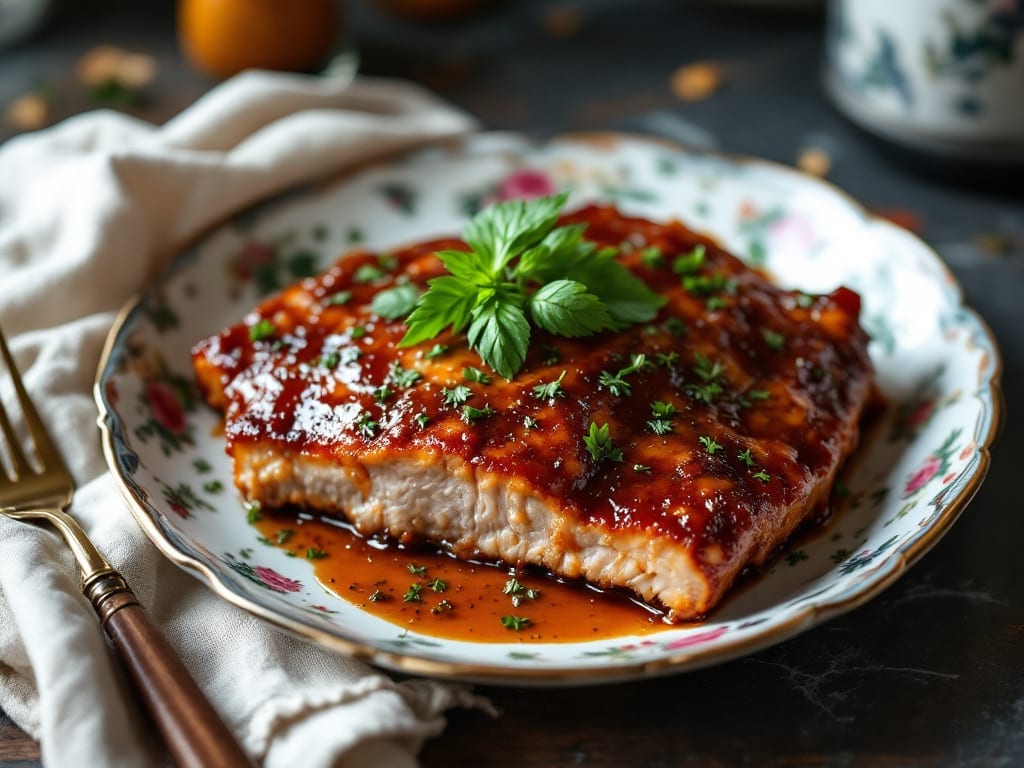
Mastering Instant Pot pork loin back ribs transforms tough cuts into melt-in-your-mouth perfection with minimal effort—something I perfected after years of slow-smoking ribs in my Charleston kitchen.
The secret lies in balancing pressure cooking with a dry rub that develops deep, smoky flavors while keeping the meat tender enough to fall apart. My heritage pigs from the farm always yield the best results, but even store-bought loin back ribs benefit from this method.
This recipe delivers fall-off-the-bone tenderness in under 2 hours, using just 3 key ingredients: a bold spice blend, apple cider vinegar for brightness, and a touch of brown sugar to caramelize during cooking.
The Instant Pot handles the heavy lifting while you focus on building flavor—no need for a smoker or hours of babysitting. Between you and me, this is the technique I use when I need restaurant-quality ribs without the fuss of traditional methods.
What you’ll end up with is ribs that are juicy, aromatic, and packed with smoky-sweet depth—the kind that disappears from plates faster than you can say “second helping.” The meat stays moist thanks to the pressure cooking process, while the crust develops a satisfying char from the dry rub.
Serve with a tangy BBQ sauce for dipping or let the natural flavors shine on their own. This is comfort food at its finest, and it’s foolproof once you get the timing right.
The beauty of this method is its versatility—use it for weeknight dinners or prep ahead for game day. Pair with classic sides like collard greens or cornbread for a full Southern spread.
Let’s get to the recipe, where I’ll walk you through every step to ensure your ribs turn out just as tender as mine do after a long day at The Smoky Pig.
Ingredients for instant pot pork loin back ribs
Three pounds of meaty ribs plus pantry staples. That’s all you need for ribs so tender they fall apart.
| Ingredient | Amount | Notes |
|---|---|---|
| Pork Loin Back Ribs 🍖 | 3 lb | Bone-in, meaty cuts preferred |
| Brown Sugar 🍚 | ½ cup | Light or dark, packed |
| Smoked Paprika 🌶️ | 2 tbsp | For deep smoky flavor |
| Ground Black Pepper 🌶️ | 1 ½ tbsp | Freshly cracked preferred |
| Kosher Salt 🧂 | 1 ½ tbsp | Diamond Crystal preferred |
| Garlic Powder 🧄 | 1 tbsp | Freshly ground for best flavor |
| Onion Powder 🧅 | 1 tbsp | For subtle sweetness |
| Apple Cider Vinegar 🍎 | ¼ cup | Unfiltered for tang |
| Yellow Onion 🧅 | 1 whole | Sliced for braising |
| Garlic Cloves 🧄 | 4 cloves | Smashed for aroma |
| Beef Broth 🍲 | 1 cup | Low-sodium preferred |
| Water 💧 | 1 ½ cups | For pressure cooking |
| BBQ Sauce 🍯 | ½ cup | For serving, optional |
The ribs are everything here. Heritage pork loin back ribs from local farms have the best marbling, but even store-bought cuts work if you choose the meatier sections. Costco or Whole Foods usually carry good quality—look for cuts with good meat-to-bone ratio. If you’re buying from the butcher, ask for the loin back section specifically. The bone-in version gives you that classic rib experience, but if you’re pressed for time, bone-out ribs will still work (just reduce cooking time by 15 minutes).
No smoked paprika? Regular paprika plus a pinch of liquid smoke gets you close. The apple cider vinegar is key for that tangy brightness—substitute lemon juice at half the amount if that’s what you have. For the dry rub, Trader Joe’s has a great pre-mixed BBQ spice blend you can use as a shortcut. The beef broth adds depth, but chicken broth works too. Just don’t skip the vinegar—it’s what keeps the meat tender during pressure cooking. And if you’re feeling fancy, add a splash of bourbon to the broth (about 2 tbsp).
These ribs reheat beautifully—actually taste better the next day once everything melds. Store in the fridge for up to 4 days or freeze for 3 months. I like to portion them into individual servings before freezing so I can just grab what I need. For serving, let them rest for 10 minutes after cooking—this keeps them from falling apart when you cut. The BBQ sauce is just for dipping, but don’t skip it—it adds that extra layer of flavor that makes everything better.
Why You’ll Love This Recipe
- I’ll be real: I make these on Sunday and eat them all week. The ribs stay tender, the glaze thickens just enough to make every bite worth it, and they reheat like a dream. Plus, pork loin ribs are cheaper than baby backs, so you’re getting serious flavor without breaking the bank.
- Sweet-Smoky Magic: That caramelized brown sugar clinging to the ribs? It’s like a hug for your taste buds. The smoked paprika adds depth without overpowering, and the black pepper gives it a little bite—simple spices, but together they create something dangerously addictive.
- Weeknight to Weekend: Between us, these ribs work everywhere. Toss them on a sheet pan for a lazy Monday dinner, bring them to a potluck (they’re always the first to disappear), or serve them at a tailgate—no one will guess they took less than 45 minutes. The kosher salt keeps them juicy, so they hold up perfectly.
Step-by-step instructions for Instant Pot pork loin back ribs
This method delivers melt-in-your-mouth tenderness with minimal effort—just follow the pressure cooker magic.
Season the Ribs Generously
Pat the 3 lb pork loin back ribs dry with paper towels, removing any excess moisture from the surface. This helps the seasoning stick and creates a better crust during cooking. In a small bowl, combine the 0.5 cup brown sugar, 2 tbsp smoked paprika, 1.5 tbsp ground black pepper, 1.5 tbsp kosher salt, 1 tbsp garlic powder, and 1 tbsp onion powder. Rub this mixture evenly over all sides of the ribs, pressing it into the meat so it adheres well. The sugar will caramelize slightly during cooking, adding depth of flavor.
Here’s the thing—don’t skip the pressing step. I’ve found that simply sprinkling the seasoning leads to uneven flavor distribution. Let the seasoned ribs sit at room temperature for 15 minutes while you prep the rest of your ingredients. This short rest ensures even cooking and better seasoning penetration.
Sauté Aromatics in the Instant Pot
Set your Instant Pot to the “Sauté” function and add 1 tablespoon of water to prevent sticking. When the pot is hot, add the sliced 1 whole yellow onion and the 4 smashed garlic cloves. Sauté for 3-4 minutes until the onions soften and become translucent, and the garlic releases its fragrant aroma. You’ll notice the kitchen filling with that wonderful garlic-onion scent—that’s your cue it’s ready for the next step.
Be careful not to let the onions brown too much. You want them soft and sweet, not crispy. If they start to stick, add a splash of water and stir to release them. This step builds the flavor foundation for your ribs, so take your time here. Once the onions are ready, pour in the 0.25 cup apple cider vinegar and let it simmer for 1 minute until the liquid reduces slightly and the aroma intensifies.
Pressure Cook the Ribs
Place the seasoned ribs bone-side down in the Instant Pot, nestling them among the sautéed onions and garlic. Pour in the 1 cup beef broth and 1.5 cups water. The liquid should come about halfway up the sides of the ribs. Secure the lid and set the valve to “Sealing.” Select the “High Pressure” setting for 60 minutes. This pressure cooking time guarantees those fall-off-the-bone results you’re after.
While the ribs cook, resist the temptation to check on them. Every time you open the lid, you release pressure and potentially extend cooking time. The Instant Pot will handle everything perfectly on its own. You’ll know it’s done when the cooking time ends and the pressure indicator pops down automatically.
Natural Release and Finish
Once the cooking cycle completes, let the pressure release naturally for 15 minutes. This slow release helps keep the meat tender and juicy. After the natural release, carefully move the pressure valve to the “Venting” position to release any remaining pressure. Open the lid and use tongs to transfer the ribs to a serving platter. The meat should be fork-tender, with the bones pulling away easily when you test a piece.
Here’s where it gets fun—use two forks to gently separate the ribs into individual pieces. The meat should come away from the bones with minimal effort, creating those beautiful, tender chunks. If you prefer, you can serve them whole or broken down—both ways are delicious. Keep the ribs warm in a 200°F oven while you prepare your serving sauce.
Serve with BBQ Sauce (Optional)
While the ribs rest, warm the 0.5 cup BBQ sauce in a small saucepan over low heat until it reaches serving temperature. This optional step adds a sweet and tangy contrast to the smoky ribs. Serve the ribs immediately with the warmed BBQ sauce for dipping or drizzling. Each bite should deliver that perfect balance of tender meat, caramelized seasoning, and smoky-sweet flavors you’ve worked so hard to achieve.
Real talk: The ribs will be at their most tender right after cooking, so don’t wait to serve them. If you have leftovers, store them in an airtight container in the refrigerator for up to 3 days. The meat continues to tenderize slightly as it cools, making it even more delicious the next day.
Pro Tips For Making Instant Pot Pork Loin Back Ribs
- Trim the Fat First: Pork loin back ribs have a thick fat cap—slice it down to ¼-inch before cooking. I learned this the hard way when my ribs turned greasy instead of crispy; the fat renders unevenly in the Instant Pot, making the sauce gloppy.
- Brown Before Pressurizing: Sear the ribs on high heat for 3-4 minutes per side until deeply browned. Skipping this step means your ribs will taste like they were steamed, not slow-cooked—those caramelized bits are where the flavor lives.
- Don’t Crowd the Pot: Leave at least 1 inch of space between ribs when stacking them. I used to jam them in tight, and they’d steam instead of crisp. If needed, cook in two batches—better ribs every time.
- Use Less Liquid: Start with just ½ cup broth or water, not the full cup most recipes suggest. The ribs release enough moisture on their own; extra liquid dilutes the sauce and makes it watery. Taste as you go—you’ll know when it’s right.
Creative variations of instant pot pork loin back ribs
Southern BBQ Style
For true Southern flavor, swap the apple cider vinegar for ½ cup tomato-based BBQ sauce (like Sweet Baby Ray’s) and add 1 tbsp brown sugar to the dry rub.
Cook the ribs with 1 cup chicken broth instead of beef, then finish by glazing them with ¼ cup vinegar-peppercorn sauce during the last 5 minutes of natural release. This creates that classic sticky, tangy crust we all love. 🌶️
Asian-Inspired Five-Spice
Transform these ribs into a fusion dish by replacing smoked paprika with 1 tbsp Chinese five-spice powder and 1 tsp ginger powder. Add 1 star anise pod and 1-inch cinnamon stick to the Instant Pot with the onions.
After pressure cooking, brush with a glaze of 2 tbsp hoisin sauce + 1 tbsp rice vinegar before serving. The result? Sweet, aromatic ribs with a completely different flavor profile that still maintains that melt-in-your-mouth texture.
Spicy Cajun Twist
Kick things up with a Cajun-inspired rub: replace the onion powder with 1 tbsp dried thyme and add 1 tbsp cayenne pepper to the dry rub. Use 1 cup chicken stock instead of beef broth, and add 2 bay leaves to the pot.
After cooking, serve with a spicy remoulade sauce made from ½ cup mayonnaise, 1 tbsp hot sauce, 1 tsp Worcestershire sauce, and 1 tsp lemon juice. This version brings that Louisiana heat while keeping the ribs tender.
Honey-Garlic Glazed
For a sweeter profile, reduce the brown sugar in the dry rub to ¼ cup and add 1 tbsp honey. After pressure cooking, brush the ribs with a glaze of 3 tbsp honey + 2 tbsp soy sauce + 1 minced garlic clove.
Broil for 2-3 minutes to caramelize the glaze. The honey adds a beautiful sheen and balances the smoky flavors perfectly. This version pairs beautifully with steamed jasmine rice and quick-pickled cucumbers.
Breakfast Ribs
Turn these ribs into a brunch star by adding 1 tsp mustard powder and ½ tsp onion powder to the dry rub. After cooking, serve with a side of buttermilk biscuits and a maple-bacon syrup for dipping.
The savory-sweet combo is perfect for lazy weekend mornings. I like to add a splash of bourbon to the broth for extra depth—just 2 tbsp does the trick. 💫
Nutrition facts
Frequently asked questions
Can I use bone-in or boneless pork loin back ribs for this recipe?
This recipe is designed for bone-in pork loin back ribs—they deliver that classic rib experience with perfect meat-to-bone ratio. If you must use boneless, reduce cooking time by 15 minutes (to 45 minutes high pressure) since they cook faster. The tenderness will still be excellent, though the texture will differ slightly.
Why does the recipe call for apple cider vinegar instead of BBQ sauce?
The vinegar serves two critical purposes: it tenderizes the meat during pressure cooking and adds bright acidity that balances the smoky-sweet flavors. Using BBQ sauce in the pot would make the ribs soggy. Save the sauce for serving! The vinegar’s tang also helps break down collagen, ensuring that fall-apart texture you crave.
What if my Instant Pot ribs turn out dry instead of tender?
Dry ribs usually happen from two issues: overcooking or releasing pressure too quickly. First, check your cooking time—60 minutes high pressure is perfect for bone-in ribs. Second, always do a 15-minute natural release (never quick release) to let moisture redistribute. Pro tip: If using smaller cuts (2 lbs), reduce time to 45 minutes.
Can I make these ribs ahead of time for a party?
Cook the ribs as directed, then let them cool completely. Store in an airtight container in the fridge for up to 4 days or freeze for 3 months. Reheat in the Instant Pot on “Sauté” mode with 2 tbsp broth for 5 minutes—they’ll taste even better reheated as the flavors meld further.
How do I adjust the spice level for kids or sensitive eaters?
Reduce the black pepper to 1 tsp and omit the cayenne (if using variations). For extra mildness, add 1 tsp honey to the dry rub to balance any remaining heat. Kids love these ribs when served with a side of sweet potato mash—the natural sweetness from the brown sugar makes them approachable for all ages.

- Baked Potatoes in Crock Pot Recipe: Buttery Interiors and Crispy Top Magic - November 1, 2026
- Braised Beef Short Ribs Recipe: Crock Pot Fall-Off-Bone Magic in 6 Hours - November 1, 2026
- Crock Pot Cocoa Recipe: Velvety Warmth With Hidden Spice Magic - November 1, 2026