
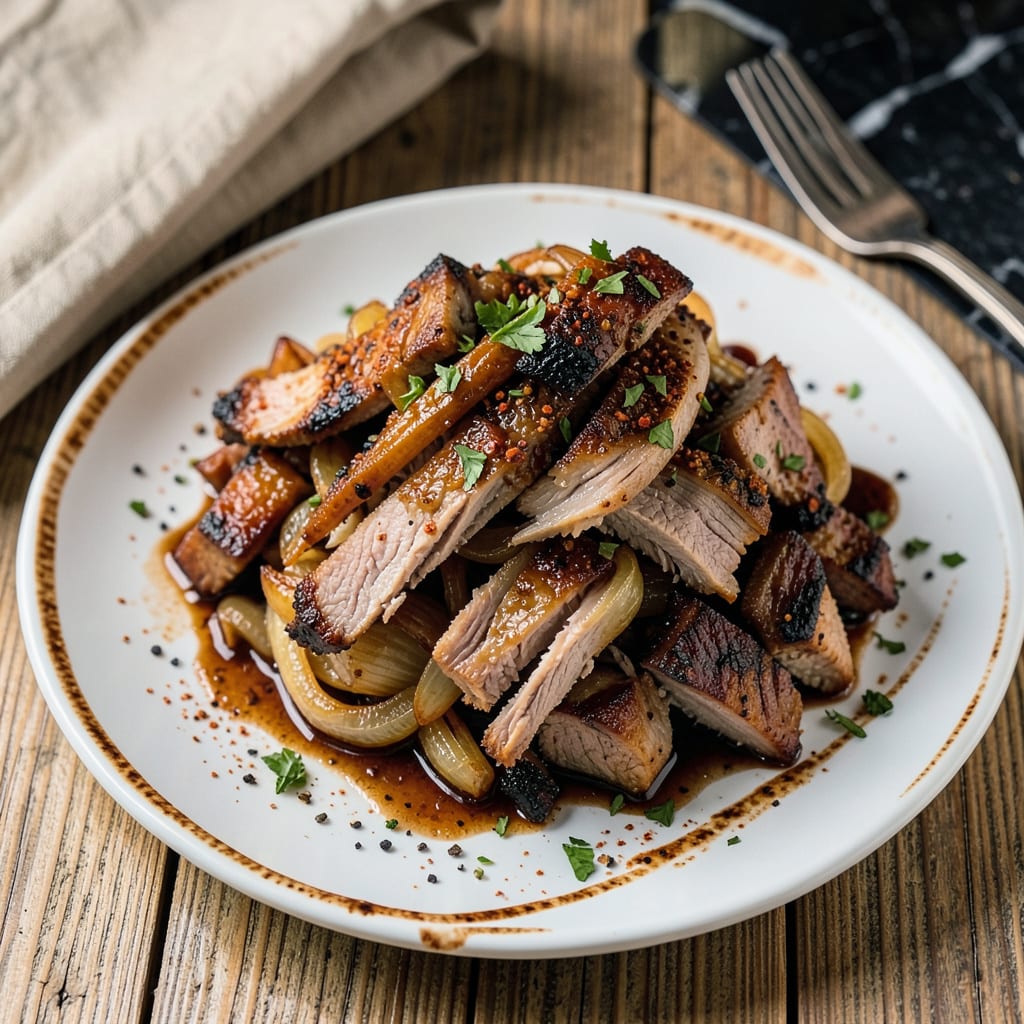
This Instant Pot method delivers fall-apart tender pulled pork in a fraction of traditional cooking time. The pressure cooker transforms tough pork shoulder into perfectly shreddable meat while infusing it with smoky, savory flavors. No more waiting all day—just 90 minutes yields results that rival slow-cooked versions.
What sets this recipe apart is its simplicity and reliability. A basic spice rub and the Instant Pot’s high-pressure setting do all the work, locking in moisture while breaking down connective tissue. The result is juicy, flavorful pork that’s ready for sandwiches, tacos, or meal prep—with minimal active effort required.
Ingredients for Instant Pot Pulled Pork
Sixteen ingredients transform tough pork shoulder into Instant Pot magic with smoky, savory depth and guaranteed tenderness.
| Ingredient | Amount | Notes |
|---|---|---|
| Pork Shoulder Roast 🍖 | 3 ½ lb | Boneless, cut into 3-4 chunks |
| Kosher Salt 🧂 | 1 ½ tbsp | Diamond Crystal preferred for precision |
| Light Brown Sugar 🍚 | 2 tbsp | Packed, for caramelization |
| Smoked Paprika 🌶️ | 1 ½ tbsp | Spanish smoked for authentic depth |
| Garlic Powder 🧄 | 1 tbsp | Freshly opened for maximum potency |
| Onion Powder 🧅 | 1 tbsp | Dehydrated, not granulated |
| Ground Black Pepper 🌶️ | 1 tsp | Freshly cracked preferred |
| Dried Oregano 🌿 | 1 tsp | Mexican oregano if available |
| Ground Cumin 🌿 | 1 tsp | Toasted for enhanced aroma |
| Apple Cider Vinegar 🍎 | ¼ cup | Unfiltered for tangy brightness |
| Chicken Broth 🥄 | ½ cup | Low-sodium preferred |
| Tomato Paste 🍅 | 2 tbsp | Double-concentrated preferred |
| Worcestershire Sauce 💧 | 1 tbsp | Anchovy-free if preferred |
| Liquid Smoke 💨 | ½ tsp | Hickory flavor recommended |
| Yellow Mustard 🟡 | 1 tbsp | Classic prepared style |
[recipeingredientscaler]
The pork shoulder selection is critical for optimal results. Bone-in roasts offer more flavor but require additional trimming; boneless cuts provide convenience with consistent texture. Professional kitchens prefer 80/20 fat ratio for moisture retention during pressure cooking. Source from reputable butchers or Costco for bulk purchasing. The spice rub components must be freshly opened—smoked paprika loses potency after 6 months, while ground cumin benefits from light toasting in a dry skillet before use.
Substitutions require careful consideration to maintain flavor balance. Pork butt may replace shoulder with identical cooking times. For dietary restrictions, vegetable broth substitutes chicken broth effectively, while coconut aminos replaces Worcestershire sauce at a 1:1 ratio. The apple cider vinegar provides essential acidity—white vinegar with 1 tsp sugar approximates the profile. Liquid smoke alternatives include smoked salt (reduce quantity by half) or chipotle powder for heat and smokiness.
Storage considerations ensure maximum flavor retention. The cooked pork maintains quality refrigerated in its juices for 4-5 days, while the uncooked spice rub remains potent in airtight containers for 3 months. For extended preservation, vacuum-seal cooked portions before freezing—maintains texture for up to 6 months. Always bring refrigerated pork to room temperature before reheating to prevent drying.
Why You’ll Love This Recipe
- Dump-and-Go Magic: I’m not kidding—this is literally five ingredients tossed in the Instant Pot. The pork shoulder does all the work while you ignore it (yes, even if you burn the garlic toast).
- Smoky-Sweet Obsession: That combo of smoked paprika and brown sugar? It caramelizes into this sticky, slightly crispy crust while the inside stays juicy. I’ve caught my husband eating it straight from the pot with a fork.
- Meal Prep Overachiever: One batch makes enough for tacos Tuesday, sandwiches Thursday, and a lazy nacho plate Saturday. Honestly, it’s the only way I survive weeks when grocery runs feel like a chore.
- Budget Hero: A $12 pork shoulder feeds my family for three meals—and the leftovers freeze like a dream. Between us, I’d pay double for how little effort this saves me.
Instructions
This method delivers perfectly tender pulled pork with minimal hands-on time and maximum flavor development.
Step 1: Prepare and Season the Pork
Cut the 3.5 lb pork shoulder roast into 3-4 equal chunks about 2-3 inches thick. This ensures even cooking and better flavor penetration. Pat each piece completely dry with paper towels—residual moisture prevents proper browning and seasoning adherence.
In a small bowl, combine the 1.5 tbsp kosher salt, 2 tbsp light brown sugar, 1.5 tbsp smoked paprika, 1 tbsp garlic powder, 1 tbsp onion powder, 1 tsp ground black pepper, 1 tsp dried oregano, and 1 tsp ground cumin. Rub this mixture aggressively over every surface of the pork chunks, pressing it into the meat. The sugar will caramelize during cooking, creating a flavorful crust.
Step 2: Sear the Pork for Depth of Flavor
Set your Instant Pot to the “Sauté” function on high heat. When the display reads “Hot,” add the seasoned pork chunks in a single layer. Sear for 3-4 minutes per side until deeply browned. You’ll know it’s ready to flip when the meat releases easily from the pot—don’t force it.
Remove the pork and set aside temporarily. The fond (browned bits) in the pot will dissolve into your cooking liquid, adding incredible depth to the final dish. Deglaze the pot by adding the 0.25 cup apple cider vinegar and scraping the bottom with a wooden spoon until all browned bits are incorporated.
Step 3: Build the Cooking Liquid and Pressure Cook
To the deglazed pot, add the 0.5 cup chicken broth, 2 tbsp tomato paste, 1 tbsp Worcestershire sauce, 0.5 tsp liquid smoke, and 1 tbsp yellow mustard. Whisk until the tomato paste fully dissolves into the liquid. Return the seared pork chunks to the pot along with any accumulated juices.
Secure the lid and set the valve to “Sealing.” Cook on high pressure for 90 minutes. The pork is done when it reaches an internal temperature of 200°F and shreds easily with a fork. Natural release for 15 minutes, then quick release any remaining pressure. The meat should be fall-apart tender at this point.
Step 4: Shred and Reduce the Sauce
Transfer the pork to a large bowl and shred using two forks, working against the grain. Discard any large fat deposits or connective tissue. Return the shredded meat to the pot and stir to coat in the cooking liquid.
Set the Instant Pot to “Sauté” on medium heat and simmer for 5-7 minutes, stirring occasionally, until the liquid reduces slightly and coats the pork. The sauce should be thick enough to cling to the meat but not dry. Taste and adjust seasoning if needed—the flavors will have concentrated during cooking.
Troubleshooting Great Instant Pot Pulled Pork
Pork Won’t Shred
If your pork isn’t falling apart after cooking, it likely didn’t reach the proper internal temperature. The collagen needs to break down at 200°F for that signature tenderness. Return the meat to the Instant Pot with additional ½ cup chicken broth and pressure cook for another 20-30 minutes. I’ve found this extra time usually solves the issue. 💪
Burn Notice Appears
This happens when food sticks to the bottom during pressure cooking. First, cancel the program and quick release pressure. Check if there’s enough liquid—you need at least 1 cup total. Scrape any stuck bits, add ¼ cup more broth, and restart. Next time, deglaze thoroughly after searing.
Too Watery Sauce
After shredding, if the liquid seems thin, remove the pork and set Instant Pot to “Sauté.” Simmer the liquid for 8-10 minutes until reduced by half. For faster results, mix 1 tsp cornstarch with cold water and stir into the sauce. This creates a glossy, clingy consistency without overcooking the meat.
Bland Flavor Profile
The spices might have mellowed during cooking. After shredding, stir in 1 tbsp apple cider vinegar and 1 tsp smoked paprika to brighten flavors. I always taste before serving—sometimes a pinch of kosher salt or brown sugar balances everything perfectly. 🌟
Fat Separation
If you see a greasy layer on top after cooking, skim it off with a ladle before shredding. For prevention next time, trim visible fat from the pork shoulder before cooking, leaving just ¼-inch fat cap for flavor. The 15-minute natural release also helps fat reincorporate into the meat.
Instant Pot Won’t Pressurize
Check three things: the sealing ring is properly seated, the steam release valve is set to “Sealing,” and there’s enough liquid (minimum 1 cup). If using frozen pork, add 10 minutes to come to pressure. I once forgot to close the valve—simple mistake that wasted 30 minutes of cooking time!
Nutrition Facts
Frequently Asked Questions
Can I use frozen pork shoulder directly?
Yes, but add 10-15 minutes to the cooking time. The Instant Pot will take longer to come to pressure with frozen meat. For best results, thaw overnight in the fridge first—this ensures even seasoning and better searing.
Why do I need to cut the pork into chunks?
Smaller 3-4 inch pieces cook more evenly in the pressure environment. Whole roasts may have undercooked centers while outer layers overcook. The increased surface area also absorbs more flavor from the rub and cooking liquid.
What if I don’t have liquid smoke?
Substitute with ½ tsp smoked paprika or a dash of chipotle powder for heat. For authentic smokiness, add 1 tsp smoked salt to the rub instead. The flavor won’t be identical but still delicious.
How do I make it crispy after pressure cooking?
Spread shredded pork on a baking sheet and broil for 3-5 minutes. Watch closely to avoid burning! Alternatively, crisp small batches in a hot skillet with 1 tbsp oil for 2 minutes per side.
Can I double the recipe?
Yes, but don’t exceed ⅔ full capacity of your Instant Pot. For 6-7 lbs pork, use the same cooking time but increase liquid to 1 cup broth. You may need to sear in batches.

- 8 Bean Soup Recipe Crock Pot: Hearty Vegetable Medley in One Pot - September 25, 2026
- 4C Bread Crumbs Meatballs Recipe: Crispy Crust and Juicy Centers - September 25, 2026
- 6 Oz Chocolate Chip Cookie Recipe: Perfectly Balanced Crispy Edges and Chewy Hearts - September 25, 2026