
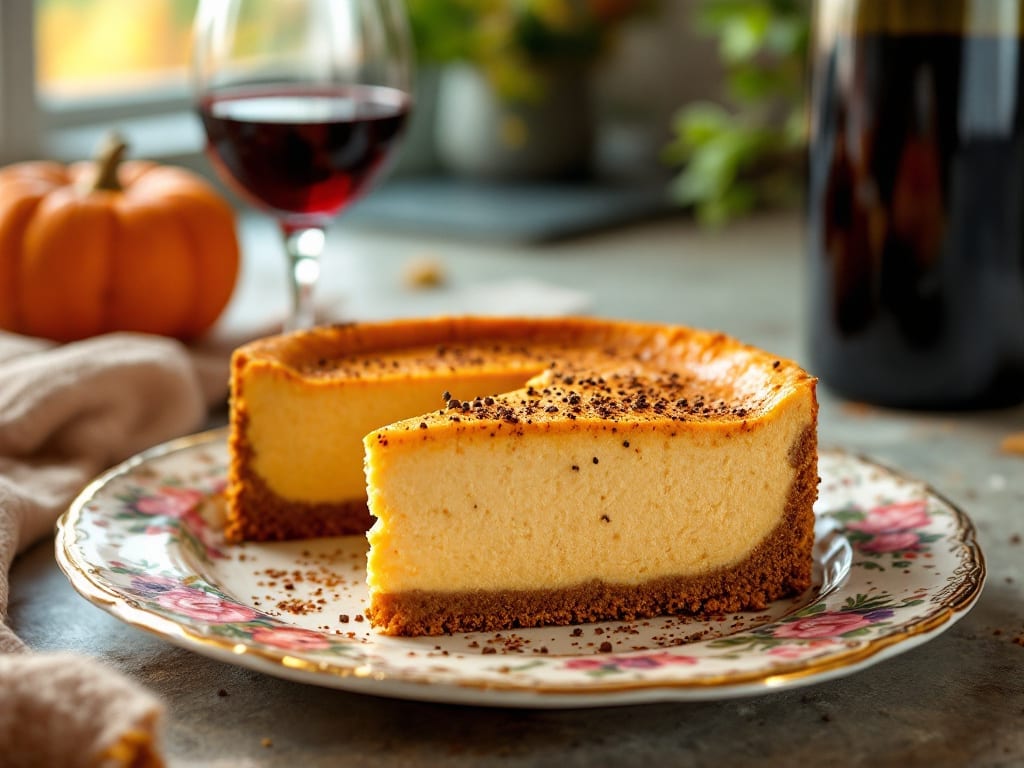
Here’s a delicious instant Pot pumpkin cheesecake recipe that delivers restaurant-quality results with a silky texture and no watery cracks—all in under an hour. The secret lies in precise temperature control and a foolproof crust technique that prevents soggy bottoms.
After years of testing desserts in my Instant Pot, I finally cracked the code for a pumpkin cheesecake that rivals traditional oven-baked versions.
The recipe combines classic pumpkin cheesecake flavors with modern convenience: pumpkin puree adds natural sweetness while cream cheese ensures that rich, velvety texture we all love. A graham cracker crust baked separately guarantees crisp edges that hold up perfectly.
The Instant Pot’s “Yogurt” setting creates gentle heat distribution, preventing the common issue of cracked tops or dense centers.
What you’ll end up with is a perfectly set pumpkin cheesecake with a smooth, jiggly interior and a clean slice every time. The crust stays crisp while the filling remains silky—no soggy layers or watery surprises.
This method eliminates the guesswork of oven baking while delivering professional results in your kitchen.
Perfect for fall gatherings, holiday menus, or when you crave dessert without the 90-minute oven commitment. Let’s get started with this game-changing recipe that transforms your Instant Pot into a cheesecake maker.
Ingredients for instant pot pumpkin cheesecake
Sixteen ingredients transform your Instant Pot into a pumpkin cheesecake maker.
| Ingredient | Amount | Notes |
|---|---|---|
| Pumpkin Puree 🎃 | 1 ½ cups | Unsweetened, 100% pure pumpkin |
| Large Eggs 🥚 | 4 whole | Room temperature for best blending |
| Full-Fat Cream Cheese 🧀 | 16 oz | Room temperature, not low-fat |
| Granulated Sugar 🍚 | 1 ½ cups | White or light brown sugar |
| Pumpkin Pie Spice 🌶️ | 2 tsp | Freshly ground if possible |
| Vanilla Extract 🌸 | 1 tbsp | Pure, not imitation |
| Heavy Whipping Cream 🥛 | 1 cup | Full-fat for stability |
| Graham Cracker Crumbs 🍪 | 1 ½ cups | Finely crushed, no large pieces |
| Unsalted Butter 🧈 | ½ cup | Melted, for crust binding |
| Diamond Crystal Kosher Salt 🧂 | ½ tsp | Adjust to taste |
| Sour Cream 🍶 | ¼ cup | Full-fat for creaminess |
| Condensed Milk 🥛 | ½ cup | Sweetened, for texture |
The cream cheese is non-negotiable—full-fat only—it’s what gives that velvety texture. Philadelphia brand melts perfectly, but any high-quality block works too. Room temperature is key: take it out 30 minutes before mixing. The pumpkin puree should be 100% pure, unsweetened—none of that spiced canned pumpkin. Libby’s or store-brand cans are fine, but drain any excess water. For the crust, graham crackers from the bulk section crush finer than pre-made crumbs, and butter from a European-style brand adds extra richness to the base.
No pumpkin pie spice? Mix 1 tsp cinnamon, 0.25 tsp ginger, 0.125 tsp nutmeg, and 0.125 tsp cloves—it’s the same thing. Running short on condensed milk? Sweetened condensed milk from a can works, but half-and-half plus 2 tbsp sugar is a decent pinch. The sour cream can be swapped for Greek yogurt at half the amount, though it’ll be slightly tangier. For a lighter texture, reduce the sugar by 0.25 cup—the pumpkin’s natural sweetness balances it. And if you’re worried about cracks? Whip the cream cheese and sugar together for 2 full minutes—that’s the secret to that silky finish.
This cheesecake sets beautifully overnight—4-6 hours in the fridge—but if you’re impatient, chill it for 2 hours then finish in the freezer for 1 hour. The crust stays crisp for 3 days if stored properly: wrap the whole thing in plastic, then foil. For serving, room temperature slices are the best—let it sit 15 minutes before cutting. Leftovers? Freeze individual slices for up to 2 months—they thaw perfectly. And trust me, the second day is even better as the flavors meld.
Why You’ll Love This Recipe
- No Fuss, One Pot: Between us, I’ve made cheesecake that required a water bath, cooling overnight, and still came out lopsided. This? Just blend, dump, and press start. The Instant Pot handles all the heavy lifting—no jiggling, no guessing—while the pumpkin puree and cream cheese blend into something silky without a single hand mixer in sight.
- Creamy-Spiced Magic: That first bite where the full-fat cream cheese melts into the pumpkin’s natural sweetness? It’s like autumn wrapped in a hug. The pie spice isn’t just there—it’s warm, cinnamon-forward, and just a whisper of nutmeg to keep it from tasting like a Halloween costume. Honestly, I’ve had people ask if I baked it twice.
- Leftovers That Shine: This isn’t one of those desserts that turns sad after day one. The texture stays firm enough to slice cleanly, and the flavor only deepens—perfect for grabbing a piece with coffee or packing in a lunchbox. (Yes, even on a Tuesday.) My kids actually beg for it the next morning, which, let’s be real, is a parenting win.
- Budget-Friendly Luxury: You’re using pantry staples here: pumpkin puree (a can lasts forever), eggs, and cream cheese that’s already cheaper than store-bought cheesecake. The sugar and spice? A dollar’s worth of flavor. It’s the kind of dessert that makes you feel fancy without emptying your wallet—or your fridge.
Step-by-step instructions for Instant Pot pumpkin cheesecake
Here’s how to create a velvety pumpkin cheesecake with a perfect crust—no cracks, no fuss.
Prepare the Crust and Mix the Filling Ingredients
Begin by melting the 0.5 cup unsalted butter in a microwave-safe bowl in 30-second intervals, stirring between each, until completely smooth. In a separate medium bowl, combine the 1.5 cups graham cracker crumbs with the melted butter. Mix until the crumbs are uniformly moistened and resemble damp sand. Press this mixture firmly into the bottom of a 6-inch springform pan, creating an even layer. Chill in the refrigerator while you prepare the filling.
In a large mixing bowl, beat the 16 oz full-fat cream cheese with an electric mixer until completely smooth—this prevents lumps in the final texture. Gradually add the 1.5 cups granulated sugar while mixing on medium speed until fully incorporated. The mixture should lighten in color and become creamy. Here’s the thing—creaming these two ingredients properly is what guarantees that silky texture you’re after.
Blend Wet Ingredients for Maximum Smoothness
Add the 1.5 cups pumpkin puree to the cream cheese mixture and blend until fully combined. The pumpkin should be evenly distributed, with no visible streaks. Next, incorporate the 4 whole large eggs one at a time, mixing just until each egg is fully integrated before adding the next. This sequential addition prevents overmixing, which can lead to a denser final product.
Stir in the 0.25 cup sour cream, 0.5 cup condensed milk, 1 tbsp vanilla extract, and 2 tsp pumpkin pie spice until everything is uniformly distributed. The condensed milk adds subtle sweetness and helps stabilize the texture. Taste the mixture and adjust the 0.5 tsp diamond crystal kosher salt if needed—this is your chance to balance the flavors before baking.
Assemble and Cook in the Instant Pot
Carefully pour the filling over the chilled crust in the springform pan. Place the pan on a trivet inside your Instant Pot and secure the lid. Select the “Yogurt” setting and cook for 35 minutes on high pressure. This gentle cooking method ensures even heat distribution, which is critical for preventing cracks. When the cooking cycle completes, allow the Instant Pot to naturally release pressure for 15 minutes, then quick-release any remaining pressure.
Remove the springform pan from the Instant Pot and let it cool to room temperature. This gradual cooling prevents sudden temperature shifts that could cause the cheesecake to crack. Once cooled, refrigerate for at least 4 hours—overnight is ideal—for the flavors to fully meld and the texture to set properly. The cheesecake should be firm but still slightly jiggly in the center when done.
Finish with Whipped Cream and Serve
Before serving, whip the 1 cup heavy whipping cream with a hand mixer until soft peaks form. Spread this lightly over the top of the cheesecake for a decorative touch. The cream adds a luxurious finish while balancing the rich, spiced pumpkin flavor. Let the cheesecake sit at room temperature for 10 minutes before slicing to allow the cream to set slightly.
Slice into 6 equal portions and serve immediately. The interior should be silky with a smooth, crack-free surface, while the crust remains crisp at the edges. Each bite should deliver a perfect balance of creamy, spiced pumpkin and the buttery graham cracker base. For best results, serve within 2 days for optimal texture and flavor.
Pro Tips For Making Instant Pot Pumpkin Cheesecake
- Preheat Your Pot: Skip the “just add water” step—run the Instant Pot on high pressure for 3 minutes with ½ cup water first. This guarantees your crust sets properly and prevents a gummy center, especially when using pumpkin puree, which can make fillings denser than usual. (Yes, it’s an extra minute, but your cheesecake will thank you.)
- Whip Cream Cheese First: Beat the full-fat cream cheese until completely smooth before adding sugar or eggs. Lumps in the filling lead to a lumpy texture, and pumpkin puree doesn’t hide them well. Use a hand mixer—it’s faster than elbow grease and ensures a silky result.
- Don’t Overmix the Batter: Stir the pumpkin puree and spices into the cream cheese mixture just until combined. Overmixing introduces too much air, which can cause cracks or a domed top when it bakes. Think “marble swirls,” not “fluffy batter.”
- Natural Release Only: Let the pressure release naturally for 30 minutes after cooking. Rushing it with a quick release risks a runny center, and pumpkin’s moisture needs time to set. The crust will hold together better, and the texture will be firm but creamy—not like a sad, wobbly pudding.
Make-ahead tips for this dish
Prep Ahead for Efficiency
Mix the crust ingredients the night before and store them in an airtight container in the fridge. This saves 15 minutes of prep time the next day—just press and chill before assembling.
For the filling, blend all wet ingredients (pumpkin, eggs, cream cheese) in a food processor for 30 seconds to eliminate lumps. Store the blended mixture in the fridge for up to 24 hours before baking. This step ensures a silky texture without last-minute mixing stress. 💡
Crust Pre-Baking Shortcut
Bake the crust separately in a 350°F oven for 8-10 minutes while you prepare the filling. This pre-baking step prevents sogginess and gives you a head start. Line the springform pan with parchment paper before pressing the crust to make removal effortless.
I use a 6-inch pan for perfect proportions, but an 8-inch pan works too—just adjust baking time to 38 minutes in the Instant Pot. 🍪
Filling Prep Timeline
Assemble the entire cheesecake (filling over crust) up to 4 hours ahead of cooking. Cover tightly with plastic wrap and refrigerate. When ready to bake, simply place the assembled pan in the Instant Pot and follow the cooking instructions.
This makes it perfect for holiday gatherings—just set it up the morning of and enjoy stress-free dessert service. The flavors develop beautifully during this waiting time. ⏰
Freezer-Friendly Assembly
For maximum convenience, assemble the cheesecake completely (including crust) and freeze it for up to 1 month before baking. Thaw in the fridge overnight before cooking. The freezing process actually enhances the texture by stabilizing the cream cheese mixture.
When baking from frozen, increase the Instant Pot time to 40 minutes to ensure even cooking throughout. This method is ideal for meal prep enthusiasts who want to bake ahead for special occasions. ❄️
Portioning for Serving
Use a 6-inch springform pan for perfect 6-serving portions. For individual servings, divide the filling into 6 ramekins (about 3.5 oz each) before baking. These bake in 25 minutes in the Instant Pot using the same “Yogurt” setting.
Store individual portions in airtight containers for up to 3 days in the fridge or 2 months in the freezer. This makes perfect single-serving desserts for parties or office treats. 🍴
Make-Ahead Serving Suggestions
Prepare whipped cream toppings in advance by whipping the 1 cup heavy cream and storing it in a sealed container with parchment paper between layers. This prevents drying out and keeps it ready to spread at serving time.
For a festive touch, pipe the cream into decorative swirls using a pastry bag with a star tip. Store garnishes separately until the last minute to maintain freshness. This attention to detail elevates your make-ahead dessert to restaurant-quality presentation. ✨
Nutrition facts
Frequently asked questions
Why does your recipe use the Instant Pot’s “Yogurt” setting instead of “Cake”?
The “Yogurt” setting provides gentle, even heat distribution that’s perfect for delicate desserts like cheesecake. It prevents the common issue of cracked tops or dense centers that can occur with higher-heat settings. This method mimics the slow baking process of traditional oven-baked cheesecakes but in a fraction of the time.
Can I make this recipe without a springform pan?
Yes, but with precautions. Use a regular oven-safe pan and line the bottom with parchment paper. After baking, let it cool completely before removing the sides to avoid breaking the delicate filling. For best results, still use the “Yogurt” setting and increase cooking time by 2 minutes to ensure full doneness.
What’s the secret to preventing cracks in the cheesecake?
Three key factors:
- Whip the cream cheese and sugar together for 2 full minutes to fully aerate the mixture,
- Avoid overmixing after adding eggs, and
- Let the cheesecake cool gradually at room temperature before refrigerating. The “Yogurt” setting’s gentle heat also helps create a stable texture that resists cracking.
Can I substitute regular cream cheese for full-fat in this recipe?
While you can use it, the texture will be less rich and creamy. Full-fat cream cheese is essential for that signature velvety consistency. If you must use low-fat, add 1 extra tablespoon of sour cream to compensate for the reduced fat content, but expect a slightly denser final product.
How do I know when the cheesecake is fully set?
The cheesecake should be firm to the touch but still have a slight jiggle in the center when done. It will continue setting as it cools, so don’t overcook. The edges should pull away cleanly from the pan when gently tugged. If in doubt, insert a toothpick—it should come out with just a few moist crumbs, not liquid.

- Crock Pot Round Steak Recipe: Slow-Sear Crust With Juicy Center - November 6, 2026
- Candied Sweet Potatoes Crock Pot Recipe: Caramelized Sweetness With Zero Effort - November 6, 2026
- Steak Recipe Crock Pot: Juicy, Caramelized Crust in 4 Hours - November 6, 2026