
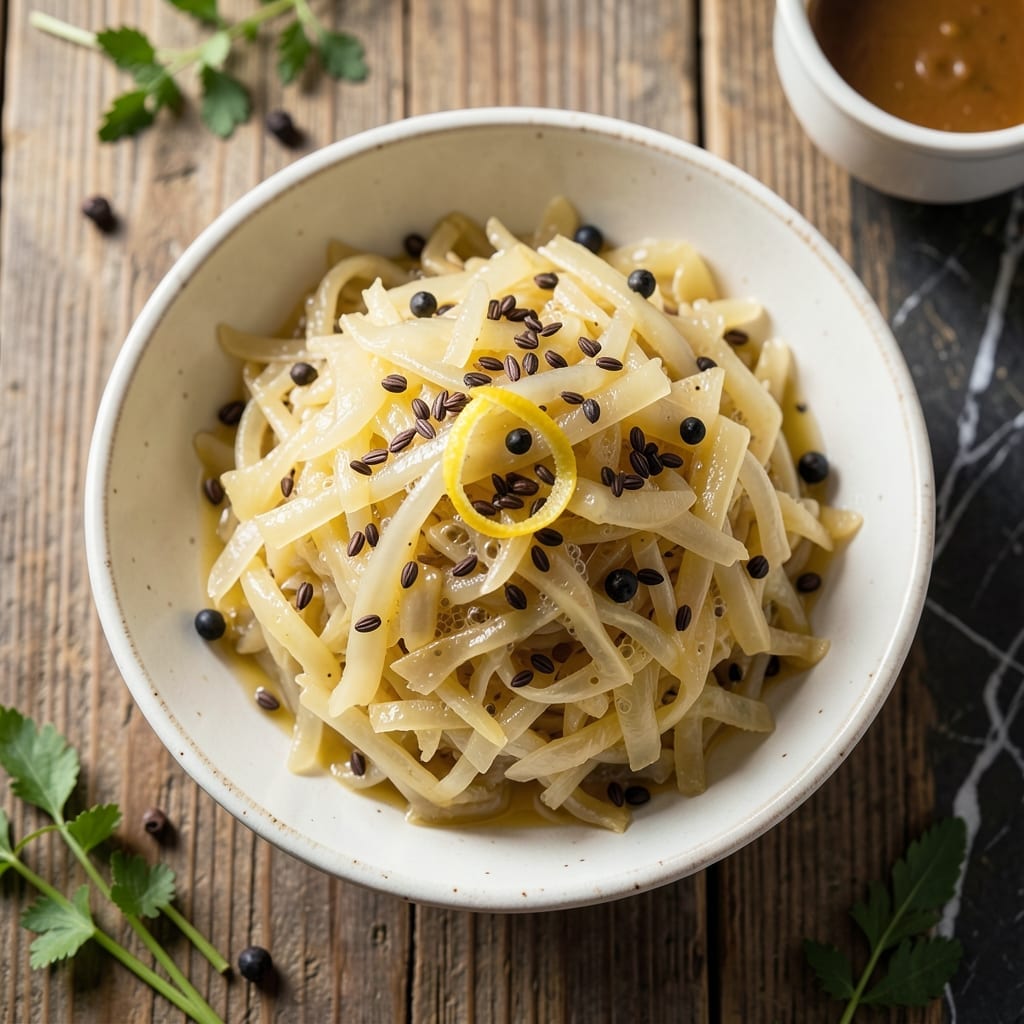
Fermenting sauerkraut traditionally takes weeks, but this Instant Pot method delivers that signature tangy crunch in a fraction of the time.
The pressure cooker speeds up the fermentation process while maintaining the probiotic benefits and crisp texture you expect. A simple ratio of cabbage to salt creates the perfect environment for natural lactic acid development.
You’ll achieve tender yet crunchy sauerkraut with that authentic sour flavor, ready to enjoy as a side dish or topping. The process is straightforward and requires minimal hands-on time.
Safety is key—proper cleaning and timing ensure successful results every time. This method makes homemade sauerkraut accessible without special equipment.
Ingredients for Instant Pot Sauerkraut
Minimal ingredients deliver maximum tangy crunch with this streamlined method.
| Ingredient | Amount | Notes |
|---|---|---|
| Green Cabbage 🥬 | 2 ½ lb | Thinly sliced, core removed |
| Kosher Salt 🧂 | 1 ½ tbsp | Non-iodized, for fermentation |
| Filtered Water 💧 | 1 cup | Chlorine-free for best results |
| Caraway Seeds 🌿 | 1 tsp | Optional, for traditional flavor |
| Juniper Berries 🍇 | ½ tsp | Lightly crushed, optional |
| Black Peppercorns 🌶️ | ½ tsp | Whole, optional for depth |
| Bay Leaves 🍃 | 2 whole | Dried, for aromatic base |
| Apple Cider Vinegar 🍏 | 2 tbsp | Raw, unfiltered preferred |
The cabbage is everything here. Green cabbage gives the classic texture and flavor, but red works too (just expect a pink hue). Whole Foods or farmers markets often have the freshest heads—look for dense, heavy cabbages with crisp leaves. Organic isn’t mandatory, but it does reduce pesticide residue. For salt, Diamond Crystal kosher is the gold standard for fermentation—its coarse texture dissolves perfectly.
No caraway seeds? Skip them entirely—this isn’t a dealbreaker. Juniper berries can be swapped for a pinch of ground allspice (use sparingly). If you’re out of apple cider vinegar, white vinegar in a pinch works, though the flavor will be sharper. The bay leaves can be replaced with a teaspoon of mustard seeds for a different but complementary aroma.
Store unopened cabbage in the crisper drawer for up to 2 weeks. Once sliced, use within 3 days or ferment immediately. Finished sauerkraut keeps in the fridge for 6 months in an airtight container. The flavor deepens over time, so resist eating it all at once.
Why You’ll Love This Recipe
- Set It and Forget: I toss in the cabbage, salt, and spices, press a button, and walk away. No babysitting required.
- Tangy with a Kick: The caraway and juniper berries give it this deep, earthy flavor that’s way better than store-bought.
- Meal Prep Magic: I make a big batch and it keeps for weeks—perfect for topping sausages, salads, or even straight from the jar.
- Budget-Friendly Ferment: A single head of cabbage and a few pantry staples turn into quarts of sauerkraut. Honestly, it’s a steal.
Step-by-Step Instructions for Instant Pot Sauerkraut
This method delivers tangy, crisp fermented cabbage with minimal effort and maximum flavor.
Step 1: Prepare and Pack the Cabbage
Remove the core from the 2.5 lb green cabbage and thinly slice it into uniform shreds. I use a sharp chef’s knife for consistent texture. Transfer the shredded cabbage to a large mixing bowl.
Sprinkle the 1.5 tbsp kosher salt evenly over the cabbage. Massage the cabbage with clean hands for 5-7 minutes until it releases significant liquid and softens slightly. This step draws out moisture, creating the brine needed for fermentation.
Step 2: Add Aromatics and Liquid
In a small bowl, combine the 1 tsp caraway seeds, 0.5 tsp juniper berries, and 0.5 tsp black peppercorns. Lightly crush the juniper berries to release their oils. Add these spices to the cabbage along with the 2 whole bay leaves.
Pour the 1 cup filtered water and 2 tbsp apple cider vinegar over the cabbage mixture. The vinegar jumpstarts the fermentation process while preserving the cabbage’s vibrant color. Toss everything together to distribute the spices and liquid evenly.
Step 3: Pack and Press into the Instant Pot
Transfer the cabbage mixture to your Instant Pot, packing it down firmly. Use a wooden spoon or your hands to compress the cabbage, ensuring it’s submerged under its own liquid. This prevents mold growth and ensures even fermentation.
Leave at least 1 inch of headspace at the top of the pot. The cabbage will expand slightly as it ferments. If there isn’t enough liquid to fully submerge the cabbage, add a small amount of additional filtered water to cover it completely.
Step 4: Ferment Under Pressure
Secure the lid on your Instant Pot and set the valve to sealing. Select the yogurt function and adjust the time to 4 hours. The consistent temperature accelerates fermentation while the sealed environment protects against contamination.
After 4 hours, carefully release the pressure and open the lid. The sauerkraut should have a tangy aroma and the cabbage will be slightly softened but still retain a pleasant crunch. If you prefer a stronger flavor, seal and ferment for an additional 1-2 hours.
Step 5: Cool and Store
Remove the bay leaves from the sauerkraut. Transfer the mixture to clean, airtight containers, pressing down to submerge the cabbage in its liquid. Let it cool to room temperature before sealing.
Store in the refrigerator for at least 24 hours before serving to allow the flavors to develop fully. The sauerkraut will continue to ferment slowly in the fridge, becoming more tangy over time. It keeps for up to 3 weeks refrigerated.
Pro Tips For Making Instant Pot Sauerkraut
- Pack It Tight: Press the cabbage down hard into the jar or Instant Pot—sounds weird, but it works: the tighter the pack, the better the fermentation and crunch.
- Use the Right Salt: Stick to kosher salt, not iodized; I learned this the hard way after a batch turned out metallic and flat.
- Skip the Tap Water: Filtered water only—chlorine in tap water can mess with fermentation, and after ruining two batches, I finally switched.
- Vent the Lid: Don’t fully seal the Instant Pot lid; crack it just a bit to let gases escape during fermentation or you’ll end up with a smelly, exploded mess.
Dietary Considerations for instant pot sauerkraut
Vegan Friendly
This creation is naturally 100% plant-based, containing only cabbage, salt, and optional spices. It’s perfect for vegan diets, offering that signature tangy crunch without any animal products. I love how it adds probiotic benefits to plant-forward meals. 🌱
Gluten-Free
The recipe contains no gluten ingredients, making it safe for those with celiac disease or gluten sensitivity. Just ensure your spices are certified gluten-free—I recommend checking labels on caraway seeds and other seasonings.
Low-Calorie Option
A ½ cup serving contains about 25-30 calories, making this a guilt-free addition to any meal. The fermentation process actually enhances nutrient absorption while keeping calories minimal.
Sodium Considerations
With 1.5 tbsp salt for the entire batch, the sodium content is moderate. For low-sodium diets, you can reduce salt to 1 tbsp, though this may affect fermentation speed and flavor development.
Allergen-Free
This dish is free from all major allergens: no dairy, eggs, nuts, soy, or wheat. The simple ingredient list makes it safe for most food allergies. I always double-check spice blends for hidden allergens.
Probiotic Benefits
The natural fermentation creates beneficial bacteria that support gut health. Unlike store-bought versions that may be pasteurized, this homemade sauerkraut retains live cultures. 💪
Nutrition Facts
Frequently Asked Questions
Do I need to use filtered water?
Yes, filtered or distilled water is best. Chlorine in tap water can inhibit fermentation and affect flavor development.
Can I use red cabbage instead of green?
Red cabbage works perfectly, though it will turn a vibrant pink during fermentation. The flavor remains the same.
How do I know when it’s done fermenting?
The sauerkraut is ready when it has a tangy aroma and the cabbage is slightly softened but still crisp. After 4 hours in the Instant Pot, taste and add more time if you prefer stronger flavor.
What if my cabbage isn’t submerged in liquid?
Add a small amount of additional filtered water to cover it completely. Submerging prevents mold growth and ensures even fermentation.

- 6 Oz Chocolate Chip Cookie Recipe: Perfectly Balanced Crispy Edges and Chewy Hearts - September 25, 2026
- 6-Inch Coffee Cake Recipe: Vanilla Bean Swirls and Buttery Streusel Topping - September 25, 2026
- 1 Hour Soup Recipe: Velvety Richness Without the Wait - September 25, 2026