
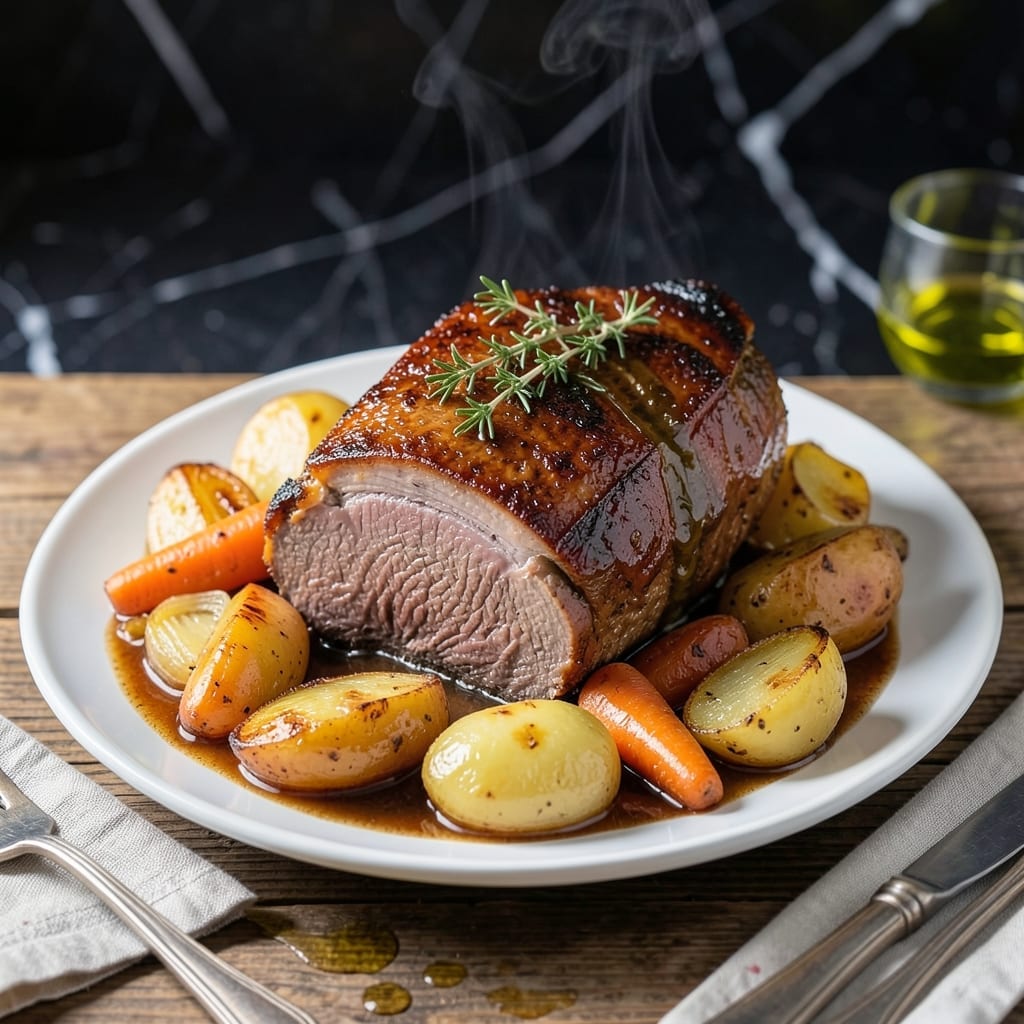
This pressure-cooker method transforms tough shoulder cuts into melt-in-your-mouth perfection in a fraction of traditional cooking time. The Instant Pot locks in juices while breaking down connective tissue, creating impossibly tender meat that falls apart at the touch of a fork.
Root vegetables cook alongside the roast, absorbing the rich beefy essence to create a complete, one-pot meal. Carrots, potatoes, and onions emerge from the pressure cooker infused with deep, savory flavor and ideal texture.
The natural release ensures the meat stays moist while finishing the vegetables to perfect doneness. This technique delivers results that rival all-day braising with minimal active effort.
Serve directly from the pot or transfer to a platter for a hearty, satisfying dinner that belies its hands-off preparation.
Ingredients for Instant Pot Shoulder Roast
Transform tough cuts into tender perfection with these bold, savory ingredients ready for pressure cooking.
| Ingredient | Amount | Notes |
|---|---|---|
| Beef Chuck Shoulder Roast 🥩 | 3 lb | Boneless, well-marbled for tenderness |
| Yukon Gold Potatoes 🥔 | 1 ½ lb | Quartered, uniformly sized pieces |
| Carrots 🥕 | 4 whole | Peeled, cut into 2-inch chunks |
| Yellow Onions 🧅 | 2 whole | Peeled, quartered through root |
| Beef Broth 💧 | 1 ½ cups | Low-sodium preferred for control |
| Tomato Paste 🍅 | 2 tbsp | For depth of umami flavor |
| Worcestershire Sauce 🫒 | 1 tbsp | Essential for savory complexity |
| Garlic Cloves 🧄 | 6 cloves | Smashed, peeled for robust flavor |
| Dried Thyme 🌿 | 1 tsp | Crushed between fingers to release oils |
| Dried Rosemary 🍃 | 1 tsp | Crushed between fingers to release oils |
| Bay Leaves 🌿 | 2 whole | Removed before serving |
| Kosher Salt 🧂 | 1 ½ tsp | Diamond Crystal preferred for even distribution |
| Black Pepper 🌶️ | 1 tsp | Freshly ground for maximum aroma |
| Olive Oil 🫒 | 2 tbsp | For searing the roast |
For optimal results, select a well-marbled chuck roast—this fat distribution ensures the meat becomes fall-apart tender. Costco and Whole Foods consistently carry high-quality options. Look for pieces with visible white streaks throughout. The Yukon Gold potatoes add buttery richness, while the carrots and onions form the classic mirepoix base that absorbs the beefy essence beautifully.
No chuck roast? Brisket or short ribs work equally well in the Instant Pot. Out of Yukon Golds? Russet potatoes hold their shape but lack the same creaminess. For a deeper umami punch, add 1 tbsp soy sauce or 1 tsp fish sauce to the broth. Fresh herbs can replace dried at a 3:1 ratio, but dried are more convenient for this long cook.
Store the roast in its original packaging in the coldest part of your fridge for up to 5 days before cooking. Leftovers keep beautifully for 4-5 days refrigerated or can be frozen for up to 3 months. The flavor actually improves overnight as the meat reabsorbs the juices.
Why You’ll Love This Recipe
- Set It and Forget: I dump everything in the Instant Pot—roast, potatoes, carrots, onions, broth—press a button, and walk away. No babysitting, no stirring.
- Fall-Apart Tender: The chuck roast melts like butter after pressure cooking, and the veggies soak up all that rich beefy flavor from the broth.
- Sunday Dinner, Tuesday Night: I serve this for weekend family meals, but honestly it’s just as easy to throw together on a busy weeknight.
- Leftovers for Days: One roast feeds us for two full meals, and the leftovers make killer beef sandwiches or stew the next day.
Step-by-Step Instructions for Pressure-Cooked Shoulder Roast
Here is the professional method for achieving tender beef with root vegetables in the Instant Pot.
Step 1: Sear the Beef Chuck Shoulder Roast
Set the Instant Pot to Sauté mode on high heat. Add the 2 tbsp olive oil and allow it to heat until shimmering. Pat the 3 lb beef chuck shoulder roast dry with paper towels, then season generously with the 1.5 tsp kosher salt and 1 tsp black pepper.
Sear the roast on all sides for 4-5 minutes per side until a deep, rich brown crust forms. This step develops fundamental flavor compounds that elevate the final dish. Transfer the seared roast to a plate and set aside temporarily.
Step 2: Sauté Aromatics and Deglaze
In the same pot, add the quartered 2 whole yellow onions, 4 whole carrots, and smashed 6 cloves garlic cloves. Sauté for 3-4 minutes until the onions begin to soften and develop color at the edges.
Stir in the 2 tbsp tomato paste and cook for 1 minute to deepen its umami character. Add the 1 tbsp Worcestershire sauce, 1.5 cups beef broth, 1 tsp dried thyme, 1 tsp dried rosemary, and 2 whole bay leaves. Scrape the bottom of the pot thoroughly to release all browned bits, ensuring no fond remains to potentially trigger a burn notice.
Step 3: Pressure Cook to Perfection
Return the seared beef chuck shoulder roast to the Instant Pot along with any accumulated juices. Add the 1.5 lb Yukon Gold potatoes quartered into uniform pieces, ensuring they are mostly submerged in the liquid. Secure the lid and set the valve to Sealing.
Cook on High Pressure for 60 minutes. The pressure cooking process will break down the connective tissue in the beef, transforming it into fork-tender perfection. Allow a natural pressure release for 15 minutes, then carefully quick-release any remaining pressure.
Step 4: Rest and Serve
Remove the bay leaves from the pot and discard. Gently transfer the beef chuck shoulder roast to a cutting board and allow it to rest for 10 minutes before slicing or shredding. This resting period allows the juices to redistribute throughout the meat.
Arrange the root vegetables on a serving platter and top with the sliced or shredded beef. Spoon some of the cooking liquid over the top for added moisture and flavor. The beef should be incredibly tender, and the vegetables should be soft with a slight resistance at the center.
Pro Tips For Making Instant Pot Shoulder Roast
- Sear the Chuck: Take the extra 5 minutes to brown the shoulder roast on all sides using the sauté function—it deepens the flavor in ways skipping it just can’t. I learned this the hard way after making a bland batch that tasted like it was missing its soul.
- Cut Potatoes Even: Chop the Yukon Golds into 2-inch chunks so they cook through without turning to mush. Sounds obvious, but I’ve ruined more than one pot by leaving some pieces too big while others dissolved into the broth.
- Deglaze Thoroughly: After searing, pour in a little beef broth and scrape the bottom hard to lift all those browned bits. Skipping this step means losing layers of richness, and I was skeptical until I tried it.
- Use Natural Release: Let the pressure release naturally for at least 10 minutes before switching to quick release—this keeps the meat from tightening up. Yes, it adds time, but the difference in tenderness is noticeable every single time.
Make-Ahead Tips for This instant pot shoulder roast
Overnight Prep Method
I always prep the vegetables the night before to save morning time. Peel and cut the 2 onions, 4 carrots, and 1.5 lb Yukon Gold potatoes into uniform pieces, storing them in separate airtight containers in the fridge. This keeps them fresh and ready for quick assembly. 💡
Morning Assembly
In the morning, I sear the 3 lb roast first thing, then layer everything into the Instant Pot. The prepped veggies go straight in—no chopping required. This approach cuts active prep time to under 15 minutes before pressure cooking begins.
Full Cook Ahead
You can cook the entire dish 1-2 days ahead and reheat gently. The flavors actually deepen as the meat rests in its juices. Store the cooked roast and vegetables together in the cooking liquid in an airtight container.
Reheating Tips
To reheat, transfer to a pot and warm over low heat for 10-15 minutes, stirring occasionally. For individual portions, microwave covered on 50% power in 1-minute intervals. Add a splash of broth if it looks dry. 🔥
Freezer Meal Prep
Portion the cooked roast and vegetables into freezer-safe containers with some cooking liquid. They freeze beautifully for up to 3 months. Thaw overnight in the fridge before reheating using the methods above.
Shredding for Later
For sandwiches or tacos, shred the cooked roast and store it separately from the vegetables. This gives you flexibility to use the meat in different dishes throughout the week. The vegetables keep their shape better when stored whole.
Nutrition Facts
Frequently Asked Questions
Do I need to sear the roast first?
Yes, searing creates a flavorful crust and deepens the overall taste. Use 2 tbsp olive oil on high Sauté mode for 4-5 minutes per side until deeply browned.
Can I use a frozen roast?
It’s not recommended. A frozen roast won’t sear properly and may trigger the Instant Pot’s burn notice. Always thaw completely in the fridge for 24 hours before cooking.
Why does my meat come out tough?
Undercooking is the most common cause. Ensure you cook on High Pressure for the full 60 minutes and allow a 15-minute natural release. The connective tissue needs this time to break down.
Can I add other vegetables?
Try parsnips, turnips, or mushrooms. Cut them to similar sizes as the potatoes and carrots for even cooking. Avoid delicate veggies like zucchini that turn mushy.

- 4C Bread Crumbs Meatballs Recipe: Crispy Crust and Juicy Centers - September 25, 2026
- 6 Oz Chocolate Chip Cookie Recipe: Perfectly Balanced Crispy Edges and Chewy Hearts - September 25, 2026
- 6-Inch Coffee Cake Recipe: Vanilla Bean Swirls and Buttery Streusel Topping - September 25, 2026