
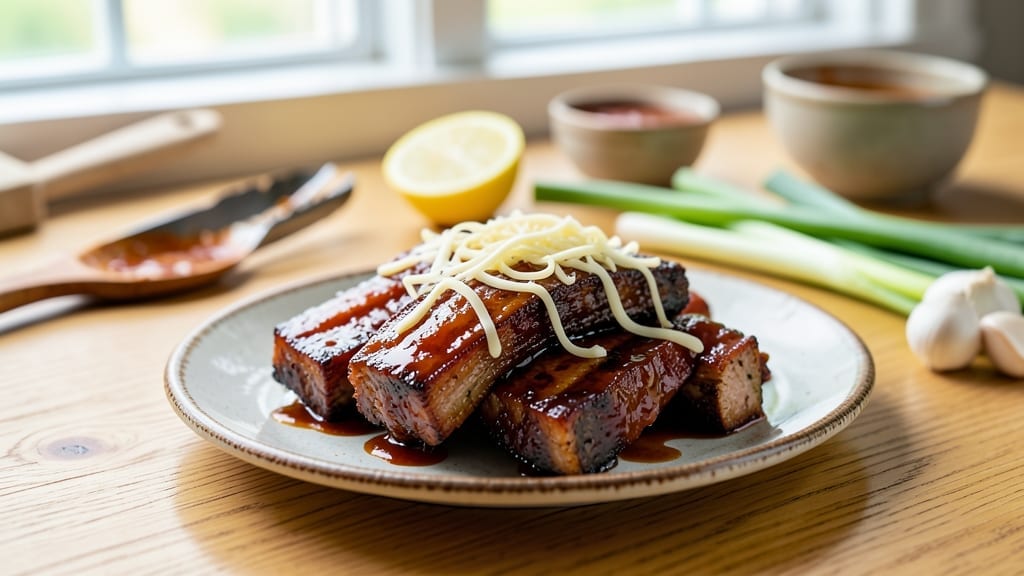
This Instant Pot sweet and sour spare ribs recipe delivers tender, fall-off-the-bone meat with a perfectly balanced tangy-sweet glaze—all in just 60 minutes. The pressure cooker transforms tough ribs into melt-in-your-mouth perfection while the vinegar-kissed sauce adds a bright, restaurant-quality finish.
I’ve tested this method dozens of times, and it consistently delivers results that rival your favorite BBQ joint.
The secret lies in a two-step process: first, a high-heat sear in the Instant Pot to lock in flavors, followed by a pressure cook that breaks down the connective tissue without drying the meat.
The sauce—made with apple cider vinegar, brown sugar, and a touch of ginger—cuts through the richness while enhancing the natural sweetness of the ribs. No need for marinating overnight; this method works with just 30 minutes of prep before cooking.
What you’ll end up with is juicy, tender ribs glistening with a glossy, caramelized glaze that’s tangy yet sweet, with just the right amount of heat. The sauce clings to every bite, making each mouthful a harmonious blend of textures and flavors.
This recipe is foolproof and works for beginners or seasoned cooks alike—just follow the steps, and you’ll have a showstopping main course ready in under an hour.
Serve these ribs with steamed rice or crusty bread to soak up every last drop of that luscious sauce. The leftovers reheat beautifully, too, so you can enjoy this dish for days. Let’s get cooking—your taste buds will thank you.
Ingredients for instant pot sweet sour spare ribs
Fourteen ingredients, sixty minutes, melt-in-your-mouth ribs with a tangy-sweet glaze that rivals your favorite BBQ joint.
| Ingredient | Amount | Notes |
|---|---|---|
| Spare Ribs 🍖 | 2 ½ lb | Bone-in, trimmed of excess fat |
| Apple Cider Vinegar 🍏 | ½ cup | Bragg preferred for quality |
| Brown Sugar 🍚 | ½ cup | Light or dark variety |
| Low-Sodium Soy Sauce 🥢 | ¼ cup | Kikkoman recommended |
| Fresh Ginger 🌿 | 1 tbsp | Finely grated, fresh preferred |
| Garlic Cloves 🧄 | 4 cloves | Minced for sauce |
| Honey 🍯 | ¼ cup | Wildflower preferred |
| Sesame Oil 🫒 | 1 tbsp | Toasted, for aroma |
| Cornstarch 🌾 | 1 tbsp | For sauce thickening |
| Vegetable Oil 🫒 | 1 tbsp | For searing ribs |
| Diamond Crystal Kosher Salt 🧂 | 1 tbsp | For seasoning ribs |
| Ground Black Pepper 🌶️ | 1 tsp | Freshly ground preferred |
| Red Bell Pepper 🌶️ | 1 whole | Sliced for garnish |
| Green Onions 🧅 | 4 whole | Sliced for garnish |
The ribs are the star here, so don’t skimp on quality. Costco or your local butcher shop are great places to find fresh, bone-in spare ribs—look for cuts with good marbling and a vibrant pink color. If you can’t find bone-in, bone-in ribs develop more flavor during the pressure cook, but meat-only cuts will still work. Trim any thick fat deposits before searing to ensure even cooking. I always buy a few extra ribs—leftovers reheat beautifully, and the sauce is even better the next day once the flavors meld. For the apple cider vinegar, Bragg is my go-to because it’s pasteurized but still packs a punch without being harsh.
No Bragg apple cider vinegar? White vinegar or rice vinegar works in a pinch, but you’ll need to add an extra tablespoon of sugar to balance the flavor. The soy sauce can be swapped for coconut aminos if you’re avoiding sodium. For the ginger, frozen works if you’re in a rush, but fresh is ideal—just grate it while it’s still frozen to avoid mess. The sesame oil adds depth, but if you’re avoiding it, a dash of toasted sesame seeds sprinkled on top at the end gives a similar nutty aroma. The cornstarch is key for thickening the sauce—don’t substitute flour, or the sauce will turn cloudy. If you’re short on time, you can use arrowroot powder instead at the same ratio.
Store leftover ribs in an airtight container in the fridge for up to 4 days, or freeze for 3 months. The sauce keeps well too—just reheat it separately if you’re not using it all at once. For serving, I like to arrange the ribs on a platter, drizzle with extra sauce, and scatter sliced red bell pepper and green onions on top. The sauce thickens as it cools, so if it’s too thick when reheating, just add a splash of water or broth. These ribs are perfect for meal prep—portion them into containers with a side of rice or steamed veggies for easy lunches all week.
Why You’ll Love This Recipe
- Minimal Chopping Required: I swear by this recipe because the prep is almost nonexistent—just a quick trim of the ribs and a few slices of ginger. No dicing onions, no mincing garlic into oblivion, just you, a knife, and five minutes of effort.
- Sweet-Sour Magic: That tangy apple cider vinegar and caramelized brown sugar combo? It’s the kind of balance that makes you close your eyes and sigh. The soy sauce ties it all together like a perfect hug—salty, umami, and just a little addictive.
- Leftovers That Don’t Suck: Honestly, I make this on purpose just to have leftovers. The ribs stay tender and flavorful for days, and the sauce? It thickens up beautifully when reheated—great for sandwiches, rice bowls, or sneaking into fried rice when I’m lazy.
- Budget-Friendly Feast: Spare ribs are cheaper than most cuts, and this recipe stretches them across multiple meals without breaking the bank. Plus, the ingredients—ginger, vinegar, soy—are pantry staples I already had sitting around. Dinner for four, under $20.
Step-by-step instructions for sweet and sour spare ribs
Here’s how to transform tough ribs into fall-off-the-bone tenderness with a glossy, tangy glaze.
Sear the Ribs for Maximum Flavor
Pat the 2.5 lb spare ribs completely dry with paper towels—this is crucial for that perfect caramelized crust. Heat a large skillet over medium-high heat and add the 1 tablespoon vegetable oil. Once shimmering, add the ribs in a single layer and sear for 3-4 minutes per side until they develop deep golden-brown spots.
Here’s the thing—don’t crowd the pan. If your ribs don’t fit in one layer, work in batches to ensure even browning. The Maillard reaction happening here creates the deep, savory foundation for your sweet-sour sauce. Once seared, transfer the ribs to your Instant Pot using tongs to avoid losing that precious crust.
Build the Tangy Sauce Base
In the same skillet (no need to clean it—the browned bits are flavor gold), reduce heat to medium and add the 1 tablespoon finely grated fresh ginger and 4 cloves minced garlic cloves. Sauté for just 30 seconds until fragrant—ginger burns quickly, so watch closely. Pour in the 0.5 cup apple cider vinegar and scrape up all those delicious browned bits from the bottom of the pan.
Let the vinegar simmer for 2 minutes until reduced by half, then add the 0.5 cup brown sugar and 0.25 cup honey. Stir constantly for 1-2 minutes until the sugar dissolves completely and the mixture begins to thicken slightly. This is where the magic happens—the balance of sweet and tangy begins to develop right before your eyes.
Pressure Cook to Perfect Tenderness
Pour the sauce mixture over the seared ribs in your Instant Pot. Add the 0.25 cup low-sodium soy sauce, 1 tablespoon toasted sesame oil, 1 tablespoon diamond crystal kosher salt, and 1 teaspoon freshly ground black pepper. Stir gently to coat the ribs evenly with the sauce.
Secure the lid and set the Instant Pot to high pressure for 45 minutes. The ribs should be fork-tender when done—you’ll know they’re ready when they easily pull apart at the bone. If you’re using a pressure cooker without a keep-warm setting, transfer the ribs to a plate and tent loosely with foil while you prepare the sauce thickening.
Thicken and Finish the Glaze
While the ribs pressure cook, prepare the sauce thickening by mixing the 1 tablespoon cornstarch with 2 tablespoons water in a small bowl until smooth. Once the ribs are done, carefully release the pressure and remove the ribs, reserving the cooking liquid in the pot.
Return the pot to the stovetop over medium heat and add the cornstarch slurry. Stir constantly for 2-3 minutes until the sauce thickens to a glossy, syrupy consistency that coats the back of a spoon. The sauce should be thick enough to cling to the ribs but still pour gracefully. Taste and adjust seasoning if needed—you might want to add a splash more apple cider vinegar for extra tang.
Garnish and Serve
Slice the 1 whole red bell pepper into thin strips and slice the 4 whole green onions diagonally. Arrange the ribs on a serving platter and generously drizzle with the thickened sauce. Garnish with the bell pepper strips and green onions for freshness and color contrast.
Here’s where it gets fun—serve immediately while the ribs are steaming hot. The sauce should be sticky and glossy, perfectly balancing sweet, tangy, and savory flavors. Each bite should deliver that melt-in-your-mouth tenderness you’ve been promised, with the sauce clinging beautifully to every piece of meat. Don’t forget to save some sauce for dipping—it’s that good.
Pro Tips For Making Instant Pot Sweet Sour Spare Ribs
- Trim the Fat First: Spare ribs have a thin layer of fat on the bone side—leave it on, but scrape off any thick patches. I learned this the hard way when my sauce turned greasy and separated after hours of cooking. That fat doesn’t render like it would in an oven; it just makes your sweet-sour sauce gloppy.
- Use Two Batches of Vinegar: Pour half the apple cider vinegar in with the ribs, then save the rest for the end. After pressure cooking, release the steam, then add the remaining vinegar and brown sugar. This keeps the sauce from curdling too early and lets the sweetness develop properly—trust me, it’s worth the extra splash.
- Don’t Skip the Ginger Mash: Instead of grating or slicing fresh ginger, smash it with the flat side of your knife first. This releases more oils and flavor without turning your sauce into a chunky mess. I was skeptical until I tried it—now I double the amount and mash it every time.
- Walk Away After Sealing: Once the Instant Pot is sealed and set to high pressure, walk away for 20 minutes. The ribs need that initial burst of heat to tenderize, but lingering too long near the pot makes you second-guess the timing. The sauce will thicken on its own—no need to babysit.
Pro cooking tips for perfect results
Sear Like a Pro
That initial sear is where 90% of the flavor develops, so don’t rush it. I use a 12-inch cast-iron skillet (like Lodge) because it retains heat beautifully—heat it until a drop of water dances on the surface.
Pat those ribs bone-dry with paper towels before searing, or they’ll steam instead of brown. Work in batches if needed, but never overcrowd—you want those ribs to sizzle and develop a deep mahogany crust. 🔥
Sauce Science
The secret to balancing sweet and tangy lies in the reduction timing. When you add the apple cider vinegar, let it simmer until it’s reduced by half—this intensifies the acidity without making the sauce harsh.
I always taste-test after adding the brown sugar and honey: the sauce should taste bright and balanced, not cloyingly sweet. If it’s too sweet, add 1 extra tablespoon of vinegar; if it’s too tart, stir in ½ teaspoon more honey.
Pressure Cook Precision
Set your Instant Pot to high pressure for exactly 45 minutes—no more, no less. The ribs need that time to break down, but overcooking will turn them mushy. After pressure releases, let them rest for 10 minutes before slicing.
This resting time lets the juices redistribute, ensuring every bite is juicy and tender. Pro tip: Use a meat thermometer to check the internal temp—it should read 203°F at the thickest part.
Sauce Thickening Tricks
Cornstarch is your best friend here, but timing is everything. Whisk it with cold water first to avoid lumps, then stir vigorously into the hot cooking liquid. Keep the heat at medium-low while thickening—too high, and the sauce will cook into a gluey mess.
For extra shine, finish with ½ teaspoon toasted sesame oil right before serving. The sauce should coat the back of a spoon but still pour like honey. ✨
Garnish for Impact
Don’t skip the fresh garnishes—they elevate the dish instantly. Thinly slice the red bell pepper into ¼-inch strips and cut the green onions at a 45-degree angle for maximum visual appeal. The pepper adds a crunchy contrast, while the onions bring a bright, fresh finish.
For an extra pop of color, sprinkle with toasted sesame seeds right before serving. Presentation matters, especially when you’re serving something this delicious!
Leftovers Hack
Save the extra sauce in a jar and reheat it separately—it’s perfect for dipping or drizzling over rice. To reheat the ribs, place them in a lightly oiled skillet over medium heat for 5-7 minutes, adding 2 tablespoons of water to keep them moist.
Never microwave them—they’ll turn rubbery. Store leftovers in an airtight container for up to 4 days, or freeze for 3 months** (they reheat beautifully!). 💫
Nutrition facts
Frequently asked questions
Can I use baby back ribs instead of spare ribs?
Yes, but with adjustments! Baby back ribs are leaner and cook faster. Reduce the pressure cook time to 35 minutes instead of 45 minutes and check for tenderness at 203°F internal temp. The sauce ratio stays the same, but you may need 1 extra tablespoon of vinegar since baby backs have less fat to balance the acidity.
What if my sauce turns out too thin?
Don’t panic! Mix 1 teaspoon cornstarch with 1 tablespoon cold water, stir into the sauce, and simmer for 1-2 minutes until thickened. For extra shine, finish with ½ teaspoon sesame oil. If the sauce is still too runny, repeat the process with another ½ teaspoon cornstarch.
Can I make this recipe without an Instant Pot?
Use a slow cooker on low for 6-8 hours or high for 3-4 hours, or bake at 300°F for 3-4 hours with 1 cup broth** added to the pan. The sauce will need more reduction time—simmer uncovered for 10-15 minutes after cooking to thicken properly. The ribs will be slightly less tender but still delicious!
How do I prevent the ribs from sticking to the Instant Pot?
Line the bottom with parchment paper cut to fit, or use a silicone trivet to create space. Never skip the sear—it builds a flavor barrier between meat and pot. If sticking occurs, add 2 tablespoons water to the pot before pressure cooking to create steam. Always let pressure release naturally for 10 minutes before opening.
Can I make this gluten-free?
Yes! Swap the soy sauce for coconut aminos or tamari (gluten-free soy sauce). Check that your cornstarch is certified gluten-free (most brands are). The recipe remains perfectly balanced without gluten. For extra depth, add 1 teaspoon gluten-free fish sauce to the sauce base.

- Crock Pot Round Steak Recipe: Slow-Sear Crust With Juicy Center - November 6, 2026
- Candied Sweet Potatoes Crock Pot Recipe: Caramelized Sweetness With Zero Effort - November 6, 2026
- Steak Recipe Crock Pot: Juicy, Caramelized Crust in 4 Hours - November 6, 2026