
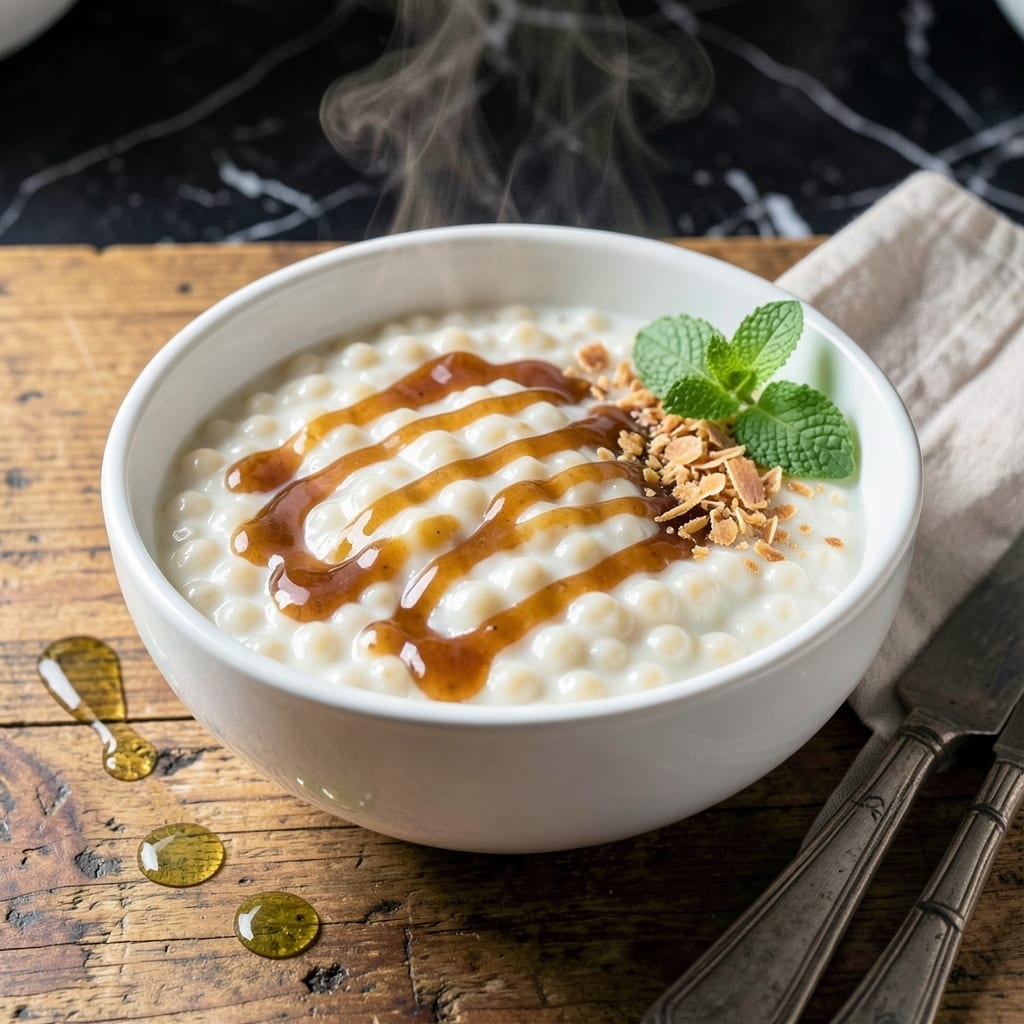
I’ve perfected a method for making tapioca that delivers silky smooth pearls every time, right in the Instant Pot. This approach eliminates the guesswork of stovetop cooking and ensures consistent results without constant stirring.
The Instant Pot’s precise pressure cooking transforms small pearl tapioca into a creamy, dreamy texture in just 15 minutes. Using coconut milk as the base creates a naturally vegan dessert that’s rich and satisfying.
What you’ll get is a bowl of perfectly cooked tapioca with a luxurious mouthfeel, lightly sweetened and ready for your favorite toppings. The process is nearly hands-off, making it ideal for busy cooks.
Serve it warm or chilled, plain or with fresh fruit and a drizzle of syrup. Here’s how to make it.
Ingredients for Instant Pot Tapioca
Pantry staples meet tropical flavors for this creamy, dreamy dessert base.
| Ingredient | Amount | Notes |
|---|---|---|
| Small Pearl Tapioca ⚪ | ¾ cup | Rinsed before cooking |
| Full-Fat Coconut Milk 🥥 | 2 cups | Canned, well-shaken |
| Water 💧 | 1 ½ cups | For pressure cooking |
| Granulated Coconut Sugar 🏝️ | ⅓ cup | Adjust to taste |
| Pure Vanilla Extract 🌿 | 1 tsp | For depth of flavor |
| Pinch of Salt 🧂 | 1 pinch | Enhances sweetness |
| Mixed Fresh Berries 🍓 | 1 cup | For topping (optional) |
| Toasted Coconut Flakes 🥥 | ¼ cup | For texture contrast |
| Maple Syrup 🍁 | 2 tbsp | For serving drizzle |
| Lime Zest 🍈 | 1 tsp | Brightens flavors |
The tapioca pearls are the foundation—bob’s Red Mill small pearl is my go-to for consistent texture (the big ones take forever). Full-fat coconut milk is non-negotiable here; Thai Kitchen or Native Forest brands have the right creaminess. Water ratio matters—too little and it’ll burn, too much and it’ll be soupy. I’ve ruined batches both ways, so stick to the 2:1 liquid-to-tapioca ratio.
No coconut sugar? Brown sugar or maple syrup works, but adjust sweetness to taste. Skipping the vanilla? Almond extract at half the amount adds a nice twist. For a tropical vibe, swap berries for mango or pineapple. The coconut flakes toast in 5 minutes in a dry pan—watch them closely (they go from golden to burnt fast).
Leftovers thicken as they cool. Thin with a splash of coconut milk before reheating. Stays fresh for 4-5 days refrigerated in an airtight container. Freezing isn’t ideal—tapioca gets grainy when thawed.
Why You’ll Love This Recipe
- I’ll be real: this doubles easily for potlucks, and kids and adults alike go back for seconds (yes, even the picky ones).
- Set and Forget: I toss everything in the Instant Pot, press a button, and walk away—no stirring, no watching, just creamy tapioca in 20 minutes.
- Rich Coconut Dream: The full-fat coconut milk and sugar create this velvety, naturally sweet pudding that tastes like a tropical vacation in a bowl.
- Feeds a Crowd: I’ll be real: this doubles easily for potlucks, and kids and adults alike go back for seconds (yes, even the picky ones).
Step-by-Step Instructions for Instant Pot Tapioca
Here’s my tested method that delivers perfectly creamy pearls with minimal effort.
Step 1: Rinse and Prepare the Tapioca
Place the 0.75 cup Small Pearl Tapioca in a fine-mesh strainer and rinse thoroughly under cold running water. This removes excess starch that could make your pudding gummy. I like to swirl the pearls with my fingers to ensure every one gets rinsed.
After rinsing, drain well and transfer to the Instant Pot insert. The pearls should look clean and slightly opaque. This step takes less than 2 minutes but makes a noticeable difference in the final texture.
Step 2: Combine Liquids and Sweeteners
Add the 2 cups Full-Fat Coconut Milk (make sure it’s well-shaken first), 1.5 cups Water, 0.33 cup Granulated Coconut Sugar, 1 tsp Pure Vanilla Extract, and 1 pinch Pinch of Salt to the Instant Pot with the tapioca. Stir gently to combine, ensuring the sugar begins to dissolve.
I always use full-fat coconut milk here because the richness balances the chewy tapioca pearls beautifully. The mixture should look slightly thin at this stage—that’s normal, as the pearls will absorb liquid during cooking.
Step 3: Pressure Cook to Perfection
Secure the Instant Pot lid, set the valve to sealing, and cook on high pressure for 10 minutes. The pot will take about 10-15 minutes to come to pressure first. You’ll know it’s working when you hear that satisfying hissing sound as the pressure builds.
After cooking, allow for a natural pressure release for 10 minutes, then carefully switch the valve to venting to release any remaining pressure. The pearls should be translucent and tender when done, with just a slight bite to them. If they’re still too firm, cook for an additional 2-3 minutes on high pressure.
Step 4: Rest and Thicken the Pudding
Once the pressure is fully released, open the lid and give the pudding a good stir. You’ll notice it thickens significantly as it cools. Let it sit undisturbed for 10-15 minutes—this resting period allows the tapioca to absorb more liquid and develop its signature creamy texture.
If the pudding seems too thick after resting, stir in a splash of warm water. If it’s too thin, let it sit for another 5-10 minutes. The consistency should be similar to a thick porridge when properly cooked.
Step 5: Serve with Toppings
Divide the warm tapioca pudding among serving bowls. Top each portion with 1 cup Mixed Fresh Berries, 0.25 cup Toasted Coconut Flakes, a drizzle of 2 tbsp Maple Syrup, and a sprinkle of 1 tsp Lime Zest.
The bright berries and citrus zest cut through the richness, while the toasted coconut adds a satisfying crunch. Serve immediately for the best texture—the pudding will continue to thicken as it cools, so enjoy it while it’s still warm and creamy.
Pro Tips For Making Instant Pot Tapioca
- Soak the Tapioca: I learned this the hard way—soaking the small pearl tapioca for 15-20 minutes before pressure cooking prevents that weird gummy texture and cuts the cooking time in half.
- Use Full-Fat Coconut Milk: Sounds obvious, but light coconut milk just doesn’t deliver the same creaminess. The fat content actually changes the outcome, making it rich and velvety.
- Avoid Overfilling: Resist the urge to double the batch—tapioca expands, and filling past the halfway mark can clog your Instant Pot’s valve. Stick to 1.5 cups tapioca max for a 6-quart pot.
- Add Vanilla Last: Stir in the vanilla extract after pressure cooking. Adding it too early can make the flavor bitter—I was skeptical until I tried it, but now it’s non-negotiable.
Essential Equipment for Perfect Results
Instant Pot Must-Haves
Your 6-quart Instant Pot is the star here—I use my Duo Crisp model, but any standard model works. The pressure cooking function is essential for achieving that perfect tapioca texture without constant stirring. A good seal on the lid is critical to prevent burning.
Fine-Mesh Strainer
For rinsing the 0.75 cup Small Pearl Tapioca, a fine-mesh strainer is non-negotiable. I love my OXO Good Grips strainer because it fits perfectly over my sink and has a comfortable handle. This step removes excess starch that could make your pudding gummy.
Wooden Spoon
A wooden spoon is my go-to for stirring the tapioca mixture before and after cooking. It won’t scratch your Instant Pot insert, and it’s sturdy enough to handle the thickened pudding. Avoid metal utensils to protect your pot’s non-stick coating. 💡
Glass Measuring Cups
Accurate measurements are key for this recipe. I use Pyrex glass measuring cups for the 2 cups Full-Fat Coconut Milk and 1.5 cups Water. The clear markings make it easy to hit the exact ratios, and they’re microwave-safe for reheating leftovers.
Toasting Pan
For the 0.25 cup Toasted Coconut Flakes, a small dry skillet works perfectly. I use my 8-inch nonstick pan—heat it over medium-low heat and stir constantly. The flakes will toast in 3-5 minutes, turning golden brown.
Serving Bowls
I love serving this in shallow, wide bowls—they show off the pudding’s creamy texture and make the toppings pop. Stoneware bowls from Le Creuset retain heat beautifully if you’re serving it warm. The contrast of warm pudding against cool toppings is divine. ✨
Nutrition Facts
Frequently Asked Questions
Can I use quick tapioca instead of small pearls?
Quick tapioca cooks faster but may turn mushy in the pressure cooker. Stick with small pearl tapioca for the best texture. It holds its shape better during the 10-minute pressure cook.
Why did my tapioca turn out gummy?
This usually happens if you skip rinsing the pearls first or use too much liquid. Always rinse to remove excess starch and stick to the 2:1 liquid-to-tapioca ratio.
How long will leftovers keep?
Store in an airtight container in the fridge for up to 4-5 days. Thin with a splash of coconut milk before reheating, as it thickens when chilled.
Can I make this with other milks?
Full-fat coconut milk is ideal for creaminess, but you can try almond or oat milk. The texture may be slightly less rich, and you might need to adjust the sweetness.

- 1 Hour Soup Recipe: Velvety Richness Without the Wait - September 25, 2026
- 3 Dozen Deviled Eggs Recipe: Classic Bites With Creamy Yolk Magic - September 25, 2026
- 3-Ingredient Baked Chicken Wings Recipe: Crispy, Juicy, and Ready in 25 Minutes - September 25, 2026