
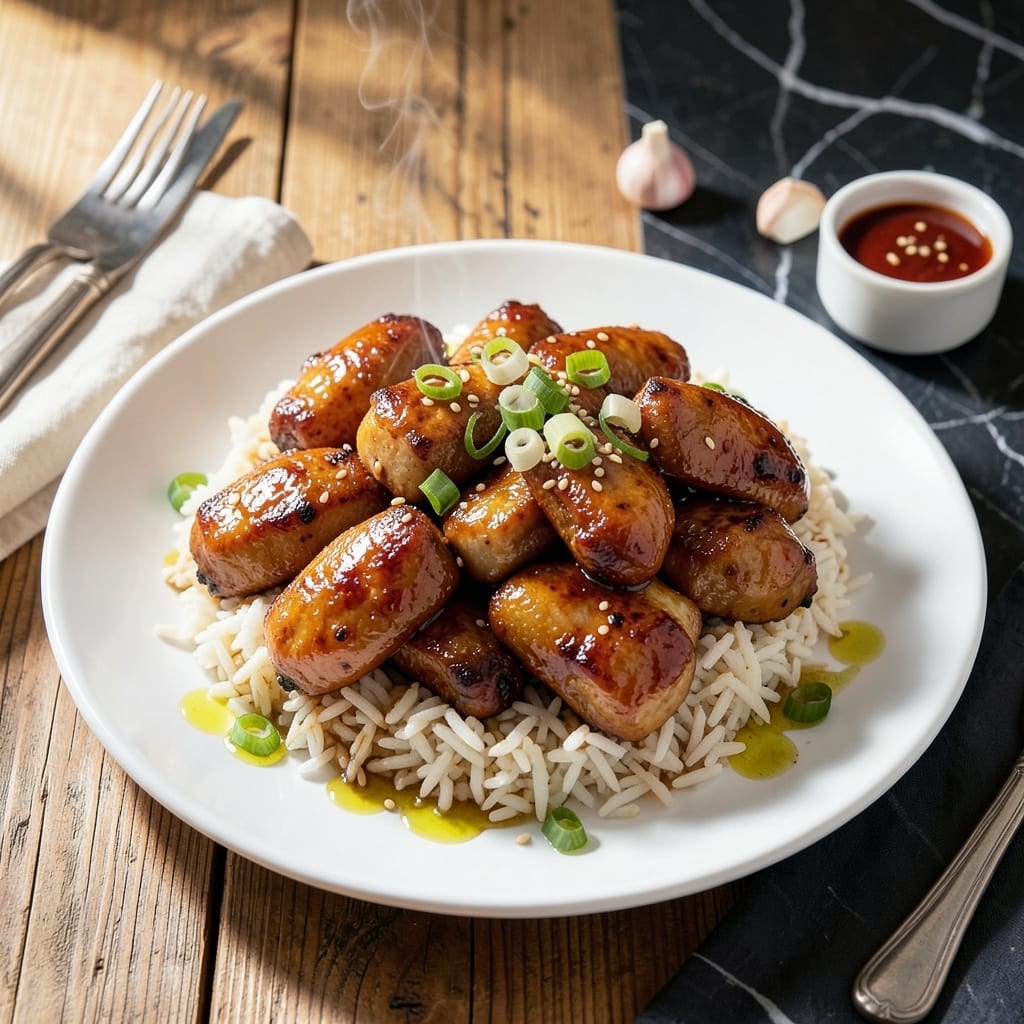
This one-pot meal transforms busy weeknights into something special. I developed this method after years of testing different ratios and techniques to achieve the perfect balance of sweet and savory in every bite.
The Instant Pot handles everything—chicken, rice, and sauce—simultaneously, creating layers of flavor without extra effort. The teriyaki glaze caramelizes beautifully under pressure, coating each grain of rice and piece of chicken in rich, sticky goodness.
You’ll get tender chicken, fluffy rice, and a glossy sauce that comes together in under 30 minutes. It’s the kind of dish that tastes like you spent hours in the kitchen but requires minimal hands-on time.
Perfect for feeding a family or meal prepping for the week. Here’s how to make this foolproof creation.
Ingredients for Instant Pot Teriyaki Chicken and Rice
Everything cooks in one pot for this sweet-savory weeknight winner.
| Ingredient | Amount | Notes |
|---|---|---|
| Boneless Skinless Chicken Thighs 🍗 | 1 ½ lb | Cut into bite-sized pieces |
| Long-Grain White Rice 🍚 | 1 ½ cups | Rinsed until clear |
| Low-Sodium Soy Sauce 🫒 | ½ cup | For balanced sodium |
| Honey 🍯 | ⅓ cup | For natural sweetness |
| Rice Vinegar 🍶 | 2 tbsp | Adds tangy brightness |
| Fresh Garlic Cloves 🧄 | 4 cloves | Minced finely |
| Fresh Ginger Root 🌿 | 1 tbsp | Grated or minced |
| Sesame Oil 🫒 | 1 tbsp | Toasted variety preferred |
| Chicken Broth 🥣 | 1 ¼ cups | Low-sodium recommended |
| Cornstarch 🌾 | 2 tbsp | For thickening sauce |
| Granulated Sugar 🍚 | 2 tbsp | Balances acidity |
| Green Onions 🧅 | 4 whole | Sliced thin for garnish |
| Sesame Seeds 🌰 | 1 tbsp | Toasted for garnish |
| Neutral Cooking Oil 🫒 | 1 tbsp | For sautéing chicken |
The chicken is non-negotiable here—thighs stay juicy where breasts would dry out under pressure. Costco or Sam’s Club are great for bulk buys, but any supermarket will do. Look for skinless, boneless to save prep time. The rice needs to be long-grain white (jasmine works too) for that perfect fluffy texture. Avoid instant rice—it turns to mush.
No honey? Maple syrup or brown sugar work in a pinch (use same quantities). Out of rice vinegar? Apple cider vinegar at half the amount gets you close. Fresh ginger is ideal, but ground ginger at one-quarter the amount saves a grocery trip. The soy sauce should be low-sodium to keep the dish from getting too salty—Kikkoman is my go-to.
Leftovers keep 4-5 days in the fridge, and honestly taste better the next day. Freezes beautifully for 3 months (portion before freezing for easy reheating). The sesame seeds and green onions are best added fresh when serving, so keep those separate until ready to eat.
Why You’ll Love This Recipe
- One Pot Magic: I toss in the chicken, rice, and sauce, then let the Instant Pot do all the work—no babysitting required.
- Sticky Sweet Perfection: The honey and soy sauce blend into this glossy, finger-licking teriyaki glaze that coats every bite.
- Weeknight Rescue: Between us, this is my Tuesday night hero—ready before the kids finish their homework.
- Budget Stretch: A pound of thighs and pantry staples feed my family for two nights straight, with leftovers that reheat beautifully.
Step-by-Step Instructions for Teriyaki Chicken and Rice
Follow this one-pot method for perfectly tender chicken and fluffy rice with minimal cleanup.
Step 1: Sauté the Aromatics and Chicken
Set your Instant Pot to Sauté on Normal heat. Add the 1 tbsp neutral cooking oil and swirl to coat the bottom. When the oil shimmers, add the 1.5 lb boneless skinless chicken thighs cut into bite-sized pieces. Cook for 4-5 minutes, stirring occasionally, until the pieces are no longer pink on the outside.
Push the chicken to one side and add the 4 cloves fresh garlic cloves and 1 tbsp fresh ginger root. Sauté for 30 seconds until fragrant—this builds the flavor foundation. The chicken doesn’t need to be fully cooked at this stage, as it will finish under pressure.
Real talk: if the chicken starts to stick, deglaze with a splash of the 1.25 cups chicken broth to prevent burning. Scrape up any browned bits—they’re packed with flavor.
Step 2: Build the Teriyaki Sauce
In a small bowl, whisk together the 0.5 cup low-sodium soy sauce, 0.33 cup honey, 2 tbsp rice vinegar, 2 tbsp granulated sugar, and 1 tbsp sesame oil until the honey dissolves completely. This balance of sweet, salty, and tangy is what makes teriyaki so addictive.
Pour the sauce over the chicken and stir to coat every piece evenly. Here’s the thing—don’t skip this step. Letting the chicken marinate in the sauce for a minute or two before pressure cooking intensifies the flavor.
Sprinkle the 2 tbsp cornstarch over the mixture and stir well. This will thicken the sauce beautifully as it cooks.
Step 3: Pressure Cook with Rice
Add the 1.5 cups long-grain white rice to the pot, stirring to distribute it evenly among the chicken and sauce. Pour in the remaining 1.25 cups chicken broth, making sure all the rice is submerged. Give it one final stir to prevent any rice from sticking to the bottom.
Secure the lid, set the valve to Sealing, and cook on High Pressure for 8 minutes. The Instant Pot will take about 10-12 minutes to come to pressure before the timer starts. You’ll know it’s working when the float valve pops up.
Step 4: Release Pressure and Finish
Once the cooking time is up, let the pressure release naturally for 5 minutes, then switch the valve to Venting to release any remaining pressure. This gradual release prevents the rice from becoming mushy or the sauce from thinning out too much.
Open the lid and give everything a gentle stir. The rice should be tender and the chicken fully cooked to 165°F. If the sauce seems too thin, set the Instant Pot back to Sauté and let it simmer for 2-3 minutes to thicken.
Taste and adjust seasoning if needed—though with the balanced ingredients, it should be perfect as is.
Step 5: Garnish and Serve
Sprinkle the 4 whole green onions, sliced thin, and the 1 tbsp sesame seeds over the top. The green onions add a fresh crunch, while the sesame seeds bring a nutty finish that ties everything together.
Let it sit for 2-3 minutes to allow the flavors to meld. Serve hot, with extra green onions and sesame seeds on the side for those who want to garnish their own bowls. This dish is best enjoyed fresh, with every bite delivering that perfect sweet-savory balance.
Pro Tips For Making Instant Pot Teriyaki Chicken And Rice
- Brown the Chicken: Sear the thighs in the Instant Pot first—3 minutes per side on sauté mode. I learned this the hard way: skipping this step leaves the chicken bland and the sauce watery.
- Rinse the Rice: Give the long-grain white rice a quick rinse to remove excess starch. Sounds tedious, but it prevents a gummy, sticky mess in the final dish.
- Balance the Sauce: Use equal parts honey and low-sodium soy sauce (about 1/3 cup each) with a splash of rice vinegar. After burning a batch from too much honey, I finally figured out the ratio that actually works.
- Natural Release Only: Let the pressure release naturally for 10 minutes before quick-releasing. My grandmother swore by this, and she was right: it keeps the chicken tender and the rice fluffy.
Health Benefits of This instant pot teriyaki chicken and rice
Protein Powerhouse
This dish delivers 35-40g of protein per serving from the chicken thighs, supporting muscle repair and keeping you full for hours. The 1.5 lb of boneless, skinless thighs provides all nine essential amino acids your body needs. 💪
Low-Fat Energy
Unlike fried dishes, this recipe uses minimal oil—just 1 tbsp for sautéing. The chicken thighs stay juicy without excess fat, making it a heart-healthier option that doesn’t sacrifice flavor.
Complex Carbs
The 1.5 cups long-grain white rice provides sustained energy, with each serving offering about 45g of complex carbohydrates. This fuels your body without the blood sugar spikes of refined grains.
Essential Micronutrients
Garlic and ginger in this recipe offer anti-inflammatory benefits, while the low-sodium soy sauce provides essential minerals like iron and magnesium. These ingredients work together to support immune function.
Balanced macros
With roughly 40% carbs, 30% protein, and 30% fat, this meal offers a well-rounded nutritional profile. The healthy fats from sesame oil and chicken promote satiety and nutrient absorption. 🥗
Quick nutrient boost
This one-pot wonder packs in B vitamins from chicken, antioxidants from garlic and ginger, and trace minerals from sesame seeds. It’s a complete meal that nourishes your body in under 30 minutes.
Nutrition Facts
Frequently Asked Questions
Can I use chicken breasts instead of thighs?
Yes, but thighs are recommended for juicier results. If using breasts, reduce pressure cooking time to 6 minutes to prevent dryness.
What if my sauce is too thin after cooking?
Set the Instant Pot to Sauté mode and simmer uncovered for 2-3 minutes. The sauce will thicken as excess liquid evaporates.
Can I make this with brown rice?
Yes, but increase pressure time to 22 minutes and use 1.75 cups broth. Brown rice needs more liquid and time.
How do I prevent rice from burning?
Always deglaze the pot after sautéing and ensure all rice is submerged in liquid before pressure cooking.

- 6 Oz Chocolate Chip Cookie Recipe: Perfectly Balanced Crispy Edges and Chewy Hearts - September 25, 2026
- 6-Inch Coffee Cake Recipe: Vanilla Bean Swirls and Buttery Streusel Topping - September 25, 2026
- 1 Hour Soup Recipe: Velvety Richness Without the Wait - September 25, 2026