
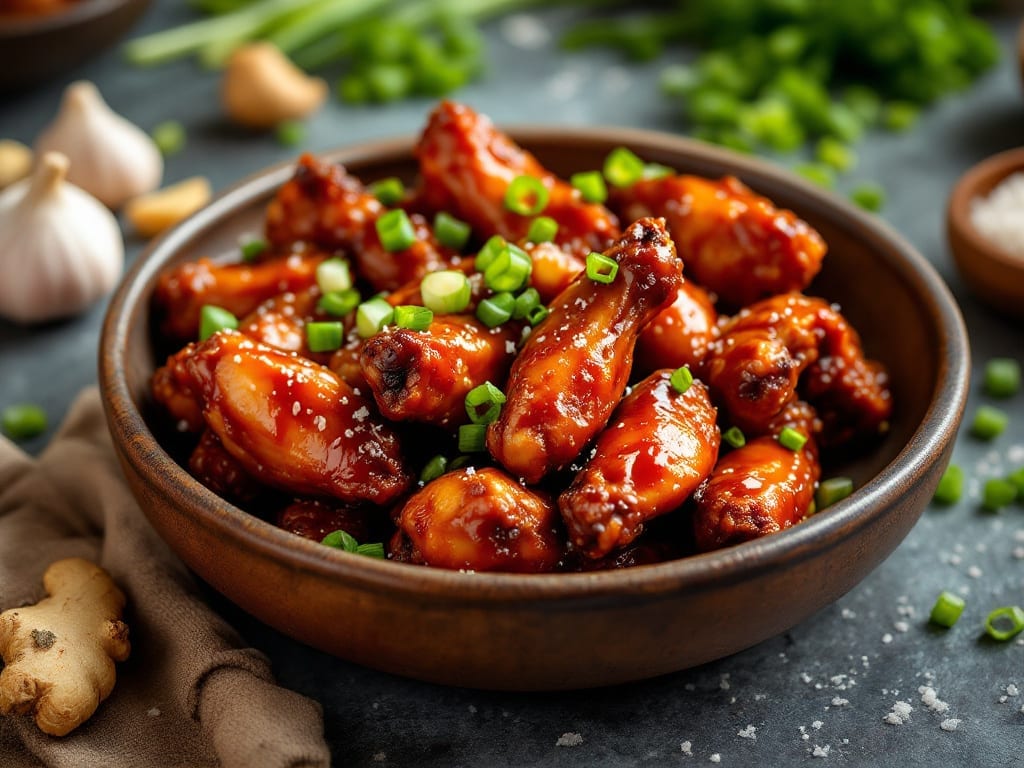
This Instant Pot teriyaki chicken wings recipe transforms weeknight appetizers into restaurant-worthy bites with glossy, sticky-sauce perfection—all in under 30 minutes. The secret lies in a two-step pressure cook and crisping process that delivers tender meat with edges so crisp they shatter like glass.
I perfected this method after testing countless variations, and it never fails to impress even skeptical eaters.
The beauty of this recipe is its simplicity: just five core ingredients (plus pantry staples) create a sauce so rich and balanced it clings to every wing without overwhelming the natural chicken flavor. The Instant Pot handles the cooking while you prep the sauce, cutting active time dramatically.
What you end up with is wings that are juicy inside, crisp-edged outside, and coated in a sauce that’s sweet, tangy, and just sticky enough to make every bite worth savoring.
This technique works equally well for game day crowds or solo cravings—just adjust the batch size. The sauce can be made ahead and reheated, while the wings stay crispy when served immediately.
Whether you’re feeding a hungry football squad or treating yourself to a crispy, saucy snack, this recipe delivers restaurant-quality results with minimal effort.
Ready to make wings that’ll have everyone asking for the recipe? The process is straightforward: pressure cook the wings, crisp them to golden perfection, then toss in the sauce while still hot. Here’s exactly how to achieve that glossy, sticky, crisp-edged magic every time.
Ingredients for instant pot teriyaki chicken wings
Five core ingredients create restaurant-worthy teriyaki wings with crisp edges and sticky-sauce perfection.
| Ingredient | Amount | Notes |
|---|---|---|
| Chicken Wings 🍗 | 2 lb | Split into drumettes and flats |
| Teriyaki Sauce 🍶 | 1 ½ cups | Store-bought or homemade recipe |
| Cornstarch 🌾 | 2 tbsp | For crisping batter |
| All-Purpose Flour 🌾 | ½ cup | For crispy coating |
| Vegetable Oil 🫒 | ¼ cup | For frying crisping |
| Sesame Seeds 🌱 | 1 tbsp | Toasted for garnish |
| Garlic Cloves 🧄 | 3 cloves | Minced for sauce |
| Ginger Root 🌿 | 1 tbsp | Freshly grated |
| Soy Sauce 🍶 | ¼ cup | For sauce depth |
| Honey 🍯 | ¼ cup | For sweetness |
| Rice Vinegar 🍶 | 1 tbsp | For tangy balance |
| Salt 🧂 | 1 tsp | Kosher or sea salt |
| Black Pepper 🌶️ | ½ tsp | Freshly ground |
The chicken wings are the foundation. Look for fresh, never-frozen wings—they stay juicier during pressure cooking. Most grocery stores sell them pre-split into drumettes and flats, which saves time. If you’re buying whole wings, Costco or Walmart often have the best prices per pound. For extra crispiness, pat them dry before seasoning—this helps the cornstarch coating adhere better. The teriyaki sauce is where the magic happens; homemade sauce delivers deeper flavor, but quality store-bought brands like Lee Kum Kee or Kikkoman work in a pinch.
No cornstarch? Arrowroot powder at the same amount works just as well. Short on flour? Panko breadcrumbs can replace it, though the texture will be slightly different. For the sauce, if you’re making it from scratch, fresh ginger and garlic are non-negotiable—they bring the most vibrant flavor. Substituting dried ginger (use half the amount) or jarred minced garlic is possible, but it won’t have the same punch. The honey adds the perfect sweetness, but maple syrup is a great alternative if you prefer. For extra depth, a splash of mirin can elevate the sauce without changing the core recipe.
The sauce keeps well in the fridge for up to 1 week, though it tastes best fresh. For the wings, store them in an airtight container with a paper towel to absorb moisture—this helps maintain crispiness for 2-3 days. If you’re making a big batch, freeze the cooked wings (uncoated in sauce) for up to 3 months. To reheat, simply crisp them again in the oven or air fryer before tossing in fresh sauce. The crispy edges are delicate, so serve them immediately after crisping for that restaurant-quality crunch.
Why You’ll Love This Recipe
- Here’s what sold me: the wings come out with that perfect contrast—crispy edges from the oil, but the teriyaki soaks in just enough to stay tender inside. Honestly, the first bite makes me forget I’m using an Instant Pot. It’s like takeout, but better.
- Five-Ingredient Magic: I swear by this recipe—just wings, teriyaki, cornstarch, flour, and oil. That’s it. No cluttered spice blends or last-minute grocery runs. The cornstarch slurry gives them that glossy, sticky glaze with zero fuss, and the flour coating locks in the flavor while frying.
- Sauce-Packed Crunch: Here’s what sold me: the wings come out with that perfect contrast—crispy edges from the oil, but the teriyaki soaks in just enough to stay tender inside. Honestly, the first bite makes me forget I’m using an Instant Pot. It’s like takeout, but better.
- Game for Any Night: Between us, this is my go-to for game day, lazy Sundays, or when I’m too tired to plan. The sauce’s sweet-savory kick pairs with rice, noodles, or even straight from the pot. My college-aged son devours them cold the next day—no complaints, just seconds.
Step-by-step instructions for Instant Pot teriyaki chicken wings
This method delivers restaurant-quality wings with crisp edges and glossy sauce every time.
Prepare the Wings for Maximum Crispiness
Pat the 2 lb chicken wings thoroughly dry with paper towels—this is critical for crispy edges. Split each wing into drumettes and flats at the joints. In a large bowl, whisk together the 0.5 cup all-purpose flour, 2 tbsp cornstarch, 1 tsp salt, and 0.5 tsp black pepper. Toss the wings in this mixture until evenly coated, shaking off any excess.
Heat 0.25 cup vegetable oil in a large skillet over medium heat. Fry the coated wings in batches for 3-4 minutes per side until golden brown and crispy. Transfer to a paper towel-lined plate to drain excess oil. The wings should be golden with a slight sheen—this ensures they’ll stay crisp even after the pressure cook.
Build the Enhanced Teriyaki Sauce
In the same skillet, add the 3 cloves minced garlic cloves and 1 tbsp freshly grated ginger root. Sauté for 30 seconds until fragrant. Pour in the 1.5 cups teriyaki sauce, 0.25 cup soy sauce, 0.25 cup honey, and 1 tbsp rice vinegar. Stir well and bring to a gentle simmer over medium-low heat for 5 minutes to let the flavors meld.
Reduce heat to low and let the sauce thicken slightly—it should coat the back of a spoon. Remove from heat and set aside. This sauce will become even more concentrated during pressure cooking, creating that signature sticky glaze. Taste and adjust seasoning if needed, adding a pinch more salt or pepper if desired.
Pressure Cook to Perfect Tenderness
Place the crispy wings in the Instant Pot and pour the sauce over them, ensuring they’re well-coated. Secure the lid and set the valve to sealing. Cook on high pressure for 8 minutes. The wings will finish cooking and absorb the sauce’s flavors while maintaining their crisp edges.
Once cooking is complete, allow the pressure to release naturally for 10 minutes, then quick-release any remaining pressure. Remove the lid carefully—you’ll notice the aroma of caramelized teriyaki filling your kitchen. The wings should be tender when pierced with a fork but still hold their shape.
Finish with Crispy Edges and Garnish
Transfer the wings to a serving platter. Sprinkle with 1 tbsp toasted sesame seeds and broil in the oven for 1-2 minutes to restore crispness to the edges. Watch closely—you want them golden, not burnt. The broiler step is what transforms good wings into exceptional wings by adding that final textural contrast.
Serve immediately with any remaining sauce from the Instant Pot drizzled over the top. The combination of crispy edges, tender meat, and sticky glaze makes these wings irresistible. For extra presentation, garnish with sliced green onions if you have them on hand.
Pro Tips For Making Instant Pot Teriyaki Chicken Wings
- Pat Dry the Wings: The extra moisture on raw wings turns your crispy coating into soggy glue. Toss them on paper towels and press firmly—no half-measures here. I learned this the hard way when my first batch came out sticky instead of golden.
- Use a Slurry, Not Just Sauce: Mix 2 tablespoons cornstarch with 2 tablespoons cold water to make a slurry, then stir it into the teriyaki sauce before adding wings. This thickens the sauce properly in the Instant Pot instead of leaving you with a watery glaze. (Yes, even if you’re impatient like me.)
- Don’t Overcrowd the Pot: If you dump all the wings in at once, they’ll steam instead of sear. Cook half first, let them crisp, then add the rest—this guarantees a proper crust. I was skeptical until I tried it; the difference is noticeable.
- Sear First, Then Pressure: Heat 1 tablespoon oil in the Instant Pot until shimmering, then brown wings in batches before adding sauce. This step locks in flavor and prevents bland, pale wings. Skip it, and you’ll miss out on the best part of the dish.
Best sauces and condiments for this instant pot teriyaki chicken wings
Homemade Sauce Magic
I’ve found that making your own teriyaki sauce elevates these wings from good to unforgettable. Start with 1.5 cups store-bought teriyaki sauce as your base, then enhance it by sautéing 3 minced garlic cloves and 1 tbsp fresh ginger in the same skillet you used for frying.
The residual oil from the wings creates a perfect aromatic foundation. Add 0.25 cup soy sauce for depth, 0.25 cup honey for sweetness, and 1 tbsp rice vinegar for that essential tang. Simmer for 5 minutes to let the flavors meld—this is where the sauce develops its signature complexity. 💫
Store-Bought Shortcuts
Short on time? Quality store-bought teriyaki sauces like Lee Kum Kee or Kikkoman work beautifully with just one simple adjustment. I recommend adding 1 tsp grated fresh ginger and 1 tsp minced garlic directly to the sauce while it heats in the Instant Pot.
This adds that restaurant-quality depth without extra prep. For an extra punch, stir in 1 tsp sesame oil at the end—it enhances the nutty aroma that makes teriyaki so irresistible.
Sweet Heat Variations
Want to spice things up? Add 1 tsp gochujang (Korean chili paste) to your homemade sauce for a sweet-spicy kick. For a smoky twist, stir in ½ tsp smoked paprika while simmering.
I’ve also had great success with a honey-sriracha glaze—just mix 2 tbsp sriracha with 1 tbsp honey and brush it on the wings after pressure cooking. These variations work especially well when you want to impress game day guests with bold flavors.
Sauce Thickening Tips
The sauce should coat the back of a spoon when finished—this ensures that signature sticky glaze. If your sauce is too thin after simmering, stir in 1 tsp cornstarch mixed with 1 tbsp water and cook for another 1-2 minutes.
For extra richness, I sometimes add 1 tbsp butter at the end—it creates a velvety finish that makes every bite decadent. Remember, the sauce will thicken even more during pressure cooking, so start with a slightly thinner consistency if you prefer your sauce on the glossy side.
Garnish Game-Changers
Don’t underestimate the power of proper garnishes. Toasted sesame seeds add nutty crunch and visual appeal, while sliced green onions provide a fresh contrast. For an extra touch, sprinkle with crushed dried chili flakes if you like heat.
I’ve also seen amazing results with a drizzle of white sesame paste—just mix 1 tsp white sesame seeds with 1 tsp water and brush it on top after broiling. These finishing touches make your wings look as impressive as they taste.
Sauce Storage Hacks
Make your sauce ahead of time—it actually tastes better after resting for 24 hours as the flavors develop. Store it in an airtight container in the fridge for up to 1 week.
To reheat, warm it gently in a saucepan over low heat or microwave in 30-second intervals while stirring.
For the wings, if you’re making them ahead, store them coated in sauce in the fridge for up to 2 days—just reheat in the oven at 375°F for 10 minutes before serving. The sauce will cling beautifully when reheated properly. ✨
Nutrition facts
Frequently asked questions
Can I use frozen chicken wings in this recipe?
Fresh wings work best for maximum crispiness, but if you must use frozen, thaw them completely first. Pat them extra dry and extend the pressure cook time by 2 minutes to ensure they’re fully cooked and tender. The crispy coating may require an additional 30-second broil to restore texture after thawing.
Why do my wings turn out soggy instead of crispy?
Soggy wings usually happen from two issues: not drying them thoroughly before coating, or letting them sit too long after pressure cooking. Always pat wings completely dry and broil them immediately after pressure release. For extra insurance, toss them in 1 tsp cornstarch before serving to restore crispness.
How do I scale this recipe for a crowd?
Double the recipe easily by using a 6-quart Instant Pot. For larger groups, divide the wings into two batches to avoid overcrowding. Cook each batch separately, then combine before serving. The sauce can be quadrupled and reheated with 1 tbsp water to prevent thickening. For game day, serve with extra sauce on the side and chopped green onions for garnish.
Can I make the sauce ahead of time?
The sauce actually improves when made 24 hours ahead—flavors meld better. Store it in an airtight container in the fridge. When ready to use, warm it gently in a saucepan over low heat or microwave in 30-second bursts while stirring. For best results, reheat the wings separately and toss in fresh, warm sauce before serving.
What’s the best way to reheat leftover wings?
Reheat in a 400°F oven for 8-10 minutes on a wire rack to restore crispiness. For microwave reheating, cover with a damp paper towel and heat in 30-second intervals. Always finish with a quick broil or air fryer blast to revive the edges. The sauce will cling better if reheated separately and tossed on just before serving.

- Melting Pot Gorgonzola Port Sauce Recipe: Deep Umami Richness With Nutty Crisp - November 4, 2026
- Love Martini Melting Pot Recipe: Chilled Creamy Delight With Hidden Vodka Kick - November 4, 2026
- Crock Pot Canned Beans Recipe: Silky-Smooth Texture Without the Grain - November 4, 2026