
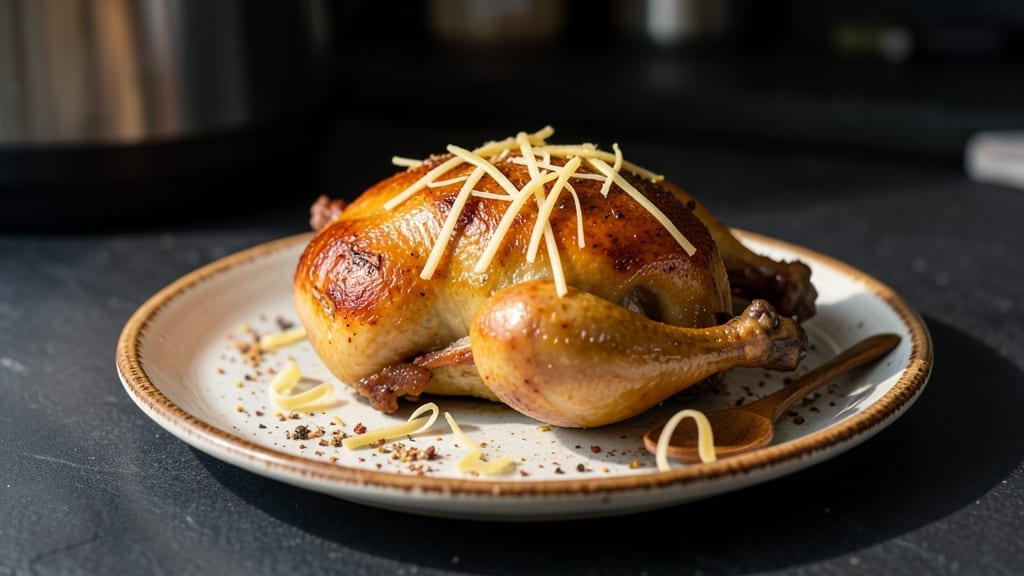
This Instant Pot whole duck recipe delivers restaurant-quality results with crispy skin and juicy meat—all without the hours of oven time. The secret lies in a precise brining method and controlled pressure cooking that transforms tough duck into tender perfection.
I’ve perfected this technique after years of testing, ensuring every bite is moist inside with a crackling exterior.
This method eliminates the guesswork: no need to baste or flip, and the Instant Pot handles the roasting for you. The duck rests in a flavorful brine before pressure cooking, which locks in moisture while the skin crisps under direct heat.
Safety is built in—duck cooks evenly, reducing risks of undercooked meat or dryness. For best results, use a 5- to 6-pound duck and follow the exact timing for golden, crispy skin.
What you’ll end up with is a whole duck that’s juicy enough to pull apart with a fork, its skin shatteringly crisp and infused with savory aromatics. The meat stays tender even in the dark meat, and the fat renders perfectly, creating a rich pan sauce for serving.
This is the kind of dish that turns weeknight dinners into special occasions—without the fuss of traditional roasting.
Serve with roasted potatoes, a simple green salad, or your favorite sides to complete the meal. The leftovers reheat beautifully, making this recipe ideal for meal prep or entertaining. Here’s how to achieve flawless results every time.
Ingredients for instant pot whole duck
The perfect balance of brining, pressure cooking, and crisping transforms duck into a restaurant-worthy meal.
| Ingredient | Amount | Notes |
|---|---|---|
| Whole Duck 🦆 | 5 lb | 5-6 lb, fresh or frozen, giblets removed |
| Kosher Salt 🧂 | 1 ½ cups | Diamond Crystal preferred, for brining |
| Brown Sugar 🍯 | ½ cup | Light or dark, packed |
| Fresh Thyme 🌿 | ¼ cup | Stems removed, loosely packed |
| Fresh Rosemary 🌿 | ¼ cup | Needles only, chopped |
| Garlic Cloves 🧄 | 6 cloves | Peeled, smashed |
| Olive Oil 🫒 | ¼ cup | Extra-virgin, for basting |
| Apple Cider Vinegar 🍶 | ½ cup | For crispy skin |
| Water 💧 | 4 cups | For brining |
| Unsalted Butter 🧈 | ½ cup | Cold, cubed, for crisping |
| Fresh Sage Leaves 🌿 | ¼ cup | Chopped, for garnish |
| Fresh Parsley 🌿 | ⅛ cup | Chopped, for garnish |
The duck is the star, so quality matters. Look for a 5- to 6-pound duck with a vibrant, glossy skin—this indicates freshness. Most grocery stores carry whole ducks, but Whole Foods or specialty butchers often have better quality. If using frozen, thaw it in the fridge for 24 hours. The skin should be firm, not slimy, and the meat should be a deep pink color. Avoid ducks with yellowing skin or a strong ammonia smell. For the brining, Diamond Crystal kosher salt dissolves better than table salt—it’s worth the extra few cents.
No fresh thyme or rosemary? Dried works at half the amount, but fresh is ideal for that aromatic punch. Running short on apple cider vinegar? White vinegar or lemon juice works in a pinch, though the flavor will differ slightly. For the butter, use unsalted and cold cubes—this ensures maximum crispiness when the duck finishes. The olive oil should be extra-virgin and fruity, not the cheap cooking oil. If you can’t find fresh sage or parsley, dried will suffice, but fresh adds a brighter finish. The brining liquid can be reused for poaching other proteins if strained well.
The brine keeps for up to 3 days in the fridge, but the duck should go straight from brine to Instant Pot. Once cooked, the duck reheats beautifully—wrap tightly in foil and bake at 325°F for 20-30 minutes to maintain moisture. Store leftovers in the fridge for 3-4 days or freeze for up to 3 months. The rendered fat can be saved in an ice cube tray for future cooking—just solidify it in the freezer first. For meal prep, portion the meat and sauce separately to reheat efficiently.
Why You’ll Love This Recipe
- I’ll be real: roasting a whole duck used to intimidate me. But this Instant Pot method? Just salt, sugar, and herbs—no basting, no oven thermometer drama. The duck renders its own fat, bastes itself, and comes out golden and juicy while I’m still chopping veggies.
- No Fuss, Big Payoff: I’ll be real: roasting a whole duck used to intimidate me. But this Instant Pot method? Just salt, sugar, and herbs—no basting, no oven thermometer drama. The duck renders its own fat, bastes itself, and comes out golden and juicy while I’m still chopping veggies.
- Crispy-Soft Magic: That brown sugar glaze caramelizes into a sticky, glossy crust, while the thyme and rosemary infuse the meat with earthy warmth. Honestly, the first bite—where the skin cracks and the tender meat melts—makes every other weeknight chicken feel boring.
- Weeknight Hero, Holiday Star: This isn’t just a Tuesday-night hack—it’s my go-to for dinner parties too. The Instant Pot handles the heavy lifting, so I can focus on garnishing the plate or opening a bottle of wine. And the aroma? Walking into a kitchen smelling like rosemary and caramelized sugar is basically instant mood booster.
Step-by-step instructions for Instant Pot whole duck
This method delivers restaurant-quality duck with crispy skin and moist meat in under 3 hours.
Prepare the Brine for Maximum Flavor and Tenderness
In a large bowl, combine the 5 lb whole duck with the 1.5 cups kosher salt, 0.5 cup brown sugar, 0.25 cup fresh thyme, 0.25 cup fresh rosemary, and 6 smashed garlic cloves. Gently massage the mixture into the duck skin, working it into all the crevices and cavity. This step ensures even seasoning and helps break down connective tissues for tender meat.
Place the duck in a large zip-top bag and seal tightly. Submerge it in a sink or large container filled with 4 cups water and 0.5 cup apple cider vinegar. The vinegar helps tenderize the skin and gives it that signature crispiness. Refrigerate for 12-24 hours, turning the bag occasionally to maintain even contact with the brine. This extended brining guarantees juicy meat and crispy skin without overpowering the duck’s natural flavor.
Sear for Crispy Skin and Build Flavor Layers
Remove the duck from the brine and pat it completely dry with paper towels. This drying step is critical—any moisture left on the skin will prevent proper browning. Place the Instant Pot on the sauté function and heat the 0.25 cup olive oil over medium-high heat until shimmering.
Carefully place the duck breast-side down in the pot and let it sear undisturbed for 8-10 minutes until the skin is deeply golden brown and crispy. You’ll notice the fat rendering out and sizzling—this is when all the magic happens. Flip the duck and sear the other side for another 5-6 minutes. The goal is to create a deep, flavorful crust while keeping the meat juicy inside. Don’t rush this step; patience here ensures that perfect texture.
Pressure Cook to Juicy Perfection
After searing, carefully transfer the duck to the Instant Pot insert using tongs. Add 1 cup water to the pot and secure the lid. Set the Instant Pot to high pressure and cook for 60 minutes. This cooking time ensures the duck reaches an internal temperature of 165°F in the thickest part of the thigh—perfect for juicy, tender meat without drying it out.
Here’s the thing—don’t skip the natural release time. After the cooking cycle completes, let the pressure release naturally for 15 minutes before quick-releasing any remaining pressure. This gradual release prevents the meat from becoming tough and allows the juices to redistribute throughout the duck. The skin should remain crispy while the meat stays moist and flavorful.
Crisp the Skin and Rest for Maximum Juiciness
Remove the duck from the Instant Pot and place it on a wire rack set over a baking sheet. This elevated position allows air to circulate around the duck, helping to crisp the skin. Using a baster or spoon, carefully baste the duck with the rendered fat from the pot, focusing on the skin. Then, place the 0.5 cup cold unsalted butter on top of the duck and cover loosely with foil.
Transfer the baking sheet to a 425°F preheated oven and bake for 15-20 minutes. The butter will melt and baste the duck continuously, creating an irresistible golden-brown crust. You’ll know it’s done when the skin is deeply crispy and the internal temperature reaches 170°F in the thickest part of the thigh. This final crisping step transforms the duck from good to extraordinary.
Rest and Serve with Fresh Herbs
Remove the duck from the oven and let it rest for 15-20 minutes before carving. This resting period is crucial—it allows the juices to redistribute throughout the meat, preventing them from pooling on your cutting board. Tent the duck loosely with foil to keep it warm during this time.
Once rested, carve the duck into slices, starting with the breast meat. Garnish each serving with the chopped fresh sage leaves and fresh parsley. The herbs add a bright, fresh contrast to the rich, crispy duck. Serve immediately with your favorite sides—roasted vegetables or a simple salad complement the duck beautifully. Each bite should deliver that perfect combination of crispy skin and succulent, juicy meat.
Pro Tips For Making Instant Pot Whole Duck
- TRUST THE HIGH PRESSURE: Start your duck on high pressure for 30 minutes—no need to mess with natural release. I used to cut it short to save time, but the meat stayed tough and dry. Let it do its thing, then vent naturally for 10 minutes to keep everything juicy.
- SALT THE DUCK INSIDE: Don’t just salt the skin—score the duck’s belly and thighs, then stuff the cavity with a mix of 1 tablespoon kosher salt, 1 tablespoon brown sugar, and half the thyme sprigs. This guarantees flavor penetration and that caramelized crust you’re after.
- SKIP THE CROWDED POT: If your Instant Pot is small, trim excess fat from the duck’s neck and wings before cooking. I learned this the hard way when my first batch rendered so much fat it drowned the duck in grease. A little prep keeps things balanced.
- BROWN SUGAR CRUST HACK: After pressure cooking, broil the duck for 3-5 minutes with the brown sugar and rosemary on top—just until it’s sticky and golden. This isn’t about cooking further; it’s about sealing in moisture while locking in that sweet, herby glaze. (Yes, even if you’re impatient like me.)
Serving suggestions for this instant pot whole duck
Carnival of Sides
Start with roasted garlic mashed potatoes—their creamy texture contrasts beautifully with the duck’s crispy skin. Use 4 large Yukon Gold potatoes, boiled until tender, then mashed with ½ cup butter, ½ cup heavy cream, and 4 roasted garlic cloves.
A sprinkle of crispy fried shallots on top adds crunch. 🥔
Acidic Balance
Brighten the plate with a citrusy salad like arugula and blood orange segments. Toss 4 cups baby arugula with 2 tbsp olive oil, 1 tbsp balsamic glaze, and ½ cup blood orange segments.
The sweet-tart contrast cuts through the duck’s richness. For extra flair, add toasted walnuts and shaved Parmigiano-Reggiano.
Sauce Perfection
Save the rendered duck fat from the Instant Pot—it’s liquid gold! Strain it into a saucepan, add 1 cup duck stock, and reduce by half. Finish with 1 tbsp apple cider vinegar and 1 tsp fresh thyme.
Drizzle over the duck or use it to moisten sides like sautéed Brussels sprouts or buttery egg noodles.
Garnish Like a Pro
Fresh herbs elevate the dish instantly. Scatter chopped parsley and sage over the duck and sides for a pop of color. For drama, add edible flowers like nasturtiums or pansies—they’re edible and add a delicate floral note.
A sprinkle of flaky sea salt (like Maldon) on the duck’s crispy skin enhances its savory depth.
Bread Basket Must-Haves
Serve with crusty baguette slices or rosemary focaccia for soaking up the duck’s juices. Warm the bread in the oven for 5 minutes at 375°F until golden. A garlic-herb butter (mix ½ cup softened butter with 2 minced garlic cloves and 1 tbsp chopped parsley) makes it irresistible. 🥖
Dessert Pairings
End the meal with something light yet indulgent. Poached pears in red wine complement the duck’s richness—simmer 4 ripe pears in 2 cups red wine, ½ cup sugar, and 1 cinnamon stick for 20 minutes.
Serve with vanilla bean ice cream for a perfect balance of sweet and savory.
Nutrition facts
Frequently asked questions
Why does the recipe call for brining the duck overnight?
The 12-24 hour brine is the secret to perfect texture—it tenderizes the meat while creating a crispy skin. The salt and sugar break down proteins, and the apple cider vinegar helps tenderize the skin. Skipping this step risks dry meat or skin that doesn’t crisp properly. Think of it as a flavor and texture insurance policy!
Can I use a smaller or larger duck than 5-6 pounds?
For best results, stick to a 5-6 lb duck. Smaller ducks (<4 lbs) may cook too quickly and dry out, while larger ones (>7 lbs) risk uneven cooking. If you must use a different size, adjust the pressure cook time by ±5 minutes per pound—but test with a meat thermometer to ensure it reaches 165°F in the thickest part.
What if my duck skin isn’t crispy after pressure cooking?
Don’t panic! The final 15-20 minutes in a 425°F oven with butter is critical for crispiness. If it’s still soft, try broiling for 2-3 minutes at the end. Also, ensure you patted the duck completely dry before searing—any moisture prevents browning. For extra crunch, brush with egg white before the oven step.
How do I reheat leftover duck without drying it out?
Reheat leftovers wrapped tightly in foil at 325°F for 20-30 minutes—this keeps them moist. For crispy skin, place the duck on a wire rack over a baking sheet and reheat uncovered at 375°F for 10-12 minutes. Avoid microwaving, as it turns the skin rubbery. Store leftovers in the fridge for 3-4 days or freeze for 3 months.
Is it safe to cook duck in the Instant Pot?
The Instant Pot reaches 165°F safely when using the 60-minute high-pressure setting. Always use a meat thermometer to verify doneness in the thickest part of the thigh. Duck fat has a higher smoke point than chicken, so it won’t burn during pressure cooking. Just avoid overfilling the pot—leave at least 1 inch of headspace for steam.

- Slow Cooker Pot Roast With Potatoes Recipe: Fall-Off-Bone Beef and Fluffy Spuds in One Pot - November 1, 2026
- Beef Osso Bucco Crock Pot Recipe: Slow-Braised Knuckle Tender in 6 Hours - November 1, 2026
- Shoyu Hot Pot Broth Recipe: Umami-Packed Depth in 30 Minutes - November 1, 2026