
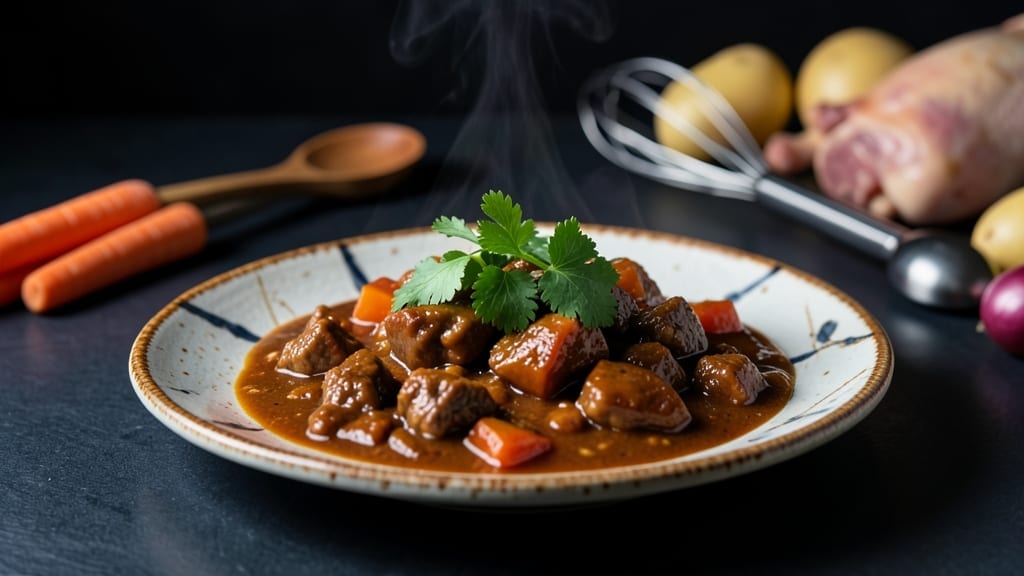
Mastering Japanese curry in an Instant Pot delivers restaurant-quality depth with minimal effort—rich, aromatic layers of roux, tender meat, and vegetables all develop in a single pot. The secret lies in balancing pressure cooking for maximum flavor extraction while preserving the signature velvety texture of traditional Japanese curry.
I’ve refined this recipe over countless batches to ensure the roux doesn’t separate, the meat stays fork-tender, and every bite delivers that unmistakable umami punch.
This method transforms tough cuts of beef or chicken into melt-in-your-mouth pieces while caramelizing onions and potatoes until they’re golden and sweet.
The Instant Pot’s pressure cooking cuts preparation time by half compared to stovetop methods, but the result is just as complex—deep, savory, and slightly sweet, with the roux binding everything together in a cohesive, velvety sauce.
No need for multiple pots or hours of simmering; this curry builds flavor through precise timing and layering.
By the end, you’ll have a steaming bowl of Japanese curry with tender meat, perfectly cooked vegetables, and a glossy sauce that clings to every spoonful.
The aroma alone will have everyone gathering around the table, and the first bite delivers that perfect balance of sweet, spicy, and umami that defines the dish. Serve it over steamed rice to soak up every last drop of that rich, flavorful sauce.
Whether you’re feeding a family or meal prepping for the week, this Instant Pot Japanese curry adapts effortlessly. The recipe scales perfectly, and leftovers reheat beautifully while maintaining that restaurant-quality texture. Here’s how to make it—step by step—for a dish that’s both impressive and foolproof.
Ingredients for japanese curry recipe instant pot
Rich umami flavors and tender meat come together in this Instant Pot Japanese curry.
| Ingredient | Amount | Notes |
|---|---|---|
| Japanese Curry Block 🌶️ | 2 tbsp | Or substitute with 2 tbsp curry powder |
| Boneless Chicken Thighs 🍗 | 1 ½ lb | Skinless, cut into bite-sized pieces |
| Yellow Onions 🧅 | 1 whole | Thinly sliced for caramelization |
| Russet Potatoes 🥔 | 1 ½ lb | Cut into 1-inch cubes for even cooking |
| Carrots 🥕 | 1 lb | Peeled and cut into 1-inch chunks |
| Garlic Cloves 🧄 | 6 cloves | Minced for aromatic depth |
| Extra-Virgin Olive Oil 🫒 | 2 tbsp | For sautéing and roux development |
| Chicken Broth 💧 | 1 ½ cups | Low-sodium preferred for flavor control |
| Applesauce 🍎 | ½ cup | Unsweetened for natural sweetness |
| Soy Sauce 🍶 | 2 tbsp | For umami depth and color |
| Honey 🍯 | 1 tbsp | Balances acidity and adds sweetness |
| White Wine 🍷 | ¼ cup | Dry variety for acidity balance |
| Salt 🧂 | 1 tsp | Kosher or sea salt for seasoning |
| Black Pepper 🌶️ | ½ tsp | Freshly ground for warmth |
| Vegetable Oil 🫒 | 1 tbsp | For Instant Pot sealing and greasing |
The Japanese curry block is the heart of this dish—it’s what gives that signature velvety texture and deep umami flavor. Look for authentic blocks at Asian markets; brands like S&B Golden Curry are widely available. If you can’t find the block, substitute with 2 tbsp curry powder plus 1 tsp turmeric and 1 tsp garam masala. The chicken thighs are key here; they stay juicy and tender despite the long cooking time. Buy bone-in, skin-on thighs for extra flavor, then remove the skin and bone before cutting into pieces. For the potatoes, Russets are ideal—they hold their shape and absorb the sauce beautifully without turning mushy.
No Japanese curry block? Homemade roux works too: melt 2 tbsp butter, whisk in 2 tbsp flour, then add 1 cup chicken broth, 1 tbsp soy sauce, and 1 tsp each of curry powder, turmeric, and garam masala. For the white wine, dry varieties like Sauvignon Blanc or Pinot Grigio work best—avoid sweet wines. The applesauce adds natural sweetness without altering the texture; unsweetened is crucial. If you’re avoiding wine, substitute with extra chicken broth and a splash of apple cider vinegar for acidity. The carrots can be swapped for sweet potatoes if you prefer, but they’ll have a slightly different texture.
This curry reheats beautifully—just add a splash of water or broth and pressure cook for 5 minutes. Store in an airtight container for up to 5 days in the fridge or freeze for 3 months. For meal prep, portion into individual containers with rice—it’s a game-changer for busy weeknights. The sauce thickens as it cools, so stir in a splash of broth if it seems too thick when reheating. Always let the pressure release naturally for the first 10 minutes to keep the meat tender.
Why You’ll Love This Recipe
- Instant Pot Magic: I swear, this recipe is the reason I keep my Instant Pot—dump everything in raw, press a button, and boom. No stirring, no babysitting, no mess. The curry block does all the work while I chop onions in five minutes flat.
- Rich Without Effort: That first spoonful of curry sauce—thick, fragrant, with just the right kick—is what makes this dish. The potatoes melt into creamy perfection, the carrots stay tender-crisp, and the chicken? Fall-apart tender. Honestly, it tastes like a restaurant made it, not my kitchen.
- Leftovers That Save Me: I always make this for Sunday dinner because the leftovers are my secret weapon. Reheat with a splash of water, and it’s just as good the next day—ideal for lunches or when I’m too tired to cook. (Yes, even on a Tuesday night.)
- Budget-Friendly Comfort: Chicken thighs and potatoes stretch this into four servings for under $10. The curry block adds depth without breaking the bank, and I can swap in whatever veggies are on sale. It’s the kind of meal that feels indulgent but won’t ruin my grocery budget.
Step-by-step instructions for Japanese curry Instant Pot
This method delivers restaurant-quality curry with minimal effort and maximum flavor.
Sauté Aromatics and Brown the Chicken
Add the 1 tablespoon vegetable oil to your Instant Pot and set it to “Sauté” mode over medium heat. Once hot, add the 1 whole yellow onions and 6 cloves garlic cloves (minced), cooking for 4-5 minutes until the onions soften and turn translucent. This develops their natural sweetness.
Push the onions to one side of the pot and add the 1.5 lb boneless chicken thighs (cut into bite-sized pieces). Cook for 3-4 minutes until the chicken begins to brown. Don’t overcrowd the pot—this ensures proper browning. The chicken should release easily from the bottom when ready to flip.
Build the Curry Base
Add the 2 tbsp extra-virgin olive oil and stir to coat the chicken. Sprinkle in the 2 tbsp Japanese curry block (or substitute with 2 tbsp curry powder) and stir constantly for 1 minute until the spices bloom and fill the pot with aroma. This step unlocks the curry’s complex flavors.
Pour in the 0.25 cup white wine and scrape up any browned bits from the bottom. Let it simmer for 1 minute until mostly evaporated. Add the 2 tbsp soy sauce, 1 tbsp honey, 1 tsp salt, and 0.5 tsp black pepper, stirring to combine. This creates the flavor foundation for your curry.
Add Vegetables and Broth
Add the 1.5 lb russet potatoes (cut into 1-inch cubes) and 1 lb carrots (cut into 1-inch chunks) to the pot. Pour in the 1.5 cups chicken broth and stir gently to combine. The liquid should reach about halfway up the vegetables. This ensures even cooking and prevents the bottom from burning.
Place the lid on the Instant Pot and set the valve to “Sealing.” Cook on High Pressure for 10 minutes. The pressure cooking time is critical—this ensures the vegetables become tender while maintaining their shape and the chicken stays juicy.
Finish with Applesauce and Natural Release
Once cooking is complete, allow the pressure to release naturally for 10 minutes, then quick-release any remaining pressure. Remove the lid and stir in the 0.5 cup applesauce. This adds natural sweetness and helps thicken the sauce to a perfect consistency. The applesauce also balances the richness of the curry.
Taste and adjust seasoning if needed. The curry should be rich, slightly sweet, and deeply umami with a perfect balance of spice. Serve immediately over steamed rice for the full experience. Each bite should deliver tender chicken, perfectly cooked vegetables, and a velvety sauce that coats every spoonful.
Pro Tips For Making Japanese Curry Recipe Instant Pot
- Sear Chicken First: The curry block adds depth, but nothing beats browning the chicken thighs first—even for 3-4 minutes on high heat. I learned this the hard way when my curry tasted flat; that crust locks in flavor and keeps the meat juicy, especially in the Instant Pot where things can get steamy.
- Cut Potatoes Small: Uniform 1-inch cubes guarantee even cooking—no mushy centers or undercooked edges. Russets break down faster than you’d think, so resist the urge to go big; your future self will curse you if you don’t.
- Don’t Overcrowd: Toss in the veggies in batches if needed—the Instant Pot struggles when packed too tight. I once dumped everything in at once and ended up with half-cooked carrots; layer the potatoes first, then onions and carrots on top.
- Sauté Onions Until Soft: Skip the raw onion chunks—they’ll turn to mush. Cook them for 2-3 minutes until translucent before adding the curry block; this builds flavor and prevents a watery curry. (Yes, even if you’re impatient like me.)
Dietary considerations for this recipe
Gluten-Free Adaptation
Japanese curry traditionally contains wheat-based ingredients like the curry block and roux, but you can easily adapt this recipe for gluten-free diets. Replace the 2 tbsp Japanese curry block with 2 tbsp gluten-free curry powder (like Badia brand) mixed with 1 tsp turmeric and 1 tsp garam masala.
For the roux, use 2 tbsp gluten-free flour (like Bob’s Red Mill) instead of regular flour. Always check labels on soy sauce—opt for tamari or certified gluten-free soy sauce to avoid cross-contamination. 🌱
Vegetarian Option
Swap the chicken for 1.5 lb firm tofu or 1 lb mushrooms (like shiitake or cremini) for a hearty vegetarian version. Press tofu for 15 minutes to remove excess water, then cut into cubes and pan-fry until golden before adding to the pot.
For extra umami, add 1 tbsp vegetarian Worcestershire sauce (like Annie’s brand) when building the curry base. The applesauce and broth will still create that signature velvety texture. 🥕
Dairy-Free Considerations
This recipe is naturally dairy-free, but if you’re using a homemade roux, ensure you’re not adding butter. The Japanese curry block and curry powder are typically dairy-free, but always double-check the label.
For extra richness, stir in 1 tbsp coconut milk (like Thai Kitchen brand) after cooking to enhance the sauce’s creaminess without dairy. The applesauce and olive oil provide plenty of natural fat for a satisfying texture. ✨
Low-Carb Modifications
Reduce the potatoes by half (0.75 lb) and replace them with 1 lb cauliflower florets for a lower-carb version. Cauliflower absorbs the sauce beautifully while keeping the dish lighter.
For extra flavor, add 1 tbsp nutritional yeast (like Bragg brand) to the curry base for a cheesy, umami boost. Serve with cauliflower rice instead of white rice to keep carbs in check. 💪
Allergen-Friendly Swaps
For nut allergies, avoid any added nut-based ingredients (this recipe is naturally nut-free). If you’re sensitive to onions, substitute with 1 cup leek greens (milder flavor) or 1 tbsp onion powder. For garlic allergies, use 1 tsp garlic powder** instead of fresh cloves.
Always taste as you go—pressure cooking can intensify flavors, so adjust seasonings gradually. The applesauce and honey provide natural sweetness without relying on allergens. 🍎
Nutrition facts
Frequently asked questions
Can I use beef instead of chicken in this Instant Pot Japanese curry?
Swap the chicken thighs for 1.5 lb beef chuck roast or 1.5 lb stew meat, cut into 1-inch cubes. The Instant Pot’s pressure cooking will tenderize the beef beautifully. Increase cooking time to 15 minutes on high pressure for optimal tenderness.
Why does my Instant Pot Japanese curry sauce separate or become watery?
This usually happens when the roux isn’t properly developed or the applesauce isn’t added at the right time. Always stir in the 0.5 cup applesauce after natural release to thicken the sauce. If it’s still too thin, simmer uncovered on sauté mode for 2-3 minutes to reduce. For separation, whisk vigorously and add 1 tbsp cornstarch mixed with water.
How do I make this Japanese curry thicker or thinner?
For a thicker sauce, simmer uncovered on sauté mode for 3-5 minutes after adding applesauce. For a thinner sauce, stir in 2-4 tbsp chicken broth or water. The Instant Pot’s natural release helps set the texture—always let it release for 10 minutes before quick-release.
Can I make this recipe without white wine?
Yes! Replace the 0.25 cup white wine with 0.25 cup apple cider vinegar or 0.25 cup extra chicken broth. The vinegar adds acidity to balance flavors, while broth maintains the same consistency. For depth, add 1 tsp lemon juice instead of wine.
What’s the best way to reheat leftover Instant Pot Japanese curry?
Add 2-3 tbsp water or broth per serving, then pressure cook for 3-5 minutes on high. For stovetop reheating, simmer gently for 3-4 minutes—never boil, or the sauce may separate. Stir occasionally and adjust seasoning if needed. Leftovers stay fresh for 5 days in the fridge or 3 months frozen.

- Crock Pot Round Steak Recipe: Slow-Sear Crust With Juicy Center - November 6, 2026
- Candied Sweet Potatoes Crock Pot Recipe: Caramelized Sweetness With Zero Effort - November 6, 2026
- Steak Recipe Crock Pot: Juicy, Caramelized Crust in 4 Hours - November 6, 2026