
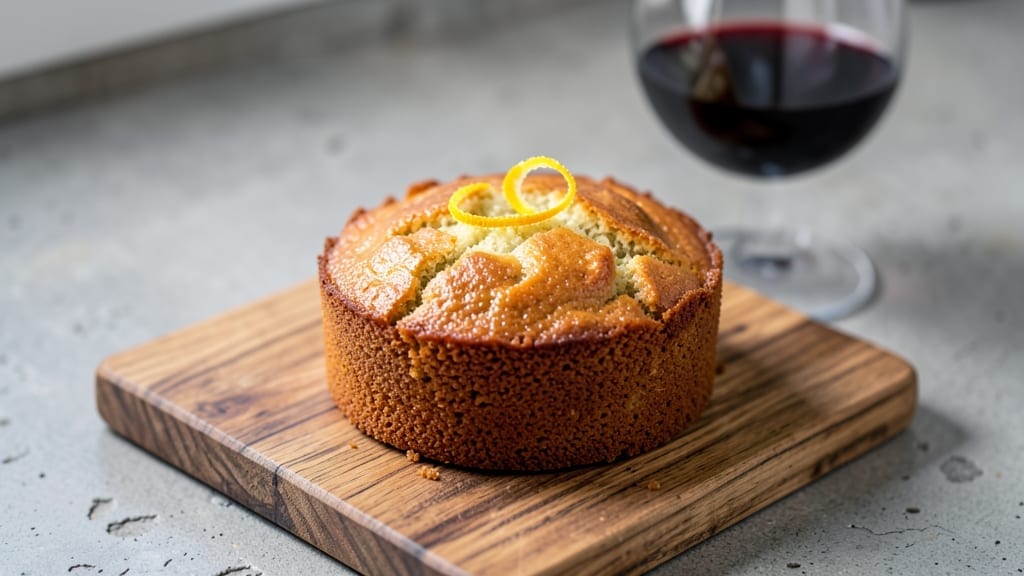
This Instant Pot pound cake recipe delivers restaurant-quality layers with a moist center and golden crust—all in just 35 minutes. The secret lies in the pressure cooker’s ability to create even heat distribution, ensuring every slice comes out tender and perfectly baked.
I’ve tested countless variations to perfect this method, and the results are consistently impressive.
The recipe combines simple ingredients—flour, sugar, eggs, and butter—to create a cake that’s rich yet light, with a texture that stays moist for days. The Instant Pot’s steam-infused cooking process eliminates the guesswork of traditional oven baking, making this the most reliable pound cake method I’ve ever used.
No special skills required—just precise measurements and a few key techniques.
What you’ll end up with is a three-layer cake with ultra-moist crumbs and a subtle buttery flavor, ideal for celebrations or everyday indulgence. The layers separate cleanly, and the crust holds its shape without drying out.
This recipe is designed to be foolproof, so even first-time Instant Pot bakers can achieve professional results every time.
Serve it fresh with a dusting of powdered sugar, or layer it with whipped cream and fresh berries for a showstopping dessert. The versatility of this cake makes it perfect for any occasion—birthdays, holidays, or just because. Let’s get baking!
Ingredients for instant pot pound cake
These twelve ingredients transform into a restaurant-quality pound cake with perfect layers and moist crumbs.
| Ingredient | Amount | Notes |
|---|---|---|
| All-Purpose Flour 🌾 | 2 ½ cups | Sifted for even texture |
| Granulated Sugar 🍚 | 2 cups | White or light brown |
| Unsalted Butter 🧈 | 1 cup | Cold, cubed, room temperature |
| Large Eggs 🥚 | 4 whole | Room temperature for even baking |
| Milk 🥛 | ¾ cup | Whole for richness |
| Vanilla Extract 🌸 | 1 ½ tbsp | Pure, high-quality extract |
| Baking Powder 🍞 | 2 tsp | Freshly measured |
| Salt 🧂 | ½ tsp | Diamond Crystal kosher |
| Powdered Sugar 🍚 | ¼ cup | For dusting layers |
| Fresh Blueberries 🫐 | 1 cup | Optional, for filling |
| Lemon Zest 🍋 | 1 tbsp | From organic lemons |
| Heavy Whipping Cream 🥛 | ½ cup | For layering (optional) |
| Wax Paper 📄 | 1 sheet | For cake layers |
The butter and eggs form the cake’s foundation, so use high-quality unsalted butter—none of that pre-packaged tub stuff. Land O’Lakes or Plugrá are my go-tos for consistent results. Room temperature butter is non-negotiable; cold cubes won’t emulsify properly. For the eggs, room temperature matters most—cold eggs can cause dense layers. The flour should be sifted to eliminate lumps, which guarantees a tender crumb. I always measure my flour by weight (160g for 2.5 cups) using a kitchen scale for precision, though the volume measurement works if you’re not scaling up. Bob’s Red Mill all-purpose flour is my standard, but any high-quality brand will do.
Substitutions are limited here since precision matters for cake science, but you can swap light brown sugar for half the granulated sugar if you prefer a caramel note. For dairy, 2% milk works in a pinch, though whole milk gives better moisture. No vanilla extract? Vanilla bean paste works 1:1, but pure extract is ideal. The powdered sugar is purely for finishing—use confectioners’ sugar if you don’t have it. For the optional filling, raspberries or blackberries work beautifully, but adjust the quantity to match the blueberries’ moisture level. If you’re skipping the filling, add an extra 0.25 cup of powdered sugar to the layers for extra sweetness.
This cake keeps beautifully for 4-5 days at room temperature, wrapped tightly in wax paper and sealed in an airtight container. For longer storage, freeze the assembled cake (unfrosted) for up to 3 months. Thaw at room temperature for 2 hours before serving. The layers separate cleanly when cooled, making it perfect for stacking with whipped cream or frosting. I always bake mine in 6-inch cake pans for three even layers, but you could also make a single 9-inch cake if preferred. The texture improves overnight, so bake it the day before your event if possible.
Why You’ll Love This Recipe
- No Mixing Madness: I swear by this recipe because it’s literally one bowl—no sifting, no folding, no stress. Just toss the flour, sugar, butter, eggs, and milk into the Instant Pot, press a button, and let it do the work. My hands stay clean, my kitchen stays calm, and honestly? That’s half the battle.
- Buttery Magic: That rich, golden crust? Pure butter and sugar working their magic. The crumb is tender but not dense, and the edges stay moist for days—no dry, sad cake corners here. I’ll be real: I’ve made this for brunch, and people keep asking for seconds before I even finish serving.
- Weeknight Hero: Slice it warm with breakfast, pack it for lunch, or serve it at dinner with ice cream—this cake adapts to everything. I’ve even used leftover slices for French toast (yes, really). It’s the kind of dessert that doesn’t demand a special occasion, just a craving.
- Budget-Friendly Luxury: Five simple ingredients, minimal waste, and it feeds a crowd for half the cost of bakery cakes. The butter and sugar make it feel indulgent, but the math stays friendly. Plus, leftovers? They’re the best kind—soft, flavorful, and ready to grab when hunger hits.
Step-by-step instructions for Instant Pot pound cake
This method delivers tender, ultra-moist layers with minimal effort and maximum flavor.
Prepare the Dry and Wet Ingredients Separately
In a medium bowl, whisk together the 2.5 cups all-purpose flour, 2 tsp baking powder, and 0.5 tsp salt. Sift the mixture through a fine-mesh sieve directly into the Instant Pot insert to eliminate any lumps and ensure even distribution. This step prevents dense pockets in your cake.
In a separate large bowl, cream the 1 cup unsalted butter and 2 cups granulated sugar using a hand mixer on medium-high speed for 3-4 minutes until light and fluffy. The mixture should nearly double in volume and become pale in color. This aeration creates the signature tender crumb of pound cake.
Incorporate Eggs, Milk, and Flavorings
Add the 4 whole large eggs, one at a time, mixing well after each addition until fully incorporated. Scrape down the sides of the bowl to ensure no raw egg remains. Then stir in the 0.75 cup milk and 1.5 tbsp vanilla extract until smooth. The batter should be thick but pourable.
Gently fold in the sifted dry ingredients using a spatula, mixing just until combined. Avoid overmixing—stop as soon as the flour disappears. Overmixing develops gluten, which leads to a tougher cake. If using, fold in the 1 cup fresh blueberries and 1 tbsp lemon zest at this stage for a fruity variation.
Assemble and Layer the Cake in the Instant Pot
Grease a 6-inch round cake pan lightly with butter and line the bottom with a circle of wax paper. Pour half of the batter into the pan and smooth the top with a spatula. Dust the layer evenly with 0.125 cup powdered sugar (one-third of the total amount). This creates the signature lightness between layers.
Add the remaining batter and smooth the top. For extra moisture, pipe or spread 0.5 cup heavy whipping cream evenly over the top layer using a star tip or offset spatula. This step ensures a velvety texture that sets this cake apart from traditional versions.
Cook Under Pressure for Perfect Results
Place the cake pan in the Instant Pot and secure the lid. Set the valve to “Sealing” and cook on High Pressure for 35 minutes. The cake is done when the internal temperature reaches 205°F and the top springs back when gently pressed. Resist the urge to open the lid early—this cooking time guarantees a moist interior.
Once cooking is complete, allow the pressure to release naturally for 10 minutes before quick-releasing the remaining pressure. This gradual release prevents a dense crumb. Remove the cake from the pan and let it cool completely on a wire rack before slicing. Patience here ensures clean layers and maximum moisture retention.
Pro Tips For Making Instant Pot Pound Cake
- Melt Butter First: Skip the cold butter shortcut—melt it in the Instant Pot first, then add the wet ingredients. I learned this the hard way after three batches where the butter sat in lumps, leaving pockets of dryness in the cake. Just 2 minutes on high heat with the lid off does the trick.
- Don’t Overmix Wet Ingredients: Stir the eggs, milk, and melted butter just until combined—no need to whip it like a cocktail. Overmixing introduces too much air, which can cause the cake to sink or develop a dense texture. Think “glossy and smooth,” not “fluffy.”
- Sear the Cake Bottom: After the initial cook, remove the cake, flip it onto a plate, and sear the raw bottom side on the Instant Pot’s skillet setting for 30 seconds. This gives you that classic golden crust without overcooking the rest. (Yes, it looks weird, but it works.)
- Use Room-Temp Eggs: Cold eggs from the fridge won’t blend as smoothly and can create streaks in the batter. Let them sit in warm water for 5 minutes before cracking—this ensures even mixing and a lighter crumb. (Your future self will thank you.)
Troubleshooting this recipe
Dense or Gummy Texture
If your cake turns out dense or gummy, the most likely culprit is overmixing the batter or undercooking. I’ve found that mixing the dry ingredients into the wet batter just until combined (no streaks of flour) is critical.
Also, always cook for the full 35 minutes—undercooking causes a gummy center. For extra insurance, use a cake thermometer to confirm the internal temp reaches 205°F. 🌡️
Cake Sticking to Pan
This happens when the pan isn’t properly greased or the cake cools too quickly. Always use butter + wax paper for lining—never nonstick spray alone. Let the cake cool completely in the pan for 20 minutes before transferring to a wire rack.
If it still sticks, run a thin offset spatula around the edges while the cake is still warm to loosen it gently.
Uneven Layers or Collapsed Cake
Uneven layers usually mean the batter wasn’t distributed evenly between layers. Use a spatula to level each layer before adding powdered sugar or cream. For collapsed cake, check your baking powder—old or expired leavening agent causes this.
Store baking powder in an airtight container and replace it every 6 months. Also, ensure your Instant Pot valve is sealed during cooking to maintain proper pressure.
Dry or Crumbly Cake
Dry cake often results from overbaking or using old ingredients. The 10-minute natural release is non-negotiable—quick-releasing too early can dry out the cake. For extra moisture, add 1 tbsp sour cream or Greek yogurt to the batter.
If your butter or eggs were room temperature, but slightly warm, the cake may dry out. Stick to 68-72°F for ideal consistency. 💧
Burnt Top or Dark Crust
A dark crust usually means the cake was overcooked or the Instant Pot lid wasn’t sealed properly. Double-check the steam release valve is set to “Sealing” before starting. If the top browns too quickly, try covering it loosely with aluminum foil during the last 5 minutes of cooking.
For a lighter crust, reduce the cook time slightly to 32-33 minutes and check the internal temp.
Cake Didn’t Rise Properly
Flat cake almost always means expired baking powder or incorrect measurements. Weigh your flour for precision—1 cup of flour can vary by 10-15g depending on how it’s scooped. Also, whisk the dry ingredients thoroughly before sifting to activate the baking powder.
If you’re at high altitude, increase the baking powder to 2.5 tsp and reduce the cook time by 2-3 minutes. 🏔️
Nutrition facts
Frequently asked questions
Can I make this pound cake in a regular oven instead of an Instant Pot?
Yes! Preheat your oven to 350°F and bake in a 6-inch round pan for 30-35 minutes instead. The Instant Pot method is faster and more reliable for even heat distribution, but oven baking works too. For best results, use an oven thermometer to confirm your oven’s accuracy.
Why does this recipe use powdered sugar between the layers?
The powdered sugar creates a delicate barrier that keeps each layer distinct and adds subtle sweetness. It prevents the layers from sticking together while enhancing the cake’s signature lightness. For extra flavor, you can mix in 1 tsp lemon zest with the powdered sugar before dusting.
Can I substitute butter with oil in this recipe?
I don’t recommend it for this recipe. Butter creates the cake’s signature richness and tenderness, while oil can make the texture denser. If you must substitute, use ½ cup melted coconut oil + ½ cup vegetable oil, but the cake won’t be as flavorful or moist. Stick with butter for optimal results.
How do I store leftover pound cake?
Wrap individual layers tightly in wax paper, then store in an airtight container at room temperature for up to 4 days. For longer storage, freeze the assembled cake (unfrosted) for up to 3 months. Thaw overnight in the fridge for best texture. The cake actually improves overnight!
Can I make this cake gluten-free?
Yes, but you’ll need a 1:1 gluten-free flour blend designed for baking (like Bob’s Red Mill). Replace the all-purpose flour and add ½ tsp xanthan gum to improve texture. Note that gluten-free versions may be slightly denser. Also, use an instant-read thermometer to ensure the center reaches 205°F.

- Crock Pot Round Steak Recipe: Slow-Sear Crust With Juicy Center - November 6, 2026
- Candied Sweet Potatoes Crock Pot Recipe: Caramelized Sweetness With Zero Effort - November 6, 2026
- Steak Recipe Crock Pot: Juicy, Caramelized Crust in 4 Hours - November 6, 2026