
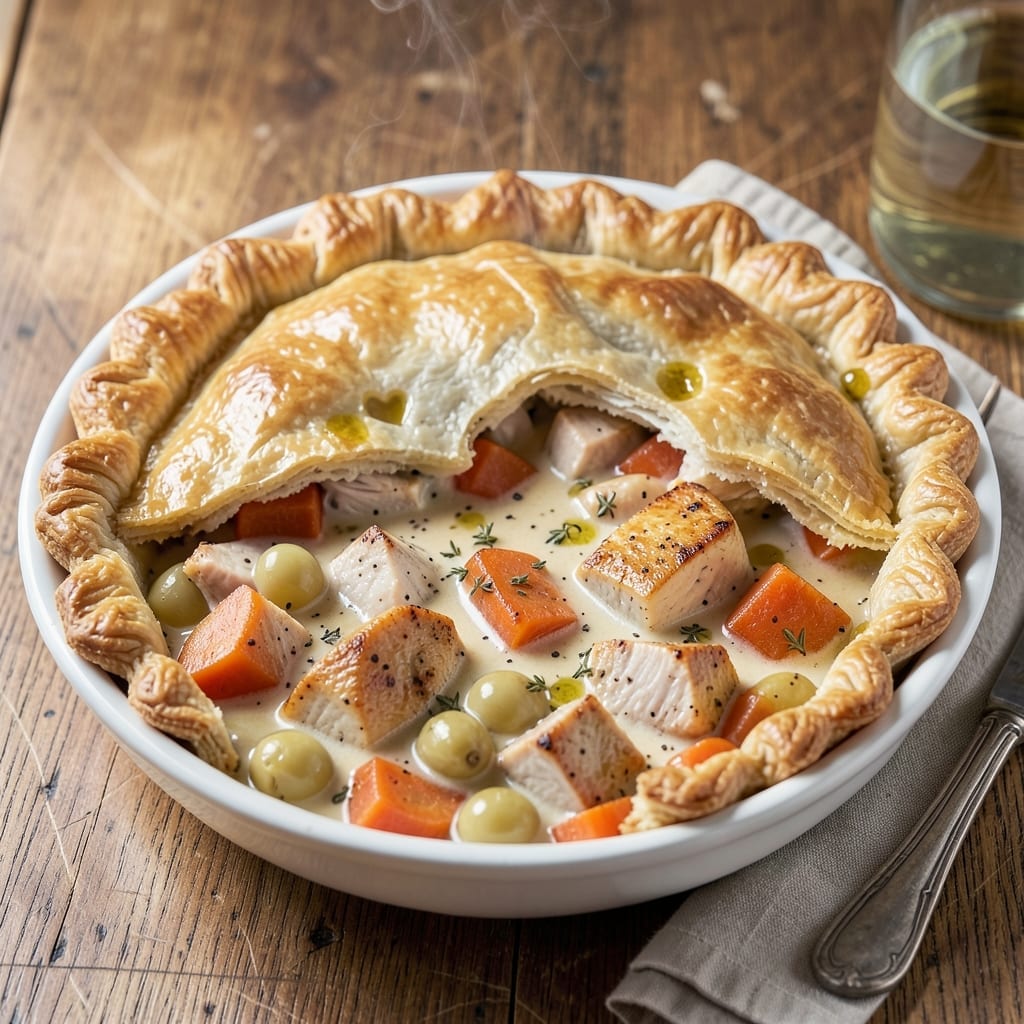
There’s nothing quite like the first bite of a well-made chicken pot pie—tender chunks of chicken, hearty vegetables, and a creamy sauce all encased in a flaky, golden crust. This version stays true to the timeless appeal of the original while ensuring every element is perfectly balanced.
The secret to achieving that classic texture lies in the crust and the filling working in harmony. A buttery, layered pastry on top and bottom provides the ideal contrast to the rich, savory filling inside. The result is comforting, satisfying, and undeniably nostalgic.
With a few straightforward techniques, you’ll create a pie that’s as beautiful as it is delicious. The filling comes together with simple ingredients, while the crust bakes to a perfect golden finish. It’s a dish that feels special but is entirely approachable.
Serve it fresh from the oven for a meal that’s sure to become a family favorite.
Ingredients for Joy of Cooking Chicken Pot Pie
Classic comfort food starts with tender chicken, fresh veggies, and a golden crust.
| Ingredient | Amount | Notes |
|---|---|---|
| Boneless Chicken Breast 🍗 | 1 ½ lb | Cut into 1-inch cubes |
| All-Purpose Flour 🌾 | 1 cup | For roux and crust |
| Unsalted Butter 🧈 | 1 cup | Cold, cubed for crust |
| Chicken Broth 💧 | 1 ½ cups | Low-sodium preferred |
| Whole Milk 🥛 | ¾ cup | For creamy sauce |
| Carrots 🥕 | 2 whole | Peeled and diced |
| Celery Stalks 🌿 | 2 whole | Diced finely |
| Yellow Onion 🧅 | 1 whole | Medium, finely chopped |
| Frozen Peas 🌱 | 1 cup | No need to thaw |
| Garlic Cloves 🧄 | 2 cloves | Minced for depth |
| Fresh Thyme 🍃 | 1 tbsp | Chopped, or 1 tsp dried |
| Salt 🧂 | 1 tsp | Divided for seasoning |
| Black Pepper 🌶️ | ½ tsp | Freshly ground |
| Pie Crust 🥧 | 2 sheets | Store-bought or homemade |
The chicken is the backbone here—bone-in, skin-on thighs stay juicier than breasts (but use what you prefer). I grab mine from Whole Foods or the local butcher. For the crust, store-bought puff pastry saves time but homemade is worth it for that flaky texture. Butter matters: European-style has higher fat content for a richer crust.
No fresh thyme? Dried at one-third the amount works fine. Swap celery for extra carrots or add diced potatoes for heartiness. The milk can be whole or 2%—just avoid skim. For extra depth, a splash of white wine in the sauce makes a difference. If using pre-made crust, Pillsbury is my go-to for reliability.
Assemble the pie just before baking—prevents soggy crust. Leftover pie keeps 3-4 days in the fridge, reheats best in the oven. Freeze unbaked pies for up to 2 months (thaw overnight before baking).
Why You’ll Love This Recipe
- One-Bowl Wonder: I love that I can mix the flour and butter right in the same bowl I’ll use for the filling—no extra dishes piling up.
- Buttery Crust Magic: The combo of butter, flour, and whole milk makes this crust flaky on top and rich underneath.
- Freezer Friend: Honestly, I double the batch and freeze one—perfect for those nights I just can’t.
- Stretches Far: A pound of chicken breast and basic pantry staples feeds my family of four with leftovers for lunch.
Step-by-Step Instructions for Chicken Pot Pie
Here’s the method that delivers that classic comforting dish with a perfectly flaky top.
Step 1: Cook the Chicken and Vegetables
In a large pot or Dutch oven, melt ½ cup unsalted butter over medium heat. Add the 1.5 lb boneless chicken breast cut into 1-inch cubes, seasoned with ½ tsp salt and 0.5 tsp black pepper. Cook for 5-6 minutes until the chicken is no longer pink and starts to brown slightly.
Remove the chicken and set aside. In the same pot, add the diced 2 carrots, 2 celery stalks, and 1 yellow onion. Cook for 5 minutes until the vegetables begin to soften. Stir in the minced 2 garlic cloves and 1 tbsp fresh thyme, cooking for an additional 1 minute until fragrant.
Step 2: Prepare the Creamy Sauce
Sprinkle the 1 cup all-purpose flour over the vegetables and stir well to coat. Gradually pour in the 1.5 cups chicken broth and 0.75 cup whole milk, whisking constantly to avoid lumps. Bring the mixture to a simmer and cook for 3-4 minutes until it thickens into a rich, creamy sauce.
Return the chicken to the pot along with the 1 cup frozen peas. Stir to combine, ensuring everything is coated in the sauce. Taste and adjust seasoning with the remaining ½ tsp salt if needed. Cook for an additional 2 minutes to heat the peas through.
Step 3: Assemble and Bake the Pot Pie
Preheat your oven to 375°F. Transfer the chicken and vegetable mixture into a 9-inch pie dish or a similar-sized baking dish. Unroll 1 sheet pie crust and place it over the filling, trimming any excess dough from the edges. Cut a few slits in the top crust to allow steam to escape.
Optional, but recommended for extra flakiness: brush the top crust with a bit of melted butter. Bake for 30-35 minutes until the crust is golden brown and the filling is bubbling. If the crust begins to brown too quickly, tent the dish with foil.
Step 4: Add the Top Crust and Finish
For a double-crust pot pie, roll out the second pie crust and place it over the filling before baking. Crimp the edges to seal and cut steam vents in the top crust. Bake as directed above until the crust is deep golden brown and the filling is hot and bubbly.
Let the pot pie rest for 10 minutes before serving. This allows the filling to set slightly, making it easier to serve. Each portion should have a generous amount of flaky crust and a hearty mix of chicken and vegetables in the creamy sauce.
Pro Tips For Making Joy Of Cooking Chicken Pot Pie
- Pre-Cook Your Chicken: Poach the boneless chicken breasts in the chicken broth first—it keeps them juicy and infuses the stock with extra flavor before you make the filling.
- Chill the Dough: After mixing the flour and butter for the crust, let it rest in the fridge for at least 30 minutes. I learned this the hard way—warm dough shrinks and toughens in the oven.
- Thicken the Filling First: Cook the flour and butter into a roux for 2-3 minutes before adding the milk and broth. Sounds tedious, but it prevents that raw flour taste in the finished pie.
- Vent the Top Crust: Cut 4-5 small slits in the top crust before baking—steam needs an escape route, or you’ll end up with a soggy bottom. Yes, even if you’re in a hurry.
Essential Equipment for This Recipe
Pie Dish Essentials
A 9-inch glass pie dish is my go-to for even baking and that perfect golden crust. I prefer Pyrex because it heats uniformly and lets me monitor the bottom crust. Avoid metal pans unless you’re experienced—they can brown too quickly. 💛
Rolling Pin Matters
For homemade crust, a French-style tapered rolling pin gives you more control. I use my Joseph Joseph pin—it’s lightweight and has removable handles. Dust with ¼ cup flour to prevent sticking as you roll.
Crust Cutting Tools
A pastry wheel makes clean cuts for vent holes and trimming excess dough. The fluted edge gives a professional finish. Alternatively, a sharp paring knife works well for precise cuts. Always cut vents before baking to prevent steam buildup.
Whisk for Sauce
The roux requires constant whisking to avoid lumps. A balloon whisk with a long handle lets you reach the pot’s corners easily. I keep a OXO Good Grips whisk in my kitchen—it’s durable and comfortable for 3-4 minutes of vigorous stirring.
Thermometer Check
An instant-read thermometer ensures your filling reaches 165°F. I use a ThermoWorks Thermapen—it gives accurate readings in 2-3 seconds. Check the center of the pie, not just the edges, for doneness.
Pastry Brush
Brushing the crust with melted butter gives that extra sheen. A silicone pastry brush works best—it’s heat-resistant and easy to clean. Apply a thin, even layer right before baking for maximum flakiness. 🔥
Nutrition Facts
Frequently Asked Questions
Can I use chicken thighs instead of breasts?
Bone-in, skin-on thighs add richer flavor and stay juicier. Adjust cooking time to 8-10 minutes for browning since they take slightly longer than breasts.
How do I prevent a soggy crust?
Pre-bake the bottom crust for 10 minutes before adding filling. Also, ensure your filling is thickened properly and not watery. Let the pie rest 10 minutes after baking too.
Can I make this ahead of time?
Yes! Assemble the pie but don’t bake it. Refrigerate for up to 1 day or freeze for 2 months. Bake straight from the fridge, adding 5-10 minutes to the baking time.

- 6 Oz Chocolate Chip Cookie Recipe: Perfectly Balanced Crispy Edges and Chewy Hearts - September 25, 2026
- 6-Inch Coffee Cake Recipe: Vanilla Bean Swirls and Buttery Streusel Topping - September 25, 2026
- 1 Hour Soup Recipe: Velvety Richness Without the Wait - September 25, 2026